I was elbow-deep in packing tape last October, wrestling with a box of Christmas decorations that had somehow multiplied in the attic, when the smell hit me. Not pine or cinnamon—something sharper, sweeter, more specific. It was the faint, dusty scent of royal icing that had been sealed in a plastic container for eleven months. And suddenly I was eight years old, standing on a step stool in my neighbor Mrs. Kowalski’s kitchen, my fingers pressed into a ball of sugar cookie dough that felt like warm Play-Doh.
Mrs. Kowalski wasn’t my grandmother. She wasn’t even related. She was just this tiny, fierce Polish woman who lived three doors down and believed that every holiday—even the ones that weren’t technically hers—required cookies. She’d tap on our back door every November with a Tupperware container and say, “Come, child. We have leaves to make.” I never understood why she cared so much about Thanksgiving cookies. But I showed up anyway, because her kitchen smelled like butter and she let me lick the spatula.
She’s been gone ten years now. The house sold, the step stool probably thrown out. But that smell in the attic—that sealed-in-sugar scent—brought her back so clearly I almost turned around to see if she was standing there, flour on her apron, telling me I was pressing the cookie cutter wrong. Honestly, I sat down on a box of old sweaters and cried for a minute. Maybe you’ve been there—that moment when a random smell just undoes you.
So this year, I decided to make her cookies. Not the Christmas ones. The Thanksgiving ones. The sugar cookies shaped like oak and maple leaves, painted with royal icing in colors that looked exactly like the trees in her backyard. I wanted to get it right. I wanted that exact crumb, that precise snap when you bit into the edge, that glossy, smooth icing that looked too pretty to eat. It took me four batches to stop crying and start remembering the details. But now I’ve got it. And honestly, this recipe is better than I ever thought I could make on my own.
Why You’ll Love This Recipe
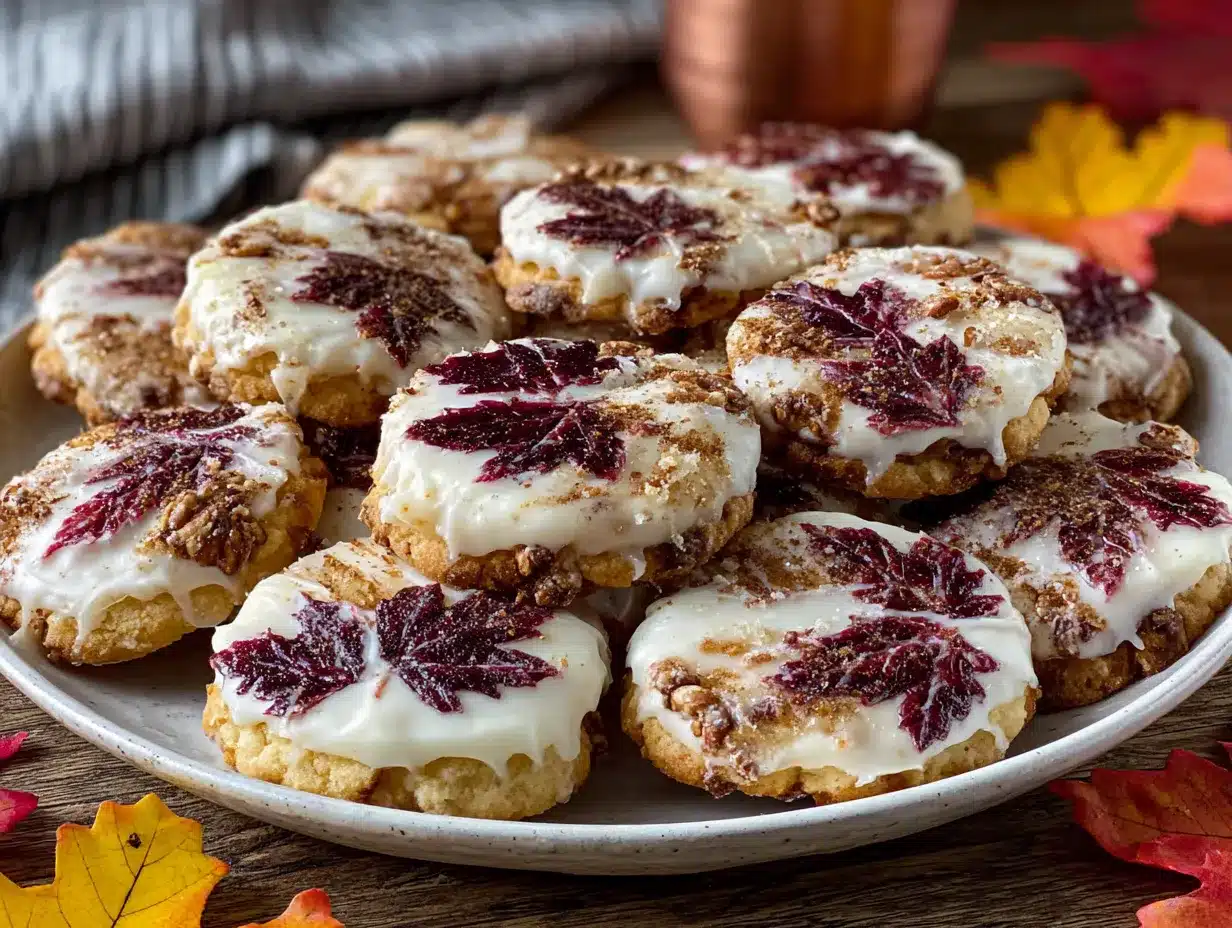
Let me tell you why these Thanksgiving Sugar Cookies with Royal Icing Leaves are going to become your new holiday tradition. I’ve tested this recipe six times—yes, six—to get the texture just right. The cookie itself has that perfect balance: firm enough to hold a sharp leaf shape, but tender enough to melt on your tongue. No puffiness, no spreading, no sad, bloated leaves.
- Simple Ingredients : You probably have everything already. Butter, sugar, flour, eggs, vanilla. The royal icing uses just powdered sugar, meringue powder, and water. No weird specialty items that sit in your pantry for three years.
- Perfect for Thanksgiving : While everyone else is stressing about the turkey, you can make these ahead. They keep beautifully for up to two weeks. I mean, try telling your guests that the cute little maple leaf on the dessert table has been sitting in a tin since November 12th. They won’t believe you.
- Crowd-Pleaser : Kids love decorating them. Adults love eating them. I brought a batch to my book club and three people asked for the recipe before the discussion even started. One person tried to sneak an extra into her purse. I saw it. I chose not to judge.
- Unbelievably Delicious : The vanilla and almond extract combo gives these cookies a flavor that’s somehow nostalgic and fresh at the same time. It’s the kind of cookie that makes you close your eyes after the first bite. Not even kidding.
What makes this version different from all the other sugar cookie recipes out there? It’s the technique. I spent hours figuring out why my cookies kept spreading in the oven. Turns out, it was the butter temperature and a 30-minute chill that changed everything. This isn’t just another sugar cookie recipe—it’s the one that works. The one that makes you look like a professional baker even if you’ve never iced a cookie in your life.
What Ingredients You Will Need
This recipe uses simple, wholesome ingredients to deliver that classic sugar cookie flavor with a texture that’s absolutely perfect for decorating. Most of these are pantry staples, so you probably won’t need a special trip to the store—unless you’re out of meringue powder, which I always forget to buy.
For the Sugar Cookies
- 1 cup (226g) unsalted butter, softened to room temperature (I use Land O’Lakes—it has a consistent fat content that gives reliable results)
- 1 cup (200g) granulated sugar
- 1 large egg, room temperature
- 1 teaspoon vanilla extract (pure, not imitation—trust me on this)
- ½ teaspoon almond extract (this is the secret ingredient that makes people ask what’s different)
- 2 ½ cups (312g) all-purpose flour, spooned and leveled
- ½ teaspoon baking powder
- ¼ teaspoon salt
For the Royal Icing
- 4 cups (480g) powdered sugar, sifted (clumps are the enemy of smooth icing)
- 3 tablespoons meringue powder (I prefer Wilton brand—it dries hard and glossy)
- 5-6 tablespoons warm water (add slowly—you can always add more, but you can’t take it out)
- Gel food coloring in autumn colors: red, orange, yellow, brown, and green (AmeriColor or Wilton gels work best—liquid coloring will mess up the consistency)
For the leaf designs, you’ll want a few different shades. I mix a deep burgundy red, a bright pumpkin orange, a golden yellow, a warm brown, and a forest green. You can also make ombre effects by mixing colors together. Don’t be afraid to experiment—that’s half the fun.
Equipment Needed
You don’t need a professional bakery setup for these cookies, but a few specific tools will make your life significantly easier. I’ve learned this the hard way, through many misshapen leaves and frustrated tears.
- Stand mixer or hand mixer (I use my KitchenAid, but a hand mixer works fine—just expect to cream the butter and sugar for a full 3 minutes)
- Rolling pin with thickness rings (these are a game-changer—they ensure even thickness so your cookies bake uniformly. I use the ¼-inch setting)
- Leaf-shaped cookie cutters in various sizes (a set of 4-5 different leaf shapes gives you variety. I found mine on Amazon for $12)
- Baking sheets (light-colored aluminum sheets work best—dark sheets cause over-browning on the bottom)
- Parchment paper or silicone baking mats (parchment is cheaper and works perfectly)
- Cooling racks (essential for letting cookies cool completely before icing)
- Piping bags or squeeze bottles (I prefer squeeze bottles for flooding—less hand fatigue)
- Small round piping tips (size 2 or 3 for outlining, size 4 or 5 for flooding)
- Toothpicks (for popping air bubbles and dragging icing into corners)
- Food-safe paintbrushes (optional, for creating watercolor effects on the leaves)
If you don’t have piping bags, you can use a zip-top bag with the corner snipped off. It’s not as precise, but it works in a pinch. I’ve done it. I’m not proud, but the cookies still looked cute.
Preparation Method
Let’s walk through this step by step. I’ve broken it down so even a first-timer can follow along without panicking. Take your time—these cookies are worth the effort.
Step 1: Make the Cookie Dough
In a large bowl or stand mixer fitted with the paddle attachment, cream together the softened butter and granulated sugar on medium speed for 3 minutes. It should look light, fluffy, and almost pale in color. Scrape down the sides of the bowl halfway through. Add the egg, vanilla extract, and almond extract. Beat on medium speed until fully combined, about 1 minute. The mixture might look slightly curdled—that’s okay, it will come together when you add the flour.
In a separate medium bowl, whisk together the flour, baking powder, and salt. Gradually add the dry ingredients to the wet mixture, mixing on low speed. Stop as soon as the dough comes together—don’t overmix, or your cookies will be tough. The dough should be soft but not sticky. If it feels too sticky, add another tablespoon of flour.
Step 2: Chill the Dough
Divide the dough into two discs, wrap each tightly in plastic wrap, and refrigerate for at least 30 minutes. This step is non-negotiable. Chilling solidifies the butter, which prevents the cookies from spreading in the oven. I once skipped this step out of impatience and ended up with leaf-shaped blobs. Learn from my mistakes.
Step 3: Roll and Cut
Preheat your oven to 350°F (175°C). Line two baking sheets with parchment paper. Lightly flour your work surface and rolling pin. Roll out one disc of dough to ¼-inch thickness. If you have thickness rings, use them. If not, use two stacked wooden spoons as guides—it’s a hack I learned from a bakery owner in Portland.
Cut out your leaf shapes using the cookie cutters. Dip the cutters in flour between cuts to prevent sticking. Transfer the cut cookies to the prepared baking sheets, spacing them about 1 inch apart. Gather the scraps, re-roll, and cut again. You can repeat this process once—after that, the dough gets tough.
Step 4: Bake
Bake for 8-10 minutes, rotating the baking sheets halfway through. The cookies are done when the edges are just barely golden—the centers should still look pale. They will continue to set as they cool. Let them cool on the baking sheet for 5 minutes, then transfer to a wire rack to cool completely. Do not ice warm cookies. The icing will melt and slide off. I know this from personal tragedy.
Step 5: Make the Royal Icing
In a large bowl, combine the sifted powdered sugar and meringue powder. Add 5 tablespoons of warm water and beat on low speed until combined. Increase to medium-high speed and beat for 5-7 minutes, until the icing is glossy and forms stiff peaks. If it’s too thick, add water 1 teaspoon at a time. If it’s too thin, add more powdered sugar.
Divide the icing into separate bowls for each color. Add gel food coloring a little at a time until you reach your desired shade. For the flooding consistency (the thin icing you’ll use to fill in the leaves), add water ½ teaspoon at a time until the icing flows like honey and smooths out within 10 seconds after being stirred. For the outlining consistency, keep it thicker—it should hold a peak when you lift the spoon.
Step 6: Decorate
Transfer the thicker icing to piping bags fitted with small round tips. Outline each leaf cookie with the appropriate color. Then, using the thinner flooding icing, fill in the outlines. Use a toothpick to spread the icing into corners and pop any air bubbles. Let the flooded icing dry for 15-20 minutes before adding details like leaf veins or dots. For the veins, use a slightly thicker icing in a contrasting color.
Let the decorated cookies dry completely, uncovered, at room temperature for 6-8 hours or overnight. The icing should be hard to the touch before you stack or store them.
Cooking Tips & Techniques
I’ve made plenty of mistakes with sugar cookies over the years, so let me save you some trouble. The biggest issue people face is spreading—those perfectly cut leaves turn into amorphous blobs. The fix is always the same: chill your dough. Not for 10 minutes. For at least 30. And if your kitchen is warm, chill the cut cookies on the baking sheet for 10 minutes before they go in the oven. This single trick changed my baking life.
Another common mistake is overbaking. Sugar cookies should look slightly underdone when you pull them out. They’ll continue baking on the hot sheet. If you wait until they’re golden all over, they’ll be dry and crunchy. You want that tender, melt-in-your-mouth texture, not a jaw workout.
For the royal icing, the consistency is everything. If it’s too thick, it won’t smooth out. If it’s too thin, it will run off the edge of the cookie. The “10-second rule” is your friend: lift your spoon and count to 10. If the icing ribbon disappears back into the bowl within 10 seconds, you’re golden. If it sits on top, add water. If it disappears immediately, add more powdered sugar.
Timing-wise, I recommend making the cookies one day and decorating them the next. The cookies stay fresh for days, so there’s no rush. I usually bake on a Friday night while watching a movie, then decorate on Saturday morning when I have better light and more patience.
Variations & Adaptations
These cookies are endlessly adaptable. Here are a few ways to switch things up:
- Dietary Adaptations : For a dairy-free version, substitute the butter with a high-quality vegan butter stick (not the spreadable kind in a tub). For gluten-free, use a 1:1 gluten-free flour blend that contains xanthan gum. I’ve tested both, and they work surprisingly well—just add an extra tablespoon of flour if the dough feels too sticky.
- Flavor Variations : Swap the almond extract for lemon zest and lemon extract for a bright, citrusy cookie. Or add 1 teaspoon of pumpkin pie spice to the flour mixture for a fall-spiced version. I made a batch with cardamom and orange zest last year, and they were gone in two days.
- Decorating Styles : Instead of royal icing, try a simple glaze made from powdered sugar and milk. It won’t be as crisp, but it’s faster. You can also press small edible flowers or herbs (like rosemary sprigs) into the dough before baking for a rustic look. Or dust the baked cookies with powdered sugar for an elegant, minimalist finish.
- Cookie Shapes : Don’t limit yourself to leaves. These cookies work with any fall-themed cutter—pumpkins, acorns, turkeys, or even simple circles decorated like autumn wreaths.
Serving & Storage Suggestions
These cookies are best served at room temperature. Arrange them on a platter or cake stand for a stunning Thanksgiving dessert table. They pair beautifully with hot apple cider, spiced chai, or a warm cup of coffee. For a more elaborate presentation, stack them in a decorative tin lined with parchment paper and tie with a ribbon—they make wonderful hostess gifts.
To store, place the fully dried and decorated cookies in an airtight container, separating layers with parchment paper. They will keep at room temperature for up to 2 weeks. Do not refrigerate—the humidity can cause the icing to become sticky or weep. You can freeze undecorated cookies for up to 3 months. Wrap them tightly in plastic wrap and place in a freezer-safe bag. Thaw at room temperature before icing.
One thing I love about these cookies is that the flavors actually improve after a day or two. The almond and vanilla meld together, and the cookie softens ever so slightly. They’re good on day one, but they’re magical on day three.
Nutritional Information & Benefits
Let’s be honest—these are cookies, not health food. But here’s the estimated nutritional breakdown per cookie (based on 24 cookies with icing): approximately 180 calories, 7g fat, 28g carbohydrates, 2g protein, and 16g sugar. The butter provides a small amount of vitamin A, and the eggs add protein and choline.
If you’re looking to lighten them up, you can reduce the sugar in the cookie dough to ¾ cup without affecting the texture too much. For the icing, you can use a sugar-free powdered sugar alternative, though the texture will be slightly different. These cookies are not gluten-free or dairy-free in their standard form, but see the variations section for substitutions.
My personal perspective? These are a once-a-year treat. Thanksgiving is about indulgence and gratitude. I don’t stress about the calories—I focus on the joy of making something beautiful and sharing it with people I love. That’s worth every single gram of sugar.
Conclusion
These Thanksgiving Sugar Cookies with Royal Icing Leaves are more than just a dessert—they’re a way to slow down and create something beautiful in the middle of a hectic holiday season. Every time I pipe those tiny leaf veins, I think of Mrs. Kowalski and her patient hands guiding mine. I think about how she never rushed, never got frustrated when I smudged the icing. She just said, “Try again, child. The leaf will forgive you.”
I hope you make these cookies. I hope you get a little flour on your shirt and a little icing on your counter. I hope you mess up a few leaves and laugh about it. And I hope you share them with someone who matters. Because that’s what this recipe is really about—not perfection, but presence. The smell of butter and sugar in a warm kitchen. The sound of someone saying, “These are beautiful.” The feeling of passing on a tradition, even if it’s one you just started yourself.
If you make these, I’d love to hear about it. Leave a comment below and tell me about your decorating adventures. Did you try a color combination I didn’t mention? Did you use a different cookie cutter shape? Share your photos and tag me—I want to see your leaves. And if you’re looking for more Thanksgiving dessert ideas, check out my pumpkin cheesecake bars and apple cider donut cake—they’re both make-ahead friendly and absolutely delicious.
Happy baking, friend. And happy Thanksgiving.
Frequently Asked Questions
Can I make these cookies ahead of time?
Absolutely. You can bake the cookies up to two weeks in advance and store them in an airtight container at room temperature. Decorate them a day or two before serving for the freshest look. The royal icing needs 6-8 hours to dry completely, so plan accordingly.
Why did my cookies spread in the oven?
This usually happens for one of three reasons: the dough wasn’t chilled long enough, the butter was too soft, or the baking sheets were too warm. Make sure your butter is softened but still cool to the touch, chill the dough for at least 30 minutes, and always use cool baking sheets. If your first batch spreads, pop the remaining dough back in the fridge for 15 minutes.
Can I freeze the decorated cookies?
It’s not recommended. The royal icing can become sticky or crack when thawed. Instead, freeze the undecorated cookies for up to 3 months. Wrap them tightly in plastic wrap and place in a freezer-safe bag. Thaw at room temperature, then decorate as usual.
How do I get smooth royal icing?
The key is the consistency. Your flooding icing should be thin enough to flow and smooth out on its own within 10 seconds. Use a toothpick to spread the icing into corners and pop any air bubbles. Work slowly and let each layer dry before adding details. Patience is the secret ingredient.
Can I use liquid food coloring instead of gel?
I don’t recommend it. Liquid food coloring adds too much water, which can thin out your royal icing and affect how it dries. Gel food coloring gives you vibrant colors without changing the consistency. A little goes a long way—start with a toothpick’s worth and add more as needed.
Pin This Recipe!
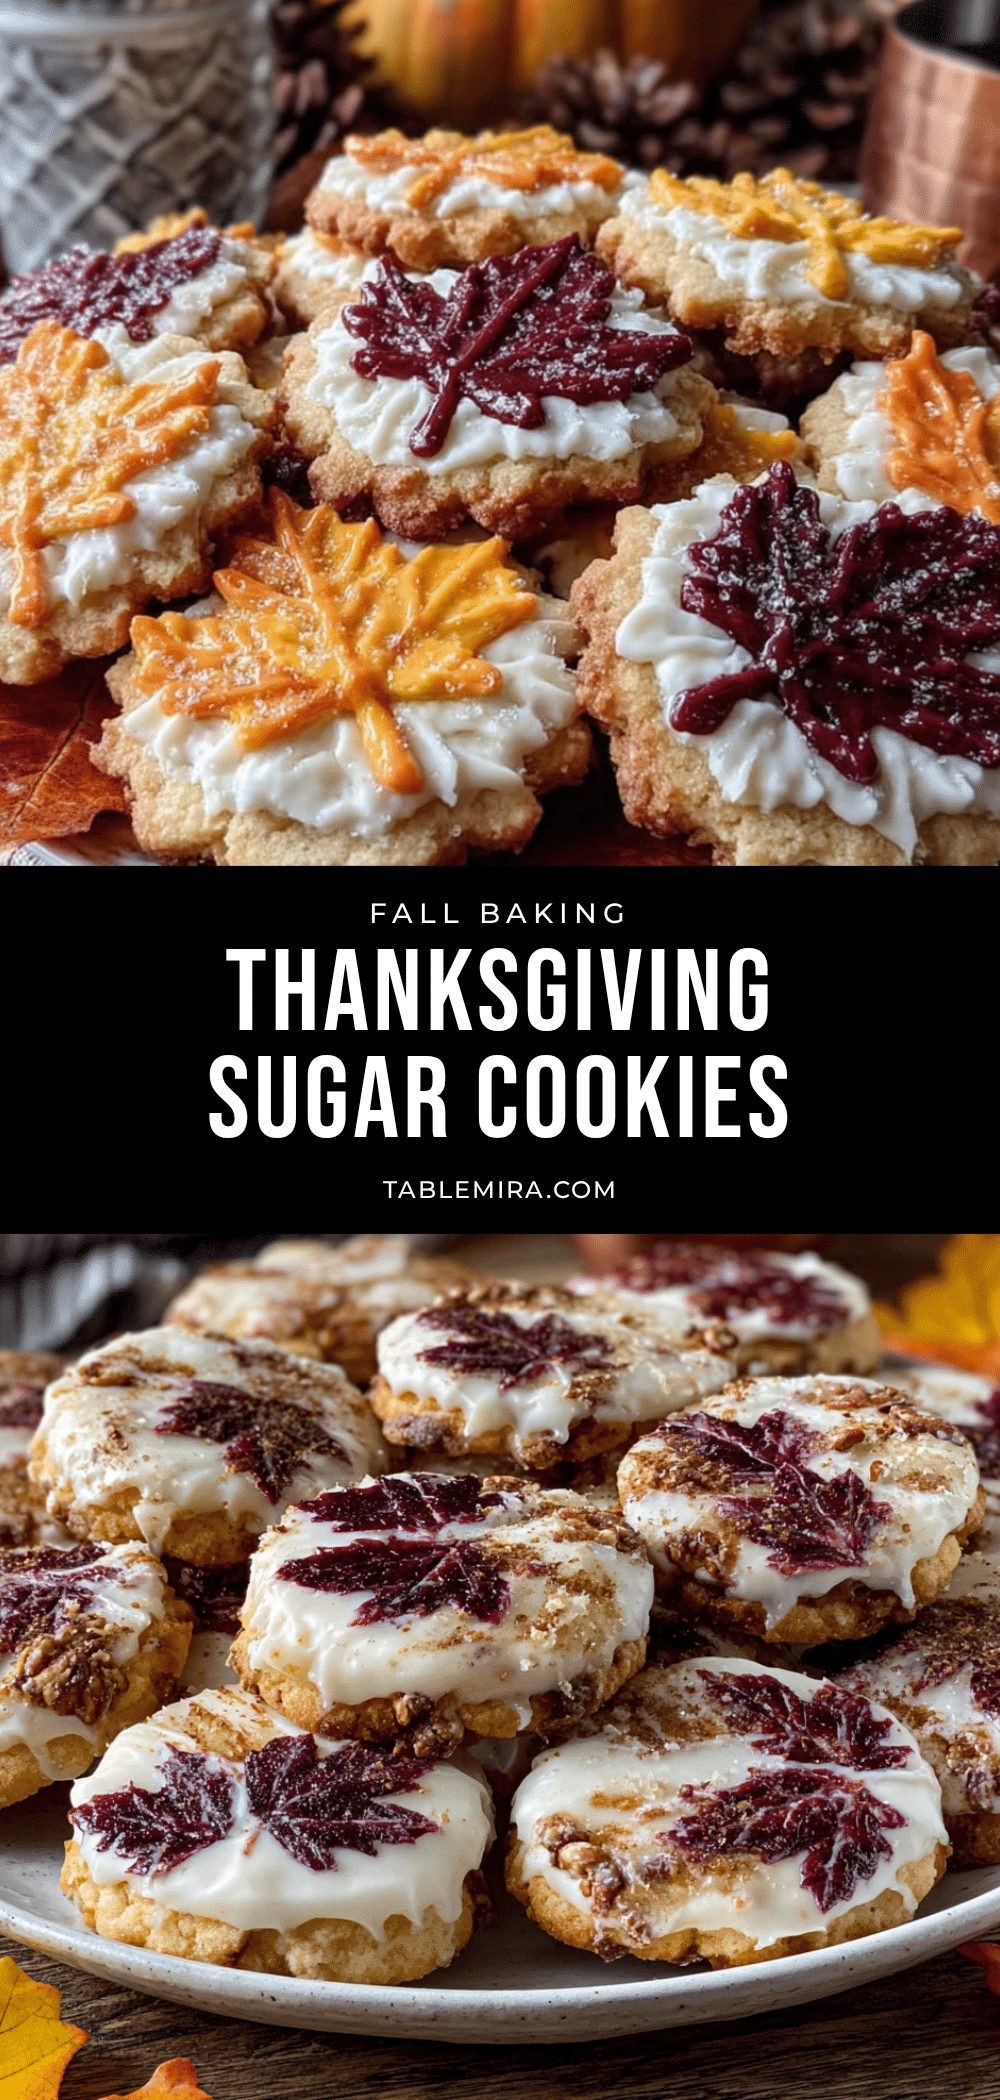
Easy Thanksgiving Sugar Cookies with Royal Icing Leaves

These Thanksgiving Sugar Cookies with Royal Icing Leaves are the perfect holiday treat—firm enough to hold a sharp leaf shape, tender enough to melt on your tongue, and decorated with glossy royal icing in autumn colors. A nostalgic recipe that’s ideal for make-ahead baking and sharing with loved ones.
- Prep Time: 30 minutes
- Cook Time: 10 minutes
- Total Time: 45 minutes (plus chilling and drying time)
- Yield: 24 servings 1x
- Category: Dessert
- Cuisine: American
Ingredients
- 1 cup (226g) unsalted butter, softened to room temperature
- 1 cup (200g) granulated sugar
- 1 large egg, room temperature
- 1 teaspoon vanilla extract (pure)
- ½ teaspoon almond extract
- 2 ½ cups (312g) all-purpose flour, spooned and leveled
- ½ teaspoon baking powder
- ¼ teaspoon salt
- 4 cups (480g) powdered sugar, sifted
- 3 tablespoons meringue powder
- 5–6 tablespoons warm water
- Gel food coloring in autumn colors: red, orange, yellow, brown, and green
Instructions
- Make the Cookie Dough: In a large bowl or stand mixer fitted with the paddle attachment, cream together the softened butter and granulated sugar on medium speed for 3 minutes until light, fluffy, and pale. Scrape down the sides halfway through. Add the egg, vanilla extract, and almond extract. Beat on medium speed until fully combined, about 1 minute. In a separate medium bowl, whisk together the flour, baking powder, and salt. Gradually add the dry ingredients to the wet mixture, mixing on low …
- Chill the Dough: Divide the dough into two discs, wrap each tightly in plastic wrap, and refrigerate for at least 30 minutes.
- Roll and Cut: Preheat your oven to 350°F (175°C). Line two baking sheets with parchment paper. Lightly flour your work surface and rolling pin. Roll out one disc of dough to ¼-inch thickness. Cut out leaf shapes using cookie cutters. Transfer cut cookies to prepared baking sheets, spacing about 1 inch apart. Gather scraps, re-roll, and cut again (repeat only once).
- Bake: Bake for 8-10 minutes, rotating the baking sheets halfway through. Cookies are done when edges are just barely golden—centers should still look pale. Let cool on baking sheet for 5 minutes, then transfer to a wire rack to cool completely.
- Make the Royal Icing: In a large bowl, combine sifted powdered sugar and meringue powder. Add 5 tablespoons warm water and beat on low speed until combined. Increase to medium-high speed and beat for 5-7 minutes until glossy and forms stiff peaks. Adjust consistency with water or powdered sugar as needed. Divide into bowls for each color and add gel food coloring. For flooding consistency, add water ½ teaspoon at a time until icing flows like honey and smooths out within 10 seconds after stirrin…
- Decorate: Transfer thicker icing to piping bags fitted with small round tips. Outline each leaf cookie with appropriate color. Using thinner flooding icing, fill in outlines. Use a toothpick to spread icing into corners and pop air bubbles. Let flooded icing dry for 15-20 minutes before adding details like leaf veins or dots with slightly thicker icing in contrasting colors. Let decorated cookies dry completely, uncovered, at room temperature for 6-8 hours or overnight.
Notes
Chill the dough for at least 30 minutes to prevent spreading. For best results, bake cookies one day and decorate the next. The 10-second rule for royal icing consistency: lift your spoon and count to 10—if the icing ribbon disappears back into the bowl within 10 seconds, it’s perfect. Do not ice warm cookies. Store decorated cookies in an airtight container at room temperature for up to 2 weeks. Freeze undecorated cookies for up to 3 months.
Nutrition
- Serving Size: 1 cookie
- Calories: 180
- Sugar: 16
- Sodium: 60
- Fat: 7
- Saturated Fat: 4
- Carbohydrates: 28
- Protein: 2
Keywords: Thanksgiving cookies, sugar cookies, royal icing, leaf cookies, fall cookies, holiday baking, decorated cookies


