My neighbor wasn’t trying to impress anyone. I’d stopped by to borrow a bag of sugar—classic baking emergency—and the smell hit me before I even got through the door. It was buttery, sweet, and weirdly… toasty? I followed my nose to her kitchen, and there they were. A cookie sheet full of what looked like gnarled, knobby witch fingers, complete with shiny almond fingernails. She just shrugged and said, “Oh, those? Just something silly for the kids’ school party.”
I stood there, honestly a little stunned. She was so casual about it, like she’d whipped up a batch of regular chocolate chip cookies. But these were spectacularly creepy. The knuckles were perfectly wrinkled, the almond nails had this almost-too-real sheen, and they looked exactly like something you’d find reaching out of a bubbling cauldron. She handed me one, still warm, and let me tell you—it was the most deliciously unsettling thing I’ve ever eaten. That first bite had this unexpected crunch from the almond, followed by the soft, melt-in-your-mouth cookie. I mean, I forgot about the sugar entirely.
I’ve been making them every Halloween since. Maybe you’ve been there—staring down a holiday party and wanting to bring something that makes people stop and talk. These witch finger cookies do exactly that. They’re the kind of recipe that makes you look like a Halloween hero without spending all day in the kitchen. Plus, watching people’s faces go from “ew, gross” to “wait, these are amazing” is honestly my favorite part of October. So grab your apron, and let’s make some magic—the spooky kind.
Why You’ll Love This Recipe
I’ve tested this recipe more times than I care to admit. The first batch was too crumbly, the second batch had nails that fell off, and the third batch was—finally—perfect. Here’s why this version is the one you’ll come back to year after year.
- Quick & Easy: These come together in about 45 minutes from start to finish. Perfect for last-minute Halloween party prep or a fun weekend project with the kids.
- Simple Ingredients: You probably have most of these in your pantry right now. Butter, sugar, flour, eggs, vanilla, and almonds. No fancy grocery store trips required.
- Perfect for Halloween: Whether it’s a school party, a neighborhood gathering, or just a spooky movie night at home, these cookies are the star of the show. They’re creepy, they’re delicious, and they get people talking.
- Crowd-Pleaser: Kids love the gross-out factor, and adults love the buttery shortbread taste. I’ve never brought a batch home with leftovers—ever.
- Unbelievably Delicious: The texture is what gets me every time. That crisp, slightly crumbly shortbread paired with the nutty crunch of the almond nail? It’s next-level comfort food disguised as something terrifying.
What makes this recipe different from all the others out there? It’s the almond-to-butter ratio. I spent a whole afternoon tweaking it until the dough held its shape perfectly without being dry. The knuckles wrinkle just right, the nails stay put, and the flavor is rich without being heavy. This isn’t just another Halloween cookie recipe—it’s your new favorite Halloween cookie recipe.
What Ingredients You Will Need
This recipe uses simple, wholesome ingredients to deliver that perfect shortbread texture and spooky aesthetic. Most of these are pantry staples, which is exactly what you want when Halloween sneaks up on you.
- 1 cup (2 sticks) unsalted butter, softened – I use Land O’Lakes for consistent results. The butter needs to be truly soft, almost like mayonnaise texture, for the creaming to work right.
- 1 cup powdered sugar – This gives the cookies that melt-in-your-mouth tenderness. Granulated sugar would make them too crunchy for witch fingers.
- 1 large egg – Room temperature is best. If you forgot to take it out of the fridge, set it in a bowl of warm water for 5 minutes.
- 1 teaspoon vanilla extract – Pure vanilla makes a difference here. The imitation stuff has a chemical aftertaste that shows up in shortbread.
- ½ teaspoon almond extract – This is the secret weapon. It reinforces the almond nail flavor and gives the cookies that mysterious, almost marzipan-like taste.
- 2 ¾ cups all-purpose flour – Spoon and level your flour. Scooping directly from the bag packs it down and gives you dry, crumbly dough.
- 1 teaspoon baking powder – Just enough to give the cookies a tiny lift without making them puffy.
- ½ teaspoon salt – Fine sea salt works best. It balances the sweetness and makes the almond flavor pop.
- Green gel food coloring – Americolor or Wilton brands give the best witchy green without thinning the dough. Liquid food coloring will make the dough sticky.
- Whole blanched almonds – About 30 almonds, one for each cookie. Look for the ones that are uniform in size and shape—they make better fingernails.
- Red jam or jelly – A tiny dab for the “blood” at the base of the nail. Raspberry or strawberry works great. Don’t use jelly with seeds—it looks weird.
Substitution Guidance: If you’re out of almond extract, you can use 1 teaspoon of vanilla instead, but the almond flavor won’t be as pronounced. For a nut-free version, skip the almond extract and use a whole cashew or a piece of dried apricot for the nail—it won’t look as realistic, but it’ll still be fun. If you’re dairy-free, use vegan butter sticks (not tub margarine, which has too much water) and chill the dough for an extra 15 minutes.
Equipment Needed
You don’t need a professional bakery setup for these cookies. Here’s what you’ll need to pull this off.
- Electric mixer – A stand mixer with the paddle attachment is ideal, but a hand mixer works just fine. I’ve made these with both, and honestly, the hand mixer gives you more control over the creaming.
- Mixing bowls – One medium bowl for the dry ingredients and one large bowl for the wet ingredients.
- Baking sheets – Two standard half-sheet pans. Line them with parchment paper or silicone baking mats. I learned the hard way that greased pans make the nails slide off.
- Sharp knife or small offset spatula – For shaping the knuckles and creating those realistic wrinkles.
- Toothpick or skewer – For pressing the almond nail into the dough and adding the “blood” detail.
- Cooling rack – Wire racks let the cookies cool evenly so the almond nails set properly.
If you don’t have a stand mixer, don’t worry. A hand mixer and some elbow grease will get you there. Just make sure your butter is extra soft so the creaming step doesn’t take forever. And if you’re on a budget, dollar store baking sheets work perfectly—just watch the baking time since thinner pans cook faster.
Preparation Method
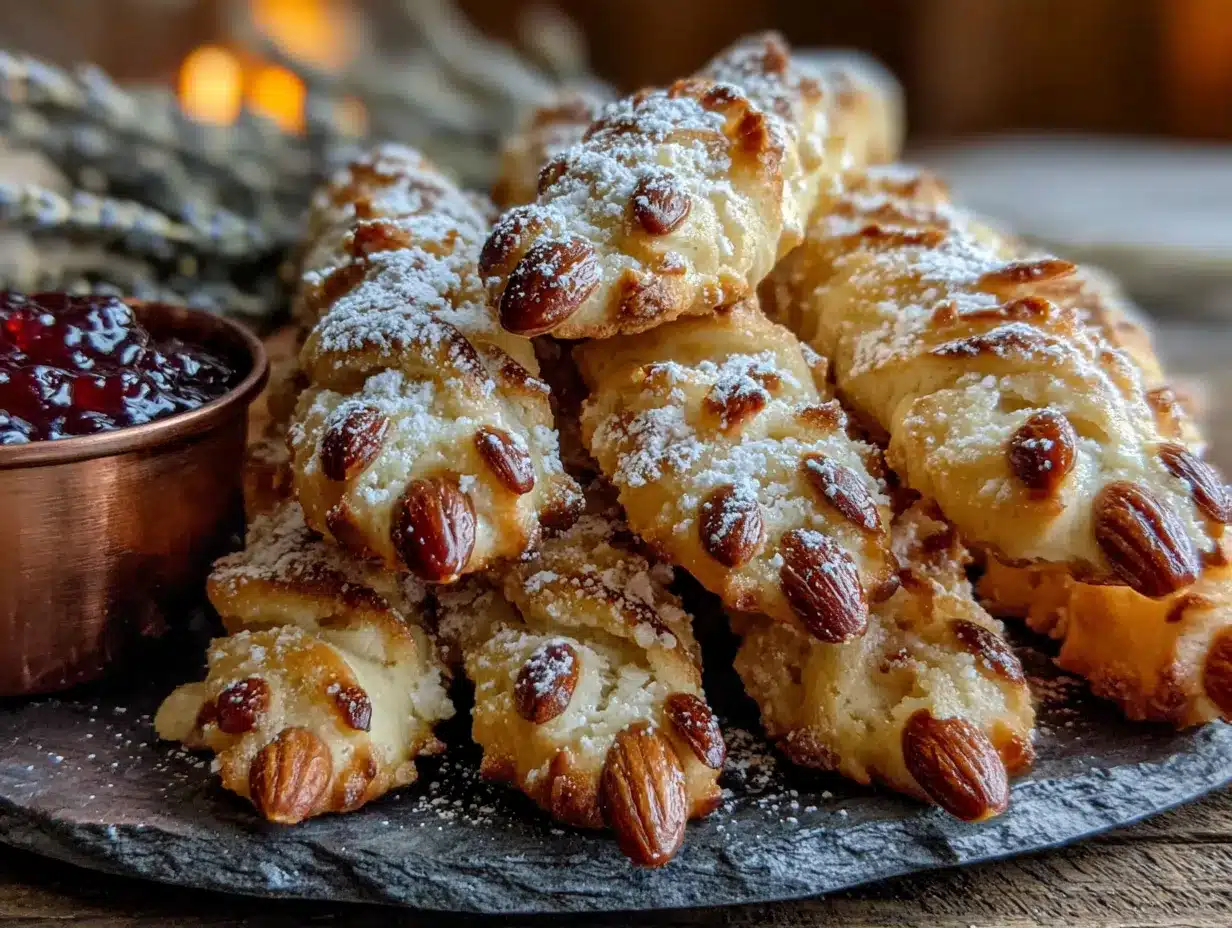
Let’s get our hands dirty. This is where the magic—and the creepiness—happens. Take your time with the shaping step; it’s what makes these cookies look like the real deal.
- Cream the butter and sugar. In a large bowl, beat the softened butter and powdered sugar together on medium speed until light and fluffy, about 3 minutes. You’re looking for a pale, almost whipped texture. Scrape down the sides of the bowl halfway through.
- Add the wet ingredients. Beat in the egg, vanilla extract, and almond extract until fully combined. The mixture should look smooth and glossy. If it looks curdled, your butter wasn’t soft enough—warm your bowl in a hot water bath for 30 seconds and beat again.
- Add the food coloring. Drop in about 8-10 drops of green gel food coloring and mix on low until the color is evenly distributed. You want a swampy, mossy green—not neon. Add more drops if needed, but go slowly. You can always add, but you can’t take away.
- Mix the dry ingredients. In a separate bowl, whisk together the flour, baking powder, and salt. Add this to the wet mixture in two batches, mixing on low speed after each addition. Stop as soon as the dough comes together. Overmixing makes tough cookies.
- Chill the dough. Wrap the dough in plastic wrap and refrigerate for at least 30 minutes. This is non-negotiable. Chilled dough is easier to shape and holds its form better during baking. I’ve skipped this step before, and my witch fingers looked more like green blobs.
- Preheat the oven. Set your oven to 325°F (165°C). Line your baking sheets with parchment paper.
- Shape the fingers. Scoop about 1 tablespoon of dough and roll it into a cylinder shape about 3 inches long. Taper one end slightly to make the fingertip. Place it on the baking sheet. Press a small indentation at the tip with your finger—this is where the nail goes. Use a sharp knife to score 2-3 lines across the middle of the finger to create knuckles. Don’t cut too deep; you just want to create creases.
- Add the almond nails. Press one whole blanched almond into the indentation at the tip of each finger. The pointy end should face outward, like a real fingernail. Gently press the dough around the base of the almond so it looks like the nail is growing out of the finger.
- Bake. Bake for 12-15 minutes, or until the cookies are set but not browned. The bottoms should be just barely golden. Overbaking dries them out and makes the nails fall off.
- Cool and decorate. Let the cookies cool on the baking sheet for 5 minutes, then transfer to a wire rack. While they’re still slightly warm, use a toothpick to dab a tiny bit of red jam at the base of each almond nail. It looks like blood—gross and perfect.
Sensory cue: When the cookies are done, the kitchen should smell like buttery almonds and vanilla. The edges will look set but the centers will still be soft. Don’t touch them until they’ve cooled—they’re fragile when hot.
Cooking Tips & Techniques
I’ve made these cookies at least a dozen times, and I’ve made every mistake in the book. Here’s what I’ve learned so you don’t have to.
Don’t skip the chilling step. I know it’s tempting to rush, but warm dough is sticky, soft, and impossible to shape. Chilled dough holds its form and gives you those realistic knobby fingers. If your dough gets too warm while shaping, pop the baking sheet in the fridge for 10 minutes before baking.
Use a light touch with the knuckles. The first time I made these, I cut too deep and the fingers split open during baking. You just want a gentle score mark—think of it as a suggestion of a knuckle, not a canyon. The dough will spread slightly in the oven, so the creases will deepen naturally.
Match your almonds to your fingers. Sort through your almonds and pick the ones that are similar in size and shape. A giant almond on a tiny finger looks comical, not creepy. Also, make sure the almond is pressed in firmly enough that it won’t fall off during baking. I lost three nails my second time around, and let me tell you, a finger without a nail just looks sad.
Watch the baking time like a hawk. These cookies go from perfectly done to overbaked in about 60 seconds. The edges should be set but not brown. If you see any browning on the sides, pull them out immediately. Overbaked cookies are dry and crumbly, and the nails will pop right off.
Multitasking strategy: While the first batch bakes, shape the second batch on a separate sheet of parchment paper. When the first batch comes out, slide the second batch in immediately. This keeps your oven working efficiently and your cookies consistent.
Variations & Adaptations
Once you’ve mastered the basic witch finger, the possibilities are endless. Here are a few variations I’ve tried and loved.
Gluten-Free Witch Fingers: Substitute the all-purpose flour with a 1:1 gluten-free baking flour blend. I’ve used Bob’s Red Mill with great results. Add an extra tablespoon of butter since gluten-free flour tends to be drier. The texture will be slightly more crumbly, but the creepiness factor is still there.
Chocolate Witch Fingers: Replace ¼ cup of the flour with unsweetened cocoa powder. The cookies turn a dark, earthy brown that looks like dirt-caked fingers. Use dark chocolate almonds for the nails, or skip the almond and use a chocolate-covered espresso bean instead. These are my personal favorite for adult Halloween parties.
Spooky Smokey Fingers: Add ½ teaspoon of smoked paprika and ¼ teaspoon of black pepper to the dough. The smoky flavor pairs weirdly well with the almond, and the paprika gives the cookies a slightly reddish tint that looks like they’ve been pulled from a fire. I made these for a campfire-themed Halloween party and they were a hit.
Vegan Version: Use vegan butter sticks and a flax egg (1 tablespoon ground flaxseed mixed with 3 tablespoons water). The dough will be a bit softer, so chill it for an extra 15 minutes. Use a whole raw cashew for the nail instead of an almond—it looks surprisingly realistic.
Serving & Storage Suggestions
These cookies are best served at room temperature, arranged on a platter that looks like a witch’s hand. I like to place them in a cluster, fingers pointing in different directions, with a few loose almonds scattered around for effect. If you’re feeling extra creepy, serve them on a black plate with a few fake spider webs draped over the edge.
What to serve alongside: These pair beautifully with a cup of hot apple cider or a glass of cold milk. For a full Halloween spread, serve them with pumpkin-shaped sugar cookies, ghost meringues, and a bowl of candy corn. The contrast between the sweet, innocent cookies and the creepy witch fingers is always a crowd-pleaser.
Storage: Store the cookies in an airtight container at room temperature for up to 5 days. Layer them between sheets of parchment paper so the nails don’t get knocked off. Do not refrigerate them—the moisture will make the cookies soft and the almonds will lose their crunch.
Freezing: You can freeze the unbaked shaped fingers on a baking sheet until solid, then transfer them to a freezer bag. Bake directly from frozen, adding 2-3 minutes to the baking time. I do this every October so I can pull out a batch whenever a Halloween party pops up.
Reheating: If you want that just-baked warmth, pop the cookies in a 300°F oven for 3-4 minutes. The almond nails will crisp up again, and the cookies will taste fresh out of the oven. Just don’t microwave them—the nails will get soft and weird.
Nutritional Information & Benefits
Let’s be real—these are Halloween cookies, not health food. But here’s the breakdown so you know what you’re working with.
Per cookie (based on 30 cookies): Approximately 140 calories, 8g fat, 16g carbohydrates, 2g protein, 8g sugar. The almonds add a small amount of healthy fats and vitamin E, which is nice. But honestly, you’re here for the spooky fun, not the nutritional profile.
Dietary considerations: This recipe contains gluten, dairy, eggs, and tree nuts (almonds). For a nut-free version, use a whole cashew or a piece of dried apricot for the nail and skip the almond extract. For a gluten-free version, use a 1:1 gluten-free flour blend as mentioned in the variations section.
My perspective: I love that these cookies use real, recognizable ingredients. There’s nothing artificial in the dough itself—just butter, sugar, flour, and eggs. The green coloring is the only concession to Halloween, and you can use natural food coloring if you prefer. It’s comfort food with a creepy twist, and that’s exactly what Halloween should be about.
Conclusion
These witch finger cookies are the kind of recipe that makes Halloween feel special. They’re creepy enough to impress, delicious enough to disappear, and simple enough that you don’t need to be a professional baker to pull them off. I’ve made them for school parties, office potlucks, and family gatherings, and every single time, someone asks for the recipe.
What I love most about them is the reaction they get. Kids squeal with delighted disgust. Adults do a double-take before laughing and grabbing a handful. And somewhere in the middle of all that spooky fun, you get to enjoy a genuinely good shortbread cookie with a satisfying almond crunch. It’s the perfect Halloween treat—a little bit scary, a whole lot delicious, and guaranteed to make you the hero of any party.
So go ahead, get your hands dirty, and make some magic. And when you do, come back and tell me about it. I’d love to hear how your witch fingers turned out—did you add extra knuckles? Did you use a different color? Did anyone actually scream? Drop a comment below or tag me in your photos. Happy Halloween, and happy baking!
Frequently Asked Questions
Can I make these cookies ahead of time?
Absolutely. You can shape the fingers and refrigerate them on the baking sheet for up to 24 hours before baking. Or freeze the unbaked cookies for up to 3 months and bake directly from frozen.
My almond nails keep falling off. What am I doing wrong?
This usually happens when the almond isn’t pressed in firmly enough, or when the dough is too warm. Make a deep indentation at the fingertip, press the almond in until it’s about halfway submerged, and chill the shaped cookies for 10 minutes before baking.
Can I use a different color for the cookies?
Of course! Purple, gray, or even pale zombie-flesh colors work great. Just use gel food coloring and add it slowly until you get the shade you want. For a more natural look, skip the coloring entirely and let the shortbread be its natural golden color.
How do I get the knuckles to look more realistic?
Use a sharp knife and make light, curved score marks across the finger. Don’t cut straight across—real knuckles have a slight curve. You can also gently pinch the sides of the finger between your thumb and forefinger to create a more three-dimensional knuckle effect.
What if I don’t have almond extract?
You can use 1 teaspoon of vanilla extract instead, but the almond flavor won’t be as strong. Alternatively, you can add ¼ teaspoon of cinnamon and ¼ teaspoon of nutmeg for a warm, spiced flavor that still feels Halloween-y.
Pin This Recipe!
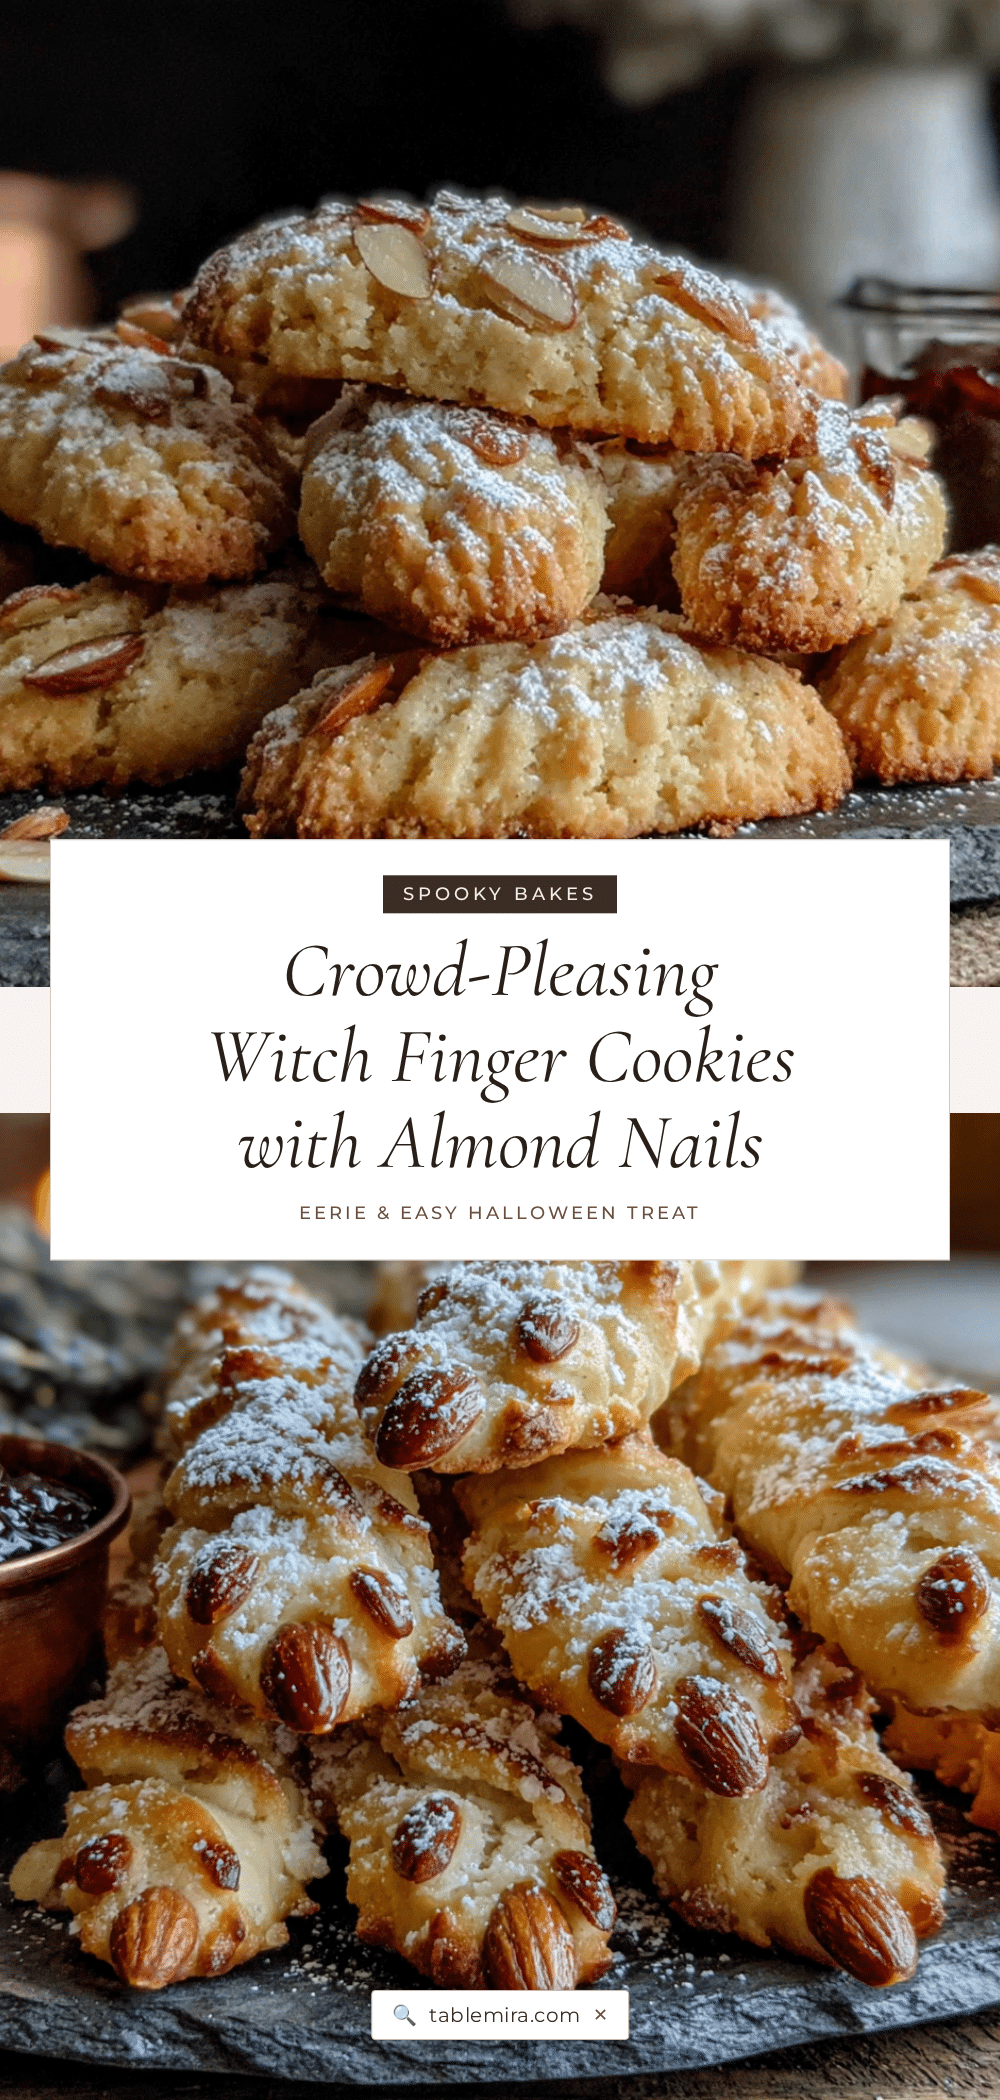
Witch Finger Cookies with Almond Nails: Easy Halloween Treat
These creepy yet delicious witch finger cookies are made with buttery shortbread dough, shaped like gnarled fingers, and topped with almond fingernails. Perfect for Halloween parties, they’re quick to make and guaranteed to get a reaction.
- Prep Time: 30 minutes
- Cook Time: 15 minutes
- Total Time: 45 minutes
- Yield: 30 cookies 1x
- Category: Dessert
- Cuisine: American
Ingredients
- 1 cup (2 sticks) unsalted butter, softened
- 1 cup powdered sugar
- 1 large egg, room temperature
- 1 teaspoon vanilla extract
- ½ teaspoon almond extract
- 2 ¾ cups all-purpose flour, spooned and leveled
- 1 teaspoon baking powder
- ½ teaspoon fine sea salt
- Green gel food coloring (e.g., Americolor or Wilton)
- 30 whole blanched almonds
- Red jam or jelly (raspberry or strawberry, seedless)
Instructions
- Cream the butter and sugar: In a large bowl, beat the softened butter and powdered sugar together on medium speed until light and fluffy, about 3 minutes. Scrape down the sides halfway through.
- Add the wet ingredients: Beat in the egg, vanilla extract, and almond extract until fully combined and smooth.
- Add the food coloring: Drop in 8-10 drops of green gel food coloring and mix on low until evenly distributed. Adjust for a swampy, mossy green.
- Mix the dry ingredients: In a separate bowl, whisk together the flour, baking powder, and salt. Add to the wet mixture in two batches, mixing on low until just combined. Do not overmix.
- Chill the dough: Wrap the dough in plastic wrap and refrigerate for at least 30 minutes.
- Preheat the oven: Set oven to 325°F (165°C). Line baking sheets with parchment paper.
- Shape the fingers: Scoop about 1 tablespoon of dough and roll into a 3-inch cylinder, tapering one end. Place on baking sheet. Press an indentation at the tip for the nail. Use a sharp knife to score 2-3 light lines across the middle for knuckles.
- Add the almond nails: Press one whole blanched almond into the indentation at the tip, pointy end outward. Gently press dough around the base of the almond.
- Bake: Bake for 12-15 minutes, until set but not browned. Bottoms should be just barely golden.
- Cool and decorate: Let cool on baking sheet for 5 minutes, then transfer to a wire rack. While slightly warm, dab a tiny bit of red jam at the base of each almond nail with a toothpick.
Notes
Don’t skip chilling the dough—it’s essential for shaping. Use a light touch when scoring knuckles; they will deepen as cookies bake. Press almonds firmly into dough to prevent them from falling off. Watch baking time closely; overbaking makes cookies dry and nails may pop off. For best results, serve at room temperature.
Nutrition
- Serving Size: 1 cookie
- Calories: 140
- Sugar: 8
- Sodium: 75
- Fat: 8
- Saturated Fat: 4.5
- Carbohydrates: 16
- Fiber: 0.5
- Protein: 2
Keywords: Halloween cookies, witch finger cookies, shortbread cookies, almond cookies, spooky treats, easy Halloween recipe, creepy cookies


