I’m not supposed to admit this, but I was hiding from my own front door. It was late October, the sky was that weird bruised purple just before dusk, and I had completely forgotten it was the night of our neighborhood’s annual pumpkin-carving party. I was frantically rummaging through my fridge, hoping to find something—anything—that could pass as a contribution, when my doorbell rang. I mean, it didn’t just ring; it played this creepy, echoing chime that my husband had installed as a joke. I froze.
Standing on my porch was my neighbor, Mrs. Kowalski. She’s this tiny, eighty-something woman who always wears floral aprons and keeps her garden so neat it looks like a magazine spread. Honestly, I was expecting a lecture about my overgrown rose bushes. Instead, she was holding a cutting board shaped like a pumpkin, and on it was the most adorable thing I’d ever seen: a veggie tray arranged to look like a tiny pumpkin patch. “I saw you were panicking,” she said, her eyes twinkling. “This is my secret weapon for every Halloween party. No one ever brings the vegetables.” She handed me the board, winked, and shuffled back to her house before I could even thank her.
That night, the tray was the first thing to disappear. Kids who swore they hated broccoli were grabbing “pumpkin stems” made of snap peas, and adults couldn’t stop talking about how clever it was. I chased Mrs. Kowalski down the next week, notebook in hand, and she reluctantly shared her method. It wasn’t about fancy carving—it was about using the shapes of the veggies themselves. Let me tell you, that conversation changed how I approach every fall gathering. Maybe you’ve been there, staring at a blank counter, wondering how to make a healthy snack look festive without spending hours on it. This is that recipe. It’s the one that makes you look like a party genius while you’re actually just arranging vegetables on a board. And honestly, it’s become my favorite Halloween tradition.
Why You’ll Love This Recipe
This Cozy Halloween Veggie Tray Pumpkin Patch isn’t just another veggie platter. It’s a conversation starter, a crowd-pleaser, and a sneaky way to get everyone—especially the kids—to eat their vegetables before the candy hits the table. I’ve tested this at three different parties now, and every single time, it’s the first thing to run out. Here’s why it works so well:
- Quick & Easy: This comes together in under 20 minutes. No baking, no complicated techniques. Just chopping and arranging. Perfect for those last-minute Halloween plans.
- Simple Ingredients: You likely already have most of these veggies in your fridge. No fancy grocery trips needed. It’s all about using what you have.
- Perfect for Halloween Parties: Whether it’s a kid’s classroom party, a spooky movie night, or a grown-up cocktail hour, this tray fits right in. It’s festive without being fussy.
- Crowd-Pleaser: I’ve seen picky eaters go back for thirds. The visual appeal makes veggies feel like a treat, not a chore. Kids and adults alike love it.
- Unbelievably Delicious: The combination of crunchy bell peppers, creamy ranch dip, and the satisfying snap of fresh snap peas is pure comfort food magic. It’s healthy, but it doesn’t taste like it.
What makes this recipe different from all the other veggie trays out there? It’s the presentation. Instead of just throwing veggies on a plate, you’re creating a scene. The bell peppers become tiny pumpkins, the snap peas become stems, and the whole thing looks like a miniature farm. It’s not just a snack—it’s an experience. And the best part? It takes almost no effort. This isn’t just another version of a veggie tray. It’s your best version. The one that makes you close your eyes after the first bite of a perfectly crisp pepper strip dipped in cool ranch. It’s comfort food reimagined—healthier, faster, but with the same soul-soothing satisfaction. Perfect for impressing guests without stress, or turning a simple snack into something memorable.
What Ingredients You Will Need
This recipe uses simple, wholesome ingredients to deliver a festive and satisfying snack without the fuss. Most of these are pantry staples or easy-to-find fall produce. Here’s what you’ll need to create your own pumpkin patch:
For the Veggie Pumpkins
- Orange bell peppers – 3 to 4 large, firm peppers. These form the body of your pumpkins. Look for ones that are squat and round rather than tall and pointy. (I prefer the ones from the farmer’s market in early fall—they have the best shape.)
- Snap peas or snow peas – 1 cup, with the stems still attached if possible. These become the pumpkin stems. The little green curve at the top looks just like a real pumpkin vine.
- Celery sticks – 2 to 3 stalks, cut into 3-inch pieces. These can be used as additional stems or as “fence posts” around your patch.
For the Dirt & Patch Base
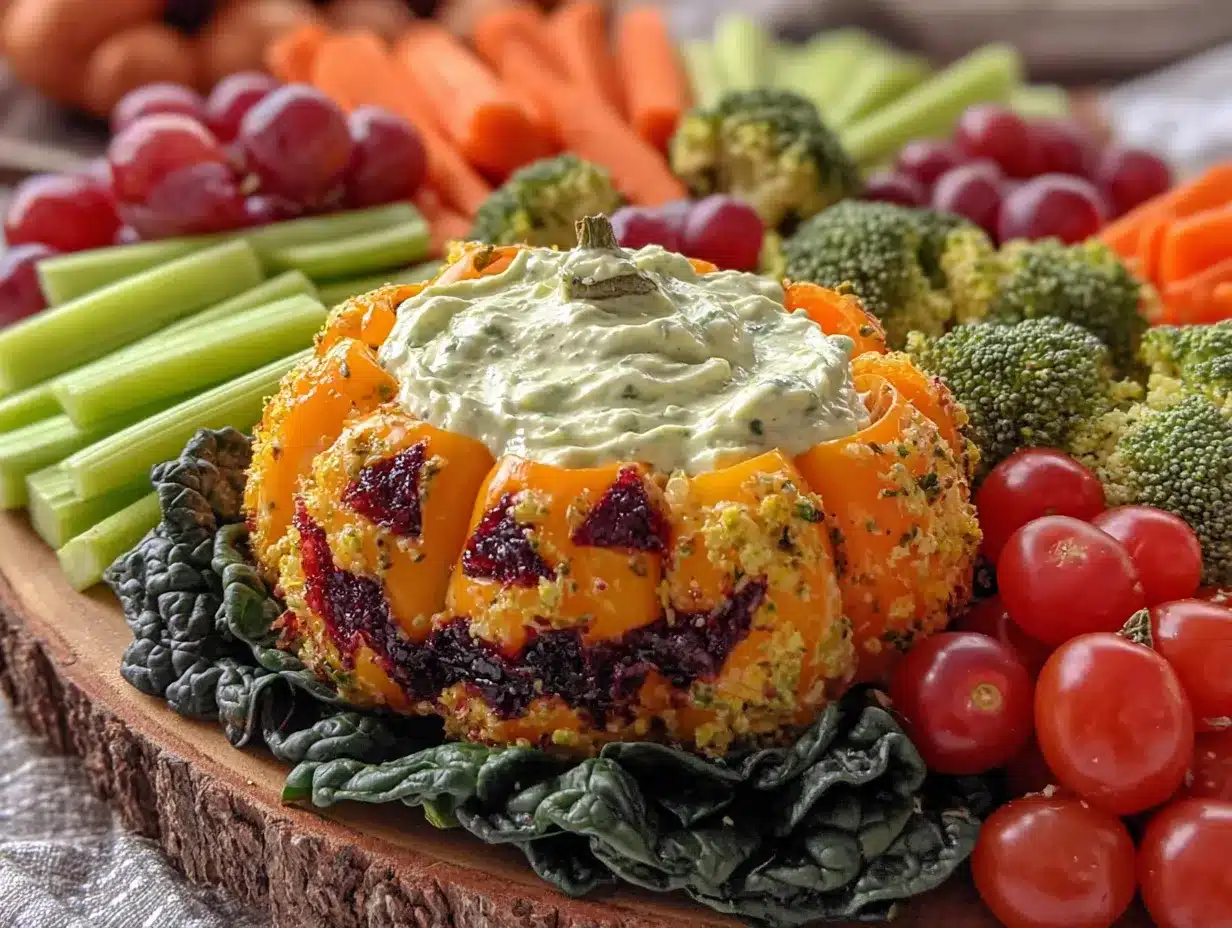
- Ranch dressing or hummus – 1 cup. This is your “dirt.” Use a thick, creamy ranch for the best visual effect. I recommend Hidden Valley for classic flavor, but any thick dip works. (For a healthier option, try roasted red pepper hummus—it looks like rich soil.)
- Broccoli florets – 2 cups, cut into small, tree-like pieces. These become the “bushes” or “plants” around your pumpkins.
- Cauliflower florets – 1 cup, for added texture and visual interest. They look like little white rocks or clouds in your patch.
- Cherry tomatoes – 1 cup, halved. These are your “mini pumpkins” or “fall berries.” They add a pop of red.
For the Garnish & Extra Crunch
- Carrot sticks – 1 cup, cut into thin, 3-inch strips. These look like little fence posts or paths through the patch.
- Cucumber slices – 1 cup, cut into rounds or half-moons. These add a fresh, cool crunch and a nice green border.
- Fresh parsley or dill – A small handful, for garnish. It looks like little weeds or grass poking up through the dirt.
- Salt and black pepper – To taste, for seasoning the veggies if desired.
Substitution Guidance: If you can’t find orange bell peppers, use red or yellow ones—they still look festive. For a gluten-free option, ensure your ranch dressing is certified gluten-free. For a dairy-free version, use a vegan ranch or hummus. You can swap snap peas for green beans if needed. In summer, use fresh cherry tomatoes from the garden for the best flavor.
Equipment Needed
You don’t need any special tools for this recipe, which is one of the things I love about it. Here’s what you’ll need:
- Large cutting board or serving platter – A round or rectangular board works best. I use a wooden cutting board about 12×16 inches. It gives a rustic, farm-like feel.
- Sharp chef’s knife – For cutting the bell peppers and other veggies. A dull knife will squish the peppers.
- Small paring knife – For any precise cuts, like carving the bell pepper stems.
- Vegetable peeler – Optional, for peeling carrot strips if you want them thinner.
- Small bowl – For holding the ranch dip or hummus. A ramekin or small glass bowl works perfectly.
- Paper towels – For drying the veggies after washing. Wet veggies make the dip slide around.
Personal Experience: I’ve tried this on a cheap plastic platter, and honestly, it didn’t look as good. The veggies slid around. A wooden or ceramic board gives the tray a cozy, harvest feel that really sells the pumpkin patch aesthetic. If you don’t have a large board, use a baking sheet lined with parchment paper. It works just as well and is easy to clean up.
Preparation Method
Let’s build your pumpkin patch. Take your time with this—it’s more about arranging than cooking. Here’s how I do it:
- Prep the veggies (5 minutes): Wash all your vegetables thoroughly and pat them dry with paper towels. This step is crucial. Wet veggies make the dip watery and cause everything to slide around. I learned this the hard way at a party—my pumpkin patch looked like a mudslide.
- Make the pumpkin bodies (5 minutes): Take your orange bell peppers. Using a sharp knife, cut off the top quarter of each pepper (the stem end). Set the tops aside. Remove the seeds and white membranes from inside the peppers. Now, flip the pepper over so the cut side is facing down. You should have a little orange “bowl” that looks like a pumpkin. (If your pepper is tall, you can also cut it in half horizontally to make two shorter pumpkins.)
- Create the pumpkin stems (2 minutes): Take your snap peas or snow peas. Insert one snap pea into the top opening of each bell pepper, with the curved end pointing up like a stem. If the snap pea is too long, trim it with scissors. For a more realistic look, use a small piece of celery stick as a thicker stem. Push it down into the pepper so it stands upright.
- Carve the pumpkin faces (optional, 10 minutes): If you want to get really festive, use a small paring knife to carve jack-o’-lantern faces into the bell peppers before you fill them. Cut small triangles for eyes and a zigzag mouth. This is totally optional, but it takes the tray from cute to unforgettable. (I did this for my niece’s Halloween party, and she screamed with joy. Totally worth the extra effort.)
- Prepare the dip “dirt” (2 minutes): Spoon your ranch dressing or hummus into a small bowl. Place the bowl in the center of your serving board. This is the “dirt patch” where your pumpkins will sit. Spread a little extra dip around the edges of the bowl to look like loose soil.
- Arrange the base layer (5 minutes): Around the dip bowl, start building your patch. Place the broccoli florets in small clusters to look like bushes. Scatter the cauliflower florets like little rocks. Arrange the carrot sticks in a crisscross pattern to look like a fence. This creates the “landscape” of your patch.
- Place the pumpkins (3 minutes): Gently set your bell pepper pumpkins around the dip bowl, nestled into the broccoli and cauliflower. Space them out so they look like pumpkins growing in a field. I like to put one or two slightly tilted, as if they’ve been knocked over by the wind.
- Add the finishing touches (3 minutes): Scatter the cherry tomatoes around the pumpkins to look like mini pumpkins or fall berries. Add the cucumber slices along the edge of the board for a fresh green border. Sprinkle the fresh parsley or dill over the entire tray to look like little weeds. Season everything with a pinch of salt and pepper.
- Serve immediately or chill (1 minute): This tray is best served fresh, but you can refrigerate it for up to 2 hours before serving. Cover it loosely with plastic wrap. Take it out 15 minutes before serving to let the flavors come to room temperature.
Sensory Cues: When you insert the snap pea stem, you should hear a gentle snap. The bell pepper should feel firm and crisp, not soft. When you arrange the broccoli, it should look like tiny green trees. The dip should be thick enough that it doesn’t run when you place the veggies on top.
Cooking Tips & Techniques
Over the years, I’ve made this tray more times than I can count, and I’ve learned a few things the hard way. Here are my best tips for a perfect pumpkin patch every time:
- Choose the right peppers: Not all orange bell peppers are created equal. Look for ones that are squat and round, like a pumpkin shape. Tall, pointy peppers look like carrots. I once bought a bag of tall peppers and ended up with a veggie tray that looked like an alien landscape. Not cute.
- Dry your veggies thoroughly: This is the number one mistake people make. Wet veggies create condensation, which makes the dip watery and causes the peppers to slide around. After washing, lay everything out on a clean kitchen towel and pat it dry. I even let them air-dry for 10 minutes before assembling.
- Don’t overfill the dip bowl: Keep the dip in a small, shallow bowl. If you use a big bowl, it looks like a swimming pool, not a dirt patch. A ramekin or a small glass bowl works best. I use a 4-ounce ramekin, and it’s the perfect size.
- Use a sharp knife for the peppers: Dull knives will crush the pepper walls and make them look ragged. A sharp knife gives you clean, smooth cuts. I learned this after ruining two peppers with a dull blade. Now I always sharpen my knife before starting.
- Make it ahead of time: You can prep all the veggies up to 24 hours in advance. Store them in separate bags in the fridge. Assemble the tray no more than 2 hours before serving. This keeps everything crisp and fresh.
- Keep it cold: If you’re serving this at a party, set the tray on a bed of ice or use a chilled serving board. Veggies stay crunchier when they’re cold. I put my cutting board in the fridge for 15 minutes before assembling.
Variations & Adaptations
One of the best things about this recipe is how adaptable it is. You can change it up based on what you have, who you’re serving, or the season. Here are some of my favorite variations:
- Spooky Spider Web Version: Instead of a pumpkin patch, arrange the veggies in a spider web pattern. Use black olives for the spider body and pretzel sticks for the legs. Place a small bowl of dip in the center. This is a huge hit with kids.
- Healthy Halloween Lunch: Turn this into a full meal by adding some protein. Include cheese cubes, hard-boiled eggs cut into spooky shapes, or small turkey roll-ups. It becomes a lunchable-style platter that’s actually good for you.
- Fall Harvest Board: Swap the ranch for a pumpkin spice hummus or a roasted garlic dip. Add apple slices, pear wedges, and some nuts like pecans or walnuts. This version is perfect for a cozy fall afternoon.
- Gluten-Free & Vegan Option: Use a dairy-free ranch or a beet hummus for the dip. All the veggies are naturally gluten-free and vegan. Just double-check your dip ingredients. I’ve made this for a vegan friend, and she loved it.
- Mini Individual Patches: For a party, make individual pumpkin patches in small mason jars or paper cups. Layer dip at the bottom, then add a mini bell pepper pumpkin and a few veggie sticks. These are perfect for grab-and-go snacks.
Personal Variation: Last Halloween, I tried a “haunted forest” version. I used purple cauliflower as the trees, black olives as the shadows, and cut the bell peppers into ghost shapes instead of pumpkins. It looked incredible, and the kids couldn’t stop talking about it. Sometimes the best ideas come from just playing around with what you have.
Serving & Storage Suggestions
This Cozy Halloween Veggie Tray Pumpkin Patch is best served fresh, but there are a few tricks to keep it looking beautiful throughout your party.
Serving Temperature: Serve the tray chilled, straight from the fridge. The cold veggies are crunchier and more refreshing. If you’re serving it outdoors, keep it in the shade or on a bed of ice. I like to set it out about 15 minutes before guests arrive so it’s not ice-cold, but still crisp.
Presentation Ideas: For a truly spooky look, place the tray on a black or dark purple platter. Add some fake spider webs around the edges. Use a small pumpkin-shaped bowl for the dip. I once served this on a slate board, and it looked like a real farm scene. The contrast between the orange peppers and the dark board was stunning.
Complementary Dishes: This tray pairs beautifully with other Halloween snacks. Serve it alongside a bowl of warm spinach artichoke dip, some ghost-shaped cheese crackers, or a batch of mummy hot dogs. For drinks, a warm apple cider or a pumpkin spice latte is perfect. If you’re serving adults, a crisp white wine or a fall ale works wonderfully.
Storage Instructions: If you have leftovers (which is rare!), store the veggies and dip separately. Place the veggies in an airtight container with a paper towel to absorb moisture. They’ll keep for up to 2 days. The dip can be stored in its original container. Do not store the assembled tray—the veggies will get soggy.
Reheating: You don’t need to reheat anything for this recipe. But if you’re using a dip like hummus, let it sit at room temperature for 10 minutes before serving for the best flavor. The veggies should always be served cold.
Flavor Development: The flavors actually get better after about an hour of sitting out. The ranch dip soaks into the broccoli and cauliflower just a little, making them more flavorful. But don’t let it sit out for more than 2 hours for food safety reasons.
Nutritional Information & Benefits
This veggie tray is not just festive—it’s genuinely good for you. Here’s a rough estimate of the nutritional breakdown for one serving (about 1 cup of veggies with 2 tablespoons of dip):
- Calories: Approximately 120-150 calories per serving
- Protein: 3-4 grams
- Carbohydrates: 15-20 grams
- Fiber: 4-6 grams
- Fat: 6-8 grams (mostly from the dip)
- Vitamin C: 100% of your daily value from the bell peppers
- Vitamin A: 80% of your daily value from the carrots and peppers
Health Benefits: The orange bell peppers are packed with vitamin C and beta-carotene, which support your immune system—perfect for cold and flu season. Broccoli is rich in fiber and antioxidants. Snap peas provide a good dose of vitamin K. The ranch dip adds a bit of calcium, but you can use a lighter version if you’re watching calories.
Dietary Considerations: This recipe is naturally gluten-free (check your dip), low-carb, and can be made vegan with a plant-based dip. It’s also nut-free and egg-free. It’s a great option for parties where guests have different dietary needs.
Allergen Note: The ranch dressing typically contains dairy and eggs. If you have allergies, use a hummus or a dairy-free ranch. Always check labels if you’re serving someone with severe allergies.
Personal Wellness Perspective: I love that this recipe makes healthy eating feel like a treat. It’s a way to get kids to eat vegetables without a fight. And honestly, after a night of candy and sweets, having a crunchy, fresh veggie tray feels like a reset for your body. It’s comfort food that actually nourishes you.
Conclusion
This Cozy Halloween Veggie Tray Pumpkin Patch is more than just a snack—it’s a little piece of autumn magic you can create in your own kitchen. It’s the recipe that saved me from a party disaster and turned into a beloved tradition. Every time I make it, I think of Mrs. Kowalski and her twinkling eyes, and I smile. It’s proof that the best recipes often come from the most unexpected places.
I hope you give this a try and make it your own. Maybe you’ll add a different dip, or carve funny faces into the peppers, or arrange it in a spooky spider web pattern. That’s the beauty of this recipe—it’s a canvas for your creativity. Don’t be afraid to play with it.
If you make this tray, I’d love to hear about it. Drop a comment below and tell me how your pumpkin patch turned out. Did the kids love it? Did the adults fight over the last snap pea? Share your photos, your variations, your happy accidents. Let’s keep this cozy Halloween tradition alive together. Happy Halloween, and happy snacking!
Frequently Asked Questions
Can I make this veggie tray the night before?
Yes, you can prep all the veggies the night before. Wash, cut, and dry them, then store them in separate airtight bags in the fridge. Assemble the tray no more than 2 hours before serving for the best texture and freshness.
What dip works best for the “dirt” look?
A thick, creamy ranch dressing works perfectly because it has a smooth, soil-like texture. Hummus, especially roasted red pepper or beet hummus, also looks great and adds a different flavor. Avoid thin dressings like vinaigrettes—they’ll look like mud, not dirt.
How do I keep the bell pepper pumpkins from rolling over?
Cut a small, flat slice off the bottom of each bell pepper before carving. This gives them a stable base. You can also nestle them into the broccoli or cauliflower for extra support. If they still wobble, use a toothpick to anchor them to a carrot stick.
Can I use other vegetables for the pumpkins?
Absolutely! You can use small orange cherry tomatoes, mini sweet peppers, or even carved carrot rounds as mini pumpkins. For a larger pumpkin, use a butternut squash slice. The key is to keep the shape round and orange.
How long can this tray sit out at a party?
For food safety, the tray should not sit out at room temperature for more than 2 hours. If you’re serving it outdoors in warm weather, keep it on a bed of ice and replace it after 1 hour. Refrigerate any leftovers immediately.
Pin This Recipe!
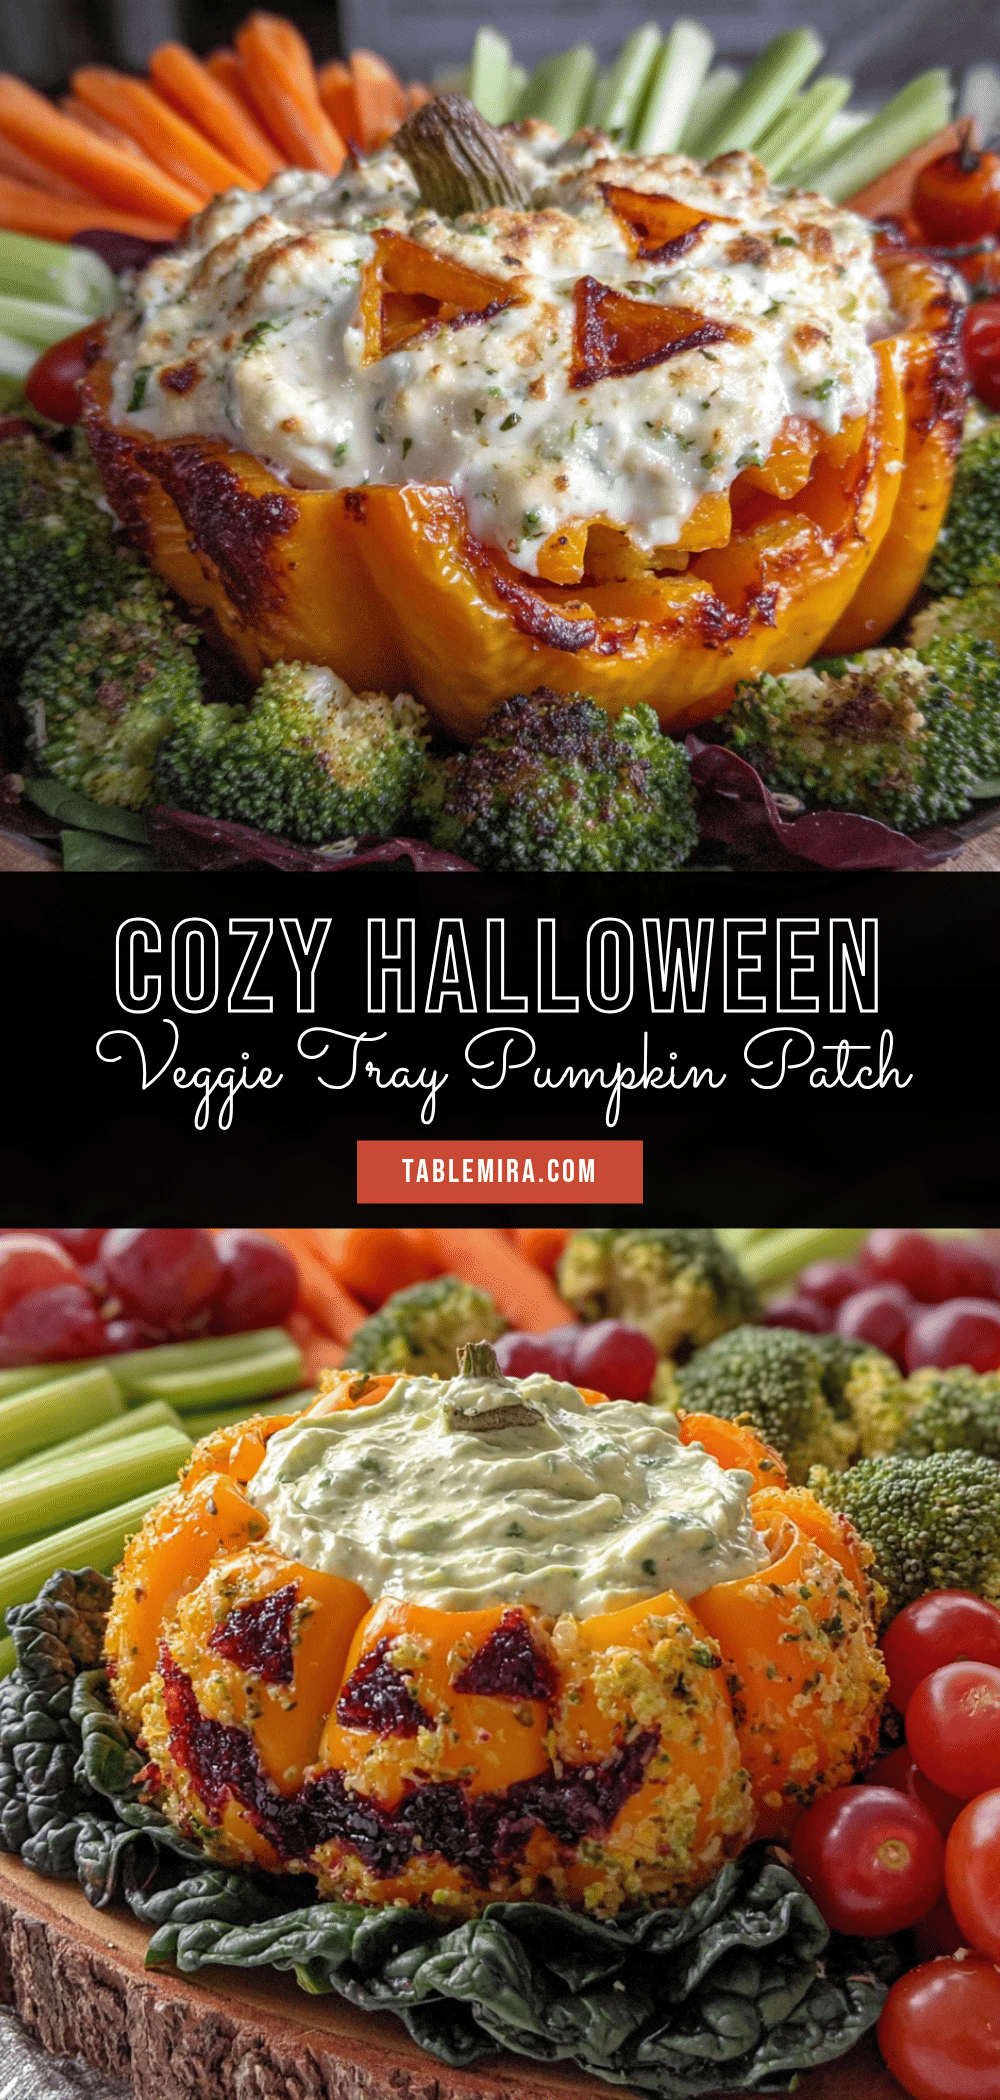
Cozy Halloween Veggie Tray Pumpkin Patch – Easy & Festive

This festive veggie tray is arranged to look like a miniature pumpkin patch, using orange bell peppers as pumpkins and snap peas as stems. It’s a quick, healthy, and crowd-pleasing Halloween snack that comes together in under 20 minutes.
- Prep Time: 20 minutes
- Cook Time: 0 minutes
- Total Time: 20 minutes
- Yield: 8 servings 1x
- Category: Appetizer
- Cuisine: American
Ingredients
- 3 to 4 large orange bell peppers
- 1 cup snap peas or snow peas, stems attached if possible
- 2 to 3 celery stalks, cut into 3-inch pieces
- 1 cup ranch dressing or hummus
- 2 cups broccoli florets, cut into small pieces
- 1 cup cauliflower florets
- 1 cup cherry tomatoes, halved
- 1 cup carrot sticks, cut into thin 3-inch strips
- 1 cup cucumber slices, rounds or half-moons
- Fresh parsley or dill, a small handful for garnish
- Salt and black pepper to taste
Instructions
- Wash all vegetables thoroughly and pat dry with paper towels.
- Cut off the top quarter of each orange bell pepper (the stem end). Remove seeds and white membranes. Flip the pepper over so the cut side faces down, forming a pumpkin shape.
- Insert one snap pea into the top opening of each bell pepper, curved end up, to create a stem. Trim if needed. Alternatively, use a small piece of celery stick as a thicker stem.
- Optional: Use a small paring knife to carve jack-o’-lantern faces into the bell peppers before filling.
- Spoon ranch dressing or hummus into a small bowl and place it in the center of a large cutting board or serving platter. Spread a little extra dip around the edges to look like loose soil.
- Arrange broccoli florets in small clusters around the dip bowl to look like bushes. Scatter cauliflower florets like rocks. Arrange carrot sticks in a crisscross pattern to resemble a fence.
- Gently place the bell pepper pumpkins around the dip bowl, nestled into the broccoli and cauliflower. Space them out and tilt one or two slightly for a natural look.
- Scatter cherry tomatoes around the pumpkins to look like mini pumpkins or fall berries. Add cucumber slices along the edge of the board for a green border. Sprinkle fresh parsley or dill over the entire tray. Season with salt and pepper.
- Serve immediately or refrigerate for up to 2 hours. Remove from fridge 15 minutes before serving.
Notes
Choose squat, round orange bell peppers for the best pumpkin shape. Dry veggies thoroughly to prevent dip from becoming watery. For a gluten-free option, ensure ranch dressing is certified gluten-free. For a dairy-free version, use vegan ranch or hummus. The tray can be prepped up to 24 hours in advance; assemble no more than 2 hours before serving.
Nutrition
- Serving Size: 1 cup of veggies wit
- Calories: 120150
- Sugar: 68
- Sodium: 200300
- Fat: 68
- Saturated Fat: 12
- Carbohydrates: 1520
- Fiber: 46
- Protein: 34
Keywords: Halloween veggie tray, pumpkin patch veggie tray, festive vegetable platter, healthy Halloween snack, easy appetizer


