I was standing in the baking aisle of my local grocery store last Tuesday when the smell hit me—a mix of cinnamon, nutmeg, and something warm and buttery drifting over from the sample station near the holiday display. And just like that, I was nine years old, sitting cross-legged on the linoleum floor of Aunt Carla’s tiny kitchen, watching her pull a tray of mini pies from the oven. She’d let me press the fork marks into the crust edges, my little fingers clumsy and determined, while she hummed along to the radio. She passed away three years ago, and I haven’t had one of her pies since. But that smell in the grocery store? It stopped me cold. I grabbed a cart, not even sure what I was buying yet, but knowing I had to try and recreate that exact feeling—not just the taste, but the warmth of that crowded kitchen with the mismatched chairs and the dog barking at the delivery truck. These mini pumpkin pies are my attempt to hold onto that memory. And honestly? They’re the easiest thing I’ve ever baked for a crowd. Maybe you’ve got a memory like that too—one you’re trying to keep close. This recipe is for those moments.
Why You’ll Love These Mini Pumpkin Pies
Let’s be real for a second. Friendsgiving can be a lot of pressure. You want to bring something impressive, but you also have a job, a life, and maybe a cat that’s been knocking things off the counter all morning. These single-serve pumpkin pies solve that problem completely.
- Quick & Easy: These come together in under 45 minutes, from start to finish. No chilling the dough overnight, no complicated lattice tops. Perfect for that Tuesday night when you realize Friendsgiving is literally tomorrow.
- Simple Ingredients: You probably have most of these in your pantry right now. Canned pumpkin? Check. Pie crust from the refrigerated section? Absolutely no shame in that game.
- Perfect for Friendsgiving: Everyone gets their own little pie. No fighting over the last slice, no awkward cutting into a full-sized pie. It’s personal, it’s cute, and it’s exactly what a gathering of friends needs.
- Crowd-Pleaser: I brought these to a potluck last month, and three different people asked for the recipe before I even sat down. Kids love the size, adults love the nostalgia.
- Unbelievably Delicious: The filling is silky and spiced just right—not too sweet, not too heavy. The crust gets perfectly golden and flaky. It’s comfort food in a tiny package.
What makes these different from every other mini pie recipe out there? It’s the texture. I use a little trick with the filling—blending it until it’s ultra-smooth—so each bite is creamy and consistent. No weird lumps, no graininess. Just pure pumpkin pie perfection. This isn’t just another version of a holiday classic; it’s the one you’ll make every year from now on. I mean it.
What Ingredients You Will Need
This recipe uses simple, honest ingredients that work together to create something genuinely special. No fancy gourmet items, no trips to three different stores. Just good, basic baking staples that deliver big flavor.
For the Crust
- 1 package refrigerated pie crusts (14.1 ounces) — I usually grab Pillsbury, but store brands work fine too. Let them sit at room temperature for about 15 minutes before unrolling so they don’t crack.
- 1 tablespoon unsalted butter, melted — for brushing the edges. Adds that beautiful golden color and a little richness.
- 1 teaspoon coarse sugar (optional) — for sprinkling on top. Turbinado or demerara gives a nice crunch.
For the Pumpkin Filling
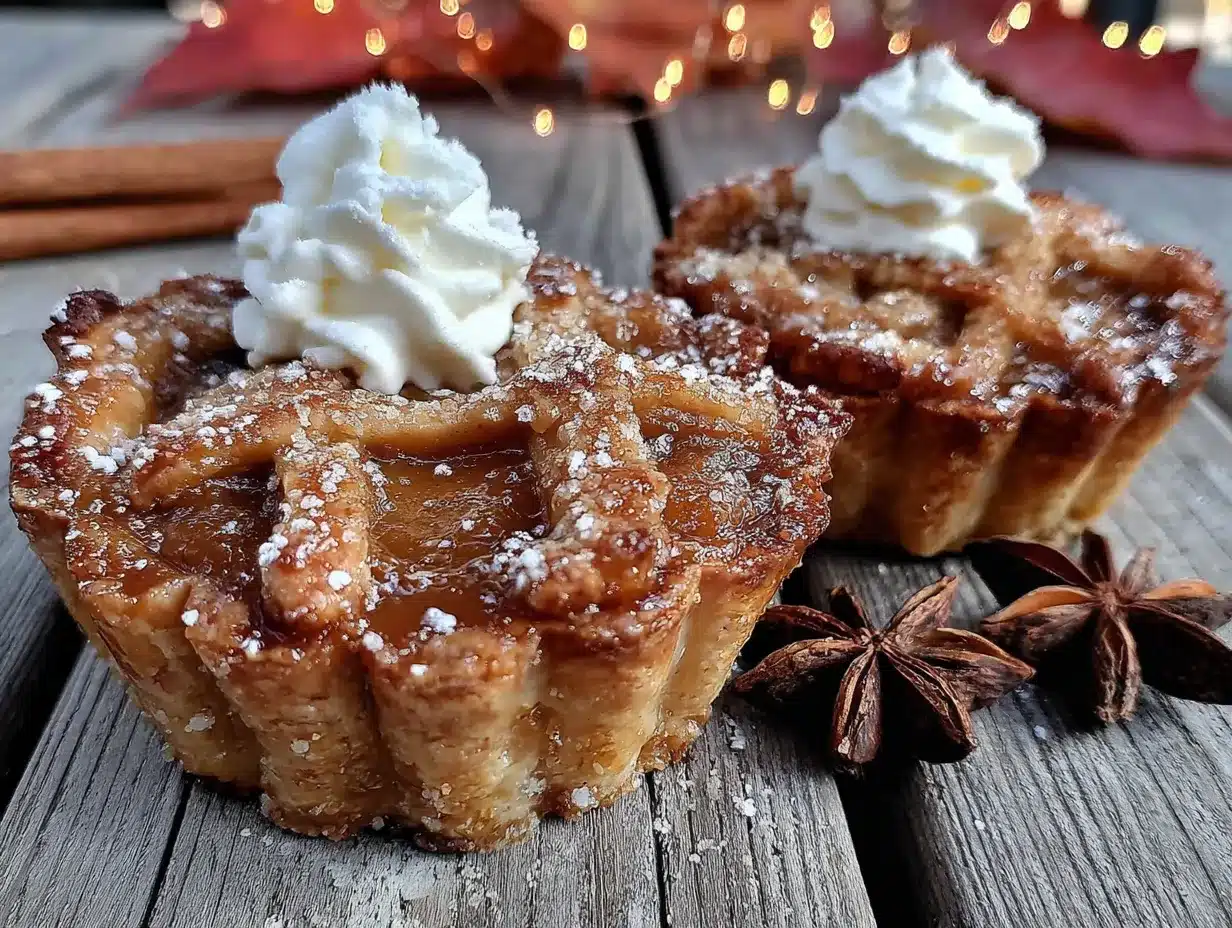
- 1 can (15 ounces) pure pumpkin purée — Not pumpkin pie filling! Look for 100% pumpkin. Libby’s is my go-to, but any brand works. The texture matters more than the label here.
- 3/4 cup (150g) granulated sugar — Regular white sugar keeps the filling light and lets the spices shine.
- 1/4 cup (55g) packed light brown sugar — Adds a hint of molasses depth. Dark brown sugar works too if that’s what you have.
- 2 large eggs — Room temperature is best. If you forgot to take them out, place them in a bowl of warm water for 5 minutes.
- 1 cup (240ml) evaporated milk — This is the secret to that silky texture. Don’t substitute with regular milk; it changes the consistency completely.
- 2 teaspoons pumpkin pie spice — Store-bought is fine, but if you want to make your own: 1 teaspoon cinnamon, 1/2 teaspoon ginger, 1/4 teaspoon nutmeg, 1/4 teaspoon allspice, and a tiny pinch of cloves.
- 1 teaspoon vanilla extract — Pure vanilla if you have it, imitation works in a pinch. It rounds out the flavors beautifully.
- 1/4 teaspoon salt — Balances the sweetness. Don’t skip it, I promise it makes a difference.
For Topping (Optional but Recommended)
- Whipped cream or whipped topping — For serving. Homemade is lovely, but a can of Reddi-Wip is perfectly acceptable when you’re short on time.
- Extra cinnamon for dusting — Just a light sprinkle makes them look fancy.
One quick note on the pumpkin: if you open your can and see any liquid on top, don’t drain it. Stir it back in. That liquid is just water and natural pumpkin solids, and you need it for the right consistency.
Equipment Needed
You don’t need a professional bakery setup for these. Here’s what I used, and what worked for me:
- Standard 12-cup muffin tin — This is non-negotiable. Mini pie tins work too, but a muffin tin is what most people have, and it creates the perfect single-serve size.
- Rolling pin — Even if you’re using pre-made crusts, a light roll helps even out the thickness.
- 3-inch round cookie cutter or a glass — For cutting the crust circles. A drinking glass with a 3-inch diameter works perfectly. I’ve used a mason jar lid in a pinch.
- Mixing bowls — One medium, one small.
- Whisk — For smoothing out the filling. A fork works if you’re in a bind, but a whisk is better.
- Measuring cups and spoons — Standard set. Dry measuring cups for sugar, liquid measuring cup for the evaporated milk.
- Pastry brush — For the melted butter on the crust edges. A clean, unused paintbrush works too. I’m not kidding.
- Cooling rack — Helps the pies cool evenly so the bottoms don’t get soggy.
If you’re on a budget, skip the cookie cutter and use a glass. Skip the pastry brush and use a paper towel dipped in butter. This recipe is forgiving, and your equipment doesn’t need to be fancy.
Preparation Method
Alright, let’s get to it. Preheat your oven to 375°F (190°C) and let’s make some magic happen.
- Prep the muffin tin. Lightly spray your 12-cup muffin tin with non-stick cooking spray. Don’t skip this step, even if your pan is non-stick. Trust me on this one—I learned the hard way when my first batch stuck like glue.
- Prepare the crust. Unroll your pie crusts onto a lightly floured surface. If they crack a little at the edges, don’t panic. Just press them back together with your fingers. Use your rolling pin to gently roll the crust to about 1/8-inch thickness. Then, using your 3-inch cutter or glass, cut out 12 circles. You might need to gather the scraps and re-roll once to get all 12. That’s totally normal.
- Press the crust into the muffin cups. Gently press each circle into a muffin cup, making sure the dough comes up the sides about 1/2 inch. Don’t stretch the dough—just let it settle naturally. If it tears, patch it with a tiny piece of extra dough. No one will know.
- Brush with butter and pre-bake. Brush the edges of each crust with the melted butter. This helps them brown beautifully. Place the muffin tin in the oven and bake for 8 minutes. This partial bake keeps the crust from getting soggy when you add the filling.
- Make the filling. While the crusts are baking, whisk together the pumpkin purée, granulated sugar, and brown sugar in a medium bowl until smooth. Add the eggs one at a time, whisking well after each. Pour in the evaporated milk, pumpkin pie spice, vanilla extract, and salt. Whisk until everything is combined and silky. The mixture should be smooth and slightly thick, like a thin milkshake.
- Fill the crusts. Remove the muffin tin from the oven. Carefully spoon the filling into each crust, filling them almost to the top—about 3/4 full. They’ll puff up a little but won’t overflow if you don’t overfill. I use a 1/4 cup measure for even portions.
- Bake the pies. Return the tin to the oven and bake for 18-22 minutes. You’ll know they’re done when the edges of the filling are set and the center jiggles just slightly when you gently shake the pan. The crusts should be golden brown. If the edges start browning too fast, tent loosely with foil.
- Cool completely. Let the pies cool in the pan for 10 minutes, then transfer them to a wire rack. Let them cool completely—at least 30 minutes. The filling will continue to set as it cools. I know it’s tempting to dig in, but warm pumpkin pie is runny pumpkin pie.
- Top and serve. Once completely cool, top each mini pie with a dollop of whipped cream and a light dusting of cinnamon. Serve at room temperature or slightly chilled.
Baking Tips & Techniques
I’ve made these mini pumpkin pies probably a dozen times now, and I’ve messed up enough to know what works. Here’s what I’ve learned:
Don’t overmix the filling. Whisk just until everything is combined. Overmixing incorporates too much air, which can cause the filling to puff up and crack. You want it smooth, not frothy.
Room temperature ingredients matter. Cold eggs and cold evaporated milk can make the filling lumpy. Set everything out 20 minutes before you start. If you forget, warm the milk slightly in the microwave (15 seconds) and place the eggs in warm water for 5 minutes.
Watch the crust edges. Pre-made crusts brown quickly. If you notice the edges getting too dark during the final bake, cover the whole pan loosely with aluminum foil. This deflects the heat and saves your crust.
Use a cookie scoop for even filling. A 1/4-cup scoop makes filling all 12 cups exactly the same. It’s a small thing, but it makes the pies look professional and bake evenly.
Let them cool completely. This is the hardest part. I once tried to speed things up by putting them in the fridge after 10 minutes, and the crust got soggy. Patience pays off here.
Make ahead tip: You can bake these a day ahead. Store them in the fridge, uncovered, for the first hour so the tops don’t get sticky, then cover loosely with plastic wrap. Add the whipped cream just before serving.
Variations & Adaptations
One of the best things about this recipe is how easy it is to tweak. Here are some ways I’ve changed it up:
Gluten-Free Version: Use a gluten-free pie crust mix. I’ve tried several brands, and Wholly Gluten Free works best for the texture. Just follow the package directions for rolling. Everything else stays the same.
Dairy-Free Adaptation: Swap the evaporated milk for full-fat coconut milk (not the light kind). Use a dairy-free butter alternative for brushing the crust. The filling will be slightly richer, but it’s still delicious. I made this for a friend last year, and she said it was better than the original.
Spice It Up: Add a pinch of cayenne pepper or chipotle powder to the filling for a smoky, spicy kick. It sounds weird, but it works surprisingly well with the sweetness. I tried this on a whim after reading about Mexican hot chocolate, and now it’s my secret weapon.
Mini Pecan Pumpkin Pies: Sprinkle a few chopped pecans on top of the filling before baking. They toast in the oven and add a wonderful crunch. My brother-in-law requests these every year.
Maple Sweetened Version: Replace the granulated sugar with 1/2 cup maple syrup and reduce the evaporated milk to 3/4 cup. The flavor is more complex and less sweet. Perfect if you’re serving these after a heavy meal.
Savory Twist: For a completely different take, omit the sugar and add 1/2 teaspoon of sage and 1/4 teaspoon of black pepper. Serve these as an appetizer with a dollop of sour cream. I haven’t tried this myself, but a reader emailed me about it, and it sounds intriguing.
Serving & Storage Suggestions
These mini pies are best served at room temperature or slightly chilled. The filling is at its creamiest when it’s not straight from the fridge. If you’ve stored them cold, let them sit on the counter for 15 minutes before serving.
Presentation ideas: Arrange them on a wooden board or a simple white platter. Add a small bowl of extra whipped cream in the center so people can help themselves. A sprinkle of cinnamon or a tiny star anise on top of each pie makes them look extra festive without much effort.
What to serve with them: These pair beautifully with a cup of hot apple cider or a spiced chai latte. For a Friendsgiving spread, they go well alongside a cheese board or a bowl of roasted nuts. If you’re feeling indulgent, drizzle a little caramel sauce over the top.
Storage instructions: Store leftover pies in an airtight container in the refrigerator for up to 4 days. The crust will soften slightly over time, but the flavor actually gets better after a day—the spices meld together beautifully. To freeze, place the cooled pies (without whipped cream) on a baking sheet and freeze for 2 hours, then transfer to a freezer bag. They’ll keep for up to 3 months. Thaw in the fridge overnight before serving.
Reheating tip: If you prefer them warm, pop them in a 300°F oven for 5-7 minutes. The microwave works in a pinch (20 seconds on low power), but the crust won’t be as crisp. Honestly, I think they’re best at room temperature, but you do you.
Nutritional Information & Benefits
Here’s the approximate nutritional breakdown for one mini pie (without whipped cream):
| Nutrient | Amount per serving |
|---|---|
| Calories | 185 |
| Total Fat | 7g |
| Saturated Fat | 3g |
| Cholesterol | 35mg |
| Sodium | 210mg |
| Total Carbohydrates | 28g |
| Dietary Fiber | 2g |
| Sugars | 16g |
| Protein | 3g |
Pumpkin is a nutritional powerhouse—it’s packed with vitamin A (great for your eyes and immune system), fiber, and antioxidants. The eggs add protein, and the evaporated milk provides calcium. Are these pies health food? No. But they’re made with real ingredients, and you can feel good about serving them to people you care about.
If you’re watching your sugar intake, you can reduce the granulated sugar to 1/2 cup without affecting the texture too much. The pie will be less sweet, but the spices will shine through more clearly.
Frequently Asked Questions
Can I use fresh pumpkin instead of canned?
Yes, but you’ll need to cook and purée it first. Roast a small sugar pumpkin at 400°F for 45 minutes, scoop out the flesh, and blend until smooth. You’ll need about 1 3/4 cups of purée. The flavor is lovely, but the texture can be slightly more watery, so you might need to drain it through a cheesecloth for 30 minutes.
Why did my filling crack?
This usually happens from overbaking or overmixing. The filling should still jiggle slightly in the center when you take it out of the oven. It will continue to set as it cools. Also, make sure you’re not whisking too vigorously—gentle mixing prevents air bubbles that cause cracking.
Can I make these in a mini muffin tin for bite-sized pies?
Absolutely! Use a 2-inch cutter and reduce the baking time to 10-12 minutes. You’ll get about 24 mini-mini pies. They’re perfect for parties where people want to sample multiple desserts. Just keep an eye on them—they bake faster than the regular size.
How do I keep the crust from getting soggy on the bottom?
The pre-baking step is key—don’t skip it. Also, make sure your filling isn’t too liquid. If your pumpkin purée seems watery (some brands are), let it drain in a fine-mesh strainer for 15 minutes before mixing. And always cool the pies on a wire rack, not in the pan, so air circulates underneath.
Can I freeze these with the whipped cream on top?
I wouldn’t recommend it. Whipped cream gets watery and weird when frozen and thawed. Freeze the pies without any topping, then add fresh whipped cream right before serving. It takes 30 seconds and makes a huge difference in texture and presentation.
Conclusion
These mini pumpkin pies have become my go-to for Friendsgiving, and I think they’ll become yours too. They’re simple enough for a Tuesday night baking session but special enough for a holiday gathering. Every time I make them, I think about Aunt Carla’s kitchen and that warm, cinnamon-scented air. And honestly? These taste just like I remember.
I’d love to hear how yours turn out. Did you try a variation? Did your friends fight over the last one? Leave a comment below and let me know. And if you’re looking for more easy dessert ideas, check out our no-bake pumpkin cheesecake or these apple cider donut holes—both are perfect for your holiday spread. Happy baking, friends.
Pin This Recipe!
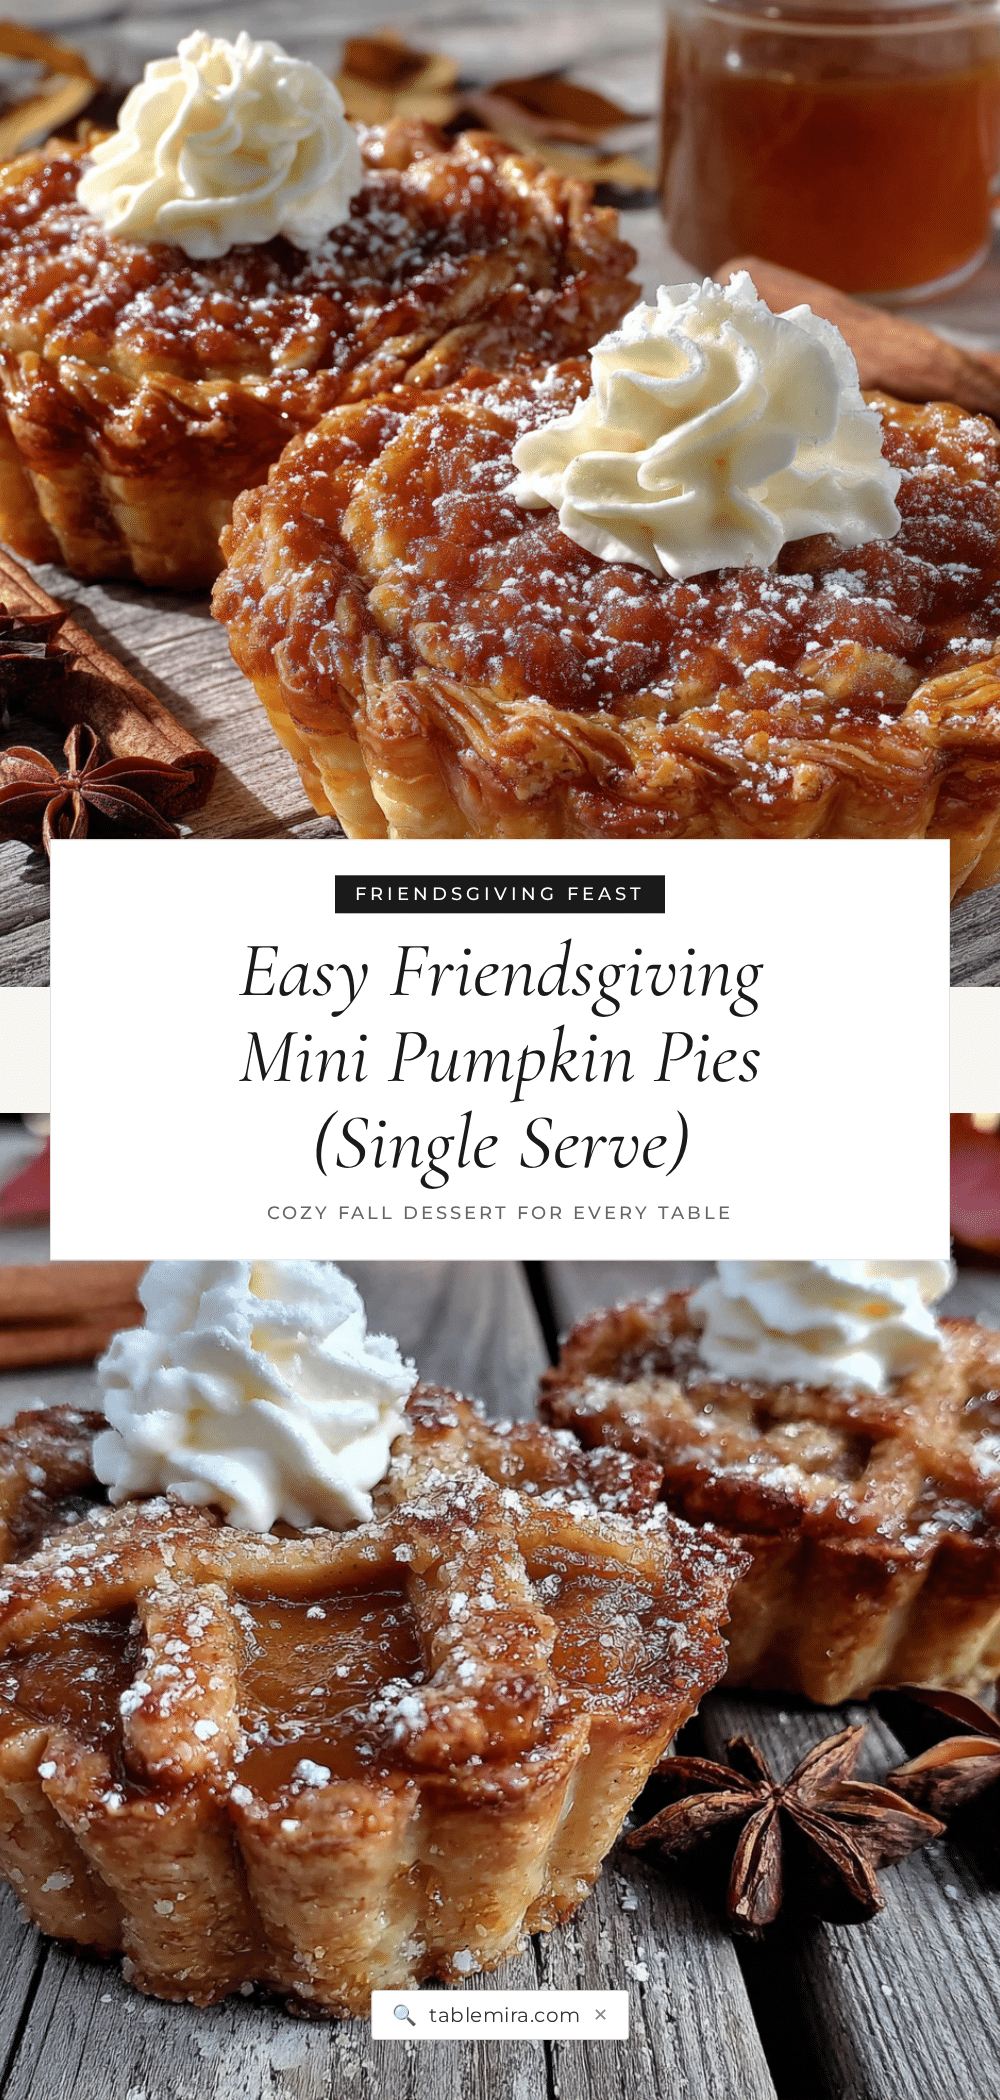
Easy Single Serve Pumpkin Pies for Friendsgiving
These mini pumpkin pies are the perfect single-serve dessert for Friendsgiving. Made with simple ingredients and ready in under 45 minutes, they’re creamy, spiced just right, and guaranteed to be a crowd-pleaser.
- Prep Time: 15 minutes
- Cook Time: 26-30 minutes
- Total Time: 45 minutes
- Yield: 12 servings 1x
- Category: Dessert
- Cuisine: American
Ingredients
- 1 package refrigerated pie crusts (14.1 ounces)
- 1 tablespoon unsalted butter, melted
- 1 teaspoon coarse sugar (optional)
- 1 can (15 ounces) pure pumpkin purée
- 3/4 cup (150g) granulated sugar
- 1/4 cup (55g) packed light brown sugar
- 2 large eggs
- 1 cup (240ml) evaporated milk
- 2 teaspoons pumpkin pie spice
- 1 teaspoon vanilla extract
- 1/4 teaspoon salt
- Whipped cream or whipped topping (for serving)
- Extra cinnamon for dusting (optional)
Instructions
- Preheat oven to 375°F (190°C). Lightly spray a 12-cup muffin tin with non-stick cooking spray.
- Unroll pie crusts onto a lightly floured surface. Roll to about 1/8-inch thickness. Cut out 12 circles using a 3-inch round cutter or glass.
- Press each circle into a muffin cup, bringing dough up the sides about 1/2 inch. Do not stretch the dough.
- Brush edges of each crust with melted butter. Bake for 8 minutes.
- While crusts bake, whisk together pumpkin purée, granulated sugar, and brown sugar until smooth. Add eggs one at a time, whisking well after each. Add evaporated milk, pumpkin pie spice, vanilla extract, and salt. Whisk until smooth and combined.
- Remove muffin tin from oven. Spoon filling into each crust, filling about 3/4 full.
- Return to oven and bake for 18-22 minutes, until edges are set and center jiggles slightly. Tent with foil if edges brown too quickly.
- Cool in pan for 10 minutes, then transfer to a wire rack. Cool completely (at least 30 minutes).
- Top each mini pie with whipped cream and a dusting of cinnamon. Serve at room temperature or slightly chilled.
Notes
Don’t overmix the filling to avoid cracking. Room temperature ingredients help prevent lumps. Pre-baking the crust prevents sogginess. Cool completely before serving to allow filling to set. Can be made a day ahead; store in fridge uncovered for first hour, then cover loosely. Add whipped cream just before serving.
Nutrition
- Serving Size: 1 mini pie
- Calories: 185
- Sugar: 16
- Sodium: 210
- Fat: 7
- Saturated Fat: 3
- Carbohydrates: 28
- Fiber: 2
- Protein: 3
Keywords: mini pumpkin pies, single serve pumpkin pie, Friendsgiving dessert, easy pumpkin pie, mini pies, pumpkin pie recipe


