It was 11:47 PM on a rainy Wednesday in late November, and I was staring down a defrosted turkey neck and a bag of giblets I had absolutely no plan for. The big day was still two days away, but the anxiety was already simmering—right alongside the strange, brothy smell filling my tiny apartment kitchen. I didn’t have a proper stockpot or any fancy chef training, but I had a deep skillet, a whisk, and the stubborn idea that I could make a real gravy from scratch without losing my mind. Honestly, I was just tired of the canned stuff. You know that feeling when you want something better, but you also want to stay in your pajamas?
So I grabbed the butter, the flour, and whatever herbs were still alive in my fridge. I didn’t have fresh thyme, but I found a dusty jar of dried sage in the back of the cabinet. The first batch was a little lumpy—okay, a lot lumpy—but the second one? That was the one. It was smooth, rich, and tasted like the kind of Thanksgiving you dream about but never actually have time to make. I remember standing over the stove, whisking like a maniac, and thinking, “Why does this have to be so complicated for everyone else?”
Maybe you’ve been there—stressed, under-caffeinated, and wondering if you can pull off a holiday meal without a meltdown. This recipe is for you. It’s the gravy that doesn’t require a perfect stock or an hour of stirring. It’s the one you can make while the turkey rests, using drippings or even just butter and broth. It is quick, forgiving, and honestly, it might be the best thing on your plate. Let me tell you, there is something about that late-night kitchen victory that sticks with you. This gravy stayed in my rotation not because it was fancy, but because it worked. Every single time.
Why You’ll Love This Recipe
Let’s be real—Thanksgiving is a marathon, not a sprint. The last thing you need is a gravy recipe that demands a culinary degree and a second stove. This one is built for real people with real schedules. I’ve tested it through three Thanksgivings, two Friendsgivings, and one very stressful Tuesday when I just needed some gravy on my mashed potatoes. It passed every single test.
- Quick & Easy: From start to finish, this gravy comes together in about 10 minutes. While your turkey is resting, you can have a silky, golden gravy ready to pour. No stress, no rush.
- Simple Ingredients: You likely have everything you need right now—butter, flour, broth, and a few seasonings. No trips to the specialty store for obscure ingredients.
- Perfect for Thanksgiving: Whether you are hosting a crowd or having a quiet dinner for two, this gravy fits the occasion. It pairs beautifully with turkey, mashed potatoes, stuffing, and even roasted vegetables.
- Crowd-Pleaser: I have served this gravy to picky eaters, health-conscious friends, and gravy purists. Everyone goes back for seconds. It is smooth, savory, and just the right consistency.
- Unbelievably Delicious: The secret is in the balance—a little butter, a little broth, and a splash of pan drippings if you have them. The flavor is deep without being heavy, rich without being greasy.
What makes this different from other recipes? It is designed for imperfection. If your roux gets a little too dark, it still works. If you only have chicken broth instead of turkey stock, it still works. This isn’t just another version—it is the version that saves your Thanksgiving. I mean, honestly, the first time I made it, I forgot the salt. I still got compliments. That is the kind of forgiving recipe we all need in our back pocket.
What Ingredients You Will Need
This recipe uses simple, everyday ingredients to create something that tastes like you spent hours in the kitchen. The magic is in the technique, not the grocery list. Here is everything you need:
- Unsalted butter (4 tablespoons) – Butter is the foundation of the roux. I prefer unsalted so I can control the salt level. Use a good-quality butter like Kerrygold if you have it; it adds a richer flavor.
- All-purpose flour (4 tablespoons) – This thickens the gravy. Make sure to cook it for at least a minute to get rid of the raw flour taste. You can substitute a gluten-free all-purpose blend if needed.
- Turkey or chicken broth (2 cups) – Use low-sodium broth so you can adjust the seasoning. I like Swanson or Kitchen Basics for consistent flavor. If you have homemade turkey stock, even better.
- Pan drippings from roasted turkey (¼ cup, optional but recommended) – This is where the deep turkey flavor comes from. Skim off the fat before using. If you don’t have drippings, just use extra broth.
- Dried sage (½ teaspoon) – Sage is the classic Thanksgiving herb. It adds an earthy, slightly peppery note. Rub it between your fingers before adding to release the oils.
- Dried thyme (¼ teaspoon) – Thyme adds a subtle floral, lemony flavor. Fresh thyme works too—use about 1 teaspoon of fresh leaves.
- Garlic powder (¼ teaspoon) – Don’t skip this. It adds a savory depth without the sharpness of fresh garlic. I promise it won’t taste like garlic bread.
- Salt (½ teaspoon, or to taste) – Start with less and add more at the end. Different broths have different salt levels.
- Black pepper (¼ teaspoon, freshly ground) – Freshly ground pepper makes a noticeable difference. It adds a gentle heat that balances the richness.
- Optional: Worcestershire sauce (1 teaspoon) – This is my secret ingredient. It adds umami and a little tang. Don’t worry, you won’t taste Worcestershire—it just makes everything taste more savory.
- Optional: Heavy cream (2 tablespoons) – For an extra luxurious gravy, stir in a splash of cream at the end. This turns it into something truly decadent.
That’s it. No fancy ingredients, no long list. You probably have most of these in your pantry right now. The beauty of this recipe is that it adapts to what you have. Out of sage? Use poultry seasoning. No Worcestershire? A tiny splash of soy sauce works too. Just don’t skip the butter and flour—they are the backbone of the whole thing.
Equipment Needed
You don’t need a professional kitchen to make this gravy. In fact, you probably already own everything on this list. But let me save you some trouble—I have learned the hard way what works and what doesn’t.
- A medium saucepan or skillet – I prefer a heavy-bottomed saucepan because it distributes heat evenly and prevents the roux from burning. A non-stick skillet works too, but you might need to whisk more vigorously to avoid lumps.
- A whisk – A good whisk is non-negotiable. A balloon whisk works best for incorporating the flour into the butter. If you only have a fork, you are in for a workout.
- A wooden spoon or silicone spatula – Useful for scraping the bottom of the pan and making sure nothing sticks. Silicone is great because it won’t scratch your cookware.
- A fat separator (optional) – If you are using pan drippings, a fat separator makes it easy to pour off the flavorful liquid without the grease. I bought mine for $8 and it is one of my favorite kitchen tools.
- Measuring cups and spoons – Precision matters here, especially for the flour and butter. Eyeballing it can lead to lumpy or overly thick gravy.
- A small bowl – For mixing the flour and broth if you prefer the slurry method (more on that in the tips section).
If you don’t have a saucepan, a deep skillet works perfectly. I have even made this in a cast-iron skillet, and it came out great. The key is to have something with enough surface area for the whisk to move freely. And please, for the love of gravy, use a whisk. I tried using a spatula once because I was too lazy to wash the whisk. It was a disaster. Learn from my mistakes.
Preparation Method

Alright, let’s get down to business. This method is straightforward, but I am going to walk you through every step so you feel confident. Trust me—if I can make this at 11 PM on a Wednesday, you can make it on Thanksgiving morning.
- Prepare your pan drippings (if using). Once your turkey is out of the roasting pan and resting, pour the drippings through a fine-mesh strainer into a fat separator or a glass measuring cup. Let it sit for a minute so the fat rises to the top. Skim off the fat, or pour the liquid from the bottom if using a separator. Set aside ¼ cup of the defatted drippings. If you don’t have drippings, just use extra broth.
- Melt the butter. Place your saucepan over medium heat. Add the 4 tablespoons of butter and let it melt completely. Swirl the pan occasionally to prevent burning. The butter should be fully melted and just starting to bubble—not browning. If it turns brown, that is actually fine for a deeper flavor, but it will change the color of your gravy.
- Make the roux. Once the butter is melted, add the 4 tablespoons of all-purpose flour all at once. Immediately start whisking. Whisk constantly for 1 to 2 minutes. The mixture will look like a thick paste and smell slightly nutty. This is the roux. Cooking the flour here is crucial—it removes the raw taste and ensures a smooth gravy. Don’t walk away. I repeat, don’t walk away. I once answered the phone during this step and ended up with a burnt roux that smelled like toast. Not ideal.
- Slowly add the broth. Reduce the heat to medium-low. While whisking continuously, slowly pour in the 2 cups of broth. Start with a thin stream, whisking the whole time. If you dump it all in at once, you will get lumps. Trust me, I have done it. The mixture will start to thicken almost immediately. Keep whisking until the gravy is smooth and has no lumps.
- Add the pan drippings (optional). If you have the defatted drippings, pour them in now. Whisk to combine. This adds a beautiful golden color and a deep turkey flavor that store-bought broth just can’t match. If you are not using drippings, just proceed with the broth.
- Season the gravy. Add the dried sage, dried thyme, garlic powder, salt, and black pepper. Whisk everything together. Let the gravy simmer gently for 2-3 minutes, stirring occasionally. This allows the flavors to meld and the gravy to reach the perfect consistency. It should be thick enough to coat the back of a spoon but still pourable.
- Taste and adjust. This is the most important step. Dip a clean spoon in and taste it. Does it need more salt? More pepper? A pinch more sage? Trust your palate. I usually add a little more black pepper at this stage because I love the heat. If the gravy is too thick, whisk in a splash of broth or water. If it is too thin, let it simmer for another minute or two.
- Optional: Finish with Worcestershire or cream. If you are using the Worcestershire sauce, stir it in now. It adds a subtle depth that makes people ask, “What is in this?” If you want a richer, creamier gravy, stir in the 2 tablespoons of heavy cream. This turns it into something truly luxurious. I usually skip the cream for Thanksgiving because the gravy is already rich enough, but a friend of mine swears by it.
- Keep warm until serving. Remove the gravy from the heat. If you are not serving it immediately, cover the saucepan with a lid to keep the heat in. The gravy will continue to thicken slightly as it cools. Before serving, give it a good whisk and add a splash of broth if needed to loosen it up.
And that is it. Nine steps, about 10 minutes, and you have a gravy that tastes like it took all day. The first time I made this for my family, my uncle asked if I had secretly taken a cooking class. I just smiled and said, “Nope, just a whisk and a little patience.”
Cooking Tips & Techniques
Over the years, I have made every gravy mistake you can imagine. Lumpy gravy, burnt gravy, salty gravy, watery gravy. I have learned from each disaster, and now I am passing those lessons on to you. Here are the tips that actually make a difference.
Whisk like you mean it. The secret to lump-free gravy is constant, vigorous whisking. When you add the flour to the butter, don’t stop whisking until the roux is smooth. When you add the broth, keep that whisk moving. If you stop for even a few seconds, lumps can form. I like to pretend I am in a cooking competition and the clock is ticking. It works.
Don’t be afraid of the roux. A lot of people get nervous about making a roux, but it is really just butter and flour cooked together. The key is to cook it long enough to remove the raw flour taste but not so long that it burns. Aim for a pale golden color. If it gets a little darker, that is okay—it will just have a nuttier flavor. I actually prefer a slightly darker roux for a more robust gravy.
Use warm broth. This is a game-changer. If you add cold broth to the hot roux, it can seize up and create lumps. Warm the broth in the microwave or a small pot before adding it. I usually microwave it for 1-2 minutes until it is steaming. This ensures a smooth, silky gravy every time.
Season in layers. Don’t dump all the salt and pepper in at once. Add a little at the beginning, then taste and adjust at the end. Different broths have different salt levels, and pan drippings can be salty too. I once ruined a batch by adding a full teaspoon of salt, only to realize the broth was already heavily salted. Start small, taste often.
Fix lumps the easy way. If you do end up with lumps—hey, it happens—don’t panic. Pour the gravy through a fine-mesh strainer into a clean saucepan. The strainer will catch all the lumps, leaving you with a smooth gravy. Then just reheat it gently. I have done this more times than I care to admit.
Make it ahead. You can make this gravy up to 3 days in advance. Let it cool completely, then store it in an airtight container in the refrigerator. Reheat it gently on the stovetop, whisking in a splash of broth or water to loosen it up. The flavor actually gets better after a day or two as the herbs meld together.
One more thing—don’t stress about perfection. Gravy is forgiving. Even if it is a little lumpy or a little thin, it will still taste delicious. The people around your table will appreciate the effort, not the consistency. I promise.
Variations & Adaptations
This recipe is a starting point, not a rigid rulebook. Over the years, I have tweaked it for different diets, different occasions, and different cravings. Here are some of my favorite variations.
Gluten-Free Gravy: Swap the all-purpose flour with a gluten-free all-purpose blend or cornstarch. If using cornstarch, mix 2 tablespoons of cornstarch with ¼ cup of cold broth to make a slurry, then whisk it into the hot broth instead of making a roux. The texture will be slightly different—a bit more glossy—but it is just as delicious. I have made this for a gluten-sensitive friend, and she couldn’t tell the difference.
Vegan Gravy: Replace the butter with vegan butter or olive oil. Use vegetable broth instead of turkey or chicken broth. Omit the Worcestershire sauce (most brands contain anchovies) or use a vegan version. The flavor will be lighter, but still savory and satisfying. I like to add a splash of soy sauce for extra umami.
Herb-Infused Gravy: For a more complex flavor, add a sprig of fresh rosemary or a bay leaf while the gravy simmers. Remove them before serving. I did this last Thanksgiving, and the rosemary added a lovely piney note that paired beautifully with the turkey. You can also experiment with fresh parsley or marjoram.
Mushroom Gravy: Finely chop ½ cup of mushrooms (cremini or button) and sauté them in the butter before adding the flour. This adds an earthy, umami-rich flavor that is incredible with mashed potatoes. I made this version for a vegetarian friend, and she asked for the recipe three times.
Spicy Gravy: Add a pinch of cayenne pepper or red pepper flakes along with the other seasonings. It won’t make the gravy spicy, just more interesting. I like a little heat, so I usually add a tiny pinch of cayenne. It wakes up the palate without overwhelming the other flavors.
Feel free to mix and match these ideas. The beauty of this recipe is that it adapts to whatever you have in your kitchen and whatever your guests need. Don’t be afraid to experiment—that is how the best recipes are born.
Serving & Storage Suggestions
Gravy is the unsung hero of the Thanksgiving table. It brings everything together—the turkey, the mashed potatoes, the stuffing, even the rolls. Here is how to serve and store it so it stays at its best.
Serving Temperature: This gravy is best served hot, straight from the saucepan. If you are not serving it immediately, keep it warm on the stovetop over the lowest heat, stirring occasionally. You can also pour it into a preheated gravy boat. I like to warm the gravy boat by filling it with hot water for a minute, then emptying it before adding the gravy. It keeps the gravy hot longer.
Presentation: Pour the gravy into a beautiful serving dish or gravy boat. If you want to get fancy, garnish with a sprig of fresh thyme or a sprinkle of fresh parsley. It adds a pop of color and a hint of freshness. I usually skip the garnish because I am too busy eating, but it looks lovely for photos.
Pairings: This gravy is perfect with roasted turkey, of course, but do not stop there. Pour it over mashed potatoes, stuffing, roasted vegetables, or even open-faced turkey sandwiches. I have also used it as a sauce for poutine—gravy over fries with cheese curds. It is incredible. For a complete Thanksgiving meal, serve it alongside perfect roasted turkey breast and fluffy mashed potatoes for a classic combination.
Refrigerator Storage: Store leftover gravy in an airtight container in the refrigerator for up to 4 days. The gravy will thicken as it cools, so don’t be alarmed. To reheat, transfer it to a saucepan and warm it over medium-low heat, whisking in a splash of broth or water until it reaches the desired consistency. I usually add about 2 tablespoons of broth per cup of gravy.
Freezer Storage: This gravy freezes beautifully. Let it cool completely, then pour it into a freezer-safe container or a zip-top bag. Leave a little room for expansion. Freeze for up to 3 months. To thaw, transfer the container to the refrigerator overnight. Reheat on the stovetop, whisking to restore the smooth texture. I like to freeze gravy in ice cube trays for small portions—perfect for a quick weeknight meal.
Flavor Development: Here is a little secret—this gravy tastes even better the next day. The flavors have time to meld and deepen. So if you are making it ahead of time, you are actually doing yourself a favor. I often make a double batch just so I have leftovers for turkey sandwiches the next day.
Nutritional Information & Benefits
Let’s be honest—gravy is not health food. But it does have some redeeming qualities, especially when made from scratch with real ingredients. Here is a rough estimate of the nutritional content per serving (about ¼ cup of gravy, made without cream or Worcestershire):
| Nutrient | Amount per Serving |
|---|---|
| Calories | 80-100 |
| Total Fat | 6-8g |
| Saturated Fat | 4-5g |
| Cholesterol | 15-20mg |
| Sodium | 200-300mg (varies by broth) |
| Carbohydrates | 6-8g |
| Fiber | 0g |
| Sugar | 0-1g |
| Protein | 1-2g |
Health Benefits: The butter in this recipe provides a small amount of vitamin A, and the broth contributes minerals like calcium and magnesium depending on the brand. If you use bone broth, you get a boost of collagen and protein. The herbs—sage and thyme—are rich in antioxidants and have anti-inflammatory properties. So while gravy is not a superfood, it is not completely empty calories either.
Dietary Considerations: This recipe is vegetarian if you use vegetable broth and skip the pan drippings. It is not vegan due to the butter, but you can easily make it vegan with the substitutions mentioned above. It contains gluten from the flour, but a gluten-free version is simple to make. The main allergen to watch for is dairy from the butter. I have made this with vegan butter for a dairy-free friend, and it turned out great.
Personal Perspective: I don’t believe in depriving yourself on Thanksgiving. This is one meal, one day. Enjoy the gravy. Savor every spoonful. The joy of sharing a delicious meal with people you love is worth more than any number on a nutrition label. That said, making gravy from scratch is still better than the canned stuff—fewer additives, more real ingredients, and a whole lot more love.
Frequently Asked Questions
Can I make this gravy without pan drippings?
Absolutely! This recipe works perfectly with just broth. The pan drippings add extra turkey flavor, but you can easily substitute with a splash of soy sauce or a pinch of poultry seasoning for depth. I have made it both ways, and honestly, my family couldn’t tell the difference.
Why is my gravy lumpy?
Lumpy gravy usually happens when you add the broth too quickly or stop whisking. The fix is simple: pour the gravy through a fine-mesh strainer into a clean saucepan. The strainer will catch all the lumps, leaving you with a smooth gravy. Next time, whisk constantly and add the broth in a slow, steady stream.
Can I use cornstarch instead of flour?
Yes, you can. Mix 2 tablespoons of cornstarch with ¼ cup of cold broth to make a slurry. Instead of making a roux, bring the broth to a simmer and whisk in the slurry. Cook for 1-2 minutes until thickened. The texture will be glossier than a flour-based gravy, but it works great for a gluten-free option.
How do I fix gravy that is too salty?
If your gravy is too salty, add a splash of unsalted broth or water to dilute it. You can also add a peeled raw potato to the pot and let it simmer for 10 minutes—the potato will absorb some of the salt. Remove the potato before serving. I have used this trick more times than I want to admit.
Can I make this gravy ahead of time?
Yes, and I actually recommend it. Make the gravy up to 3 days in advance, let it cool, and store it in the refrigerator. Reheat gently on the stovetop, whisking in a splash of broth to loosen it up. The flavors will be even better after a day or two. I always make a double batch so I have leftovers for turkey sandwiches.
Conclusion
Look, I know Thanksgiving can be overwhelming. There are a million things to do, a million dishes to prepare, and a million expectations to meet. But the gravy does not have to be one of the stressful parts. This recipe is proof that you can have something delicious, homemade, and deeply satisfying without spending hours in the kitchen. It is the kind of recipe that saves your sanity and impresses your guests at the same time.
What I love most about this gravy is how it brings people together. That first pour over the turkey, the way it blankets the mashed potatoes, the quiet moans of approval around the table—that is what cooking is all about. It is not about perfection. It is about connection. It is about showing up for the people you love, even if you are tired and running on caffeine and sheer willpower.
So go ahead. Make this gravy your own. Add a little extra sage if that is your thing. Skip the Worcestershire if you are out. Serve it over everything on your plate and then go back for seconds. And when someone asks for the recipe—because they will—send them my way. I would love to hear how it turned out. Drop a comment below or tag me in your Thanksgiving photos. Happy cooking, and happy eating!
Pin This Recipe!
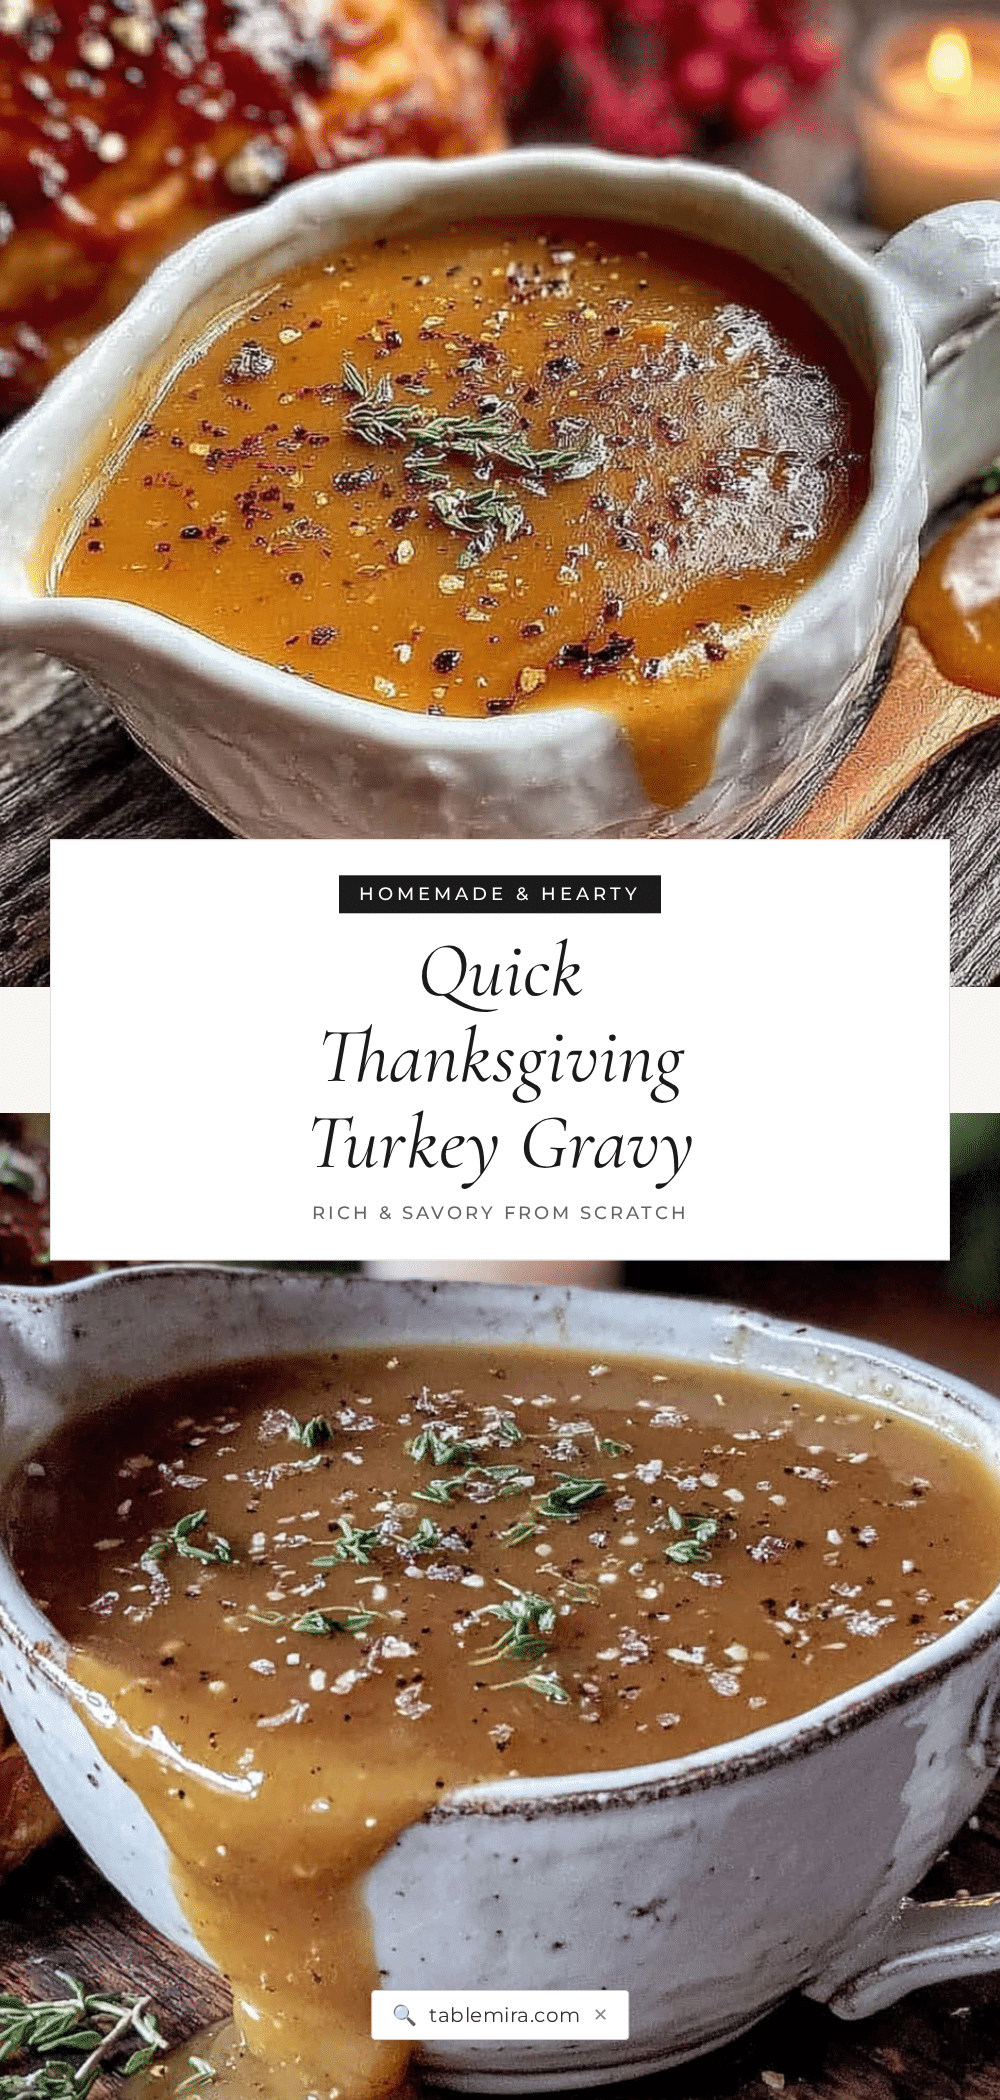
Best Easy Homemade Thanksgiving Turkey Gravy in 10 Minutes

A quick and forgiving homemade turkey gravy made in just 10 minutes with simple ingredients. Perfect for Thanksgiving or any comforting meal.
- Prep Time: 5 minutes
- Cook Time: 5 minutes
- Total Time: 10 minutes
- Yield: 8 servings 1x
- Category: Sauce
- Cuisine: American
Ingredients
- 4 tablespoons unsalted butter
- 4 tablespoons all-purpose flour
- 2 cups low-sodium turkey or chicken broth
- ¼ cup pan drippings from roasted turkey (optional)
- ½ teaspoon dried sage
- ¼ teaspoon dried thyme
- ¼ teaspoon garlic powder
- ½ teaspoon salt (or to taste)
- ¼ teaspoon freshly ground black pepper
- 1 teaspoon Worcestershire sauce (optional)
- 2 tablespoons heavy cream (optional)
Instructions
- Prepare your pan drippings (if using): Once your turkey is out of the roasting pan and resting, pour the drippings through a fine-mesh strainer into a fat separator or a glass measuring cup. Let it sit for a minute so the fat rises to the top. Skim off the fat, or pour the liquid from the bottom if using a separator. Set aside ¼ cup of the defatted drippings. If you don’t have drippings, just use extra broth.
- Melt the butter: Place your saucepan over medium heat. Add the 4 tablespoons of butter and let it melt completely. Swirl the pan occasionally to prevent burning. The butter should be fully melted and just starting to bubble—not browning.
- Make the roux: Once the butter is melted, add the 4 tablespoons of all-purpose flour all at once. Immediately start whisking. Whisk constantly for 1 to 2 minutes. The mixture will look like a thick paste and smell slightly nutty.
- Slowly add the broth: Reduce the heat to medium-low. While whisking continuously, slowly pour in the 2 cups of broth. Start with a thin stream, whisking the whole time. The mixture will start to thicken almost immediately. Keep whisking until the gravy is smooth and has no lumps.
- Add the pan drippings (optional): If you have the defatted drippings, pour them in now. Whisk to combine.
- Season the gravy: Add the dried sage, dried thyme, garlic powder, salt, and black pepper. Whisk everything together. Let the gravy simmer gently for 2-3 minutes, stirring occasionally.
- Taste and adjust: Dip a clean spoon in and taste it. Adjust salt, pepper, or herbs as needed. If the gravy is too thick, whisk in a splash of broth or water. If it is too thin, let it simmer for another minute or two.
- Optional: Finish with Worcestershire or cream: If using, stir in the Worcestershire sauce or heavy cream now.
- Keep warm until serving: Remove the gravy from the heat. If not serving immediately, cover the saucepan with a lid to keep the heat in. Before serving, give it a good whisk and add a splash of broth if needed to loosen it up.
Notes
This gravy is forgiving and can be made ahead. For a gluten-free version, use a gluten-free all-purpose flour blend or cornstarch slurry. For a vegan version, use vegan butter and vegetable broth. The gravy can be stored in the refrigerator for up to 4 days or frozen for up to 3 months.
Nutrition
- Serving Size: ¼ cup
- Calories: 80100
- Sugar: 1
- Sodium: 200300
- Fat: 68
- Saturated Fat: 45
- Carbohydrates: 68
- Protein: 12
Keywords: turkey gravy, homemade gravy, Thanksgiving gravy, easy gravy, 10-minute gravy, pan drippings gravy


