I was standing in the frozen food aisle last November, staring at a stack of pre-made pie shells, when this scent hit me—not from the freezer, but from somewhere deep in my memory. Nutmeg, cinnamon, and that warm, almost caramelized smell of butter and brown sugar. And suddenly I was seven years old, sitting cross-legged on the linoleum floor of my neighbor Mrs. Kowalski’s kitchen, watching her roll out dough on a flour-dusted counter. She had this way of humming off-key while she worked, and the whole room smelled like November. I hadn’t thought about her in years. She moved away when I was twelve, and I never got her recipe. But that moment in the grocery store, I knew I had to figure it out for myself.
So I bought a sugar pumpkin and a block of butter, went home, and made a mess of my kitchen. Honestly, the first attempt was a disaster—the crust shrunk, the filling was too runny, and I may have used the wrong measuring cup for the sugar. But by the third try, something clicked. The crust was flaky, the filling was silky, and when I took that first bite, I swear I could hear Mrs. Kowalski humming. Maybe you’ve been there too, chasing a taste from your past that you can almost but not quite remember. That’s what this homemade pumpkin pie with flaky all-butter crust is for me. It’s not just dessert—it’s a memory I can hold in my hands.
Why You’ll Love This Recipe
Let me tell you why this homemade pumpkin pie with flaky all-butter crust is the one you’ll come back to year after year. I’ve tested this recipe more times than I care to admit, and every single time, it delivers that perfect balance of creamy filling and buttery, tender crust. It’s the kind of pie that makes people close their eyes after the first bite—and I’m not exaggerating.
- Made with Simple Ingredients : No canned pumpkin mix or shortening here. You just need a sugar pumpkin (or canned pure pumpkin), heavy cream, eggs, sugar, and warm spices. The crust is flour, butter, salt, and ice water. That’s it.
- Foolproof All-Butter Crust : I’ve cracked the code on a crust that’s flaky without being tough. The secret is keeping everything cold and not overworking the dough. I’ll walk you through every step.
- Perfect for Busy Family Meals : This pie comes together in about an hour of active time, and you can make the crust a day ahead. It’s ideal for Thanksgiving, Sunday dinners, or any fall gathering where you want something special without spending all day in the kitchen.
- Crowd-Pleaser Every Time : I’ve brought this to potlucks, family dinners, and even a neighbor’s birthday party. It gets devoured. Kids love it, adults love it, and it reheats beautifully for leftovers the next day.
- Budget-Friendly : A sugar pumpkin costs about the same as a can of pumpkin puree, and butter is affordable. You’re getting a bakery-quality pie for a fraction of the price.
What makes this recipe different from the rest? It’s the technique. Most recipes skip the step of pre-baking the crust, which leads to a soggy bottom. Not here. And the filling? It’s not too sweet, not too spiced—just perfectly balanced so the pumpkin flavor shines through. This isn’t just another pumpkin pie. It’s your best version, tested and perfected in a real home kitchen.
What Ingredients You Will Need
This homemade pumpkin pie with flaky all-butter crust relies on simple, wholesome ingredients that deliver bold flavor and satisfying texture without any fuss. Most of these are pantry staples, and the ones that aren’t are easy to find at any grocery store.
For the All-Butter Crust
- 1 ¼ cups all-purpose flour (160 grams) — I prefer King Arthur Flour for consistent results. Spoon and level your flour; don’t scoop straight from the bag.
- ½ teaspoon salt — Fine sea salt works best. It dissolves evenly into the dough.
- 1 tablespoon granulated sugar — Just a touch of sweetness. This is optional but I like the subtle flavor it adds.
- ½ cup cold unsalted butter (1 stick, 113 grams) — Cut into small cubes and freeze for 10 minutes before using. This is non-negotiable for flakiness.
- 3 to 4 tablespoons ice water — Start with 3 and add more only if needed. The dough should just hold together when squeezed.
For the Pumpkin Filling
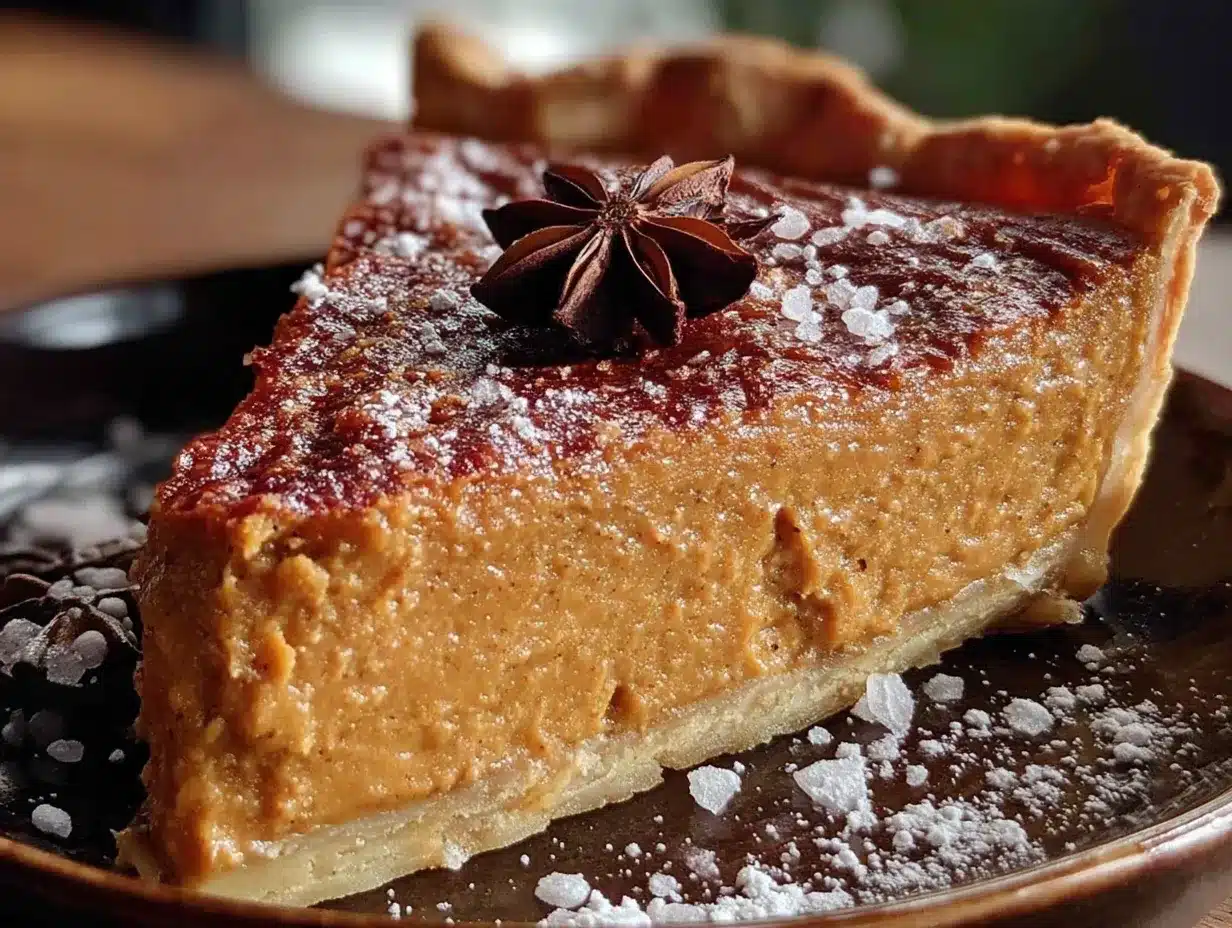
- 2 cups pumpkin puree (450 grams) — You can roast and puree a sugar pumpkin, or use canned pure pumpkin. Do NOT use pumpkin pie filling—it’s pre-sweetened and spiced.
- 1 can (12 ounces) evaporated milk (354 ml) — This gives the filling a rich, creamy texture without being too heavy. I’ve tried heavy cream and half-and-half, but evaporated milk is the sweet spot.
- ¾ cup packed brown sugar (150 grams) — Light or dark brown sugar both work. Dark brown sugar gives a deeper, almost molasses flavor.
- 2 large eggs — Room temperature is best. They incorporate more smoothly into the filling.
- 1 teaspoon vanilla extract — Pure vanilla extract adds warmth. Skip the imitation stuff if you can.
- 1 ½ teaspoons ground cinnamon — This is the backbone of the spice blend.
- ½ teaspoon ground ginger — Adds a little warmth without being spicy.
- ½ teaspoon ground nutmeg — Freshly grated is amazing if you have it. Pre-ground works too.
- ¼ teaspoon ground cloves — A little goes a long way. Be careful not to overdo it.
- ¼ teaspoon salt — Balances the sweetness and enhances the spices.
If you’re using a sugar pumpkin, here’s how to make your own puree: cut the pumpkin in half, scoop out the seeds, place cut-side down on a baking sheet, and roast at 375°F for 45-50 minutes until tender. Scoop out the flesh and blend until smooth. Drain any excess liquid through a cheesecloth if it seems watery. I’ve done this many times, and honestly, the flavor is noticeably fresher and brighter than canned. But canned is perfectly fine for busy weeknights—I use it all the time.
Equipment Needed
You don’t need fancy equipment to make this homemade pumpkin pie with flaky all-butter crust. Here’s what you’ll need:
- 9-inch pie dish — Glass or ceramic works best. Metal can work too, but it conducts heat differently. I use a glass Pyrex dish and love how evenly it bakes.
- Rolling pin — A standard rolling pin is fine. If you don’t have one, a wine bottle works in a pinch. I’ve done it.
- Mixing bowls — You’ll need a medium bowl for the crust and a large bowl for the filling.
- Pastry cutter or food processor — For cutting butter into the flour. A pastry cutter is cheap and gives you more control. A food processor is faster but be careful not to overmix.
- Plastic wrap — For chilling the dough.
- Parchment paper and pie weights — For blind baking the crust. Dried beans or rice work perfectly as pie weights. I keep a bag of dried beans just for this purpose.
- Whisk — For mixing the filling ingredients smoothly.
- Measuring cups and spoons — Accurate measurements matter, especially for the flour and spices.
- Kitchen scale — Optional but highly recommended. Weighing ingredients gives more consistent results, especially for the crust.
Preparation Method
Let’s make this homemade pumpkin pie with flaky all-butter crust from start to finish. I’ll guide you through every step, including what to look for and how to fix common issues.
Step 1: Make the Crust
In a medium bowl, whisk together the flour, salt, and sugar. Add the cold butter cubes and toss to coat them in the flour. Using a pastry cutter or your fingertips, cut the butter into the flour until the mixture looks like coarse meal with some pea-sized butter pieces remaining. This takes about 2-3 minutes. You want visible butter bits—they create steam pockets that make the crust flaky.
Sprinkle 3 tablespoons of ice water over the mixture and stir with a fork until the dough starts to come together. It should look shaggy and hold together when you squeeze a handful. If it’s too dry, add the remaining tablespoon of water, one teaspoon at a time. Turn the dough onto a piece of plastic wrap, flatten into a disk, and wrap tightly. Refrigerate for at least 1 hour, or up to 2 days.
Step 2: Roll Out the Dough
On a lightly floured surface, roll the chilled dough into a 12-inch circle, about ⅛-inch thick. Rotate the dough frequently and add more flour as needed to prevent sticking. Don’t worry if the edges crack—just pinch them back together. Carefully transfer the dough to your pie dish by rolling it around the rolling pin and unrolling it over the dish. Gently press it into the bottom and up the sides. Trim the overhang to about ½ inch, then fold it under and crimp the edges with your fingers or a fork. Place the crust in the refrigerator for 30 minutes. This prevents shrinking during baking.
Step 3: Blind Bake the Crust
Preheat your oven to 375°F. Line the chilled crust with parchment paper and fill with pie weights or dried beans. Bake for 15 minutes, then remove the parchment and weights. Prick the bottom of the crust with a fork (this is called docking) and bake for another 5-7 minutes until the bottom looks dry and lightly golden. Set aside to cool slightly while you make the filling. This step is crucial—it prevents that dreaded soggy bottom.
Step 4: Make the Filling
In a large bowl, whisk together the pumpkin puree, brown sugar, and eggs until smooth. Add the evaporated milk, vanilla, cinnamon, ginger, nutmeg, cloves, and salt. Whisk until everything is well combined and silky. The mixture should be smooth and pourable. If it looks curdled or separated, you may have overmixed or used cold eggs. Let it sit for 5 minutes and whisk again gently.
Step 5: Assemble and Bake
Pour the filling into the pre-baked crust. It should fill the crust almost to the rim. Bake at 375°F for 15 minutes, then reduce the oven temperature to 350°F and continue baking for 40-50 minutes. The pie is done when the edges are set and the center jiggles slightly when you gently shake the pan. It will continue to set as it cools. Insert a knife near the center—if it comes out clean, it’s done. If it’s still wet, bake for another 5-10 minutes.
Step 6: Cool Completely
Place the pie on a wire rack and let it cool to room temperature, about 2 hours. Do not skip this step. Cutting into a warm pie will result in a runny mess. Once cooled, you can refrigerate it for up to 3 days. The flavor actually gets better after a day in the fridge.
Cooking Tips & Techniques
I’ve made this homemade pumpkin pie with flaky all-butter crust at least twenty times, and I’ve learned a few things the hard way. Here are my best tips to help you nail it on the first try.
Keep everything cold for the crust. I cannot stress this enough. Cold butter, cold water, and even a cold bowl if you can manage it. If the butter starts to soften while you’re cutting it in, pop the bowl in the freezer for 5 minutes. Warm butter melts into the flour instead of creating those flaky layers. I once made a crust in a hot kitchen in July, and it was a disaster—tough and greasy. Never again.
Don’t overwork the dough. Overmixing develops gluten, which makes the crust tough. Mix just until the dough holds together. A few dry spots are okay. When rolling, use gentle, even pressure and don’t roll back and forth too many times. If the dough tears, just patch it with a little scrap dough and press it together.
Blind baking is your friend. I know it’s an extra step, but it makes all the difference. A pre-baked crust stays crisp and flaky, while an unbaked crust soaks up moisture from the filling and turns soggy. Trust me, the extra 20 minutes is worth it.
Watch the filling consistency. If your pumpkin puree is watery (homemade puree can be), the pie may not set properly. To fix this, cook the puree in a saucepan over medium heat for 5-7 minutes, stirring constantly, until it thickens and reduces slightly. Let it cool before using. Canned pumpkin is usually fine, but check the label—some brands are thinner than others.
Use a rimmed baking sheet. Place the pie dish on a baking sheet before putting it in the oven. This catches any spills and makes it easier to transfer the hot pie. I learned this after a near-disaster with a wobbly pie dish.
Let it cool completely. I know it’s tempting to dig in, but patience pays off. The filling needs time to set properly. If you cut into it while it’s still warm, you’ll get a soupy mess. Give it at least 2 hours at room temperature, then refrigerate for even cleaner slices.
Variations & Adaptations
This homemade pumpkin pie with flaky all-butter crust is versatile enough to adapt to different tastes and dietary needs. Here are some variations I’ve tried and loved.
Gluten-Free Version : Substitute the all-purpose flour with a gluten-free flour blend that contains xanthan gum. I’ve used Bob’s Red Mill 1-to-1 Baking Flour with great results. The crust will be a bit more delicate, so handle it gently. The filling is naturally gluten-free, so just swap the crust.
Dairy-Free Version : Use a high-quality vegan butter stick (like Miyoko’s or Earth Balance) in place of regular butter. For the filling, replace evaporated milk with full-fat coconut milk or oat milk. The texture will be slightly different—coconut milk adds a subtle coconut flavor that pairs beautifully with the spices. I made this for a dairy-free friend and she said it was the best pumpkin pie she’d ever had.
Spice It Up : If you love a bolder flavor, add ¼ teaspoon of cardamom or allspice to the spice blend. You can also use a pumpkin pie spice blend instead of individual spices—just use 2 teaspoons total. I sometimes add a pinch of black pepper for a subtle kick that complements the sweetness.
Maple Pumpkin Pie : Replace the brown sugar with ½ cup pure maple syrup and reduce the evaporated milk to 1 cup. The maple flavor adds a lovely autumnal twist. Keep in mind the filling will be slightly softer, so bake it a few minutes longer if needed.
Mini Pie Option : Use a muffin tin to make individual pies. Roll out the dough and cut circles to fit the muffin cups. Blind bake for 10 minutes, then fill and bake for 20-25 minutes. These are perfect for parties or portion control. I made these for a potluck and they were gone in minutes.
Serving & Storage Suggestions
This homemade pumpkin pie with flaky all-butter crust is best served at room temperature or slightly chilled. I personally prefer it cold from the fridge with a dollop of whipped cream. The contrast between the creamy filling and the flaky crust is pure magic.
For presentation, slice the pie with a sharp knife dipped in hot water and wiped clean between cuts. This gives you clean, beautiful slices. Serve on a nice plate with a generous swirl of lightly sweetened whipped cream and a sprinkle of cinnamon or nutmeg on top. If you’re feeling fancy, add a few candied pecans or a drizzle of caramel sauce.
This pie pairs wonderfully with a cup of hot coffee, spiced tea, or even a glass of cold milk. For a full fall spread, serve it alongside a roast turkey dinner or a hearty soup. It’s also fantastic the next morning with breakfast—don’t judge me, it’s a thing.
Storage Instructions : Cover the pie loosely with plastic wrap or aluminum foil and refrigerate for up to 3 days. The crust will stay flaky for about 2 days, then it may soften slightly. You can also freeze the baked pie for up to 2 months. Wrap it tightly in plastic wrap, then foil, and thaw overnight in the refrigerator before serving. The flavor actually deepens after freezing—it’s like a time capsule of fall.
Reheating Tips : If you prefer warm pie, reheat individual slices in a 300°F oven for 10 minutes, or in the microwave for 20-30 seconds. Be careful not to overheat, or the filling can become runny. I usually skip reheating and enjoy it cold, but my husband insists on warming his slice for 15 seconds in the microwave. To each their own.
Nutritional Information & Benefits
Here’s the approximate nutritional breakdown for one slice of this homemade pumpkin pie with flaky all-butter crust (based on 8 servings):
| Nutrient | Amount per Serving |
|---|---|
| Calories | 320 |
| Total Fat | 16g |
| Saturated Fat | 10g |
| Cholesterol | 85mg |
| Sodium | 280mg |
| Total Carbohydrates | 40g |
| Dietary Fiber | 2g |
| Sugars | 24g |
| Protein | 5g |
| Vitamin A | 200% DV |
| Calcium | 10% DV |
| Iron | 8% DV |
Pumpkin is packed with vitamin A (in the form of beta-carotene), which supports eye health and immune function. It’s also a good source of fiber and potassium. The eggs add protein and healthy fats, while the butter provides a satisfying richness. This pie isn’t health food, but it’s made with real ingredients that offer more nutritional value than a processed dessert. Plus, it’s a once-a-year treat for most of us, so enjoy every bite without guilt.
If you’re watching your sugar intake, you can reduce the brown sugar to ½ cup. The pie will be less sweet but still delicious. For a lower-fat option, use a whole wheat pastry crust and replace half the butter with Greek yogurt. I’ve tried it, and while it’s not as flaky, it’s still tasty.
Conclusion
This homemade pumpkin pie with flaky all-butter crust is more than just a recipe—it’s a way to bring a little warmth and nostalgia to your table without breaking the bank. With simple ingredients, a foolproof method, and tips I’ve learned through trial and error, you can create a pie that tastes like it came from a fancy bakery but costs a fraction of the price. Honestly, once you make this crust from scratch, you’ll never go back to store-bought. The flaky layers, the buttery flavor, the way it crumbles just slightly when you take a bite—it’s worth every minute of effort.
I love this recipe because it’s forgiving. Even if your crust cracks or your filling is a little lumpy, it will still taste amazing. And that’s the thing about homemade food—it doesn’t have to be perfect to be wonderful. So go ahead, chase that memory. Make a mess in your kitchen. And when you pull that golden pie out of the oven, take a moment to breathe in that smell. That’s November. That’s home.
I’d love to hear how your pie turns out! Leave a comment below and let me know if you tried any variations or if this recipe brought back a memory of your own. Don’t forget to share this post with someone who needs a little fall comfort in their life. Happy baking!
Frequently Asked Questions
Can I use canned pumpkin pie filling instead of pure pumpkin?
No, I don’t recommend it. Canned pumpkin pie filling is pre-sweetened and already spiced, so it will throw off the balance of this recipe. Stick with pure pumpkin puree (canned or homemade) and add your own sugar and spices. You’ll have much more control over the flavor.
Why did my crust shrink during baking?
This usually happens when the dough isn’t chilled enough before baking. Make sure to refrigerate your shaped crust for at least 30 minutes before blind baking. Also, avoid stretching the dough when you transfer it to the pie dish. If it tears, just patch it—stretching causes shrinkage.
How do I know when the pie is done?
The edges should be set and slightly puffed, while the center should jiggle gently when you shake the pan. Insert a knife about 1 inch from the center—if it comes out clean, it’s done. The internal temperature should reach 175°F. Don’t overbake or the filling can crack.
Can I make this pie ahead of time?
Absolutely! You can make the entire pie up to 3 days in advance and store it in the refrigerator. You can also freeze the baked pie for up to 2 months. Thaw overnight in the fridge before serving. I actually think the flavor improves after a day or two.
What can I use instead of evaporated milk?
You can substitute with heavy cream, half-and-half, or full-fat coconut milk for a dairy-free option. If using heavy cream, the filling will be richer and slightly denser. For a lighter version, use whole milk—but the texture may be less creamy. I’ve also used oat milk successfully, but the pie was a bit softer.
Pin This Recipe!
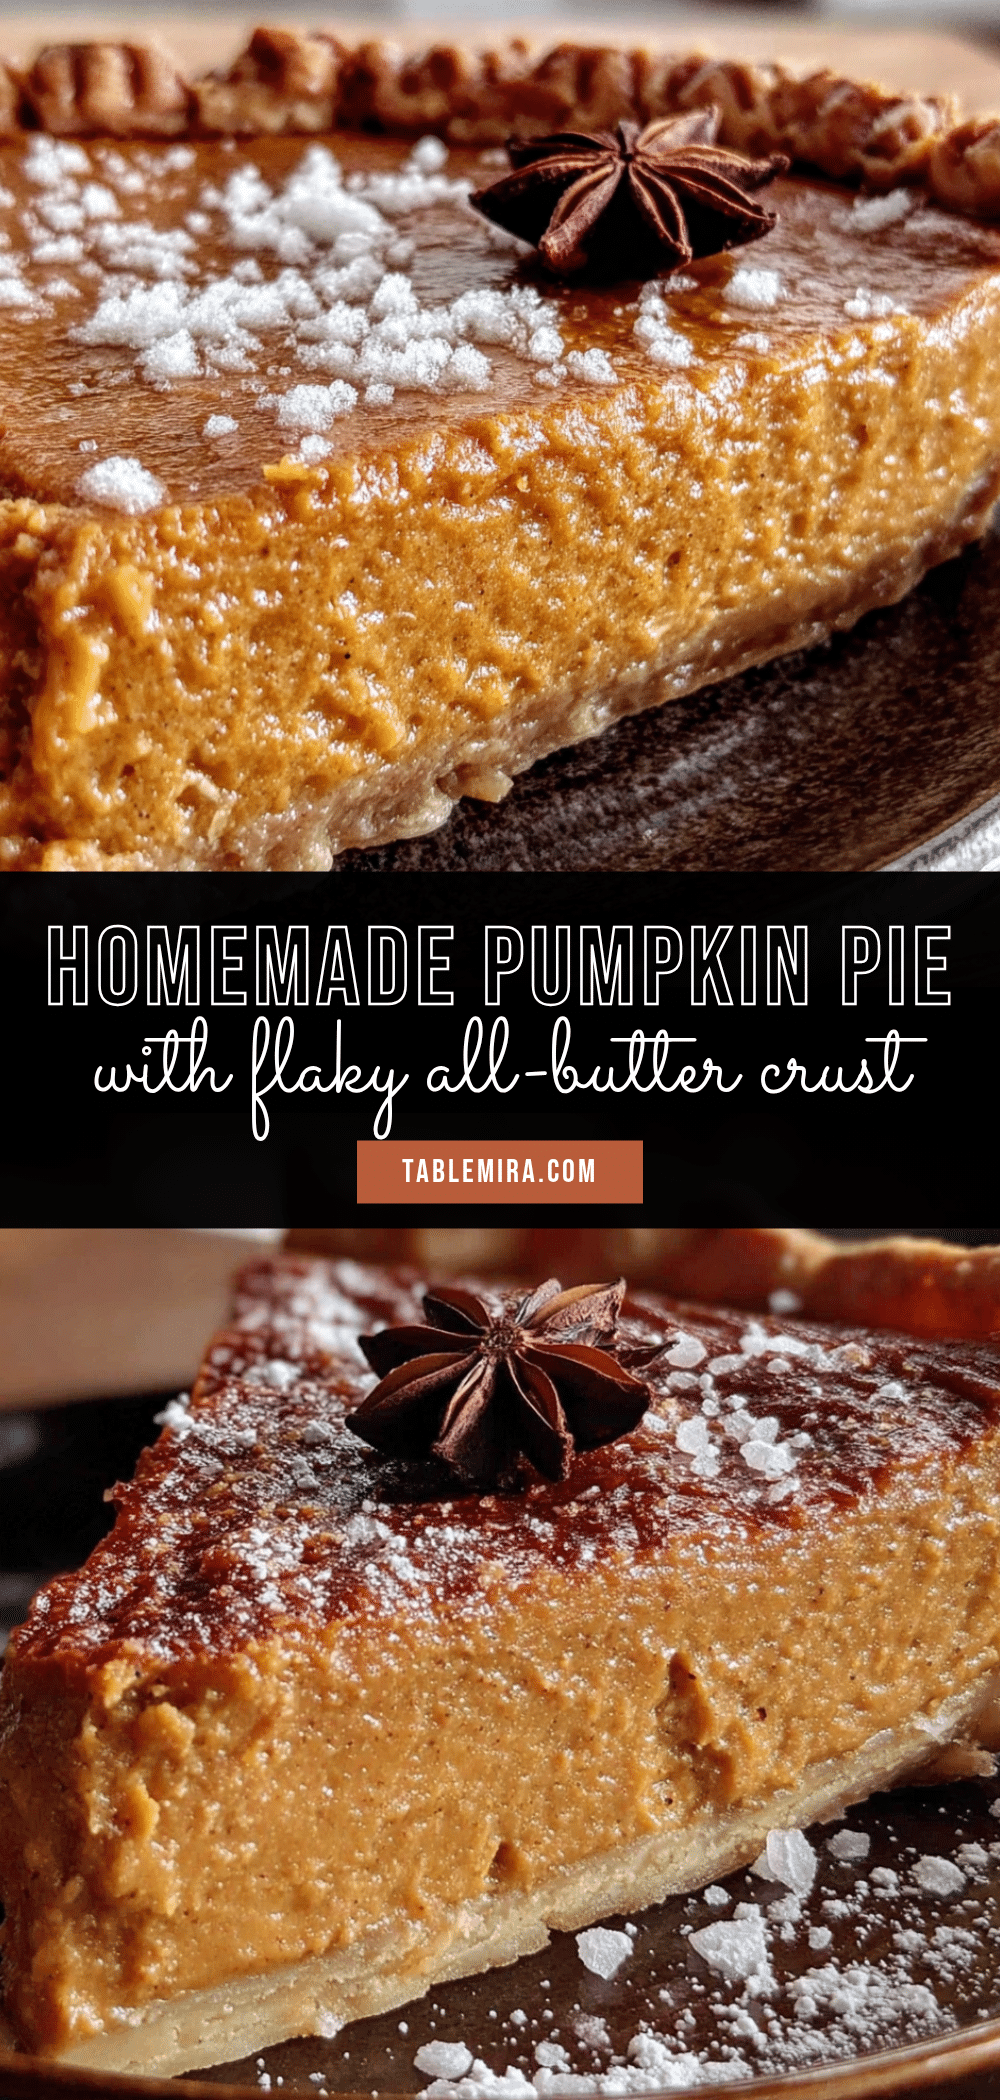
Homemade Pumpkin Pie with Flaky All-Butter Crust
A nostalgic, perfectly spiced pumpkin pie with a flaky all-butter crust. This foolproof recipe delivers a creamy, silky filling and a tender, buttery crust that will transport you back to cherished fall memories.
- Prep Time: 1 hour
- Cook Time: 1 hour 5 minutes
- Total Time: 2 hours 5 minutes (plus cooling)
- Yield: 8 servings 1x
- Category: Dessert
- Cuisine: American
Ingredients
- 1 ¼ cups all-purpose flour (160 grams)
- ½ teaspoon fine sea salt
- 1 tablespoon granulated sugar
- ½ cup cold unsalted butter (1 stick, 113 grams), cut into small cubes and frozen for 10 minutes
- 3 to 4 tablespoons ice water
- 2 cups pumpkin puree (450 grams), homemade or canned (not pumpkin pie filling)
- 1 can (12 ounces) evaporated milk (354 ml)
- ¾ cup packed brown sugar (150 grams), light or dark
- 2 large eggs, room temperature
- 1 teaspoon pure vanilla extract
- 1 ½ teaspoons ground cinnamon
- ½ teaspoon ground ginger
- ½ teaspoon ground nutmeg
- ¼ teaspoon ground cloves
- ¼ teaspoon salt
Instructions
- Make the crust: In a medium bowl, whisk together flour, salt, and sugar. Add cold butter cubes and toss to coat. Using a pastry cutter or fingertips, cut butter into flour until mixture resembles coarse meal with some pea-sized butter pieces (2-3 minutes).
- Sprinkle 3 tablespoons ice water over mixture and stir with a fork until dough starts to come together. It should look shaggy and hold together when squeezed. If too dry, add remaining water, one teaspoon at a time.
- Turn dough onto plastic wrap, flatten into a disk, wrap tightly, and refrigerate for at least 1 hour or up to 2 days.
- Roll out dough: On a lightly floured surface, roll chilled dough into a 12-inch circle, about ⅛-inch thick. Rotate frequently and add flour as needed. Transfer to a 9-inch pie dish, press into bottom and sides. Trim overhang to ½ inch, fold under, and crimp edges. Refrigerate for 30 minutes.
- Blind bake crust: Preheat oven to 375°F. Line chilled crust with parchment paper and fill with pie weights or dried beans. Bake for 15 minutes. Remove parchment and weights. Prick bottom with a fork and bake for another 5-7 minutes until bottom is dry and lightly golden. Set aside to cool slightly.
- Make filling: In a large bowl, whisk together pumpkin puree, brown sugar, and eggs until smooth. Add evaporated milk, vanilla, cinnamon, ginger, nutmeg, cloves, and salt. Whisk until well combined and silky.
- Assemble and bake: Pour filling into pre-baked crust. Bake at 375°F for 15 minutes, then reduce oven temperature to 350°F and continue baking for 40-50 minutes. Pie is done when edges are set and center jiggles slightly when shaken. Insert a knife near center—if it comes out clean, it’s done.
- Cool completely: Place pie on a wire rack and cool to room temperature, about 2 hours. Do not cut into warm pie. Once cooled, refrigerate for up to 3 days.
Notes
Keep all ingredients cold for the crust. Do not overwork the dough. Blind baking is essential to prevent a soggy bottom. If using homemade pumpkin puree, cook it down to remove excess moisture. Let the pie cool completely before slicing. The flavor improves after a day in the refrigerator.
Nutrition
- Serving Size: 1 slice
- Calories: 320
- Sugar: 24
- Sodium: 280
- Fat: 16
- Saturated Fat: 10
- Carbohydrates: 40
- Fiber: 2
- Protein: 5
Keywords: pumpkin pie, homemade pumpkin pie, all-butter crust, flaky crust, Thanksgiving dessert, fall dessert, pumpkin dessert


