I was bagging apples at the farmers’ market last October when a woman walked past me carrying a warm box of fresh pumpkin pies. The smell hit me like a freight train—cinnamon, nutmeg, that deep roasted squash sweetness—and suddenly I was nine years old, standing in my neighbor Mrs. Kowalski’s tiny yellow kitchen. I can still see her flour-dusted apron and the way she’d tap the pie crust with her knuckle to check for doneness. She wasn’t my grandmother, not even a relative, but every fall she’d let me sit on her counter and watch her make pie from scratch. She’d let me scrape the leftover filling from the bowl with my finger, and I’d sit there kicking my heels against the cabinet doors while she told me about growing up in Chicago. I haven’t thought about her in years. But that smell in the parking lot brought it all back—the warmth of her oven, the way she’d hum off-key, the patience she had with a curious kid. I bought a sugar pumpkin that day, drove home, and spent the weekend trying to get that exact flavor back. Honestly? This version is better. It’s the pie I wish I could bring her.
Let me tell you, there’s something about a homemade pumpkin pie from scratch that a can of puree just can’t touch. It’s not that canned pumpkin is bad—it’s fine, it works—but when you roast your own sugar pumpkin and blend it with real cream and fresh spices, the flavor is deeper, richer, and honestly, more like fall in a slice. You know that feeling when something tastes exactly like a memory? That’s what this pie does. And the best part? It’s not complicated. I mean, it takes a little time, sure, but the actual hands-on work is pretty simple. Maybe you’ve been wanting to try making pumpkin pie from the pumpkin itself but weren’t sure where to start. I get it. I was nervous the first time too. But once you taste the difference, you’ll never go back.
Why You’ll Love This Recipe
This isn’t just another pumpkin pie recipe. I’ve tested this one six times over two seasons—yes, six—adjusting the spice blend, tweaking the roasting temperature, and even trying different types of cream. What I landed on is the version that makes people close their eyes when they take a bite. Here’s why it works:
- Real pumpkin flavor: Roasting a sugar pumpkin concentrates the sweetness and gives you a silky, almost nutty puree that canned versions just can’t match.
- Perfectly spiced, not overpowering: I use a custom blend of cinnamon, ginger, nutmeg, and a tiny pinch of cloves. It’s warm and aromatic without tasting like a candle shop.
- Buttery, flaky crust from scratch: No store-bought crusts here. This one uses cold butter and a splash of vodka for tenderness. Trust me on the vodka trick—it’s a game changer.
- Custard that actually sets: No more runny, sad slices. This filling bakes up smooth and firm, with a slight jiggle in the center that firms up as it cools.
- Crowd-pleaser for any fall gathering: I’ve brought this to Thanksgiving, Friendsgiving, and random Tuesday dinners. It disappears every single time.
- Healthier-ish but still indulgent: Using real pumpkin and less sugar than traditional recipes means you get actual nutrition with your dessert. You can feel good about having a second slice.
This recipe is for anyone who wants the real thing—not a shortcut, not a compromise. It’s comfort food that tastes like effort even though it’s surprisingly doable. And honestly, the way it makes your whole house smell while it bakes? Worth every minute.
What Ingredients You Will Need
This recipe uses simple, whole ingredients that work together to create that classic pumpkin pie flavor with a from-scratch depth you can actually taste. Most of these are pantry staples, but a few—like the fresh pumpkin and heavy cream—make all the difference.
For the Pie Crust
- 1 ¼ cups all-purpose flour (plus more for dusting)
- ½ teaspoon salt
- 1 tablespoon granulated sugar (just a touch for flavor)
- ½ cup cold unsalted butter, cut into small cubes (I use Kerrygold for its richness)
- 3 to 4 tablespoons ice water
- 1 tablespoon vodka (optional but highly recommended—it adds moisture without making the crust tough)
For the Pumpkin Puree (Makes about 2 cups)
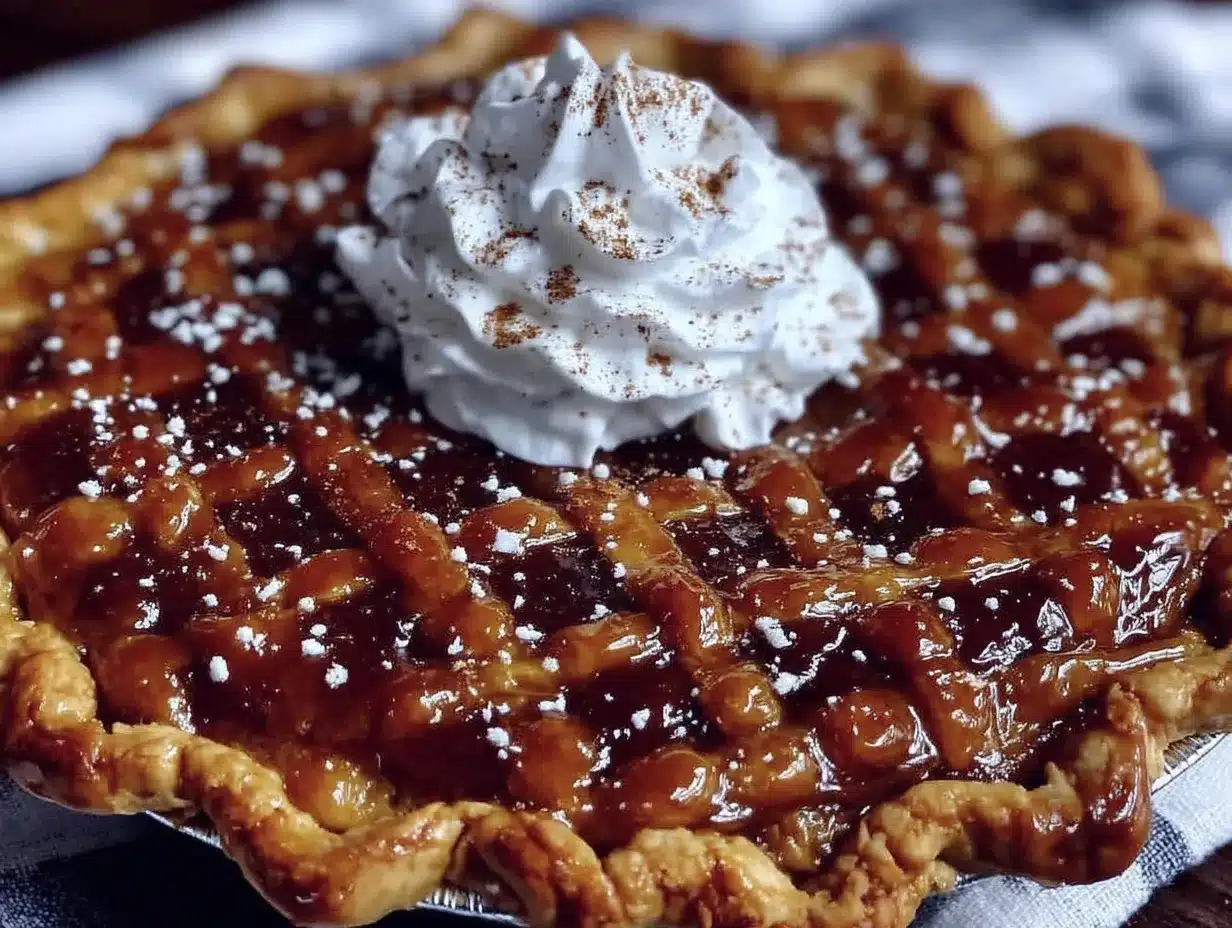
- 1 medium sugar pumpkin (about 3 to 4 pounds)—look for ones labeled “pie pumpkins,” not carving pumpkins, which are watery and bland
- 1 tablespoon olive oil
For the Filling
- 2 cups homemade pumpkin puree (or one 15-ounce can if you’re in a pinch, but honestly, make the puree)
- 1 ¼ cups heavy cream (you can substitute half-and-half for a lighter version, but the texture won’t be as luxurious)
- ¾ cup packed light brown sugar
- 2 large eggs, room temperature
- 1 large egg yolk, room temperature
- 2 teaspoons ground cinnamon
- 1 teaspoon ground ginger
- ½ teaspoon ground nutmeg (freshly grated if you have it)
- ¼ teaspoon ground cloves
- ½ teaspoon salt
- 1 teaspoon vanilla extract
When choosing your pumpkin, look for one that feels heavy for its size and has a dull, not shiny, skin. The sugar pumpkins are smaller and rounder than the big jack-o’-lantern types. I’ve made the mistake of using a carving pumpkin once—never again. It was stringy and tasted like watery squash. Stick with a sugar pumpkin and you’ll be rewarded with sweet, dense flesh that roasts up beautifully.
For the spices, I recommend buying fresh ground spices from a spice shop or at least checking the expiration dates on your jars. Spices lose their punch after about six months, and stale nutmeg is a sad thing. If you can, grate your own nutmeg with a microplane—the flavor is brighter and more aromatic.
Equipment Needed
You don’t need a fancy kitchen to pull this off, but a few tools make the process smoother. Here’s what I use:
- 9-inch pie dish (glass or ceramic works best—metal can cook the crust too quickly)
- Rolling pin (a wine bottle works in a pinch, I’ve done it)
- Food processor or pastry cutter for the crust
- Baking sheet (to catch drips and help the bottom crust cook)
- Sharp knife for cutting the pumpkin
- Vegetable peeler (optional, but easier than cutting off the skin)
- Blender or immersion blender for pureeing the pumpkin
- Mixing bowls (one large, one medium)
- Whisk
- Measuring cups and spoons
If you don’t have a food processor, you can make the crust by hand using a pastry cutter or even two forks. It takes a little more elbow grease but works just fine. The blender is your best friend for getting the pumpkin puree silky smooth—a fork or potato masher won’t give you the same texture.
Preparation Method
Step 1: Roast the Pumpkin (About 1 hour)
Preheat your oven to 400°F (200°C). Carefully cut your sugar pumpkin in half from stem to base. Scoop out the seeds and stringy pulp with a large spoon—save the seeds for roasting if you want a snack. Rub the cut sides with olive oil and place them face-down on a lined baking sheet. Roast for 45 to 60 minutes, until the flesh is tender and you can easily pierce it with a fork. Let it cool until you can handle it, then scoop the flesh out with a spoon. It should come away from the skin easily.
Step 2: Make the Puree (About 10 minutes)
Transfer the roasted pumpkin flesh to a blender or food processor. Blend until completely smooth, scraping down the sides as needed. If it seems too thick, add a tablespoon of water at a time until it reaches a consistency similar to canned pumpkin puree. You want it smooth but not watery. Set aside 2 cups for the pie. Any extra can be frozen for later use.
Step 3: Make the Pie Crust (About 15 minutes, plus 1 hour chilling)
In a food processor, pulse the flour, salt, and sugar together. Add the cold butter cubes and pulse until the mixture looks like coarse meal with pea-sized butter pieces. Add the vodka and 3 tablespoons of ice water, then pulse until the dough just comes together when pinched. Turn it out onto a floured surface, shape into a disc, wrap in plastic, and refrigerate for at least 1 hour. The vodka helps keep the crust tender without adding too much water, which develops gluten and makes it tough.
Step 4: Roll and Blind Bake the Crust (About 30 minutes)
On a floured surface, roll the dough into a 12-inch circle about ⅛-inch thick. Transfer it to your pie dish, pressing gently into the corners. Trim the excess, leaving a ½-inch overhang, then fold it under and crimp the edges with your fingers or a fork. Prick the bottom with a fork, line with parchment, and fill with pie weights or dried beans. Bake at 375°F (190°C) for 15 minutes, then remove the weights and bake another 5 to 7 minutes until lightly golden. This prevents the dreaded soggy bottom.
Step 5: Make the Filling (About 10 minutes)
In a large bowl, whisk together the pumpkin puree, heavy cream, brown sugar, eggs, egg yolk, cinnamon, ginger, nutmeg, cloves, salt, and vanilla. Whisk until completely smooth and uniform. Don’t overmix—you don’t want to incorporate too much air, which can cause cracks. The mixture should be thick but pourable, like a thick milkshake.
Step 6: Bake the Pie (About 50 to 60 minutes)
Place the blind-baked crust on a baking sheet. Pour the filling in carefully—it should come almost to the top. Bake at 375°F (190°C) for 15 minutes, then reduce the temperature to 350°F (175°C) and bake for 35 to 45 minutes more. The pie is done when the edges are set and the center has a slight jiggle—like Jell-O, not like soup. A knife inserted an inch from the edge should come out clean. Let it cool completely on a wire rack. This takes at least 2 hours, but the pie needs to be fully cool before slicing.
Cooking Tips & Techniques
I’ve made my share of pumpkin pie mistakes, and I’m happy to share them so you don’t have to repeat them. The first time I made this, I didn’t blind bake the crust. Big mistake. The bottom was a sad, soggy mess that collapsed under the filling. Blind baking is non-negotiable if you want a crust that holds up.
Another thing I learned the hard way: don’t overbake the filling. It’s tempting to leave it in until the center is completely firm, but it will continue to set as it cools. Pull it out when the center still wobbles slightly. I once left a pie in for an extra 10 minutes because I was nervous, and it came out with cracks all over the surface. Still tasty, but not as pretty.
For the smoothest filling, make sure your eggs and cream are at room temperature. Cold ingredients can cause the fat to seize, leading to a lumpy texture. I set mine out on the counter about 30 minutes before I start mixing.
Here’s a trick I picked up from a pastry chef friend: place your pie dish on a preheated baking sheet when you put it in the oven. The extra heat from the sheet helps the bottom crust cook faster, reducing the risk of a soggy bottom. I do this every time now.
And if your crust edges start browning too quickly, tent them with foil or use a pie shield. I’ve forgotten to do this more times than I’d like to admit, and the result is a crust that’s almost burnt on the edges while the center is still pale.
Variations & Adaptations
This recipe is pretty forgiving, and I’ve played around with it quite a bit. Here are some variations that work well:
- Gluten-free version: Substitute the all-purpose flour with a 1-to-1 gluten-free baking flour blend. I’ve used Bob’s Red Mill with good results. The crust will be a bit more crumbly, so handle it gently.
- Dairy-free option: Replace the heavy cream with full-fat coconut cream. The filling will have a slight coconut flavor, but it pairs beautifully with the pumpkin and spices. Use a dairy-free butter substitute for the crust.
- Maple-spiced twist: Replace the brown sugar with ½ cup maple syrup and reduce the cream by 2 tablespoons. The maple adds a deeper, more complex sweetness that’s perfect for fall.
- Extra-spicy version: Double the ginger and add ¼ teaspoon of white pepper. It gives the pie a subtle warmth that’s unexpected and delicious.
- Mini pie version: Use a muffin tin to make individual pies. Roll the crust, cut circles, press into greased muffin cups, and fill. Bake for about 20 to 25 minutes at 375°F. Perfect for parties.
I’ve personally tried the maple version for a Canadian-themed dinner party, and it was a hit. The maple flavor isn’t overpowering—it just adds a cozy, caramel-like note that makes the pie feel even more special.
Serving & Storage Suggestions
This pie is best served at room temperature or slightly warm. If you’ve refrigerated it, let it sit out for about 30 minutes before slicing. The flavors are more pronounced when it’s not ice-cold.
For serving, I love a generous dollop of lightly sweetened whipped cream. Sometimes I add a pinch of cinnamon to the cream for extra flair. If you’re feeling fancy, a drizzle of caramel sauce over the top is never a bad idea. The pie pairs beautifully with a cup of black coffee or a spiced chai latte.
For storage, cover the pie loosely with plastic wrap or foil and refrigerate for up to 4 days. The crust will soften slightly over time, but the flavor actually improves after a day—the spices meld together and mellow out. You can also freeze the baked pie for up to 3 months. Wrap it tightly in plastic wrap, then foil, and thaw overnight in the refrigerator before serving.
To reheat individual slices, pop them in a 300°F (150°C) oven for about 10 minutes. The microwave works in a pinch, but it can make the crust soggy. I don’t recommend reheating the whole pie—just the slices you’re eating.
One thing I’ve noticed: this pie actually tastes better the day after it’s baked. The filling sets more firmly, and the spices have time to settle into something more harmonious. So if you’re making it for a big meal, bake it a day ahead. Your future self will thank you.
Nutritional Information & Benefits
Here’s the estimated nutrition for one slice (based on 8 servings):
| Nutrient | Amount per slice |
|---|---|
| Calories | 385 |
| Total Fat | 22g |
| Saturated Fat | 13g |
| Cholesterol | 115mg |
| Sodium | 310mg |
| Total Carbohydrates | 43g |
| Dietary Fiber | 3g |
| Sugars | 24g |
| Protein | 6g |
| Vitamin A | 280% DV |
| Vitamin C | 8% DV |
| Calcium | 8% DV |
| Iron | 10% DV |
The star ingredient here is the pumpkin itself. It’s packed with vitamin A in the form of beta-carotene, which supports eye health and immune function. The fiber content helps with digestion, and the moderate protein from the eggs and cream makes this more satisfying than a typical dessert. Using real pumpkin instead of canned means you’re getting more of the natural nutrients without any additives or preservatives.
This recipe contains gluten, dairy, and eggs, so it’s not suitable for those with allergies to those ingredients. But the variations I mentioned above can help accommodate different dietary needs.
From a wellness perspective, I love that this pie lets you enjoy a classic indulgence while still getting some actual nutrition. It’s not health food—let’s be real—but it’s a dessert that doesn’t leave you feeling like you’ve eaten a chemistry experiment. The real ingredients make a difference in how you feel afterward.
Conclusion
This homemade pumpkin pie from scratch is the kind of recipe that becomes a tradition. It’s the pie you bring to Thanksgiving and everyone asks for the recipe. It’s the pie you make on a rainy Sunday in October just because the house smells amazing. It’s the pie that makes you feel like you’ve accomplished something real—and honestly, you have. Roasting your own pumpkin, making a crust from scratch, getting that custard just right—it’s a labor of love, but it’s one that pays off in every single bite.
I hope you give this a try. Don’t be intimidated by the from-scratch part—you’ve got this. And if something goes wrong? That’s okay. I’ve had pies crack, crusts shrink, fillings spill over. They still tasted good. The imperfections are part of the story.
If you make this pie, I’d love to hear about it. Leave a comment below, share a photo, or tell me about your own pumpkin pie memories. Did you tweak the spices? Try a different crust? I want to know. And if you’re looking for more fall baking ideas, check out our easy apple crisp recipe or our classic pecan pie from scratch—both are perfect for your holiday table.
Happy baking, friends. Go make something that smells like fall.
Frequently Asked Questions
Can I use canned pumpkin instead of roasting a fresh one?
Yes, absolutely. If you’re short on time, a 15-ounce can of pure pumpkin puree (not pumpkin pie filling) works perfectly. Just skip the roasting step and use the canned puree directly. The flavor won’t be quite as deep, but it’s still delicious.
Why did my pie crust shrink during baking?
This usually happens when the dough is overworked or not chilled enough. The gluten develops and pulls the crust back as it bakes. Make sure your butter is very cold, don’t overmix the dough, and always chill it for at least an hour before rolling. Also, let the blind-baked crust cool completely before adding the filling.
How do I know when the pie is done?
The edges should be set and slightly puffed, while the center should still have a gentle wobble—like Jell-O, not like liquid. A knife inserted about an inch from the edge should come out clean. The center will continue to set as it cools, so don’t wait for it to be completely firm in the oven.
Can I make this pie ahead of time?
Yes, and I actually recommend it. Bake the pie a day ahead, let it cool completely, then cover and refrigerate. The flavors meld and deepen overnight. Just bring it to room temperature before serving for the best flavor.
Why is my pumpkin pie filling watery?
This can happen if your pumpkin puree has too much moisture. When roasting your pumpkin, make sure to drain any excess liquid after blending. If using canned pumpkin, check the label—some brands are thinner than others. You can also cook the puree on the stovetop for a few minutes to reduce it if it seems too wet.
Pin This Recipe!
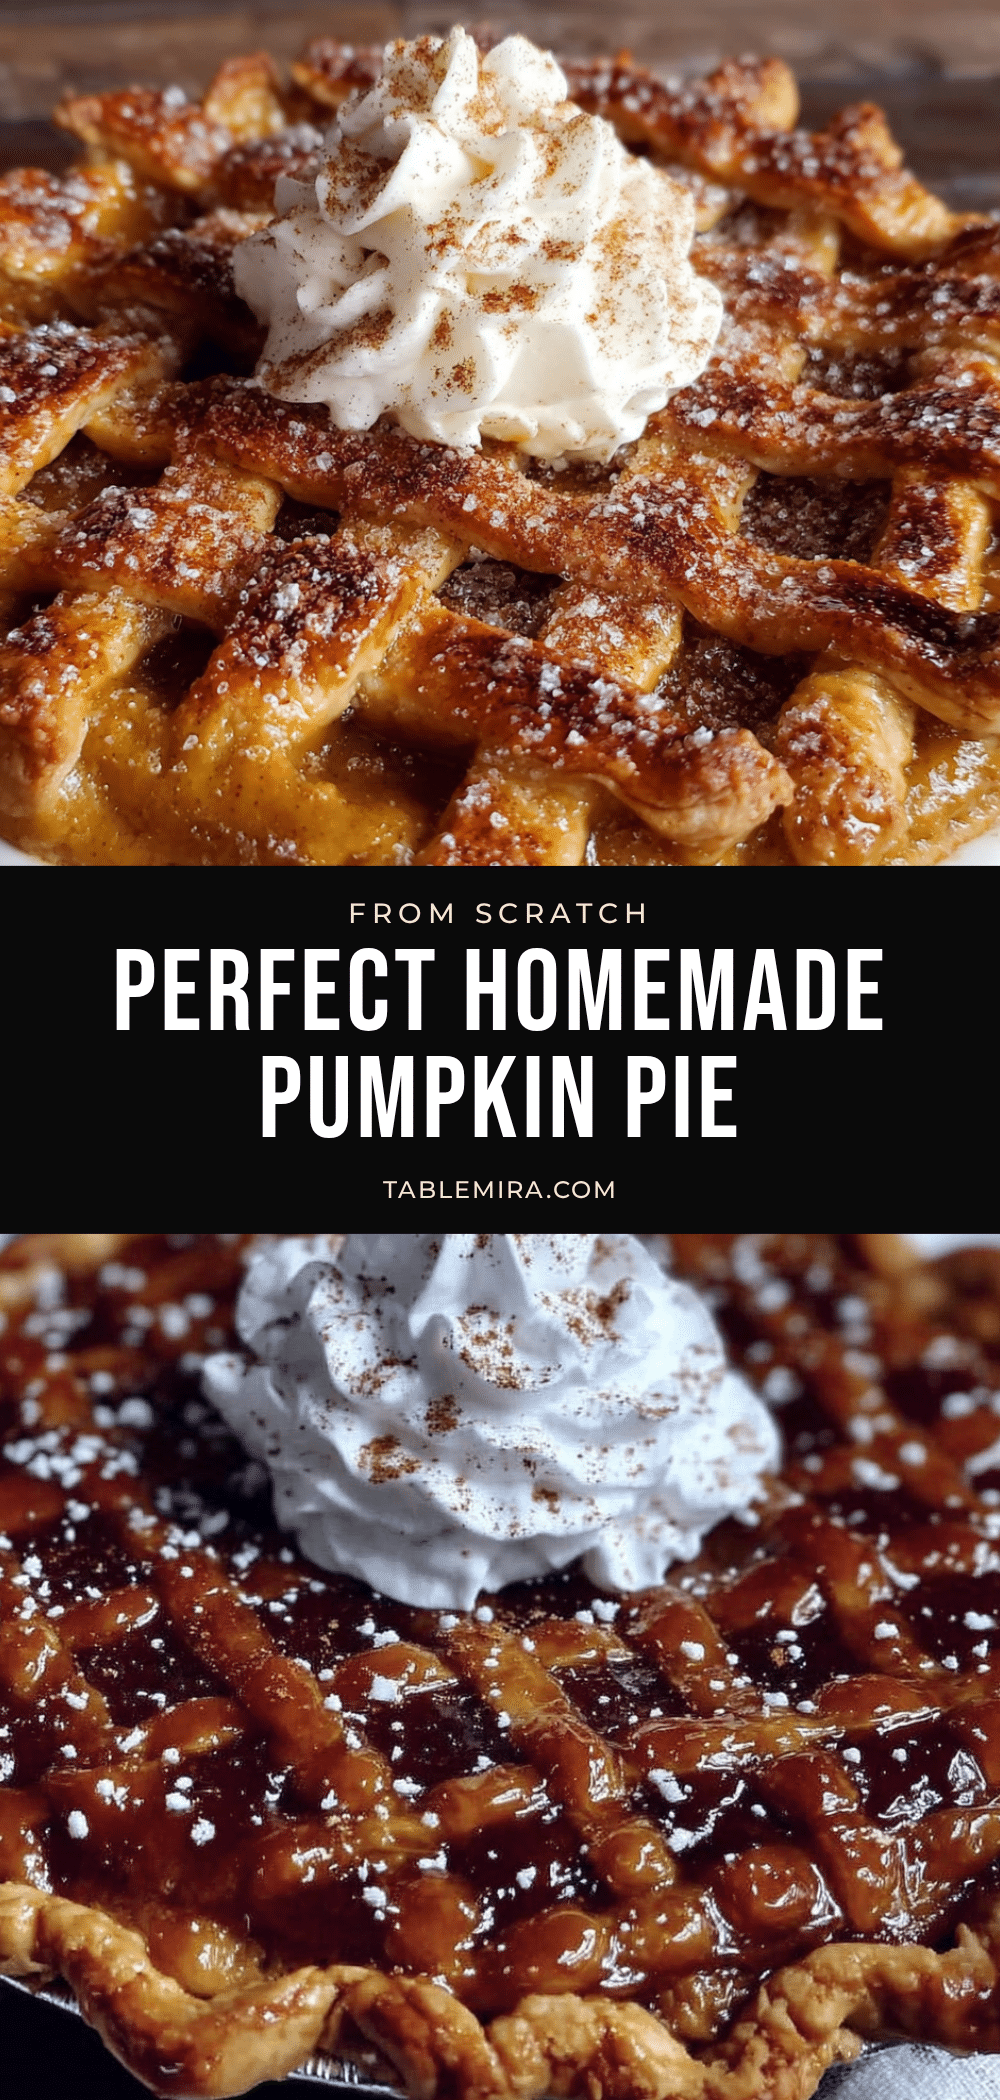
Perfect Homemade Pumpkin Pie from Scratch – Easy Fall Dessert

This homemade pumpkin pie from scratch uses roasted sugar pumpkin, a buttery flaky crust, and a perfectly spiced custard for a deep, rich fall flavor. It’s a labor of love that pays off in every bite.
- Prep Time: 30 minutes
- Cook Time: 1 hour 30 minutes
- Total Time: 2 hours 30 minutes
- Yield: 8 servings 1x
- Category: Dessert
- Cuisine: American
Ingredients
- 1 ¼ cups all-purpose flour (plus more for dusting)
- ½ teaspoon salt
- 1 tablespoon granulated sugar
- ½ cup cold unsalted butter, cut into small cubes
- 3 to 4 tablespoons ice water
- 1 tablespoon vodka (optional)
- 1 medium sugar pumpkin (about 3 to 4 pounds)
- 1 tablespoon olive oil
- 2 cups homemade pumpkin puree (or one 15-ounce can)
- 1 ¼ cups heavy cream
- ¾ cup packed light brown sugar
- 2 large eggs, room temperature
- 1 large egg yolk, room temperature
- 2 teaspoons ground cinnamon
- 1 teaspoon ground ginger
- ½ teaspoon ground nutmeg (freshly grated if possible)
- ¼ teaspoon ground cloves
- ½ teaspoon salt
- 1 teaspoon vanilla extract
Instructions
- Preheat oven to 400°F (200°C). Cut sugar pumpkin in half, scoop out seeds and pulp, rub cut sides with olive oil, and place face-down on a lined baking sheet. Roast for 45 to 60 minutes until tender. Let cool, then scoop out flesh.
- Transfer roasted pumpkin flesh to a blender or food processor. Blend until completely smooth, adding a tablespoon of water if needed. Set aside 2 cups for the pie.
- In a food processor, pulse flour, salt, and sugar. Add cold butter cubes and pulse until mixture resembles coarse meal with pea-sized butter pieces. Add vodka and 3 tablespoons ice water, pulse until dough comes together. Shape into a disc, wrap in plastic, and refrigerate for at least 1 hour.
- On a floured surface, roll dough into a 12-inch circle about ⅛-inch thick. Transfer to a 9-inch pie dish, trim and crimp edges. Prick bottom with a fork, line with parchment, and fill with pie weights. Bake at 375°F (190°C) for 15 minutes, remove weights, and bake another 5 to 7 minutes until lightly golden.
- In a large bowl, whisk together pumpkin puree, heavy cream, brown sugar, eggs, egg yolk, cinnamon, ginger, nutmeg, cloves, salt, and vanilla until smooth and uniform.
- Place blind-baked crust on a baking sheet. Pour filling into crust. Bake at 375°F (190°C) for 15 minutes, then reduce temperature to 350°F (175°C) and bake for 35 to 45 minutes more until edges are set and center has a slight jiggle. Cool completely on a wire rack.
Notes
Blind baking the crust is essential to avoid a soggy bottom. Do not overbake the filling; it should have a slight jiggle in the center when done. For best flavor, bake the pie a day ahead and let it cool completely before refrigerating. The vodka in the crust helps keep it tender without making it tough.
Nutrition
- Serving Size: 1 slice
- Calories: 385
- Sugar: 24
- Sodium: 310
- Fat: 22
- Saturated Fat: 13
- Carbohydrates: 43
- Fiber: 3
- Protein: 6
Keywords: pumpkin pie, homemade pumpkin pie, from scratch, fall dessert, Thanksgiving pie, sugar pumpkin, pie crust, custard pie


