My niece Clara asked why I couldn’t just skip the oven. She was eight, standing on a chair in my kitchen, watching me pull out mixing bowls for what I thought would be a complicated pumpkin cheesecake. I started to explain why that wouldn’t work — then stopped. Honestly, I had no good reason. I was about to lecture her on the importance of a water bath and proper cooling times when she pointed at the graham crackers and said, “Those are already cooked, right?” Out of the mouths of babes, I tell you.
So I tried it. I crushed the crackers, mixed the butter, and let her press the crust into the pan with her tiny, determined hands. I was fully prepared to toss the whole thing and start over. But when I pulled the pan from the fridge the next morning, the bars had set perfectly. The filling was creamy, the crust held together, and Clara looked at me like she’d just discovered fire. I mean, I’ve been cooking for years, and she taught me something in five minutes. That moment stuck with me, and these easy no-bake pumpkin cheesecake bars were born from a kid’s simple logic and my own stubbornness. Maybe you’ve been there — so sure about how something has to be done that you miss a simpler way. These bars are that simpler way, and they’re absolutely perfect for fall.
Why You’ll Love This Recipe
These easy no-bake pumpkin cheesecake bars have become my go-to for every fall gathering, and honestly, I don’t see that changing anytime soon. They solve so many problems at once, especially if you’re feeding a family on a sensible budget.
- Quick & Easy: Comes together in under 20 minutes of active time. No oven, no fuss, no watching a timer.
- Simple Ingredients: You probably have most of these in your pantry right now. No fancy grocery trips needed.
- Perfect for Fall Gatherings: Great for Thanksgiving, potlucks, or just a Tuesday night treat that feels special.
- Crowd-Pleaser: Kids love the creamy texture, and adults appreciate the pumpkin flavor without the work of a traditional cheesecake.
- Unbelievably Delicious: The texture is silky, the crust is buttery, and the pumpkin spice hits just right.
What makes these bars different from other pumpkin desserts? It’s the technique. By using cream cheese at room temperature and letting the bars chill fully overnight, you get a texture that rivals any baked cheesecake. No cracks, no water bath, no stress. Plus, they reheat beautifully — well, they don’t need reheating, but leftovers keep for days in the fridge. This recipe isn’t just good; it’s the kind that makes you close your eyes after the first bite. It’s comfort food reimagined — faster, easier, but with the same soul-soothing satisfaction. Perfect for impressing guests without stress, or turning a simple fall evening into something memorable.
What Ingredients You Will Need
This recipe uses simple, wholesome ingredients to deliver bold pumpkin flavor and that signature creamy texture without the fuss. Most are pantry staples, and I’ve included substitution notes where they matter most.
- Graham cracker crumbs, 2 cups (about 16 full sheets, crushed) — I recommend using a food processor for even crumbs, but a rolling pin and a zip-top bag work fine too.
- Unsalted butter, ½ cup (1 stick), melted — Salted butter works if you reduce the added salt slightly, but unsalted gives you more control.
- Granulated sugar, ¼ cup, for the crust — Adds just enough sweetness to balance the buttery crumbs.
- Cream cheese, 16 ounces (two 8-ounce blocks), softened to room temperature — This is non-negotiable for a smooth filling. Cold cream cheese will leave you with lumps.
- Pumpkin puree, 1 cup (not pumpkin pie filling) — Look for 100% pure pumpkin. Libby’s is my go-to brand for consistent texture.
- Powdered sugar, 1 cup — Dissolves easily into the filling without grittiness.
- Heavy cream, ½ cup — Adds richness and helps the filling set. You can substitute with full-fat coconut cream for a dairy-free option.
- Pumpkin pie spice, 2 teaspoons — Store-bought is fine, but I make my own with cinnamon, nutmeg, ginger, and cloves. It’s fresher and you can adjust the ratios.
- Vanilla extract, 1 teaspoon — Pure vanilla adds depth; imitation works in a pinch.
- Salt, ¼ teaspoon — Balances the sweetness and brightens the pumpkin flavor.
For the topping (optional but recommended):
- Whipped cream, 1 cup — Homemade or store-bought. I like to add a pinch of cinnamon to mine.
- Caramel sauce, for drizzling — Store-bought works great, or make your own with brown sugar and butter.
Ingredient selection tip: Make sure your pumpkin puree is thick and not watery. If it looks runny, blot it with a paper towel before mixing. This prevents the filling from being too soft to set.
Equipment Needed
You don’t need much for these easy no-bake pumpkin cheesecake bars, and that’s part of the beauty. Here’s what you’ll want on hand:
- 9×9-inch baking pan — A metal or glass pan works. If you use glass, just be gentle when cutting the bars.
- Parchment paper — Lining the pan makes lifting the bars out a breeze. Leave some overhang on two sides.
- Mixing bowls — One medium for the crust, one large for the filling.
- Electric hand mixer or stand mixer — You can whisk by hand, but a mixer gives you that silky smooth texture without arm fatigue.
- Food processor or rolling pin — For crushing graham crackers. I’ve used both, and the food processor is faster, but the rolling pin method is oddly satisfying.
- Spatula — For spreading the filling evenly. A rubber spatula works best.
- Measuring cups and spoons — Precision matters here, especially for the cream cheese and pumpkin.
Budget-friendly tip: If you don’t have a 9×9 pan, an 8×8 works too — your bars will just be a little thicker. And if you don’t have parchment paper, you can grease the pan well with butter, just be careful when cutting.
Preparation Method
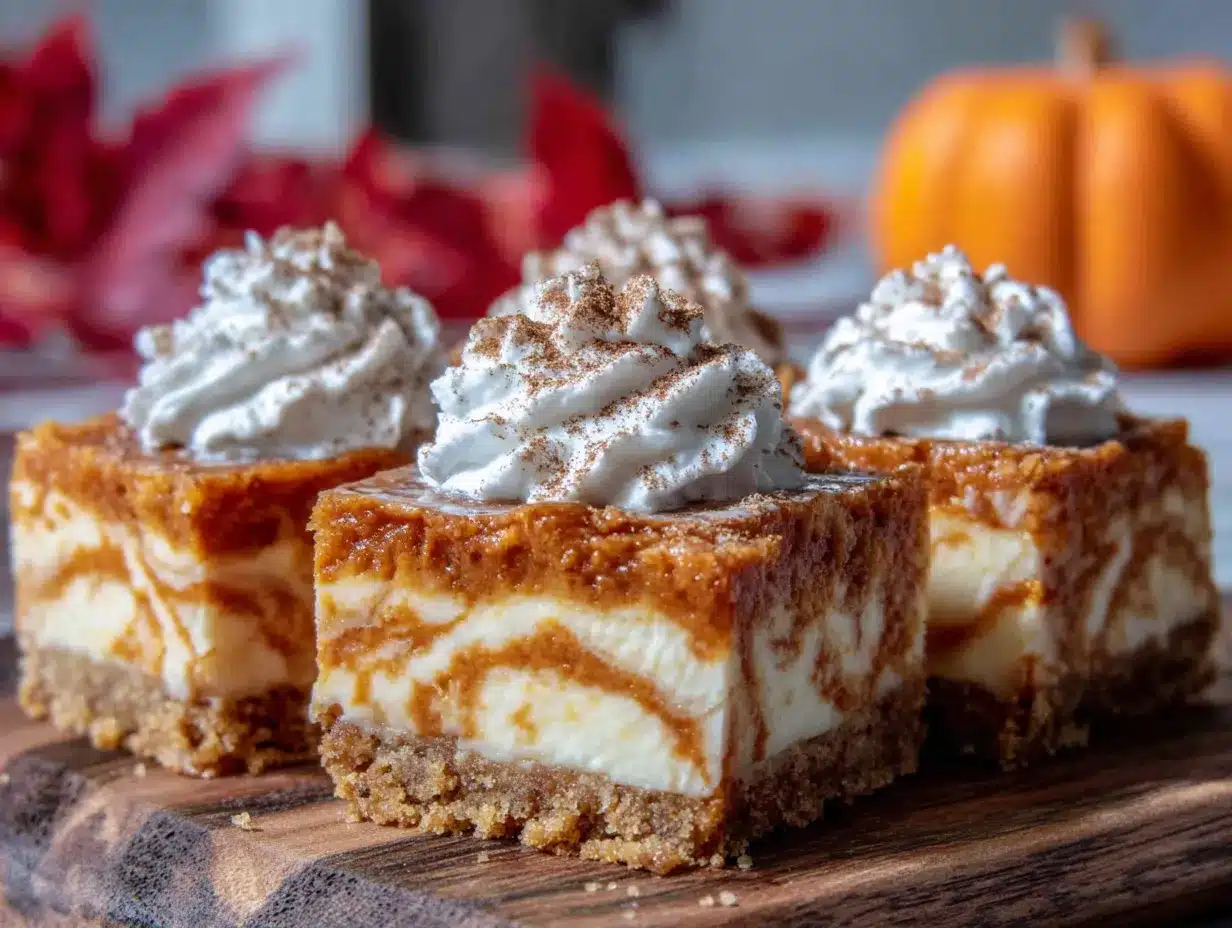
Let me walk you through this step by step. I’ve made these bars more times than I can count, and these are the exact steps that work every time.
-
Prepare the pan. Line your 9×9-inch baking pan with parchment paper, leaving about 2 inches of overhang on two opposite sides. This creates handles for lifting the bars out later. Set the pan aside.
-
Make the crust. In a medium bowl, combine 2 cups of graham cracker crumbs with ¼ cup of granulated sugar. Pour in ½ cup of melted unsalted butter and stir until the mixture looks like wet sand. Every crumb should be coated. Press this mixture firmly into the bottom of your prepared pan. I use the bottom of a measuring cup to really compact it. Pop the pan in the fridge while you make the filling.
-
Soften the cream cheese. This is the most important step. Take your cream cheese out of the fridge at least 30 minutes before you start. If you forget (I have, many times), cut it into cubes and microwave it in 10-second bursts until it’s soft to the touch but not warm. Trust me, lumps in cheesecake filling are no fun.
-
Beat the cream cheese. In a large mixing bowl, beat the softened cream cheese with an electric mixer on medium speed until it’s smooth and fluffy, about 2 minutes. Scrape down the sides of the bowl with a spatula halfway through.
-
Add the pumpkin and sugar. Add 1 cup of pumpkin puree, 1 cup of powdered sugar, 2 teaspoons of pumpkin pie spice, 1 teaspoon of vanilla extract, and ¼ teaspoon of salt. Beat on low speed until combined, then increase to medium and beat for another minute. The mixture should be thick and creamy, with a beautiful orange color.
-
Whip the cream. In a separate bowl (or using the same mixer if you wipe the beaters), pour in ½ cup of heavy cream. Beat on high speed until stiff peaks form. This takes about 2-3 minutes. You’ll know it’s ready when you lift the beaters and the cream holds its shape without drooping.
-
Fold it together. Gently fold the whipped cream into the cream cheese mixture. Use a spatula and a light hand — you want to incorporate the cream without deflating it. Fold until you don’t see any white streaks. The filling should be light and airy.
-
Assemble the bars. Pour the filling over the chilled crust. Spread it evenly with your spatula, getting into all the corners. Give the pan a gentle tap on the counter to release any air bubbles.
-
Chill. Cover the pan with plastic wrap and refrigerate for at least 6 hours, but overnight is best. The bars need that time to set properly. If you’re in a rush, 4 hours will work, but they’ll be softer.
-
Cut and serve. Once set, use the parchment overhang to lift the entire block out of the pan. Place it on a cutting board. Use a sharp knife to cut into 16 squares (4 rows by 4 rows). Wipe the knife clean between cuts for neat edges. Top with whipped cream and a drizzle of caramel sauce if you like.
Cooking Tips & Techniques
I’ve learned a few things the hard way so you don’t have to. Here are my best tips for perfect easy no-bake pumpkin cheesecake bars every time.
Don’t skip the parchment paper. I once thought I could just grease the pan and call it done. Big mistake. The bars stuck to the corners, and I ended up with a crumbled mess. Parchment overhang is your best friend here.
Room temperature cream cheese is non-negotiable. I know I said it already, but it’s that important. Cold cream cheese creates lumps that no amount of beating will fix. If you’re short on time, cut it into cubes and let it sit on the counter for 15 minutes, or use the microwave method I mentioned earlier.
Press the crust firmly. A loose crust will crumble when you cut the bars. Use the bottom of a glass or a measuring cup to really compact it. You want it to feel solid, like a cookie crust.
Let the bars chill overnight. I know it’s tempting to dig in after a few hours, but the texture improves dramatically with time. The filling firms up, the flavors meld, and the crust sets completely. Overnight is the sweet spot.
Use a sharp knife for cutting. A dull knife will drag through the filling and mess up your edges. Run the knife under hot water, wipe it dry, then cut. Repeat between cuts for clean, beautiful squares.
If your filling seems too soft, don’t panic. It might be because your pumpkin puree was watery or your cream cheese wasn’t fully softened. Just give it more time in the fridge — it will set eventually.
Variations & Adaptations
These easy no-bake pumpkin cheesecake bars are wonderfully adaptable. Here are some ways to make them your own.
Gluten-free version: Use gluten-free graham crackers or crushed gluten-free cookies for the crust. The filling is naturally gluten-free, so this swap is simple and works perfectly.
Dairy-free option: Substitute the cream cheese with a dairy-free alternative (I like Kite Hill’s version) and use full-fat coconut cream instead of heavy cream. The texture will be slightly different but still delicious.
Extra pumpkin spice kick: Add an extra teaspoon of pumpkin pie spice to the filling, or sprinkle a little cinnamon on top before serving. My husband loves this version — he says it tastes like fall in a bar.
Chocolate twist: Swap the graham cracker crust for crushed chocolate cookies (like Oreos, minus the filling). The chocolate pairs beautifully with the pumpkin and cream cheese.
Maple pecan topping: Instead of caramel sauce, drizzle with pure maple syrup and sprinkle with toasted pecans. This is my personal favorite variation for Thanksgiving — it feels extra special.
Lower sugar option: Reduce the powdered sugar to ¾ cup and skip the caramel drizzle. The pumpkin and spice still shine through, and the bars are plenty sweet for most palates.
Serving & Storage Suggestions
These bars are best served cold, straight from the fridge. The texture is firm but creamy, and the flavors are at their peak when chilled.
Presentation ideas: Cut the bars into neat squares and arrange them on a platter. Top each with a dollop of whipped cream, a drizzle of caramel sauce, and a light dusting of cinnamon or nutmeg. For a prettier look, use a piping bag for the whipped cream.
What to serve with them: A warm cup of coffee or spiced apple cider is the perfect pairing. For a dessert spread, serve alongside apple crisp or a simple pumpkin bread. They also work great on a Thanksgiving dessert table next to pecan pie.
Storage instructions: Store the bars in an airtight container in the refrigerator for up to 5 days. The crust will stay firm, and the filling will remain creamy. I actually think they taste better on day two, after the flavors have had more time to meld.
Freezing tips: These bars freeze beautifully. Wrap individual squares in plastic wrap, then place them in a freezer-safe bag or container. They’ll keep for up to 3 months. To thaw, transfer a bar to the fridge overnight or let it sit at room temperature for about 20 minutes.
Reheating note: These are a no-bake dessert, so no reheating needed. But if you like a slightly softer texture, let the bars sit at room temperature for 10-15 minutes before serving.
Nutritional Information & Benefits
Here’s the approximate nutritional breakdown for one bar (based on 16 servings, without optional toppings):
- Calories: 220
- Fat: 14g
- Carbohydrates: 22g
- Protein: 3g
- Sugar: 16g
- Fiber: 1g
These numbers are estimates and will vary based on your specific ingredients and any additions.
Health benefits: Pumpkin is packed with vitamin A, which supports eye health and immune function. It’s also a good source of fiber and antioxidants. The cream cheese provides calcium and protein, while the graham cracker crust offers a little energy from carbohydrates. Of course, this is still a dessert, but it’s one with a few redeeming qualities.
Dietary considerations: This recipe can easily be made gluten-free or dairy-free (see variations above). It contains dairy and gluten in its standard form, so be mindful of allergies. The bars are nut-free as written, making them a safe option for school events or gatherings.
From my perspective, these bars are a treat worth making. They satisfy that pumpkin craving without the fuss of baking, and they’re portion-controlled, which helps with mindful eating. I always feel good about serving them to my family.
Conclusion
These easy no-bake pumpkin cheesecake bars have become a staple in my kitchen, and I think they deserve a spot in yours too. They started with a kid’s simple question and turned into a recipe that saves time, money, and stress — all while delivering incredible flavor. The creamy pumpkin filling, the buttery graham cracker crust, and the optional caramel drizzle come together in a dessert that feels fancy but takes almost no effort.
I encourage you to make these your own. Swap the crust, add a topping, or adjust the spice level to match your taste. That’s the beauty of a simple recipe like this — it’s a foundation for your creativity. And if you have kids, let them help. Clara still talks about “her” cheesecake bars, and honestly, that makes me smile every time.
I’d love to hear how yours turn out. Drop a comment below with your favorite variation, or share a photo of your bars on social media. Tag me so I can see your creation! And if you have a picky eater at home, I promise these will win them over. Happy fall baking, friends.
Frequently Asked Questions
Can I use pumpkin pie filling instead of pumpkin puree?
No, I wouldn’t recommend it. Pumpkin pie filling is already sweetened and spiced, which will throw off the balance of this recipe. Stick with 100% pure pumpkin puree for the best results.
How long do these bars need to chill?
At least 6 hours, but overnight is ideal. The longer they chill, the firmer and cleaner the slices will be. If you’re in a hurry, 4 hours will work, but they’ll be softer.
Can I make these bars vegan?
Yes, with a few swaps. Use dairy-free cream cheese, full-fat coconut cream instead of heavy cream, and a vegan butter substitute for the crust. The texture will be slightly different but still delicious.
Why is my filling too soft?
This usually happens if your cream cheese wasn’t fully softened or if your pumpkin puree was watery. Make sure your cream cheese is at room temperature, and blot your pumpkin puree with a paper towel if it looks runny. Also, give the bars more time to chill.
Can I freeze these bars?
Absolutely. Wrap individual squares in plastic wrap and store them in a freezer-safe bag for up to 3 months. Thaw in the fridge overnight or at room temperature for 20 minutes before serving.
Pin This Recipe!
Easy No-Bake Pumpkin Cheesecake Bars: Best Fall Dessert
These easy no-bake pumpkin cheesecake bars are the perfect fall dessert with a creamy pumpkin filling, buttery graham cracker crust, and no oven required. They come together in under 20 minutes of active time and are a crowd-pleaser for any gathering.
- Prep Time: 20 minutes
- Cook Time: 0 minutes
- Total Time: 6 hours 20 minutes (includes chilling time)
- Yield: 16 servings 1x
- Category: Dessert
- Cuisine: American
Ingredients
- 2 cups graham cracker crumbs (about 16 full sheets, crushed)
- ½ cup (1 stick) unsalted butter, melted
- ¼ cup granulated sugar
- 16 ounces (two 8-ounce blocks) cream cheese, softened to room temperature
- 1 cup pumpkin puree (not pumpkin pie filling)
- 1 cup powdered sugar
- ½ cup heavy cream
- 2 teaspoons pumpkin pie spice
- 1 teaspoon vanilla extract
- ¼ teaspoon salt
- 1 cup whipped cream (optional, for topping)
- Caramel sauce for drizzling (optional)
Instructions
- Line a 9×9-inch baking pan with parchment paper, leaving about 2 inches of overhang on two opposite sides. Set aside.
- In a medium bowl, combine graham cracker crumbs and granulated sugar. Pour in melted butter and stir until the mixture looks like wet sand. Press firmly into the bottom of the prepared pan using the bottom of a measuring cup. Refrigerate while making the filling.
- In a large mixing bowl, beat the softened cream cheese with an electric mixer on medium speed until smooth and fluffy, about 2 minutes. Scrape down the sides halfway through.
- Add pumpkin puree, powdered sugar, pumpkin pie spice, vanilla extract, and salt. Beat on low speed until combined, then increase to medium and beat for another minute until thick and creamy.
- In a separate bowl, beat heavy cream on high speed until stiff peaks form, about 2-3 minutes.
- Gently fold the whipped cream into the cream cheese mixture using a spatula until no white streaks remain. The filling should be light and airy.
- Pour the filling over the chilled crust and spread evenly. Tap the pan gently on the counter to release air bubbles.
- Cover with plastic wrap and refrigerate for at least 6 hours, preferably overnight.
- Once set, use the parchment overhang to lift the block out of the pan. Place on a cutting board and cut into 16 squares (4 rows by 4 rows) with a sharp knife, wiping the knife clean between cuts.
- Top with whipped cream and caramel sauce if desired. Serve cold.
Notes
For best results, use room temperature cream cheese and chill the bars overnight. If pumpkin puree is watery, blot with a paper towel before mixing. For clean cuts, run the knife under hot water and wipe dry between cuts. Bars can be frozen for up to 3 months.
Nutrition
- Serving Size: 1 bar
- Calories: 220
- Sugar: 16
- Fat: 14
- Carbohydrates: 22
- Fiber: 1
- Protein: 3
Keywords: no-bake pumpkin cheesecake bars, easy pumpkin dessert, fall dessert, pumpkin cheesecake, no-bake dessert


