My neighbor wasn’t trying to impress anyone. I’d stopped by to borrow a whisk—mine had mysteriously vanished into the back of a drawer—and the smell of vanilla and sugar hit me before I even made it past her front door. It was a Tuesday afternoon in October, and her kitchen looked like a tiny ghost had exploded in the most delightful way possible. There were little white puffs everywhere, piped into the cutest ghost shapes I had ever seen, sitting on parchment paper like they were waiting for a party that hadn’t started yet.
“Oh, those?” she said, waving her hand like it was nothing. “Just some light ghost-shaped meringue cookies. My kids wanted something spooky but not scary.” She was wearing an old t-shirt with a coffee stain on the sleeve, and she had flour—well, powdered sugar—on her cheek. Honestly, I stood there in her doorway for a solid minute just staring at those tiny ghosts. They were impossibly light, barely there, like they might float away if I blinked too hard. She handed me the whisk and said, “Take some. I made too many anyway.”
I grabbed a handful, and let me tell you, that first bite was something else. They dissolved on my tongue, sweet and airy, with just the faintest hint of vanilla. No crunch, no chew—just a little puff of happiness that disappeared way too fast. I asked her for the recipe, and she shrugged and told me it was just three ingredients. Three! I couldn’t believe it. Maybe you’ve been there, standing in someone else’s kitchen, realizing you’ve just discovered your new favorite thing to make. That’s exactly how I felt. I went home that day with a borrowed whisk, a handful of ghost cookies, and a recipe that has become my go-to for every Halloween party, spooky movie night, or random Tuesday when I need a little magic in my life.
Why You’ll Love This Recipe
These light ghost-shaped meringue cookies aren’t just adorable—they are genuinely one of the easiest things you will ever make. I have tested this recipe at least a dozen times, tweaking the baking time and the piping technique to get those perfect little ghosts every single time. Here is why I think you will fall in love with them too:
- Quick & Easy: The active prep time is only about 15 minutes. The oven does most of the work after that. Perfect for a last-minute Halloween treat or a fun weekend project with kids.
- Simple Ingredients: You only need three things: egg whites, sugar, and vanilla extract. That’s it. No fancy grocery store runs, no obscure ingredients you will never use again.
- Perfect for Halloween: These are the cutest addition to any spooky spread. They look incredible on a dessert table, and kids absolutely lose their minds over them.
- Crowd-Pleaser: I have brought these to potlucks, school parties, and family gatherings. They disappear faster than anything else on the table. People cannot resist their charm.
- Unbelievably Delicious: They are light as air, sweet but not cloying, with a delicate vanilla flavor. They feel indulgent without being heavy—exactly the kind of treat that makes you feel good about eating a handful.
What makes these different from other meringue recipes is the technique. I whip the egg whites to stiff peaks with a little patience and a lot of attention, which gives the cookies that perfect, melt-in-your-mouth texture. Plus, shaping them into ghosts adds a playful twist that makes them instantly recognizable and totally irresistible. Honestly, this is not just another cookie recipe—it is the one that will have your friends asking, “Can you make those again?” Trust me, I know from experience.
What Ingredients You Will Need
This recipe uses the simplest ingredients to create something that feels almost magical. Here is everything you need, along with a few notes from my own kitchen trials.
- 3 large egg whites, room temperature: Fresh eggs work best. The room temperature part is important—cold egg whites do not whip up as well. I usually take my eggs out of the fridge about 30 minutes before I start. If you are in a hurry, place the eggs in a bowl of warm water for 5 minutes.
- ¾ cup (150g) granulated white sugar: Regular white sugar is perfect here. Do not use powdered sugar or brown sugar—they will change the texture and the cookies may not hold their shape. I have tried both, and trust me, stick with granulated. It dissolves beautifully into the egg whites as you whip them.
- 1 teaspoon pure vanilla extract: Pure vanilla makes a difference. Imitation vanilla works in a pinch, but the flavor is not as clean and lovely. I recommend Nielsen-Massey or Simply Organic for a really nice vanilla that shines in such a simple recipe.
- Optional: A pinch of cream of tartar (about ⅛ teaspoon): This is not strictly necessary, but it helps stabilize the egg whites and makes them less likely to deflate. I use it every time because it gives me more confidence during the whipping process. You can substitute with a few drops of lemon juice or white vinegar.
- Optional: Black gel food coloring or mini chocolate chips for the ghost faces: To make these truly ghost-shaped, you will want to add little eyes and mouths. I prefer black gel food coloring and a tiny paintbrush for precision. Mini chocolate chips work too, but they can sink into the meringue if you do not press them in gently right after piping.
And that is genuinely it. Three main ingredients, one optional stabilizer, and a little decoration. These are the kind of pantry staples I always keep on hand, which means I can whip up a batch of light ghost-shaped meringue cookies whenever the mood strikes—or whenever Halloween sneaks up on me, which it does every single year.
Equipment Needed
You do not need a professional kitchen to make these cookies, but a few key tools will make the process much smoother. Here is what I use:
- Electric stand mixer or hand mixer: You can whip egg whites by hand with a whisk, but I will be honest—it takes forever and your arm will ache. A stand mixer with the whisk attachment is my favorite, but a hand mixer works perfectly too. I have a KitchenAid stand mixer that I adore, but my old hand mixer from college did the job for years.
- Large mixing bowl: Make sure it is completely clean and dry. Any trace of grease or moisture will prevent the egg whites from whipping properly. Glass or metal bowls work best—plastic can sometimes retain oils.
- Piping bag with a round tip: A piping bag gives you control over the shape. I use a Wilton #12 round tip for these ghosts. If you do not have a piping bag, you can use a sturdy zip-top bag with a corner snipped off. It is not as precise, but it works in a pinch.
- Baking sheet lined with parchment paper: Parchment paper is non-negotiable here. The meringues will stick to wax paper or a greased pan. I use unbleached parchment paper for everything.
- Small paintbrush (for the faces): If you are using gel food coloring, a tiny paintbrush (dedicated to food use) makes adding the faces so much easier. I bought a set of food-safe brushes on Amazon for a few dollars.
- Cooling rack: After baking, the meringues need to cool completely on the baking sheet before you move them. A cooling rack helps speed up the process if you are making multiple batches.
The total cost for these tools is minimal if you already bake, and the alternatives are budget-friendly. I have made these with a hand mixer and a zip-top bag, and they turned out just as cute.
Preparation Method
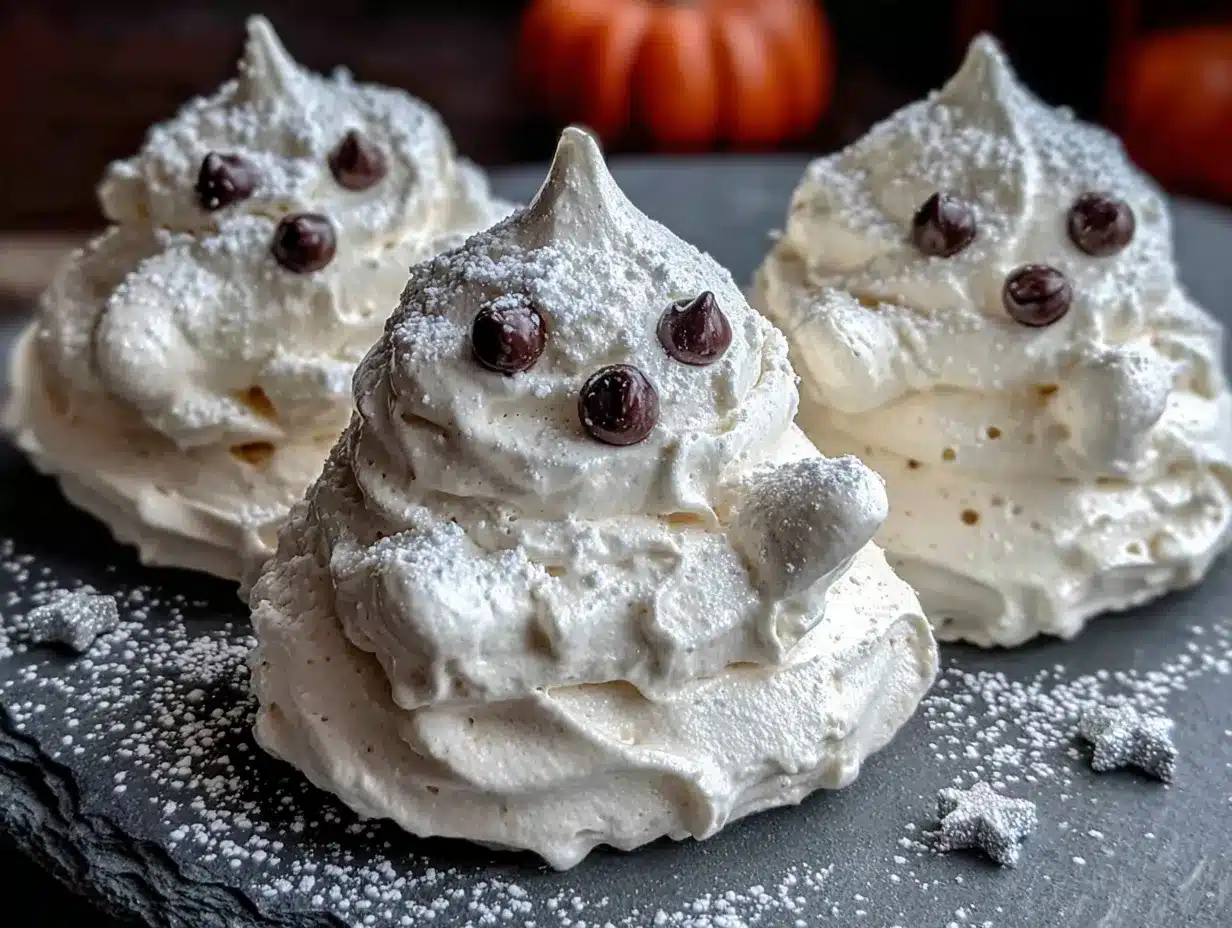
Making these light ghost-shaped meringue cookies is a process that rewards patience and attention. Here is exactly how I do it, step by step, with all the little details I have learned along the way.
- Preheat your oven to 200°F (93°C). Yes, this is very low. We are drying the meringues out, not baking them. Line a large baking sheet with parchment paper and set it aside.
- Prepare your equipment. Make sure your mixing bowl and whisk attachment are completely clean and dry. I wipe mine down with a little white vinegar on a paper towel to remove any grease, then dry thoroughly. This step matters more than you think—I have had a batch fail because my bowl had a tiny film of oil on it.
- Separate the eggs carefully. Crack your cold eggs and separate the whites from the yolks. Be very careful not to get any yolk in the whites—even a tiny bit will prevent them from whipping properly. I separate each egg into a small bowl first, then add the white to the main bowl. This way, if one yolk breaks, you have not ruined the whole batch.
- Let the egg whites come to room temperature. Pour the egg whites into your mixing bowl and let them sit for about 20-30 minutes. Room temperature egg whites whip up higher and hold more air. I usually do this step first and prep everything else while I wait.
- Start whipping on low speed. Begin mixing the egg whites on low speed for about 2 minutes until they are foamy and bubbly. If you are using cream of tartar, add it now. The mixture will look like a frothy bath—not quite white yet.
- Gradually add the sugar. With the mixer running on medium speed, add the sugar one tablespoon at a time. I know this feels tedious, but it is crucial. Adding the sugar slowly allows it to dissolve completely into the egg whites. If you dump it all in at once, you will end up with gritty meringues. Each tablespoon takes about 15-20 seconds. The whole process takes about 5 minutes.
- Add the vanilla. Once all the sugar is incorporated, add the vanilla extract. Keep mixing on medium-high speed.
- Whip to stiff peaks. Increase the speed to high and whip until the meringue forms stiff, glossy peaks. This usually takes 5-7 minutes total from the time you start adding sugar. You will know it is ready when you lift the whisk attachment and the meringue stands up straight without drooping. The mixture should be thick, white, and shiny, like marshmallow fluff. Rub a little between your fingers—if it feels smooth and not gritty, the sugar has dissolved.
- Transfer to a piping bag. Fit your piping bag with the round tip and fold the top edge down over your hand to form a cuff. Spoon the meringue into the bag, being careful not to overfill. Twist the top of the bag closed and squeeze a small amount out to make sure the tip is clear.
- Pipe the ghosts. Hold the piping bag straight up and down, about ½ inch above the parchment paper. Squeeze gently to form a round base, then lift the bag straight up while continuing to squeeze. As you lift, pull the bag away to create a little peak on top—this becomes the ghost’s head. Each ghost should be about 1½ to 2 inches tall. Leave about 1 inch of space between each one because they do not spread much. I usually get about 24-30 ghosts from one batch.
- Add the faces. If you are using gel food coloring, dip a clean paintbrush into the black gel and carefully paint two little eyes and a mouth on each ghost. If you are using mini chocolate chips, gently press two chips for eyes and one for the mouth into the meringue right after piping. Work quickly—the meringue will start to form a skin if you wait too long.
- Bake for 60-75 minutes. Place the baking sheet in the preheated oven and bake for 60 minutes. Do not open the oven door during this time—the sudden temperature change can cause the meringues to crack. After 60 minutes, test one by gently touching it. It should feel dry and firm, and lift easily off the parchment paper. If it is still soft or sticky, bake for another 10-15 minutes.
- Turn off the oven and let them cool inside. This is my favorite trick. Once the meringues are done, turn off the oven and leave the door closed. Let them cool completely inside the oven for at least 1-2 hours, or even overnight. This helps them dry out completely and ensures that perfect, crisp texture.
- Store or serve. Once completely cool, carefully peel the ghosts off the parchment paper. They are very fragile, so handle them gently. Serve immediately or store in an airtight container.
Cooking Tips & Techniques
I have made these light ghost-shaped meringue cookies more times than I can count, and I have definitely learned a few things the hard way. Here are my best tips to help you avoid the mistakes I made.
Humidity is your enemy. Meringues are basically sugar and air, and sugar loves moisture. If it is a rainy or humid day, your meringues may turn out sticky or chewy instead of crisp. I learned this the hard way when I made a batch during a summer thunderstorm and they never fully dried out. Try to make these on a dry day, or run a dehumidifier in your kitchen if you have one.
Do not over-whip. I know I said to whip to stiff peaks, but there is a fine line between stiff and over-whipped. Over-whipped meringue looks grainy and curdled, and it will not pipe smoothly. If you see the mixture start to look dry or separated, stop immediately. You have gone too far. Start over with fresh egg whites—it is frustrating, but it is better than baking a failed batch.
Pipe with confidence. When I first started, I was so tentative with the piping bag that my ghosts looked like sad little blobs. You want to squeeze firmly and lift decisively. The peak on top is what makes them look like ghosts, so do not be shy about pulling the bag up at the end. If you mess up, just scrape the meringue back into the bowl and try again. No waste, no stress.
Let them cool completely. I cannot stress this enough. If you try to remove the meringues from the parchment paper while they are still warm, they will stick and break. Leaving them in the turned-off oven overnight is the safest bet. I have woken up to perfectly dry, perfectly shaped ghosts more times than I can count.
Work in batches if needed. If you have a small oven or only one baking sheet, pipe one batch at a time and keep the remaining meringue covered with plastic wrap. It will hold for a little while, but do not let it sit too long or it will start to deflate.
Variations & Adaptations
One of the best things about this recipe is how easily it adapts to different tastes and dietary needs. Here are a few variations I have tried and loved.
Vegan Meringue Ghosts: You can make these completely plant-based by using aquafaba—the liquid from a can of chickpeas. Substitute 3 tablespoons of aquafaba for each egg white. Whip it exactly the same way, adding cream of tartar for stability. The flavor is slightly different, but the texture is remarkably similar. I have served these to vegan friends and they were thrilled.
Flavor Variations: Vanilla is classic, but you can experiment with other extracts. Peppermint makes them perfect for Christmas, almond extract adds a lovely nutty note, and lemon extract gives a bright, citrusy twist. Start with ½ teaspoon and adjust to taste. For a more intense flavor, add a little finely grated lemon or orange zest along with the vanilla.
Colorful Ghosts: If plain white ghosts feel a little boring, add a few drops of gel food coloring to the meringue before piping. Pastel pink, light blue, or even a pale lavender would be adorable. Just fold the color in gently with a spatula after whipping—do not overmix or you will deflate the meringue.
Spooky Shapes: Not in the mood for ghosts? Use a different piping tip to create other shapes. A star tip makes cute little pumpkins or bats. You can also pipe simple rounds and call them “ghost clouds.” The recipe is forgiving enough to handle any shape you can dream up.
Gluten-Free and Dairy-Free: This recipe is naturally gluten-free and dairy-free, which makes it a great option for people with dietary restrictions. Just double-check your vanilla extract to make sure it is gluten-free—most are, but it is worth a quick look at the label.
Serving & Storage Suggestions
These light ghost-shaped meringue cookies are best served at room temperature, straight from the container. They are delicate and airy, so handle them gently. I like to arrange them on a platter with a few fake spiderwebs or plastic spiders for a fun Halloween presentation. They look amazing on a dessert table alongside other spooky treats like chocolate cupcakes or caramel apples.
For drinks, these pair beautifully with a warm cup of hot chocolate, a cozy pumpkin spice latte, or even a glass of cold milk. The sweetness of the meringue balances really well with the richness of the drink. I have also served them with a scoop of vanilla ice cream for a fun, crunchy topping—just crumble them over the top like a meringue cloud.
Storage: Store the meringues in an airtight container at room temperature. Do not refrigerate them—the moisture in the fridge will make them sticky and soft. They will stay crisp for about 5-7 days if stored properly. I use a glass jar with a tight-fitting lid, and I layer them with parchment paper to prevent them from bumping into each other and breaking.
Freezing: You can freeze these meringues for up to 2 months. Place them in a single layer in a freezer-safe container, with parchment paper between each layer. Thaw them at room temperature for about 15 minutes before serving. They may lose a tiny bit of crispness, but they will still be delicious.
One thing I have noticed is that these cookies actually taste better the next day. The flavors meld together, and the texture becomes even more delicate. So if you are planning a Halloween party, make them a day or two ahead of time. Your future self will thank you.
Nutritional Information & Benefits
These light ghost-shaped meringue cookies are surprisingly light on calories compared to most cookies. Here is the approximate nutritional breakdown for one ghost (based on a batch of 30):
- Calories: 20-25
- Total Fat: 0g
- Carbohydrates: 5g
- Sugar: 5g
- Protein: 0.5g
- Sodium: 5mg
These are essentially a fat-free treat, which makes them a great option for anyone watching their fat intake. The main ingredient is egg whites, which are a good source of protein and contain no cholesterol. The sugar content is moderate for a cookie, and since each ghost is so light, it is easy to enjoy a few without overindulging.
For anyone with dietary concerns, these cookies are naturally gluten-free, dairy-free, and nut-free. They are also low in sodium and contain no artificial preservatives. The optional cream of tartar is a natural byproduct of winemaking and is generally well-tolerated.
I love that I can offer these at parties without worrying about most common allergens. They feel indulgent and fun, but they are actually a pretty sensible choice for a sweet treat. That balance—feeling good about what you are eating while still enjoying something delicious—is exactly what I look for in a recipe.
FAQs
Why did my meringue cookies turn out sticky or chewy?
This usually happens because of humidity or under-baking. Meringues need a dry environment to crisp up properly. If it is a humid day, try running a dehumidifier or waiting for a drier day. Also, make sure you bake them long enough—they should feel completely dry and firm before you turn off the oven.
Can I use liquid food coloring instead of gel?
I do not recommend it. Liquid food coloring adds too much moisture to the meringue, which can make it deflate or turn out sticky. Gel or paste food coloring is much more concentrated and will not affect the texture. If you only have liquid, use just a drop or two and expect slightly softer results.
How do I know when the meringue is whipped enough?
You are looking for stiff, glossy peaks. When you lift the whisk attachment, the meringue should stand up straight without drooping. The mixture should be thick and white, like marshmallow fluff. Rub a little between your fingers—if it feels smooth and not gritty, the sugar has dissolved and you are good to go.
Can I make these ahead of time for a party?
Absolutely. In fact, I prefer making them a day or two in advance. They hold up beautifully in an airtight container at room temperature. Just make sure they are completely cool before you store them, and do not refrigerate them. They will stay crisp for about 5-7 days.
My ghosts lost their shape during baking. What went wrong?
This can happen if the meringue was not whipped to stiff enough peaks, or if you overmixed the batter. It can also happen if the oven temperature is too high. Make sure your oven is at exactly 200°F (93°C) and that you whip the egg whites until they are truly stiff. If your oven runs hot, use an oven thermometer to double-check the temperature.
Conclusion
These light ghost-shaped meringue cookies have become a staple in my kitchen, and I honestly cannot imagine a Halloween season without them. They are fun to make, adorable to look at, and absolutely delicious to eat. The fact that they only require three ingredients and come together in under 20 minutes of active time makes them a no-brainer for busy weeknights or last-minute party planning.
I hope you give them a try and make them your own. Add a little extra vanilla, pipe them into different shapes, or experiment with colors and flavors. The beauty of this recipe is how forgiving and flexible it is. And if you mess up a batch? Well, crumbled meringue makes a fantastic topping for ice cream or yogurt, so nothing is ever wasted.
I would love to hear how yours turn out. Drop a comment below and let me know if your ghosts had the perfect peak, or if you tried a fun variation I have not thought of. Share a photo on Pinterest and tag me—I love seeing your creations. Until next time, happy baking, and may your kitchen always smell like vanilla and sugar.
Pin This Recipe!
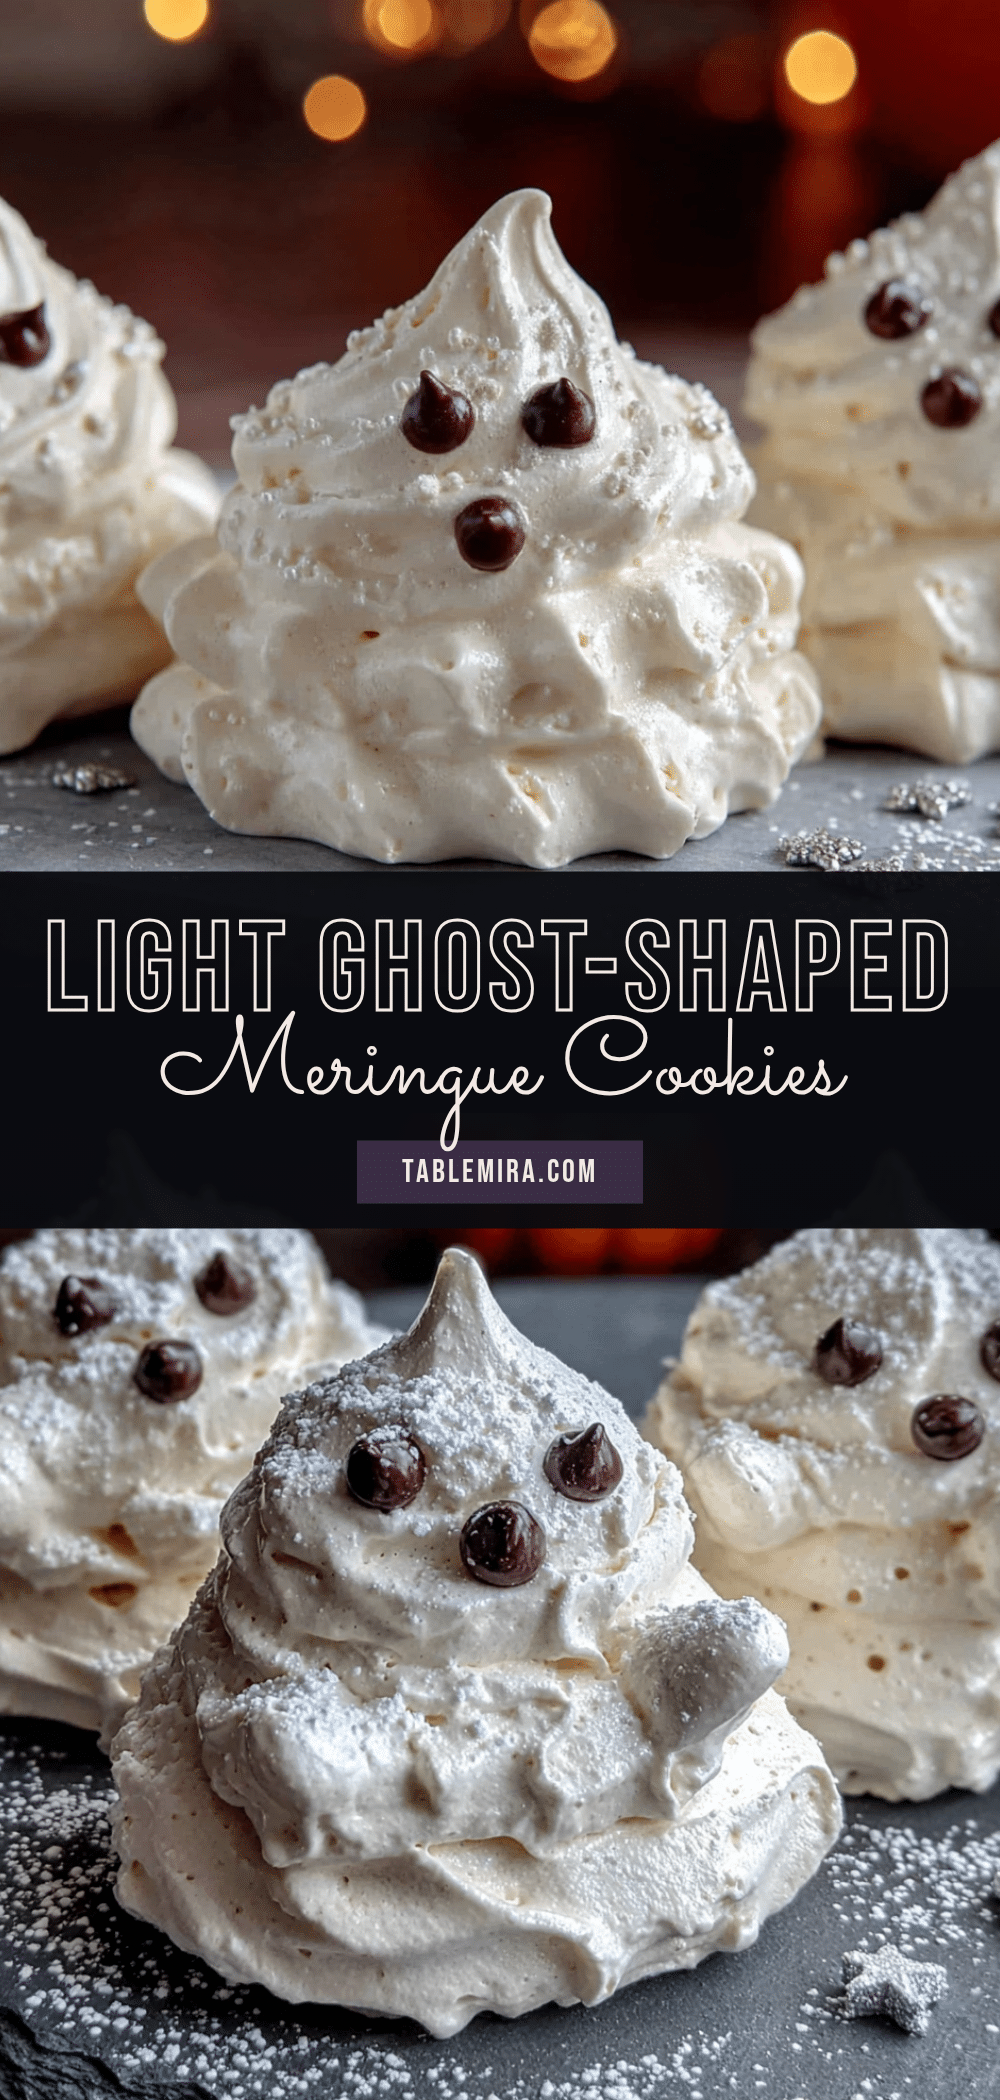
Light Ghost Meringue Cookies: Easy 3-Ingredient Recipe
These light ghost-shaped meringue cookies are adorable, easy to make with just three ingredients, and perfect for Halloween or any spooky occasion. They are airy, sweet, and melt in your mouth.
- Prep Time: 15 minutes
- Cook Time: 60-75 minutes
- Total Time: 1 hour 15 minutes to 1 hour 30 minutes (plus cooling time)
- Yield: 24-30 cookies 1x
- Category: Dessert
- Cuisine: American
Ingredients
- 3 large egg whites, room temperature
- ¾ cup (150g) granulated white sugar
- 1 teaspoon pure vanilla extract
- Optional: ⅛ teaspoon cream of tartar
- Optional: Black gel food coloring or mini chocolate chips for ghost faces
Instructions
- Preheat your oven to 200°F (93°C). Line a large baking sheet with parchment paper.
- Prepare your equipment: ensure mixing bowl and whisk attachment are completely clean and dry. Wipe with white vinegar if needed.
- Separate the eggs carefully, avoiding any yolk in the whites. Let egg whites come to room temperature (20-30 minutes).
- Start whipping egg whites on low speed for about 2 minutes until foamy. Add cream of tartar if using.
- Gradually add sugar one tablespoon at a time with mixer on medium speed, allowing each addition to dissolve (about 15-20 seconds per tablespoon).
- Add vanilla extract and continue mixing on medium-high speed.
- Increase speed to high and whip until stiff, glossy peaks form (5-7 minutes total). The meringue should stand up straight without drooping.
- Transfer meringue to a piping bag fitted with a round tip (e.g., Wilton #12).
- Pipe ghosts: hold bag straight up, squeeze to form a round base, then lift while squeezing to create a peak. Space about 1 inch apart.
- Add faces using black gel food coloring with a small paintbrush, or gently press mini chocolate chips for eyes and mouth.
- Bake for 60-75 minutes without opening the oven door. Test by touching one—it should feel dry and firm.
- Turn off oven and let meringues cool completely inside for 1-2 hours or overnight.
- Carefully peel ghosts off parchment paper. Serve immediately or store in an airtight container.
Notes
Humidity is the enemy—make on a dry day. Do not over-whip meringue; stop if it looks grainy. Pipe with confidence for best ghost shapes. Let cool completely in oven for best texture. Store in airtight container at room temperature for 5-7 days. Can be frozen for up to 2 months.
Nutrition
- Serving Size: 1 ghost cookie
- Calories: 2025
- Sugar: 5
- Sodium: 5
- Carbohydrates: 5
- Protein: 0.5
Keywords: meringue cookies, ghost cookies, Halloween cookies, 3-ingredient recipe, easy meringue, light cookies, spooky treats


