Let me tell you—these mummy hot dogs with crescent rolls are the Halloween recipe that actually delivers. I’ve tested this about six different ways, and this version is the one I keep coming back to. Here’s why it works:
- Comes together in under 25 minutes—from fridge to table. That’s faster than handing out candy to the first wave of trick-or-treaters.
- Only 3 main ingredients: hot dogs, crescent dough, and mustard. You probably already have them in your kitchen right now.
- Perfect for Halloween parties—kids go absolutely wild for them, but I’ve seen adults grab three at a time without blinking.
- No special skills required—if you can wrap a ribbon around a gift, you can wrap crescent dough around a hot dog.
- Endlessly customizable—swap the mustard eyes for ketchup, add cheese inside the wrap, or go full gourmet with fancy sausages.
What makes these different from every other mummy hot dog recipe out there? It’s the technique. Most recipes tell you to cut the crescent dough into thin strips, which sounds good but falls apart in practice. I found that tearing the dough instead of cutting it gives you those ragged edges that look way more authentic—like actual mummy bandages. Plus, the irregular strips crisp up better in the oven. I mean, honestly, I learned this after a batch where the strips kept breaking and I got frustrated. Best mistake I ever made in the kitchen.
These little guys are the kind of recipe that makes you feel like a Halloween hero without breaking a sweat. You know that feeling when you show up to a party with something that disappears in minutes? That’s what we’re going for here.
What Ingredients You Will Need
This recipe uses simple, everyday ingredients to deliver maximum Halloween fun with minimum effort. No fancy grocery trips needed—just grab these basics and you’re ready to go.
- 1 package (8 count) refrigerated crescent rolls (I prefer Pillsbury Original or Butter Flavor—the butter version gives a richer taste and crisps up beautifully)
- 8 hot dogs (standard size works best; I recommend Hebrew National or Oscar Mayer for consistent results—avoid jumbo or bun-length for easier wrapping)
- Mustard for eyes (yellow mustard gives the most classic mummy look, but honey mustard or Dijon work too—just make sure it’s thick enough to stay put)
- Optional: ketchup or sriracha for bloodshot eyes (adds a fun, gory twist for older kids and adults)
- Optional: shredded cheddar cheese (wrap inside the dough for a gooey surprise center)
- Optional: everything bagel seasoning (sprinkle on top before baking for extra crunch and flavor)
Ingredient tips from my kitchen to yours: Look for crescent rolls that come in the tube—not the sheet version. The perforated triangles make tearing into strips so much easier. If all you have is the sheet, you’ll need to cut it yourself with a pizza cutter. Also, check your hot dogs for any weird artificial colors if that matters to you—I’ve found that natural casing hot dogs hold their shape better during baking.
Substitution guidance: Use turkey or chicken hot dogs for a lighter option—just watch the baking time since they can dry out faster. For a vegetarian version, try plant-based hot dogs like Field Roast or Beyond Meat. Gluten-free crescent dough is available from brands like Pillsbury or Annie’s, but handle it gently since it’s more delicate. Dairy-free? Most crescent rolls contain butter, but you can find vegan puff pastry sheets and cut them into strips instead.
Equipment Needed
You don’t need much for this recipe, which is part of the beauty. Here’s what you’ll want on hand:
- Baking sheet (standard half-sheet pan works perfectly; line with parchment paper for easy cleanup)
- Parchment paper (non-stick foil also works, but parchment gives better browning on the bottom)
- Sharp knife or pizza cutter (for cutting dough if you’re not tearing it—I prefer tearing, but having a backup method helps)
- Small bowl (for mustard dipping or mixing glaze if you’re getting fancy)
- Pastry brush (optional, for brushing on egg wash or butter before baking)
- Cooling rack (optional but nice—keeps the bottoms from getting soggy)
Personal experience: I’ve made these with a cheap baking sheet that warped in the oven, and the mummies came out uneven. Spend the extra few bucks on a sturdy half-sheet pan—it makes a difference. Also, don’t skip the parchment paper. Trust me, cleaning baked-on mustard off a baking sheet is not how you want to spend your Halloween evening.
Preparation Method
Alright, let’s get into the nitty-gritty. I’ve broken this down step by step so you don’t miss anything. The whole process takes about 20 minutes from start to finish.
- Preheat your oven to 375°F (190°C). Line a baking sheet with parchment paper. This is non-negotiable for easy cleanup—I learned that the hard way after scraping mustard off a pan for twenty minutes.
- Open the crescent roll tube. Pop it open carefully—you know how those tubes can startle you. Unroll the dough and separate it along the perforated lines into 8 triangles. Place them on a cutting board or clean counter.
- Tear each triangle into 3-4 strips. Here’s the trick: instead of cutting with a knife, use your fingers to tear the dough into uneven strips. The ragged edges look way more like mummy bandages than clean cuts. Don’t worry if the strips are different widths—that actually adds to the mummy effect. You want some strips thin, some a bit thicker.
- Prepare your hot dogs. Pat them dry with a paper towel. This helps the dough stick better. If you’re adding cheese, use a small knife to cut a slit lengthwise down the center of each hot dog and stuff in a thin strip of cheddar.
- Wrap the mummies. Take one hot dog and start wrapping a strip of dough around it, leaving a small gap near the top for the face. Overlap the strips slightly as you go—this creates that layered bandage look. Don’t wrap too tightly or the dough won’t expand properly during baking. Leave about 1 inch (2.5 cm) of the hot dog exposed at the top for the face.
- Repeat with all 8 hot dogs. Place them on the prepared baking sheet, leaving about 2 inches (5 cm) between each one. They’ll puff up a bit, so give them room to breathe.
- Bake for 12-15 minutes. Keep an eye on them around the 10-minute mark. You want the dough to be golden brown and puffed up, but not dark brown. The hot dogs should be heated through and starting to split slightly at the ends.
- Let them cool for 2-3 minutes. This is important—the dough is hot and sticky right out of the oven. Give it a minute to set before adding the eyes.
- Add the eyes. Using a toothpick or the tip of a knife, dab two small dots of mustard onto the exposed hot dog area. For a spookier look, add a tiny dot of ketchup in the center of each mustard dot to create bloodshot eyes. Or use sriracha for an extra kick.
- Serve immediately. These are best eaten warm when the dough is still crispy. Arrange them on a platter with extra mustard for dipping and watch them disappear.
Sensory cues to watch for: The dough should feel slightly firm to the touch when done, and the hot dogs will be plump and starting to split. You’ll smell that buttery crescent roll aroma mixed with savory hot dog goodness—your kitchen will smell like a Halloween carnival.
Cooking Tips & Techniques
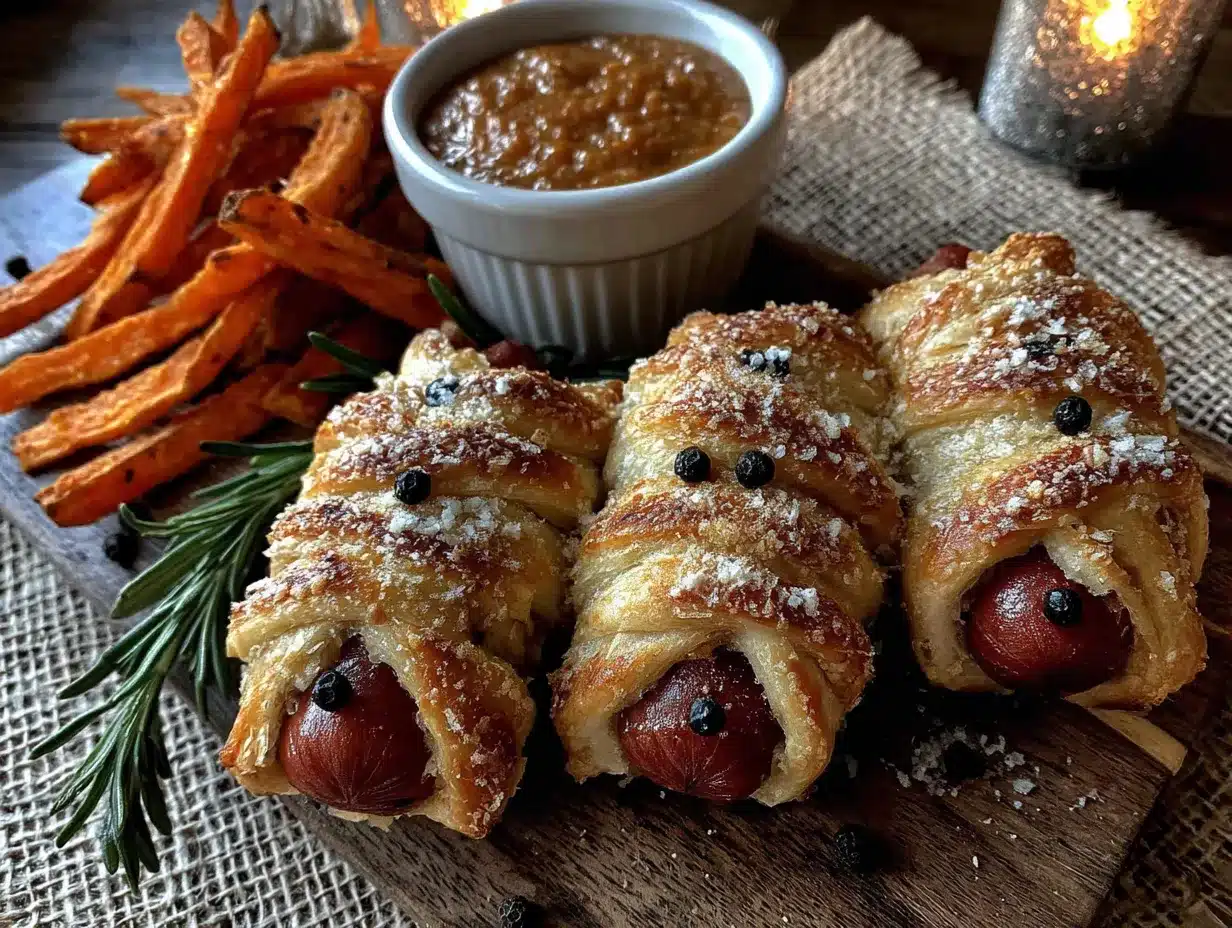
I’ve made these mummy hot dogs more times than I care to count, and I’ve picked up a few tricks along the way. Here’s what I wish someone had told me:
The dough tearing technique is everything. I mentioned this before, but it bears repeating. When you cut crescent dough with a knife, the edges are too clean and the strips look like pasta. Tearing gives you those organic, frayed edges that scream “mummy.” Plus, the irregular thickness means some parts get extra crispy while others stay soft—texture contrast makes these way more interesting to eat.
Don’t overwork the dough. Crescent roll dough is delicate. If you handle it too much, it gets tough and doesn’t puff up properly. Work quickly and gently. If the dough starts feeling sticky or warm, pop it in the fridge for 5 minutes.
Leave room for the face. I made the mistake of wrapping too much dough around the top of the hot dog on my first batch. You need that exposed area for the eyes—otherwise, you just have a dough blob with no personality. Aim for about 1 inch of exposed hot dog at the top.
Watch the baking time closely. Every oven runs differently. My first oven ran hot, and I burned a batch to a crisp. Start checking at 10 minutes. The dough should be golden brown, not dark brown. If the edges start browning too fast, tent the baking sheet loosely with foil.
Make ahead tip: You can assemble these up to 4 hours in advance. Just wrap the hot dogs, place them on the baking sheet, cover with plastic wrap, and refrigerate. Add 2-3 minutes to the baking time if they’re going in cold. Don’t add the eyes until after baking—mustard gets weird in the oven.
Multitasking strategy: While the mummies are baking, set up your dipping station. Put mustard, ketchup, ranch dressing, and maybe some queso in small bowls. Arrange them on a platter so everything’s ready when the mummies come out.
Variations & Adaptations
One of the best things about this recipe is how easy it is to customize. Here are some variations I’ve tried and loved:
Cheese-Stuffed Mummies: Cut a slit in each hot dog and stuff with a thin strip of cheddar or pepper jack before wrapping. The cheese melts into the hot dog and creates a gooey surprise center. I did this for a Halloween party and they were gone in five minutes.
Spicy Sriracha Mummies: Mix a teaspoon of sriracha into the mustard before adding the eyes. Or brush the hot dogs with sriracha before wrapping for a spicy kick. My husband loves these—he says they have “actual personality.”
Veggie Mummy Dogs: Use plant-based hot dogs and vegan crescent dough (check labels—some brands contain butter). The plant-based dogs can be a bit softer, so handle them gently during wrapping. Bake for the same time, but check at 10 minutes since they can dry out faster.
Breakfast Mummy Sausages: Swap hot dogs for breakfast sausage links and use buttermilk crescent rolls. Serve with maple syrup for dipping. I made these for a Halloween morning breakfast and the kids lost their minds.
Mini Mummy Bites: Cut hot dogs into thirds before wrapping. Use smaller strips of dough and bake for 8-10 minutes instead of 12-15. Perfect for little hands or appetizer platters.
Pizza Mummies: Brush the wrapped hot dogs with garlic butter and sprinkle with Italian seasoning before baking. Serve with marinara sauce for dipping. Tastes like pizza in mummy form.
Serving & Storage Suggestions
These mummy hot dogs are best served warm and fresh, but here’s how to handle them for different situations.
Serving temperature: Serve them straight from the oven while the dough is still crispy and the hot dogs are hot. If you’re serving them at a party, keep them warm in a 200°F (93°C) oven on a baking sheet, uncovered, for up to 30 minutes. Don’t cover them with foil or they’ll get soggy.
Presentation ideas: Arrange the mummies on a black platter or cutting board for maximum Halloween vibes. Add some “graveyard” decorations around them—pretzel sticks for bones, sliced olives for eyeballs, and maybe some green lettuce for “grass.” I once served them on a platter covered in black tissue paper and people thought I was a party planning genius.
What to serve alongside: These pair perfectly with finger foods. Try them with:
- Veggie sticks and ranch dip (for a healthy counterbalance)
- Halloween-themed fruit platter (orange slices, grapes, and apple slices cut into shapes)
- Pumpkin soup shooters (if you’re feeling fancy)
- Spider web dip (cream cheese with black olive spiders on top)
- Extra mustard, ketchup, and queso for dipping
Storage instructions: Leftover mummy hot dogs (if you have any—honestly, that’s rare) can be stored in an airtight container in the refrigerator for up to 3 days. The dough will soften overnight, so don’t expect them to be as crispy the next day.
Reheating methods: The best way to reheat is in the oven at 350°F (175°C) for 5-7 minutes. This brings back some of the crispiness. The microwave works in a pinch (30 seconds), but the dough will be soft and chewy. Air fryer fans, rejoice—350°F for 3-4 minutes gives you almost-fresh results.
Freezer instructions: You can freeze the assembled (unbaked) mummies on a baking sheet until solid, then transfer to a freezer bag. Bake from frozen at 375°F for 15-18 minutes. Add the eyes after baking. This is a game-changer for Halloween parties—just pull them out and bake when guests arrive.
Nutritional Information & Benefits
Let’s be real—these are not health food. They’re Halloween fun food, and that’s okay. But here’s the breakdown if you’re curious:
Per serving (1 mummy hot dog):
- Calories: approximately 280-320
- Protein: 10-12 grams
- Carbohydrates: 22-25 grams
- Fat: 18-20 grams
- Sodium: 700-800 mg
Health highlights: Hot dogs do provide some protein and iron, believe it or not. Crescent rolls give you a quick energy boost from carbohydrates. If you use turkey hot dogs, you’ll cut the fat and calories by about 30%. And if you add cheese, you get a little calcium boost. Look, I’m not saying these are nutritious—I’m saying they’re fun and sometimes that’s what matters.
Dietary considerations: These are not gluten-free (crescent rolls contain wheat flour) and not dairy-free (most crescent rolls have butter). But as I mentioned, there are alternatives if you need them. They are nut-free, egg-free (check your crescent roll brand), and can be made vegetarian with plant-based hot dogs.
Personal perspective: I’m a firm believer that food doesn’t have to be healthy every single time. Halloween comes once a year. Let the kids (and adults) enjoy these without guilt. Balance it out with a veggie-heavy dinner the next day. That’s how I handle it, anyway.
Frequently Asked Questions
Can I make these ahead of time for a party?
Absolutely. Assemble the mummies up to 4 hours ahead, keep them covered in the fridge, and bake just before serving. Add the eyes after baking. You can also freeze them unbaked for up to 3 months.
Why did my crescent dough fall apart while wrapping?
This usually happens if the dough is too warm or if you’re handling it too aggressively. If the dough feels sticky or soft, pop it in the fridge for 5-10 minutes. Also, try tearing instead of cutting—it gives you more control and the ragged edges actually look better.
Can I use puff pastry instead of crescent rolls?
Yes! Thaw puff pastry sheets, cut them into thin strips (about 1/2 inch wide), and wrap the same way. Puff pastry gives a flakier, more buttery result. Bake at 400°F (200°C) for 14-16 minutes. Just note that puff pastry expands more, so leave extra space between mummies on the baking sheet.
How do I get the mustard eyes to stay put?
Make sure the hot dog surface is dry before adding the mustard. You can also dab a tiny bit of mustard on the hot dog first, then add more on top—it acts like glue. For a more permanent solution, use candy eyes from the baking aisle (they stick with a dab of frosting).
What if I don’t have crescent rolls?
No problem! You can use refrigerated pizza dough, biscuit dough, or even puff pastry. Pizza dough gives a breadier texture, biscuit dough is softer and sweeter, and puff pastry is flaky. Each one works differently, but they all make delicious mummies. Adjust baking time as needed since different doughs cook at different rates.
Conclusion
These crowd-pleasing mummy hot dogs with crescent dough wraps are everything a Halloween recipe should be—fun, fast, and impossible to resist. They come together in under 25 minutes with ingredients you probably already have, and they look impressive enough to steal the spotlight at any Halloween gathering.
What I love most about this recipe is how it brings people together. I’ve seen kids who won’t touch regular hot dogs grab three of these. I’ve watched adults sneak them when they thought no one was looking. There’s something about the mummy shape that makes eating them feel like a little Halloween adventure.
Don’t be afraid to make them your own. Add cheese, spice them up, or go full gourmet with fancy sausages. The beauty of this recipe is that it’s forgiving—even a messy wrap job looks like a mummy. That’s the kind of cooking I can get behind.
So go ahead—preheat that oven, pop open that crescent roll tube, and get wrapping. Your Halloween table is about to get a whole lot more fun. And if you come up with a killer variation, I’d love to hear about it in the comments. Happy Halloween, friends!
Pin This Recipe!
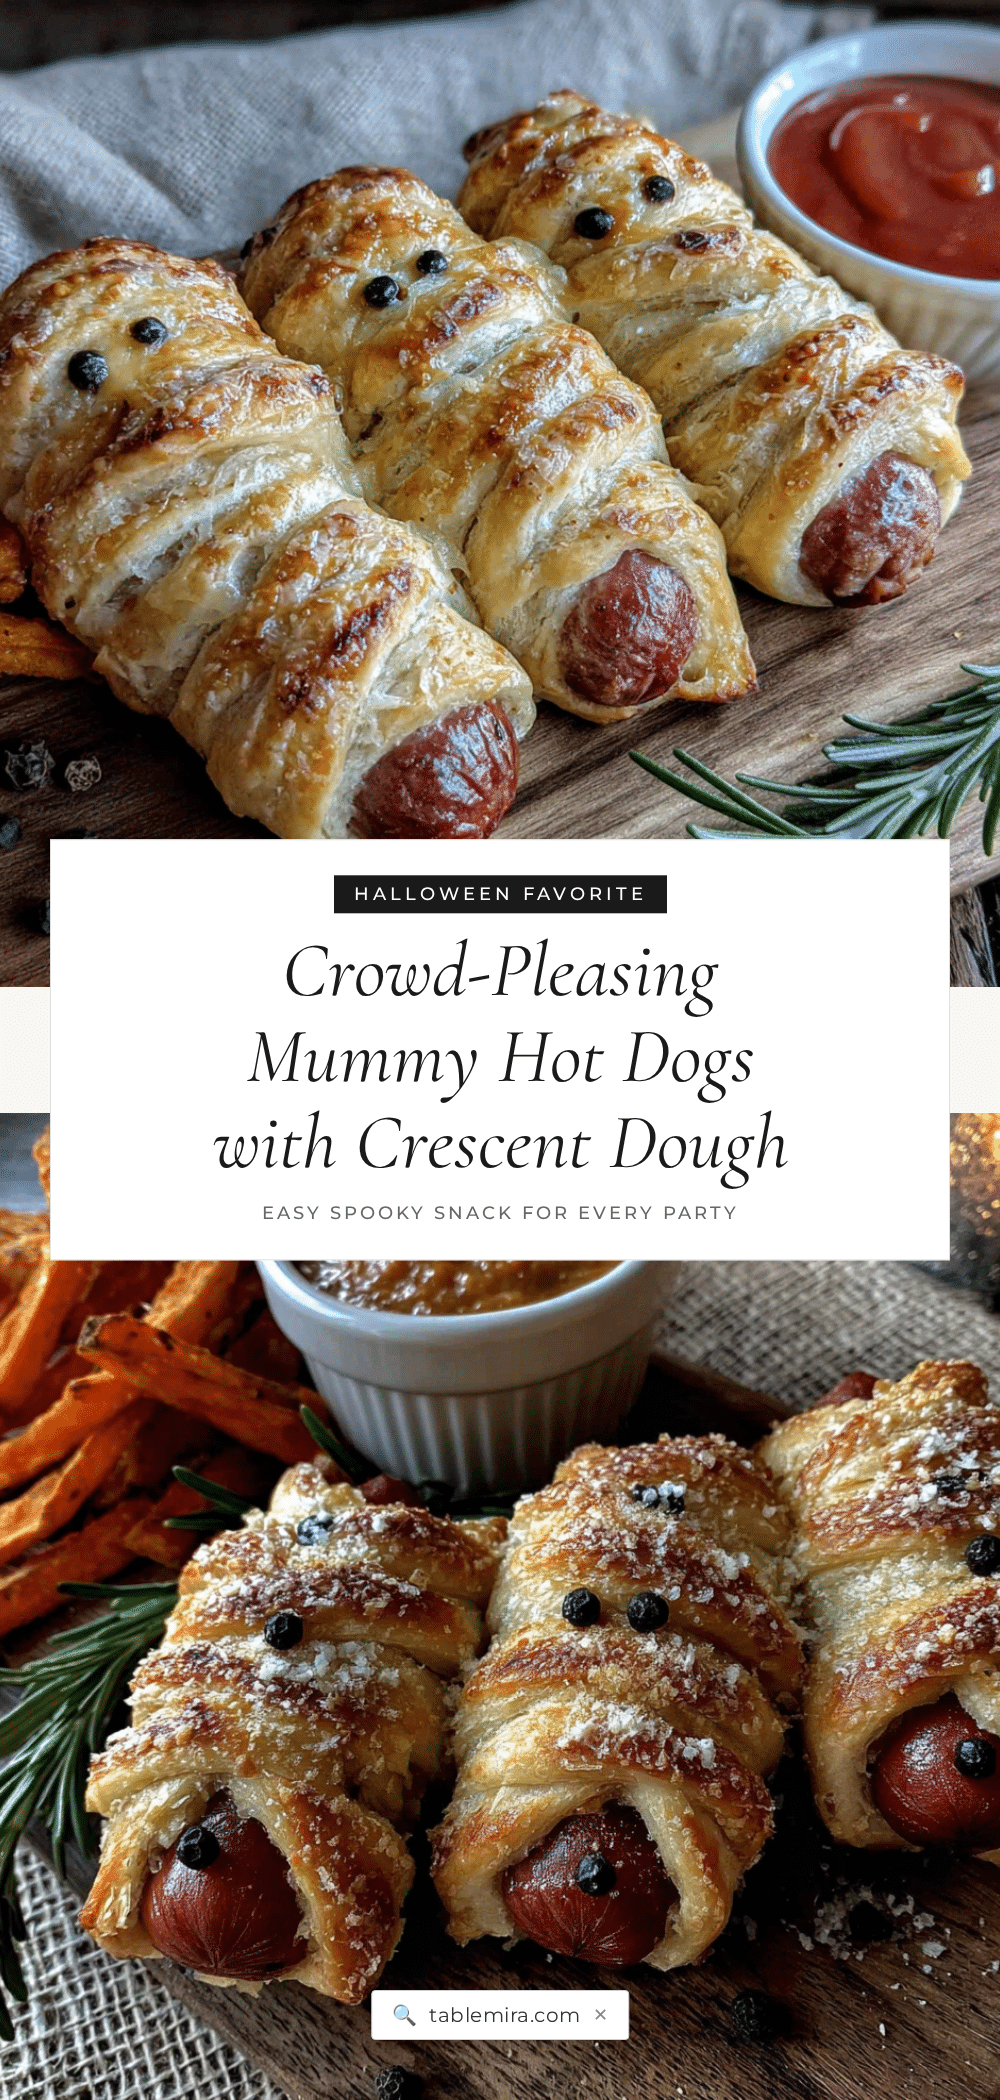
Easy Mummy Hot Dogs with Crescent Rolls

These mummy hot dogs with crescent rolls are the Halloween recipe that actually delivers. They come together in under 25 minutes with only 3 main ingredients and are perfect for Halloween parties.
- Prep Time: 10 minutes
- Cook Time: 15 minutes
- Total Time: 25 minutes
- Yield: 8 servings 1x
- Category: Appetizer
- Cuisine: American
Ingredients
- 1 package (8 count) refrigerated crescent rolls (Pillsbury Original or Butter Flavor)
- 8 hot dogs (standard size, e.g., Hebrew National or Oscar Mayer)
- Mustard for eyes (yellow, honey mustard, or Dijon)
- Optional: ketchup or sriracha for bloodshot eyes
- Optional: shredded cheddar cheese
- Optional: everything bagel seasoning
Instructions
- Preheat your oven to 375°F (190°C). Line a baking sheet with parchment paper.
- Open the crescent roll tube. Unroll the dough and separate it along the perforated lines into 8 triangles.
- Tear each triangle into 3-4 strips using your fingers for ragged edges.
- Pat hot dogs dry with a paper towel. If adding cheese, cut a slit lengthwise in each hot dog and stuff with a thin strip of cheddar.
- Wrap each hot dog with dough strips, leaving about 1 inch (2.5 cm) exposed at the top for the face. Overlap strips slightly.
- Place wrapped hot dogs on the prepared baking sheet, leaving about 2 inches (5 cm) between each.
- Bake for 12-15 minutes until golden brown and puffed.
- Let cool for 2-3 minutes.
- Add mustard eyes using a toothpick or knife tip. Optionally add a tiny dot of ketchup or sriracha in the center for bloodshot eyes.
- Serve immediately.
Notes
Tear the crescent dough instead of cutting for more authentic mummy bandage edges. Don’t overwork the dough. Leave room for the face. Watch baking time closely. Can be assembled up to 4 hours ahead and refrigerated. Freeze unbaked mummies for up to 3 months.
Nutrition
- Serving Size: 1 mummy hot dog
- Calories: 300
- Sugar: 4
- Sodium: 750
- Fat: 19
- Saturated Fat: 6
- Carbohydrates: 23
- Protein: 11
Keywords: mummy hot dogs, crescent rolls, Halloween recipe, easy appetizer, kid-friendly


