I had claimed to hate themed desserts for years. Years. It wasn’t just a preference—it was practically a personality trait. Every October, when the grocery store aisles filled with orange sprinkles and candy eyeballs, I’d roll my eyes so hard I’d almost see my own brain. “Why can’t we just eat regular chocolate?” I’d say, with all the smugness of someone who’d never had a child look at them with pure, unadulterated joy over a snack.
Then my nephew, Leo, came over on a rainy Saturday last fall. He was seven, dressed as a ninja (it was October, after all), and he asked if we could make something “spooky but not scary.” I had a bag of pretzel rods in the pantry and some melting chocolate I’d bought for a different project that never happened. Honestly, I almost said no. But the power was flickering from the storm outside, and I needed a low-energy activity that didn’t involve screens. So I told him we’d try something, but I made it very clear I wasn’t committing to anything cute.
That’s when I caught him, ten minutes later, carefully pressing two candy eyeballs onto a chocolate-dipped pretzel rod, his little tongue poking out in concentration. He had wrapped a few pretzels in drizzled white chocolate that looked exactly like mummy bandages—completely by accident. I didn’t tell him that. I just watched him line them up on the parchment paper, and I felt the quiet, stubborn crack in my anti-themed-dessert wall. Maybe you’ve been there, where a kid’s simple, unselfconscious creativity just bulldozes your grown-up opinions. These Kid-Approved Chocolate Mummy Pretzel Rods for Halloween are why I keep making them every year now. They’re not just a snack. They’re the proof that I was wrong, and honestly, I’m okay with that.
Why You’ll Love This Recipe
Let me tell you why these Chocolate Mummy Pretzel Rods have become our household’s official Halloween tradition. I’ve tested this recipe through three different batches, tweaking the chocolate consistency and the drizzle technique until it was absolutely foolproof for little hands. Here is what makes this version stand out from the dozens of other spooky treats you’ll find online:
- Quick & Easy: From start to finish, you’re looking at about 20 minutes of active work. The hardest part is waiting for the chocolate to set, which takes maybe 15 minutes in the fridge. Perfect for that window between homework and dinner when kids are bouncing off the walls.
- Simple Ingredients: You need exactly four things: pretzel rods, melting chocolate (white and dark), and candy eyeballs. That’s it. No special trip to a fancy baking supply store. I found everything at my regular grocery store in the baking aisle.
- Perfect for Halloween Parties: These are the treats that disappear first at school parties, neighborhood gatherings, or even just a cozy movie night at home. They look impressive but require zero baking skills.
- Crowd-Pleaser: I’ve watched kids as young as three and adults as old as my grumpy uncle Bob grab these off the tray. The salty-sweet combo is irresistible, and the crunch of the pretzel against the smooth chocolate is just perfect.
- Unbelievably Delicious: This isn’t just about the look. The ratio of pretzel to chocolate is carefully balanced so you get that satisfying snap first, then the creamy melt of the chocolate. The white chocolate drizzle isn’t just decorative—it adds a subtle vanilla sweetness that plays beautifully with the dark chocolate.
What makes this recipe different from the rest is the drizzle technique I stumbled upon after my first batch turned into a melted mess. Instead of trying to pipe thin lines (which always broke or blobbed), I use a simple fork-drizzle method that creates those perfect mummy bandages every single time. It’s the kind of trick you only learn by making mistakes, and I’m sharing it so you don’t have to learn the hard way. This recipe is the one that makes you close your eyes after the first bite, not because it’s fancy, but because it’s exactly what a Halloween treat should be—fun, delicious, and completely stress-free.
What Ingredients You Will Need
This recipe uses simple, everyday ingredients to create something that looks like it came from a fancy bakery. Here is exactly what you need and why each ingredient matters:
- Pretzel rods (12-15 rods): Look for thick, sturdy pretzel rods that won’t snap easily when you dip them. I personally prefer the Snyder’s of Hanover brand because they have a nice, even salt distribution and they’re consistently thick. Avoid the thin, fragile pretzel sticks—they’ll break apart in the chocolate. You want rods that feel substantial in your hand.
- Dark melting chocolate (1 cup or 170g): This is the base coating that gives the mummies their “body.” I use Ghirardelli dark chocolate melting wafers because they melt smoothly and set with a nice shine. You can use milk chocolate if your kids prefer it, but the dark chocolate provides a better contrast with the white drizzle. If you can’t find melting wafers, chop up a good quality dark chocolate bar and melt it gently with a teaspoon of coconut oil to thin it out.
- White melting chocolate (½ cup or 85g): This creates the mummy bandages. The white chocolate should be a contrasting color so the bandages pop against the dark base. I’ve tried Wilton and Merckens brands—both work well. Avoid white chocolate chips that contain stabilizers, as they don’t melt as smoothly. You want a product labeled “melting chocolate” or “candy melts.”
- Candy eyeballs (about 30-40): These are the soul of your mummies. You can find them at any craft store or in the baking aisle during October. I buy the Wilton brand ones because they have a nice flat back that sticks well to the chocolate. Pro tip: buy two packs because little fingers have a tendency to eat them before they make it onto the pretzels. If you can’t find candy eyeballs, you can use small white chocolate chips with a dot of dark chocolate piped on for the pupil.
- Optional: Coconut oil or shortening (1 teaspoon): If your melting chocolate seems too thick for dipping, a tiny bit of coconut oil or vegetable shortening will thin it out without affecting the taste. I only use this if the chocolate is being stubborn.
Ingredient Selection Tips: When choosing your pretzel rods, give them a gentle bend test in the store. If they flex without breaking, they’re fresh. Stale pretzels will snap too easily and won’t hold up to the chocolate coating. For the chocolate, always check the ingredient list. You want something that says “cocoa butter” not “palm oil” if possible. The texture difference is noticeable.
Substitution Guidance: If you need a dairy-free option, look for dark chocolate that’s labeled dairy-free (many dark chocolates naturally are) and use dairy-free white chocolate chips. Just know that dairy-free white chocolate can be a bit trickier to melt—add a teaspoon of coconut oil to help it along. For a gluten-free version, check your pretzel labels carefully. Some brands use wheat flour, but there are gluten-free pretzel rods available at most health food stores.
Equipment Needed
You don’t need a fancy kitchen to make these Chocolate Mummy Pretzel Rods. Here is what you’ll actually use:
- Microwave-safe bowls (2): One for the dark chocolate, one for the white chocolate. I use glass measuring cups because they’re easy to pour from. If you don’t have microwave-safe bowls, a double boiler works just as well.
- Parchment paper or silicone baking mat: This is non-negotiable. Wax paper will stick to the chocolate as it sets, and you’ll end up with a mess. Parchment paper allows the chocolate to release cleanly. I’ve made the mistake of using wax paper once—never again.
- Baking sheet: To hold your parchment paper and the finished pretzels while they set. Any flat baking sheet works, even a jelly roll pan.
- Fork or dipping tool: A regular dinner fork is perfect for dipping the pretzels. The tines allow excess chocolate to drip off. I’ve tried specialized dipping tools, and honestly, a fork works better.
- Small piping bag or zip-top bag: For drizzling the white chocolate. A zip-top bag with the corner snipped off is actually easier to control than a piping bag. Just don’t snip too much off—start with a tiny hole and make it bigger if needed.
- Toothpicks: For adjusting the candy eyeballs if they slide around. Also useful for popping any air bubbles in the chocolate.
- Refrigerator space: You’ll need a flat spot in your fridge to let the pretzels set. Clear a shelf beforehand so you’re not playing Tetris with your leftovers.
If you don’t have a microwave, you can melt the chocolate in a heatproof bowl set over a pot of simmering water. Just make sure the bowl doesn’t touch the water. I actually prefer this method on humid days because the chocolate is less likely to seize up. My grandmother’s old double boiler is my go-to for big batches.
Preparation Method
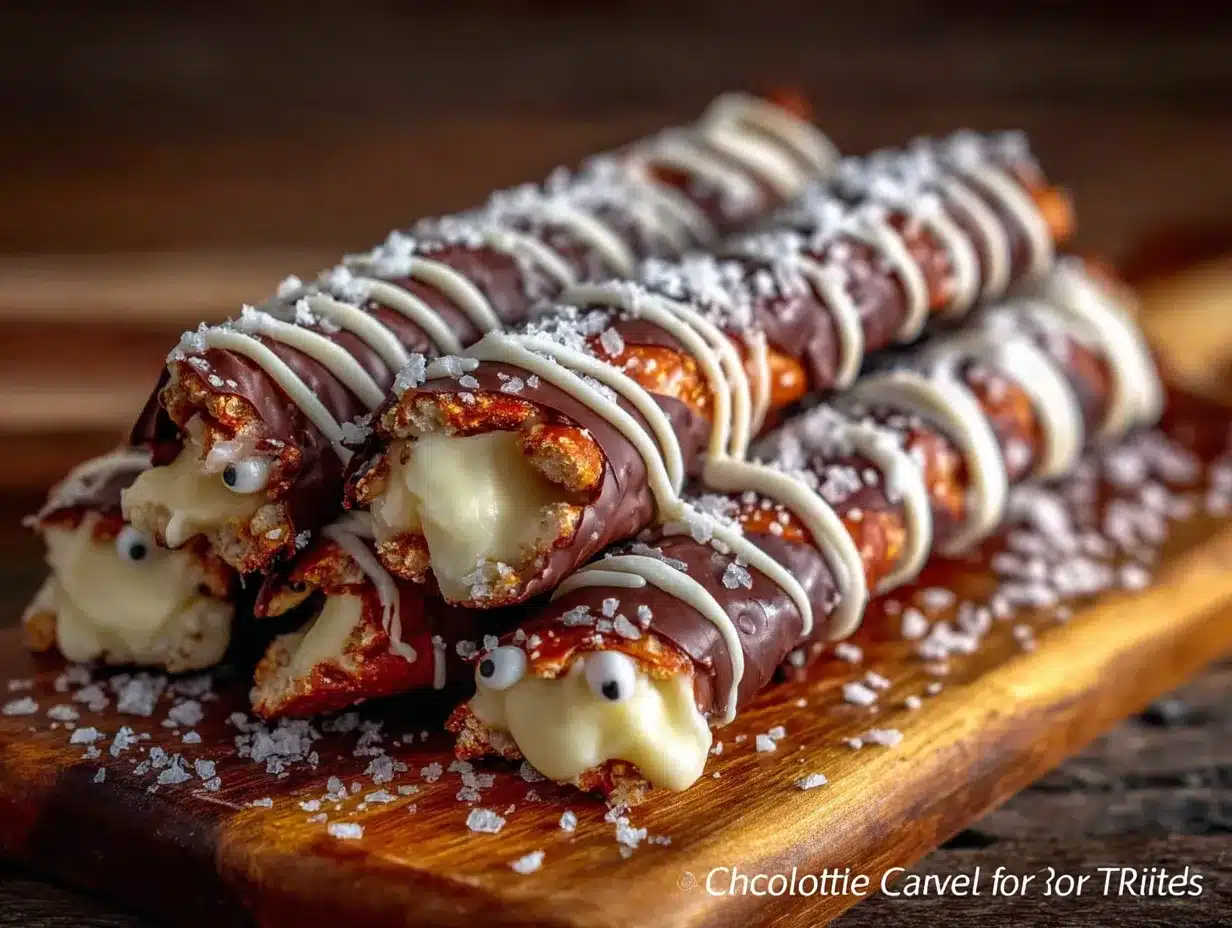
Follow these steps carefully, and you’ll have a tray of adorable mummy pretzels in under an hour. I’ve included all the little tricks I learned from my messy first attempts.
- Prepare your workspace: Line a baking sheet with parchment paper. Make sure it’s completely flat and the paper is smooth. Any wrinkles will create ripples in your finished pretzels. Clear a spot in your refrigerator where the baking sheet can sit flat. This sounds obvious, but I once had to balance a tray on a jar of pickles, and it did not end well.
- Melt the dark chocolate: Place the dark melting chocolate in a microwave-safe bowl. Microwave in 30-second intervals at 50% power, stirring thoroughly between each interval. It usually takes about 1.5 to 2 minutes total. The chocolate should be smooth and glossy. If it looks thick, add a teaspoon of coconut oil and stir. Be careful not to overheat—chocolate that gets too hot will seize up and become grainy. If that happens, you can’t fix it, so go slow.
- Dip the pretzels: Hold a pretzel rod by one end and dip it into the melted dark chocolate, leaving about an inch undipped at the top. This undipped part becomes the “head” of your mummy. Gently rotate the pretzel to coat it evenly. Lift it out and let the excess chocolate drip back into the bowl. You want a thin, even coating—not a thick, gloppy mess. Use the side of the bowl to gently scrape off any excess.
- Place on parchment: Lay the dipped pretzel on the parchment paper. Don’t worry if it looks a little uneven—the white chocolate drizzle will cover any imperfections. Repeat with all the pretzels, leaving about an inch of space between each one. If the chocolate in the bowl starts to thicken as it cools, pop it back in the microwave for 15 seconds.
- Add the eyes: While the dark chocolate is still wet, press two candy eyeballs onto the undipped section of each pretzel. This is the “head” of your mummy. Press them gently but firmly so they stick. If the chocolate has already started to set, dab a tiny bit of melted dark chocolate on the back of each eye to glue it in place. This step is crucial—I’ve had eyeballs fall off because I waited too long.
- Refrigerate to set: Place the baking sheet in the refrigerator for 10-15 minutes, or until the dark chocolate is completely firm to the touch. Don’t skip this step. If you try to add the white chocolate drizzle while the dark chocolate is still soft, the colors will blend together and you’ll lose the mummy effect. Trust me on this.
- Melt the white chocolate: While the dark chocolate sets, melt the white chocolate in a separate microwave-safe bowl. Use the same 30-second intervals at 50% power. White chocolate is more delicate than dark, so watch it carefully. It should be smooth and pourable. If it seems too thick, add a drop of coconut oil.
- Prepare the drizzle bag: Transfer the melted white chocolate to a small piping bag or a zip-top bag. If using a zip-top bag, squeeze the chocolate into one corner, twist the top to seal it, and snip off a tiny corner—smaller than you think you need. You can always make the hole bigger, but you can’t make it smaller.
- Create the mummy bandages: Remove the pretzels from the refrigerator. Starting at the bottom of each pretzel, drizzle the white chocolate back and forth in a zigzag pattern, working your way up to just below the eyes. Don’t cover the eyes completely—you want them to be visible. The drizzle should look like messy bandages, so don’t overthink it. Imperfect lines actually look better. I’ve found that holding the bag about 6 inches above the pretzel gives you the most control.
- Final set: Return the baking sheet to the refrigerator for another 10-15 minutes, or until the white chocolate is firm. The mummies are ready when the white chocolate is solid and doesn’t smudge when you touch it gently.
Sensory Cues: When you dip the pretzel in the dark chocolate, you should hear a faint sizzle if the chocolate is the right temperature. The chocolate should look glossy and smooth as it drips off the pretzel. When you drizzle the white chocolate, it should flow in a steady, thin stream—not too thick and not too runny. The finished mummies should have a clean snap when you bite into them, with no crumbling.
Cooking Tips & Techniques
I’ve made about a billion mistakes with these pretzel rods so you don’t have to. Here are the most important lessons I learned:
The Chocolate Temperature Trap: The first time I made these, I melted the chocolate on full power and it turned into a grainy, unusable mess. Chocolate is sensitive. Always melt at 50% power and stir frequently. If you see any steam rising from the chocolate, you’ve gone too far. Let it cool for a minute and stir vigorously—sometimes you can save it.
The Drizzle Disaster: My second batch looked terrible because I tried to pipe thin, perfect lines. Mummy bandages are supposed to look messy. Embrace the chaos. Let the white chocolate fall where it wants. If you get a big blob, just use a toothpick to drag it into a line. I actually prefer the look of uneven bandages—they look more like a real mummy that’s been wrapped in a hurry.
The Eyeball Placement Trick: Candy eyeballs have a tendency to slide down the pretzel if the chocolate is too warm. To prevent this, let the dark chocolate set for about 2 minutes after dipping before you add the eyes. The chocolate should be tacky but not wet. If the eyes still slide, use a toothpick to hold them in place for a few seconds until the chocolate grips them.
Multitasking Strategy: While the first batch of dark chocolate is setting in the fridge, melt the white chocolate. This saves about 10 minutes. You can also line your baking sheet while the chocolate is melting. Every minute counts when you’re making these with impatient kids.
The Humidity Factor: If you live in a humid climate like I do, your chocolate might bloom (develop white streaks) as it sets. This is cosmetic and doesn’t affect the taste, but it can make your mummies look dusty. To prevent bloom, work in an air-conditioned room and don’t leave the pretzels in the fridge for too long—15 minutes is plenty.
My Biggest Failure: I once tried to make these with regular chocolate chips instead of melting chocolate. The chips never fully set, and the mummies were sticky and messy for days. Don’t do it. Melting chocolate is formulated to set firmly at room temperature. Regular chocolate chips have stabilizers that keep them soft. It’s worth the extra dollar to buy the right stuff.
Variations & Adaptations
Once you’ve mastered the basic mummy, the possibilities are endless. Here are some variations I’ve tried and loved:
- Spider Pretzels: Instead of mummy bandages, dip the entire pretzel in dark chocolate. While wet, add four small pretzel sticks on each side for spider legs and two candy eyes on top. These are a little trickier because the legs can fall off, but they’re a huge hit at parties.
- Ghost Pretzels: Use white chocolate for the entire coating and add two candy eyes near the top. Drizzle a tiny bit of dark chocolate for a ghostly mouth. These are faster to make because you only need one type of chocolate.
- Pumpkin Pretzels: Dip in orange-colored white chocolate (use food coloring gel, not liquid) and add a green candy melt on top for a stem. These are great for non-scary Halloween parties.
- Gluten-Free Version: Use gluten-free pretzel rods. I’ve tested this with the Glutino brand and they work perfectly. The texture is slightly different—they’re a bit more crumbly—but the taste is still great.
- Vegan Option: Use dairy-free dark chocolate and vegan white chocolate chips. Add a teaspoon of coconut oil to help the vegan white chocolate melt smoothly. The candy eyeballs are typically vegan, but check the label to be sure.
- Flavor Twist: Add a pinch of sea salt or a sprinkle of cinnamon to the dark chocolate before dipping. The salt enhances the sweetness, and the cinnamon adds a warm fall flavor that pairs beautifully with the chocolate.
My personal favorite variation is the spider version because it gets the biggest reaction from kids. I made a batch for Leo’s Halloween party last year, and one little girl screamed with delight when she saw them. That moment alone was worth the extra effort of sticking on those little pretzel legs.
Serving & Storage Suggestions
These mummy pretzels are best served at room temperature. The chocolate should be firm but not hard, and the pretzel should have a satisfying crunch. I usually take them out of the fridge about 10 minutes before serving to let them come to room temperature.
Presentation Ideas: Arrange the mummies standing up in a tall glass jar or a small vase for a dramatic display. You can also lay them flat on a platter with some orange and black sprinkles scattered around. For a Halloween party, I like to place them in a small pumpkin-shaped bucket. Kids love being able to grab one by the undipped end.
Complementary Treats: These pair beautifully with a warm mug of apple cider or hot chocolate. If you’re serving them at a party, put out a bowl of caramel popcorn and some apple slices for balance. The salty-sweet combo works with almost anything.
Storage Instructions: Store the mummies in an airtight container at room temperature for up to 5 days. If your kitchen is warm, store them in the refrigerator to prevent the chocolate from softening. Layer them between sheets of parchment paper so they don’t stick together. Do not stack them too high—the weight can crack the pretzels.
Freezer Tips: These freeze beautifully. Place them in a single layer on a baking sheet and freeze until solid, then transfer to a freezer-safe container. They’ll keep for up to 2 months. Thaw at room temperature for about 15 minutes before serving. The chocolate might look a little dull after freezing, but the taste is still perfect.
Flavor Development: Interestingly, these mummies taste even better the next day. The flavors meld together, and the pretzel softens just slightly, creating a more cohesive bite. If you can resist eating them all on day one, you’re in for a treat on day two.
Nutritional Information & Benefits
Let’s be real—these are a treat, not a health food. But here’s what you’re working with per mummy (based on a standard recipe yield of 12 pretzels):
- Calories: Approximately 180-200 per mummy
- Total Fat: 10-12g
- Saturated Fat: 6-7g
- Carbohydrates: 22-25g
- Sugar: 14-16g
- Protein: 2-3g
- Sodium: 200-250mg
Health Benefits of Key Ingredients: Dark chocolate contains antioxidants called flavonoids, which can support heart health. Pretzels provide quick energy from carbohydrates, making these a good option for an active kid’s afternoon snack. The portion control is built in—one mummy is a satisfying serving size.
Dietary Considerations: This recipe can be made gluten-free and vegan with simple substitutions. It contains dairy (unless you use dairy-free chocolate) and gluten (unless you use gluten-free pretzels). The candy eyeballs may contain trace amounts of soy. Always check labels if you’re cooking for someone with allergies.
My Personal Perspective: I believe in balance. These mummy pretzels are a once-a-year treat for us, and I don’t stress about the sugar content. The joy of making them with my nephew and watching his face light up is worth every calorie. That said, I do make sure we have a vegetable-heavy dinner before we dive into the dessert tray.
Conclusion
These Kid-Approved Chocolate Mummy Pretzel Rods for Halloween are proof that you don’t need to be a professional baker to create something magical. They’re simple enough for a three-year-old to help with, impressive enough to steal the show at any party, and delicious enough to convert even the biggest themed-dessert skeptic (hi, that’s me).
I love this recipe because it’s not about perfection. The mummies that look a little lopsided, the ones with too many eyes, the ones where the chocolate dripped in funny places—those are the best ones. They have personality. They have soul. And they taste exactly the same as the “perfect” ones.
I’d love to hear how your mummies turn out. Did your kids come up with their own variations? Did you try the spider version? Drop a comment below and share your creations. And if you snap a photo, tag me on social media—I want to see your spooky, silly, wonderful mummy pretzels. Happy Halloween, and happy snacking!
Frequently Asked Questions
Can I use regular chocolate chips instead of melting chocolate?
I don’t recommend it. Regular chocolate chips contain stabilizers that prevent them from setting firmly. Your mummies will be sticky and soft, and they won’t hold their shape. Melting chocolate is formulated to set hard at room temperature, which is exactly what you need for these pretzels.
How far in advance can I make these?
You can make them up to 5 days ahead and store them at room temperature in an airtight container. They also freeze beautifully for up to 2 months. Just make sure they’re completely set before you stack them, and use parchment paper between layers to prevent sticking.
My white chocolate seized up and turned grainy. What went wrong?
This usually happens when the chocolate gets too hot or when a tiny amount of water gets into the bowl. Always melt white chocolate at 50% power in the microwave, and make sure your bowls and utensils are completely dry. If it does seize, you can try adding a teaspoon of coconut oil and stirring vigorously, but sometimes it’s a lost cause.
Can I make these without candy eyeballs?
Absolutely. If you can’t find candy eyeballs, you can use small white chocolate chips with a dot of dark chocolate piped on for the pupil. You can also skip the eyes entirely and just make mummy bandages—they’ll still look great. Some people use mini M&Ms or chocolate chips for a different look.
My kids want to help. What tasks can they do safely?
Kids can definitely help with pressing the candy eyeballs into the chocolate, drizzling the white chocolate (with supervision), and arranging the finished mummies on the tray. Older kids can help with dipping the pretzels if you trust them with warm chocolate. Just make sure an adult handles the microwave and the hot bowls.
Pin This Recipe!
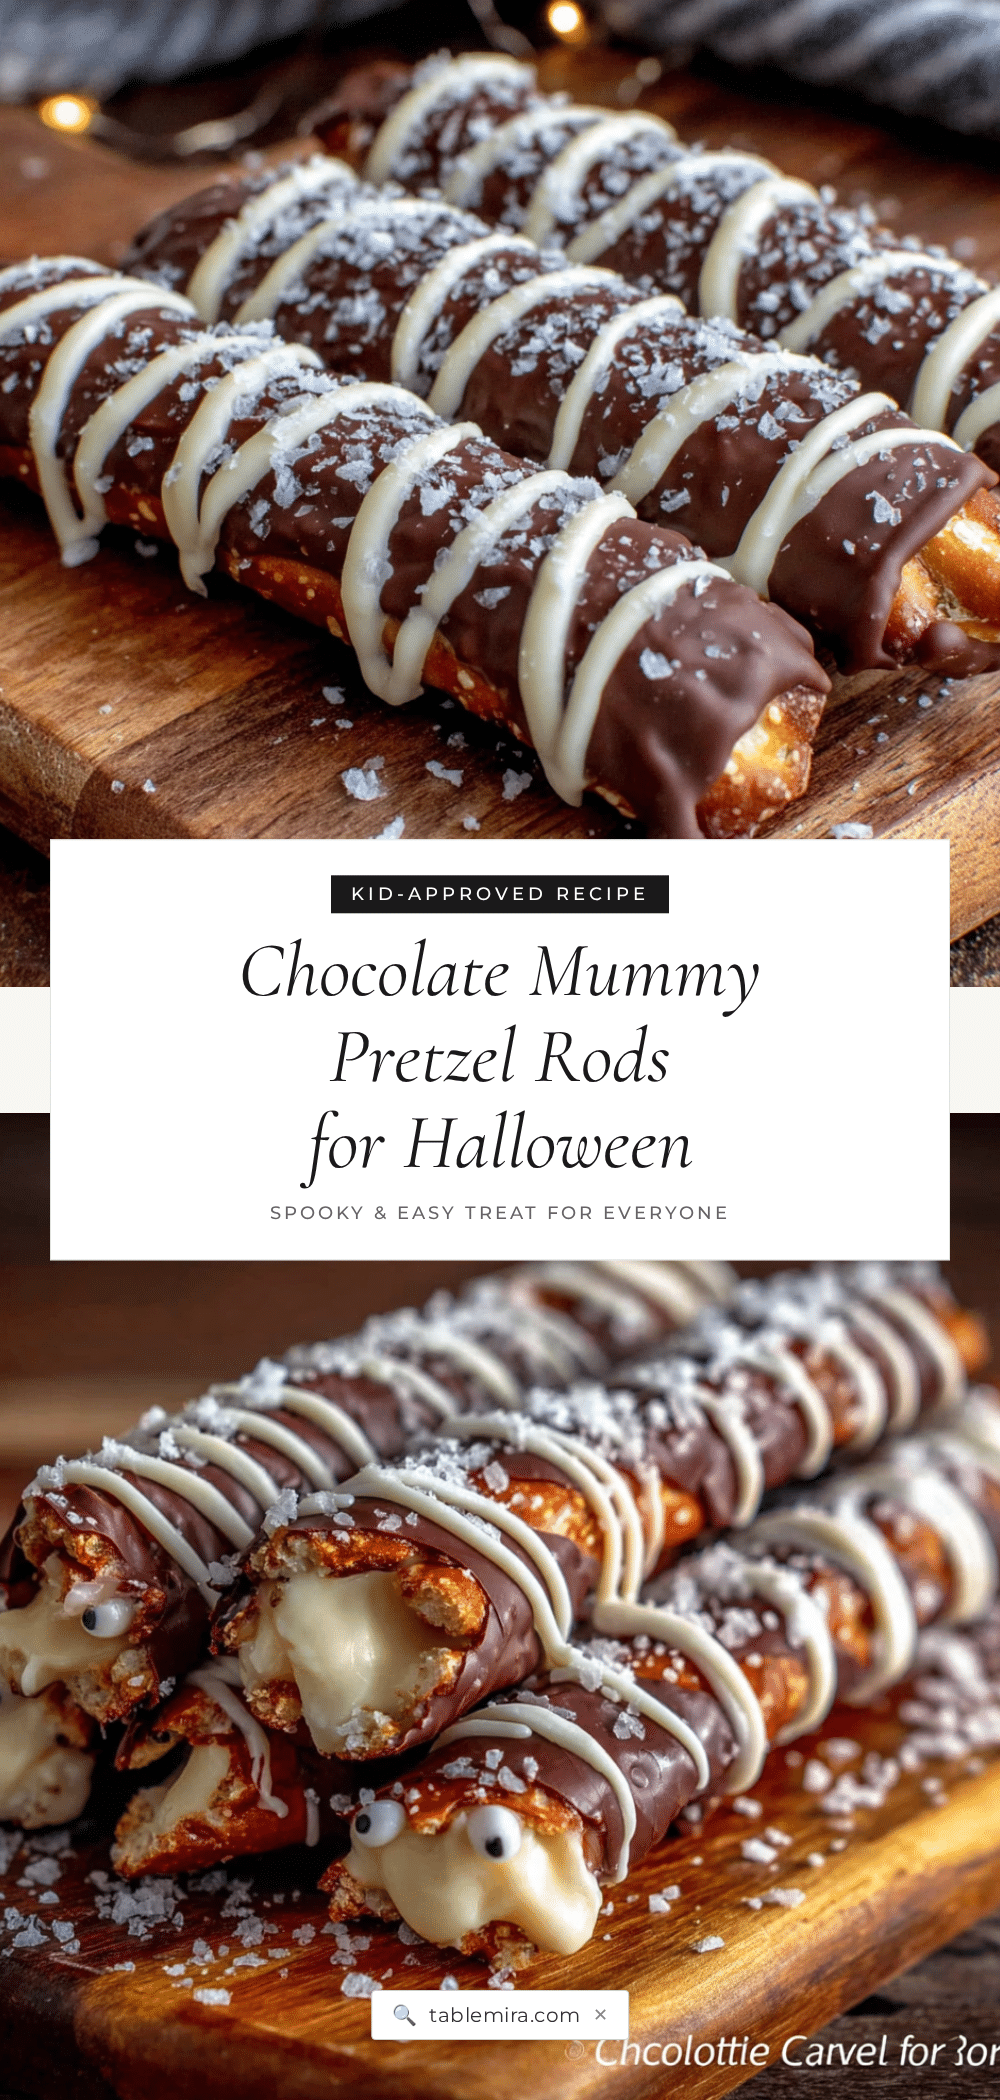
Best Halloween Chocolate Mummy Pretzel Rods Recipe

These Kid-Approved Chocolate Mummy Pretzel Rods for Halloween are quick, easy, and perfect for parties. Made with just four simple ingredients, they’re a fun and delicious treat that kids and adults love.
- Prep Time: 20 minutes
- Cook Time: 0 minutes
- Total Time: 40 minutes
- Yield: 12-15 servings 1x
- Category: Dessert
- Cuisine: American
Ingredients
- 12–15 pretzel rods
- 1 cup (170g) dark melting chocolate
- ½ cup (85g) white melting chocolate
- 30–40 candy eyeballs
- 1 teaspoon coconut oil or shortening (optional)
Instructions
- Line a baking sheet with parchment paper. Clear a flat spot in the refrigerator.
- Melt dark melting chocolate in a microwave-safe bowl in 30-second intervals at 50% power, stirring between each, until smooth and glossy (about 1.5-2 minutes). Add 1 teaspoon coconut oil if needed.
- Hold a pretzel rod by one end and dip into melted dark chocolate, leaving about 1 inch undipped at the top. Gently rotate to coat evenly, then let excess drip off.
- Place dipped pretzel on parchment paper. Repeat with remaining pretzels, spacing them about 1 inch apart.
- While dark chocolate is still wet, press two candy eyeballs onto the undipped section of each pretzel. If chocolate has started to set, dab a bit of melted dark chocolate on the back of each eye to glue.
- Refrigerate baking sheet for 10-15 minutes until dark chocolate is firm.
- Melt white melting chocolate in a separate microwave-safe bowl in 30-second intervals at 50% power until smooth and pourable.
- Transfer melted white chocolate to a small piping bag or zip-top bag. Snip off a tiny corner.
- Remove pretzels from refrigerator. Starting at the bottom, drizzle white chocolate back and forth in a zigzag pattern up to just below the eyes, creating mummy bandages.
- Return baking sheet to refrigerator for another 10-15 minutes until white chocolate is firm.
Notes
Use thick, sturdy pretzel rods to prevent breaking. Melt chocolate at 50% power to avoid seizing. For best results, let dark chocolate set for 2 minutes before adding eyes to prevent sliding. Store in an airtight container at room temperature for up to 5 days or freeze for up to 2 months.
Nutrition
- Serving Size: 1 mummy pretzel rod
- Calories: 190
- Sugar: 15
- Sodium: 225
- Fat: 11
- Saturated Fat: 6.5
- Carbohydrates: 23
- Fiber: 1
- Protein: 2.5
Keywords: Halloween, mummy pretzels, chocolate pretzels, kid-friendly, easy dessert, spooky treats


