There used to be a little hole-in-the-wall Mexican joint on the corner of Elm and 4th called Rosa’s that made the most incredible taco dip. When they closed—suddenly, with a handwritten sign taped to the door that said “Gracias, amigos”—I honestly felt a little lost. That dip was my go-to for game days, potlucks, and those nights when takeout just felt too fancy. After twelve tries—some lumpy, one that was basically soup, and a memorable disaster involving too much liquid smoke—I finally got it. And then I got a little carried away.
See, this version isn’t just a recreation. It’s a Halloween-inspired twist that my kids begged me to make year-round. The “mummy” part came about when I was rushing to throw something together for a school party and realized I had leftover black beans, a block of cream cheese, and about fifteen minutes. I wrapped the top in sour cream “bandages,” stuck on olive eyes, and called it a day. Honestly, I didn’t think much of it until the pan came back empty and three moms asked for the recipe.
This quick black bean mummy taco dip is what happens when a craving meets a deadline and neither one is willing to compromise. It’s creamy, it’s hearty, and it comes together so fast you’ll have time to actually enjoy your own party. Maybe you’ve been there—standing in your kitchen with hungry people on the way and no idea what to serve. That’s exactly why this recipe exists. It’s the kind of thing you make when you want to look like you planned ahead when you really, really didn’t.
Why You’ll Love This Recipe
Let me tell you why this dip has become my secret weapon for every gathering, from Halloween parties to random Tuesday dinners. I’ve tested it on picky eaters, vegetarian skeptics, and people who “don’t do beans,” and it wins every single time.
- Quick & Easy: You can have this on the table in under 20 minutes. No joke. I’ve made it between picking up my son from practice and the doorbell ringing for a potluck.
- Simple Ingredients: Everything comes from a standard grocery run. No fancy cheese, no obscure spices, no trips to three different stores.
- Perfect for Weeknights and Parties: It works as a quick dinner when you’re too tired to cook, a game-day snack, or the star of a Halloween spread. I’ve even served it for movie nights with just tortilla chips and called it a meal.
- Crowd-Pleaser: Kids love the mummy look. Adults love the flavor. Everyone loves that it’s vegetarian without feeling like a compromise.
- Unbelievably Delicious: The combination of creamy cheese, seasoned black beans, and cool sour cream is next-level comfort food. The texture is just right—not too runny, not too thick.
What makes this different from every other taco dip out there? It’s the black beans. Most recipes use refried beans or ground beef, but black beans bring this earthy richness that pairs perfectly with the tangy cream cheese. Plus, they’re packed with fiber, so you actually feel full after eating it—not just bloated. I’ve had people tell me this is the only taco dip they actually crave, and I get it. It’s comfort food that doesn’t weigh you down.
What Ingredients You Will Need
This recipe uses simple, wholesome ingredients to deliver bold flavor and satisfying texture without the fuss. Most of these are pantry staples, which is exactly what you want when you’re short on time.
- For the base layer:
- 8 oz cream cheese, softened (I prefer Philadelphia for that ultra-creamy texture)
- 1 cup sour cream (full-fat works best, but Greek yogurt is a fine swap)
- 1 packet taco seasoning (or 2 tablespoons homemade—see my note below)
- 1 can (15 oz) black beans, drained and rinsed (look for low-sodium if you’re watching salt)
- 1 cup shredded Mexican blend cheese (or cheddar, pepper jack, whatever you have)
- For the mummy topping:
- 1/2 cup sour cream (for the “bandages”)
- 2 black olive slices (for the eyes—use canned or jarred)
- For serving:
- Tortilla chips (I like thick restaurant-style chips for scooping)
- Optional garnishes: diced tomatoes, sliced jalapeños, fresh cilantro
Ingredient tips from my kitchen:
Let your cream cheese sit out for about 20 minutes before starting. I know, I know, who has time? But honestly, cold cream cheese makes lumpy dip, and nobody wants that. If you’re in a rush, microwave it for 10 seconds—just watch it carefully.
For the black beans, I always recommend Bush’s or Goya. They hold their shape well and don’t turn mushy. Rinse them thoroughly to remove that metallic can taste—it makes a real difference.
If you want to make your own taco seasoning, mix 1 tablespoon chili powder, 1 teaspoon cumin, 1 teaspoon paprika, 1/2 teaspoon garlic powder, 1/2 teaspoon onion powder, 1/4 teaspoon cayenne (optional), and a pinch of salt. It’s fresher and lets you control the heat.
Substitution guidance: For a dairy-free version, use vegan cream cheese and plant-based sour cream. The texture will be slightly different, but it still works beautifully. For a gluten-free option, just check your taco seasoning label—most are gluten-free, but some brands add fillers.
Equipment Needed
You don’t need fancy gadgets for this one, which is exactly how I like it on a busy weeknight.
- One 9-inch pie plate or small baking dish (I use a glass Pyrex dish—it’s perfect for seeing the layers)
- Hand mixer or stand mixer (or a strong arm and a fork—I’ve done both)
- Spatula for spreading
- Can opener
- Colander for rinsing beans
- Small piping bag or zip-top bag for the sour cream bandages
If you don’t have a hand mixer, no worries. Just mash the cream cheese with a fork until it’s soft, then stir everything together vigorously. It takes an extra minute, but it works. I’ve also used a food processor in a pinch—just pulse gently so you don’t liquefy the beans.
For the piping bag, a zip-top bag with a tiny corner snipped off works perfectly. I learned that trick after my first attempt with a real piping bag ended with sour cream everywhere but the dip. Budget-friendly and less messy!
Preparation Method
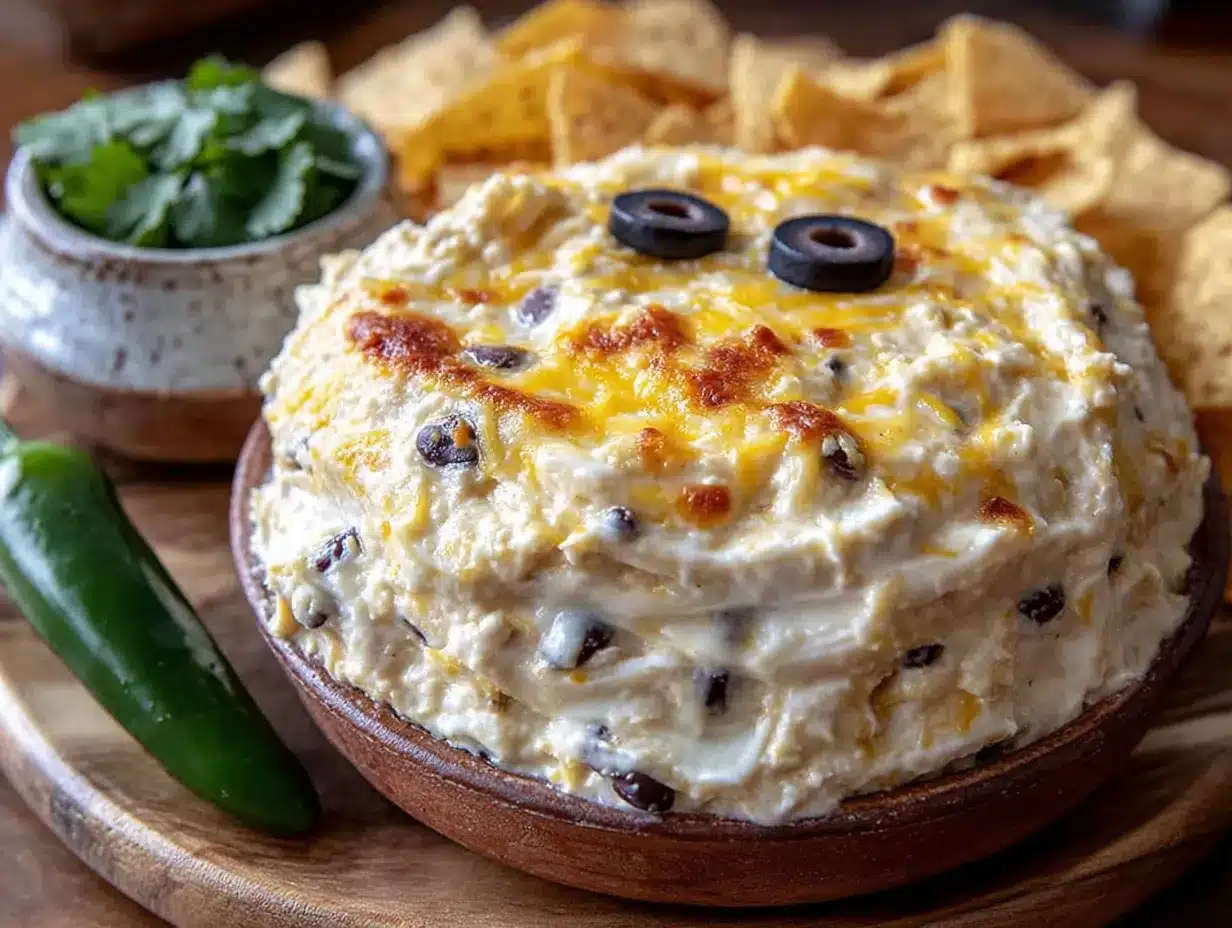
Here’s how to make this quick black bean mummy taco dip in about 15 minutes flat. I’ve timed myself, so I know it’s possible.
- Preheat your oven to 375°F (190°C). While it’s heating, let your cream cheese sit out if you haven’t already. This is the perfect time to rinse your beans and get everything ready.
- Make the base layer. In a medium bowl, beat the softened cream cheese with 1 cup sour cream until smooth. I use my hand mixer on medium speed for about 30 seconds. Add the taco seasoning and mix again until everything is combined. The color should be a uniform pale orange.
- Fold in the black beans. Gently stir in the drained and rinsed black beans with a spatula. Don’t overmix—you want some beans to stay whole for texture. I like to leave about a quarter of them slightly smashed for a creamier consistency.
- Spread in the dish. Transfer the mixture to your pie plate and spread it evenly. Use the back of your spatula to smooth the top. It should be about 1 inch thick—not too thin, not too thick.
- Add the shredded cheese. Sprinkle the Mexican blend cheese evenly over the top. Don’t pile it all in the middle—spread it out so every bite gets some cheesy goodness.
- Bake for 10-12 minutes. Pop it in the oven and bake until the cheese is melted and bubbly around the edges. You’ll know it’s done when the center is hot and the cheese is slightly golden. If you want it more browned, broil for 1-2 minutes at the end—but watch it carefully so it doesn’t burn.
- Create the mummy bandages. While the dip bakes, spoon the remaining 1/2 cup sour cream into your piping bag or zip-top bag. Snip a tiny corner—like, really tiny, smaller than you think. You can always make the hole bigger, but you can’t undo a giant gash.
- Add the eyes. Once the dip comes out of the oven, place two olive slices near the top center. These are your mummy’s eyes, so position them about 2 inches apart.
- Pipe the bandages. Starting from the top, pipe thin lines of sour cream horizontally across the dip, wrapping around the eyes. Leave a gap around the olives so the “eyes” are visible. I usually do 5-6 lines, spaced about 1/2 inch apart. Don’t worry about perfection—mummies are supposed to look a little messy.
- Serve immediately. Set the dip out with tortilla chips and watch it disappear. If you’re serving later, cover loosely with foil and keep warm in a 200°F oven for up to 30 minutes.
Sensory cues: When you fold in the beans, you should feel the mixture getting thicker. When it’s baked, the edges should be bubbling gently, and the kitchen should smell like taco night. The sour cream bandages should look like they’re wrapping a cozy little mummy—cute enough to make everyone smile.
Cooking Tips & Techniques
I’ve made this dip more times than I can count, and I’ve learned a few things the hard way. Here’s what I wish someone had told me.
Don’t overbake it. The first time I made this, I left it in the oven too long because I got distracted by a phone call. The cheese turned brown and the cream cheese layer got grainy. You want it just until the cheese melts—10 minutes is usually perfect. If your oven runs hot, check it at 8 minutes.
Room temperature ingredients matter. I know it’s annoying, but cold cream cheese creates lumps that never smooth out. I’ve tried. If you forget to take it out, cut it into small cubes and let them sit for 10 minutes. Or microwave on 50% power for 10-second intervals, turning the block each time.
Make the sour cream bandages ahead. You can pipe the sour cream onto parchment paper and freeze the strips for 10 minutes. Then just peel them off and lay them on the hot dip. This keeps the lines clean and prevents the sour cream from melting into the cheese. I learned this after my first attempt looked more like a ghost than a mummy.
Multitask like a pro. While the dip bakes, set out your chips, prep any garnishes, and clean up your workspace. By the time it’s done, you’ll have nothing left to do but serve. This is my secret for actually enjoying my own parties.
Use a serrated knife for clean cuts. If you’re serving this as a dip, it doesn’t matter. But if you want to cut it into squares for a more formal presentation, a serrated knife gives much cleaner edges than a straight blade.
Variations & Adaptations
This quick black bean mummy taco dip is endlessly adaptable. Here are some of my favorite twists.
Spicy Southwest version: Add 1/2 cup diced green chiles and 1/4 cup chopped cilantro to the base mixture. Use pepper jack cheese instead of Mexican blend. Top with sliced jalapeños before serving. My husband calls this the “wake-up call” version, and it’s perfect for people who like heat.
Loaded nacho style: After baking, top with diced tomatoes, sliced black olives, green onions, and a drizzle of hot sauce. Sprinkle with fresh cilantro. This turns it into a full meal—I’ve served it for dinner with a side salad and nobody complained.
Breakfast for dinner version: Swap the taco seasoning for a mix of cumin and smoked paprika. After baking, crack an egg on top and return to the oven for 5-7 minutes until the white is set. Serve with warm tortillas. This was a happy accident when I had leftover dip and needed breakfast—now it’s a regular thing.
Dairy-free adaptation: Use vegan cream cheese (Kite Hill works great), plant-based sour cream, and dairy-free shredded cheese. The texture is slightly less creamy, but the flavor is still fantastic. I’ve served this to dairy-free friends who didn’t even notice the swap.
Low-carb option: Serve with cucumber slices, bell pepper strips, or pork rinds instead of tortilla chips. The dip itself is relatively low in carbs if you skip the chips. My sister-in-law does this and swears by it.
I once made a “monster mash” version for a Halloween party where I added chopped roasted pumpkin and used orange cheese. It looked terrifying in the best way, and the kids went crazy for it.
Serving & Storage Suggestions
This dip is best served warm, straight from the oven. The cheese is melty, the sour cream bandages are cool and creamy, and the contrast is pure magic. I like to set it on a trivet in the middle of the table and let everyone dig in with chips.
What to serve with it: Tortilla chips are the obvious choice, but I also love it with warm flour tortillas cut into strips, pita chips, or even crunchy vegetables like carrot sticks and celery. For a full spread, add a bowl of salsa, some guacamole, and maybe a few olives on the side.
Beverage pairings: A cold Mexican lager like Corona or Modelo is perfect. For non-alcoholic options, try a spicy ginger beer or a lime sparkling water. My kids love it with apple juice—don’t ask me why, but they do.
Storage instructions: If you have leftovers (unlikely, but possible), let the dip cool completely, then cover tightly with plastic wrap or transfer to an airtight container. It will keep in the refrigerator for up to 3 days. The sour cream bandages might get a little messy, but the flavor is still great.
Reheating methods: The best way is in the oven at 350°F for 10 minutes, covered with foil. You can also microwave individual portions for 30-45 seconds, but the texture won’t be as nice. I don’t recommend freezing this dip—the cream cheese gets grainy when thawed.
Flavor development: Honestly, this dip tastes even better the next day. The flavors meld together overnight, and the black beans soak up all that seasoning. I’ve been known to make it a day ahead for parties, then just reheat and add fresh bandages before serving.
Nutritional Information & Benefits
Here’s the approximate nutritional breakdown for one serving (about 1/4 cup of dip, without chips):
- Calories: 180
- Protein: 7g
- Fat: 14g
- Carbohydrates: 8g
- Fiber: 3g
- Sugar: 2g
- Sodium: 420mg
Black beans are the real star here nutritionally. They’re packed with fiber—about 15 grams per cup—which helps keep you full and supports healthy digestion. They’re also a great source of plant-based protein and contain antioxidants that fight inflammation. Cream cheese and sour cream add calcium and vitamin A, so you’re getting some bone-health benefits too.
This dip is naturally vegetarian and can easily be made gluten-free and dairy-free. It’s lower in carbs than most party dips, especially if you skip the chips and use veggies for dipping. The protein and fiber combination makes it surprisingly filling—I’ve had it as a light dinner more times than I can count.
From a wellness perspective, I love that this recipe lets me enjoy comfort food without guilt. It feels indulgent, but it’s made from real ingredients that actually nourish your body. That’s my kind of balance.
Conclusion
This quick black bean mummy taco dip is more than just a Halloween novelty. It’s the recipe I turn to when I need something fast, delicious, and guaranteed to please a crowd. Whether you’re making it for a spooky party, a weeknight dinner, or just because you’re craving something creamy and satisfying, it delivers every single time.
I love that this recipe is forgiving—you can mess with the proportions, swap ingredients, or skip the mummy decorations entirely, and it still tastes amazing. But honestly, the mummy look is half the fun. There’s something about seeing those little olive eyes peeking out from sour cream bandages that makes everyone smile. And in a world that can feel pretty heavy, a little bit of whimsy at the dinner table goes a long way.
So go ahead—make this dip your own. Add extra heat, pile on the toppings, or keep it simple. However you serve it, I promise it’ll become a regular in your rotation. And if you come up with a fun variation, I’d love to hear about it. Drop a comment below and tell me how your mummy turned out. Happy cooking, friends!
Frequently Asked Questions
Can I make this dip ahead of time?
Absolutely! Assemble the dip completely (without the sour cream bandages) up to 24 hours in advance. Cover and refrigerate. When you’re ready to serve, bake as directed, then add the bandages right before serving. The dip might need 2-3 extra minutes in the oven if it’s cold from the fridge.
Can I use ground beef instead of black beans?
You sure can. Brown 1/2 pound of ground beef with taco seasoning, drain the fat, and substitute it for the black beans. The cooking time stays the same. I’ve done this for my meat-loving friends, and they always go back for seconds.
How do I make the sour cream bandages look neat?
The trick is to use a very small piping tip or snip a tiny hole in your zip-top bag. Practice on a plate first if you’re nervous. Also, make sure the dip is hot when you pipe—the warmth helps the sour cream stick without melting too fast.
Can I make this in a slow cooker?
Yes! Mix the cream cheese, sour cream, seasoning, and beans in a slow cooker. Cook on low for 2 hours, stirring occasionally. Sprinkle cheese on top, cover, and cook for another 15 minutes until melted. Then add the bandages and serve directly from the slow cooker. This is perfect for parties.
What if I don’t have taco seasoning?
No problem! Mix 1 tablespoon chili powder, 1 teaspoon cumin, 1 teaspoon paprika, 1/2 teaspoon garlic powder, 1/2 teaspoon onion powder, and a pinch of salt. That’s exactly what’s in a packet, minus the anti-caking agents. I actually prefer homemade because I can control the salt and spice level.
Pin This Recipe!
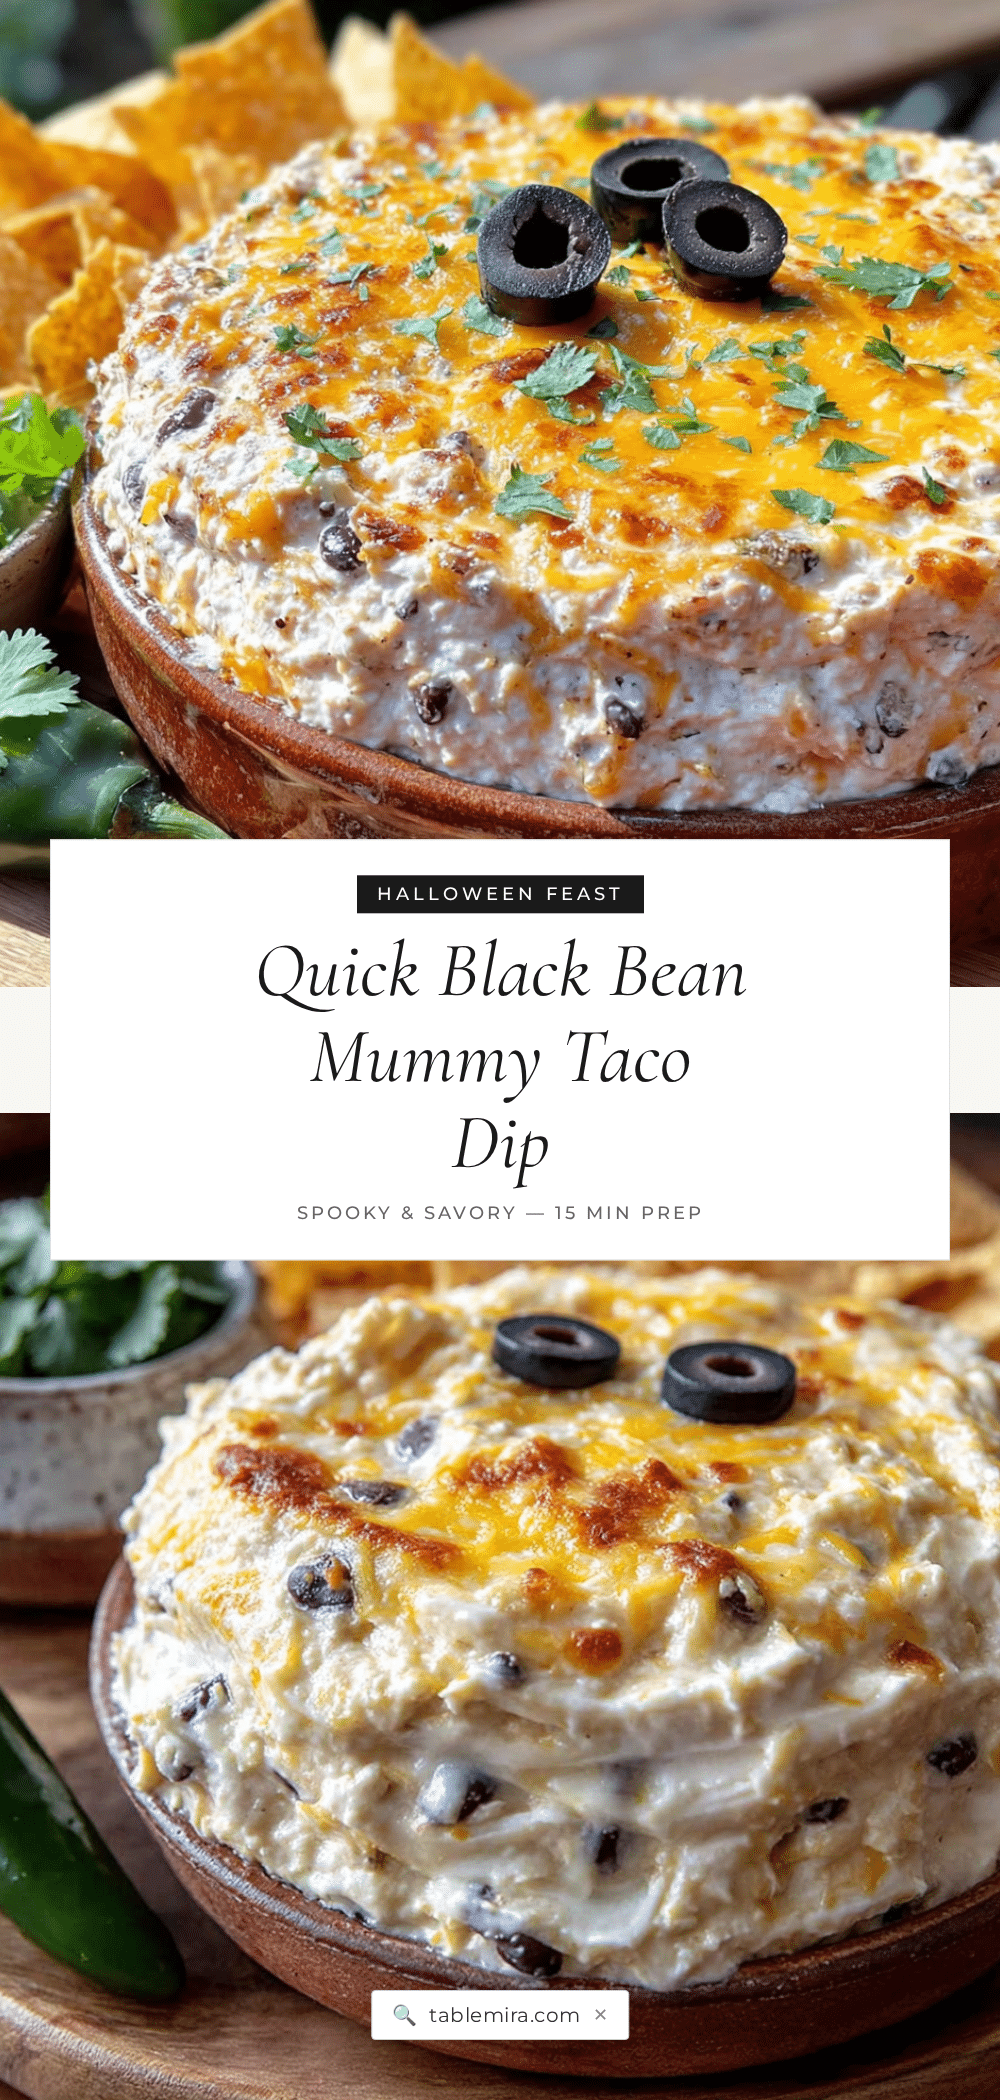
Easy Black Bean Mummy Taco Dip Recipe

A quick and easy Halloween-inspired taco dip made with creamy black beans, cream cheese, and sour cream bandages. Perfect for parties, weeknights, and game days, this vegetarian crowd-pleaser comes together in under 20 minutes.
- Prep Time: 10 minutes
- Cook Time: 12 minutes
- Total Time: 22 minutes
- Yield: 8 servings 1x
- Category: Appetizer
- Cuisine: Mexican-American
Ingredients
- 8 oz cream cheese, softened
- 1 cup sour cream (full-fat preferred)
- 1 packet taco seasoning (or 2 tablespoons homemade)
- 1 can (15 oz) black beans, drained and rinsed
- 1 cup shredded Mexican blend cheese
- 1/2 cup sour cream (for bandages)
- 2 black olive slices (for eyes)
- Tortilla chips for serving
- Optional garnishes: diced tomatoes, sliced jalapeños, fresh cilantro
Instructions
- Preheat oven to 375°F (190°C). Let cream cheese sit out to soften if not already done.
- In a medium bowl, beat softened cream cheese with 1 cup sour cream until smooth using a hand mixer on medium speed for about 30 seconds. Add taco seasoning and mix until combined and uniform pale orange.
- Gently fold in drained and rinsed black beans with a spatula. Leave about a quarter of beans slightly smashed for creamier texture; do not overmix.
- Transfer mixture to a 9-inch pie plate or small baking dish and spread evenly to about 1 inch thick. Smooth the top with the back of a spatula.
- Sprinkle shredded Mexican blend cheese evenly over the top.
- Bake for 10-12 minutes until cheese is melted and bubbly around the edges. For more browning, broil 1-2 minutes at the end, watching carefully.
- While dip bakes, spoon remaining 1/2 cup sour cream into a piping bag or zip-top bag. Snip a tiny corner off the bag.
- Once dip is out of the oven, place two olive slices near the top center, about 2 inches apart, for the mummy’s eyes.
- Pipe thin horizontal lines of sour cream across the dip, wrapping around the eyes. Leave a gap around the olives so eyes are visible. Use 5-6 lines spaced about 1/2 inch apart.
- Serve immediately with tortilla chips. If serving later, cover loosely with foil and keep warm in a 200°F oven for up to 30 minutes.
Notes
Let cream cheese sit out for 20 minutes before starting to avoid lumps. For a dairy-free version, use vegan cream cheese and plant-based sour cream. For gluten-free, check taco seasoning label. The dip tastes even better the next day as flavors meld. To make ahead, assemble without sour cream bandages up to 24 hours in advance, refrigerate, then bake and add bandages before serving.
Nutrition
- Serving Size: 1/4 cup dip (without
- Calories: 180
- Sugar: 2
- Sodium: 420
- Fat: 14
- Saturated Fat: 8
- Carbohydrates: 8
- Fiber: 3
- Protein: 7
Keywords: black bean taco dip, mummy dip, Halloween appetizer, easy taco dip, vegetarian dip, game day snack, quick appetizer