The elementary school Halloween party was in six hours and I’d completely forgotten. My son had reminded me three times that week, but somewhere between back-to-school night and a deadline at work, it had slipped through the cracks. Everyone else would be bringing those elaborate cupcake towers with fondant spiders or those Rice Krispie treats shaped like pumpkins with perfect orange icing. I had a half-empty bag of sugar, three egg whites I’d meant to use for breakfast, and maybe twenty minutes before I needed to pick him up early. Not exactly a winning combination.
I stood there staring into the fridge like it might magically produce a solution. Then I remembered a recipe my grandmother used to make when she was short on time and ingredients — meringue cookies. They were light, airy, and looked like little clouds. And honestly? If you pipe them into a teardrop shape and add two tiny chocolate chips for eyes, they look exactly like ghosts. I mean, exactly. I grabbed the mixer and hoped for the best, fully expecting to show up with a sad plate of slightly burnt something-or-other.
The panic was real, let me tell you. I was whisking egg whites with one hand and texting my neighbor to ask if she had vanilla extract (she did, thank goodness). The timer was ticking, the kids would be getting out soon, and I hadn’t even preheated the oven. Maybe you’ve been there — that frantic scramble where you’re pretty sure you’re about to embarrass yourself in front of the entire PTA. But here’s the thing about these ghost meringue cookies: they don’t just save the day. They steal the show.
I walked into that party with a slightly lopsided platter of ghost-shaped meringues, fully expecting polite nods and quick glances elsewhere. Instead, the moms crowded around asking for the recipe. The kids grabbed them by the handful. One little girl told me they were “the cutest ghosts ever” — and she was wearing a store-bought unicorn costume, so that was high praise. By the end of the party, someone had asked if I could make them for the fall bake sale. I’ve made these ghost meringue cookies every Halloween since, and they never fail to get that same reaction. It’s the recipe that taught me sometimes the simplest things win, especially when you’re under pressure.
Why You’ll Love This Recipe
These ghost meringue cookies aren’t just cute — they’re the kind of recipe that makes you look like a kitchen wizard when you barely broke a sweat. I’ve tested this batch more times than I care to count, tweaking the baking time and the sugar ratio until they came out perfect every single time. Here’s why they work for busy weeknights and last-minute Halloween chaos:
- Quick & Easy: These come together in about 10 minutes of active prep time. From start to finish, including baking, you’re looking at under 90 minutes — most of which is hands-off oven time.
- Simple Ingredients: You probably have everything already. Egg whites, sugar, vanilla, and a pinch of cream of tartar. No special trips to the store for black food coloring or fondant.
- Perfect for Halloween: They’re tailor-made for classroom parties, trunk-or-treat events, or just a fun afternoon activity with the kids. No sticky fingers, no mess.
- Crowd-Pleaser: Kids love the ghost shape, adults love the light, crispy texture. They disappear faster than candy corn at an office party.
- Unbelievably Delicious: The outside is crisp and shatteringly light, while the inside has that soft, marshmallow-y chew. It’s like eating a sweet cloud with a tiny chocolate surprise.
What makes these different from other meringue recipes? It’s the technique — I whip the egg whites to stiff peaks with a touch of cream of tartar for stability, then bake them low and slow so they stay pure white instead of turning that sad beige color. No browning, no cracking, just perfect little ghosts. This isn’t just another version of a meringue cookie — it’s the one that works every time, even when you’re rushing.
Honestly, these cookies are the kind that make you close your eyes after the first bite. They’re light enough that you can eat three without feeling guilty, but satisfying enough that one is never enough. Perfect for impressing the Halloween crowd without the stress, or turning a simple Tuesday night into something a little bit magical.
What Ingredients You Will Need
This recipe uses the most basic pantry staples to create something that looks like it took hours. The magic is in the technique, not the shopping list. Here’s what you’ll need and why each ingredient matters:
- 3 large egg whites, room temperature — Room temperature egg whites whip up higher and faster than cold ones. If you forgot to take them out of the fridge, place the eggs in a bowl of warm water for 5 minutes before separating. I’ve used both fresh and carton egg whites, and fresh always gives me the best volume.
- ¾ cup (150g) granulated sugar — Regular white sugar works best here. Don’t use powdered sugar — it contains cornstarch and will change the texture. I’ve tried this with organic cane sugar and it worked fine, just make sure it’s finely granulated so it dissolves completely.
- ½ teaspoon cream of tartar — This stabilizes the egg whites and helps them hold their shape. If you don’t have it, you can substitute with 1 teaspoon of lemon juice or white vinegar. I’ve done both, and cream of tartar gives the most reliable results.
- 1 teaspoon vanilla extract — Pure vanilla extract adds warmth and depth. I’ve used imitation vanilla in a pinch and it’s fine, but the real stuff makes these taste more like a bakery treat. My personal favorite is Nielsen-Massey, but any brand works.
- ¼ cup mini chocolate chips (about 48 chips) — These become the ghost eyes. You need two tiny chips per ghost. I prefer mini chips because they look more proportional, but you can also use regular chocolate chips cut in half. Dark chocolate chips give a nice contrast against the white meringue.
- Pinch of salt — Just a tiny bit balances the sweetness and helps the egg whites whip up more stable. Don’t skip it — I forgot once and the cookies were flat and overly sweet.
That’s it. Six ingredients, and you probably have five of them right now. The only thing you might need to pick up is cream of tartar, but it’s cheap and lasts forever in your spice cabinet. I keep a jar specifically for meringue recipes now.
If you’re making these for someone with dietary restrictions, here are some substitutions I’ve tested: use aquafaba (the liquid from a can of chickpeas) instead of egg whites for a vegan version — 3 tablespoons of aquafaba per egg white works well. For a sugar-free option, you can try monk fruit sweetener, but I’ll warn you the texture won’t be quite as crisp. And if you’re avoiding chocolate, use a tiny dot of black gel food coloring for the eyes instead — just dab it on after piping.
Equipment Needed
You don’t need a professional bakery setup for these ghost meringue cookies. Here’s what I use and what you can substitute if you’re in a pinch:
- Electric mixer (stand or hand-held) — Whipping egg whites by hand is possible, but it takes about 10-15 minutes of constant whisking. I’ve done it once when my mixer broke, and my arm was sore for two days. A hand mixer works perfectly and costs around $20. I use my KitchenAid stand mixer because it frees up my hands for other tasks.
- Large mixing bowl — Glass or metal is best. Plastic bowls can hold onto grease residue, which prevents egg whites from whipping properly. I learned this the hard way after a batch that refused to stiffen.
- Baking sheet — Any standard baking sheet works. I line mine with parchment paper for easy cleanup. Silicone baking mats also work well and give the meringues a slightly smoother bottom.
- Piping bag with round tip (or zip-top bag) — A piping bag gives you more control, but a sturdy zip-top bag with the corner snipped off works just as well. I’ve used both and honestly, the zip-top bag is easier to clean.
- Rubber spatula — For folding in the chocolate chips gently. A metal spoon can deflate the meringue too much.
- Cooling rack — Meringues need to cool completely before storage, and a wire rack allows air to circulate underneath. If you don’t have one, just let them cool on the baking sheet — it takes a bit longer but works fine.
Budget-friendly tip: skip the fancy piping tips and just use a zip-top bag. I’ve made dozens of batches this way and the ghosts come out just as cute. The only thing I wouldn’t skimp on is the electric mixer — your arm will thank you.
Preparation Method
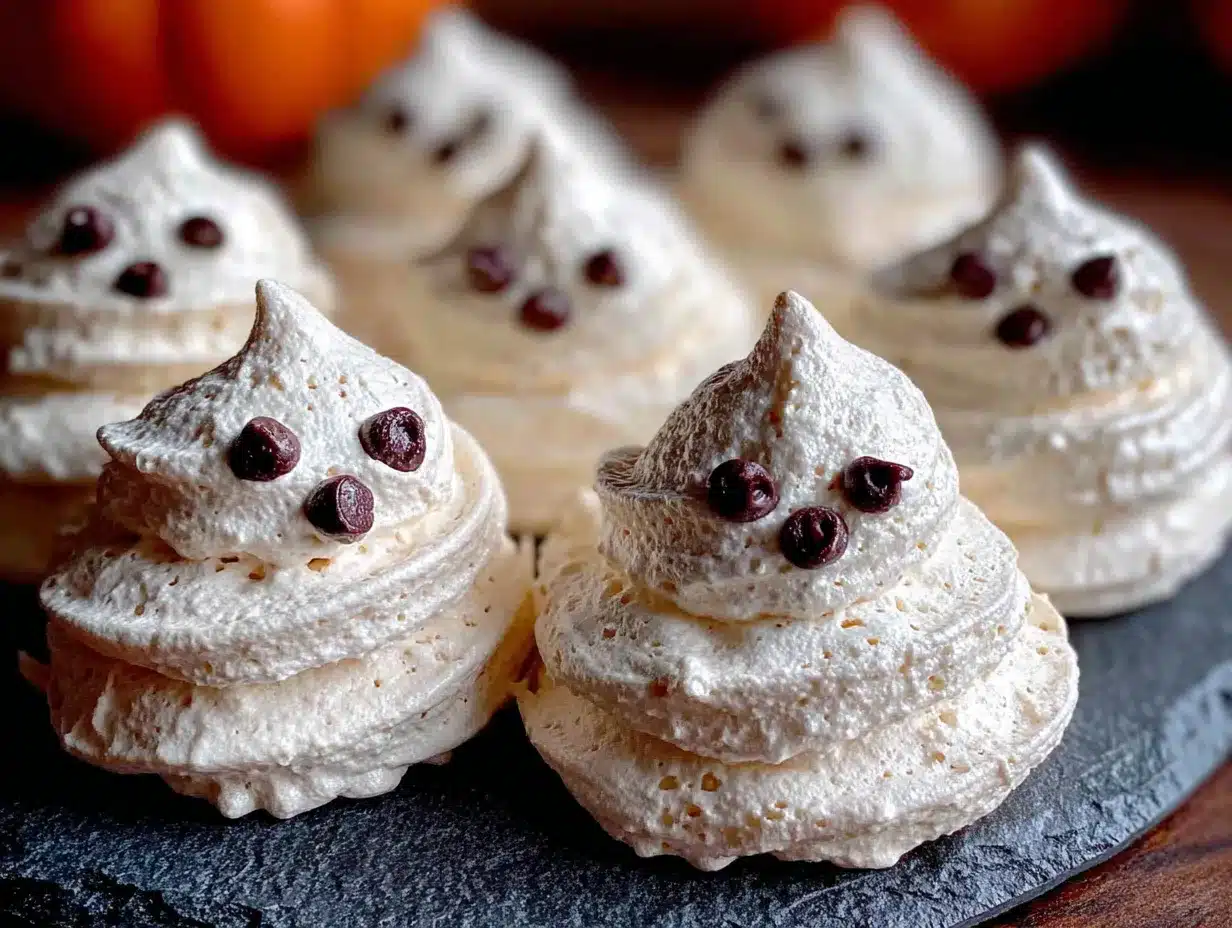
Let me walk you through this step by step. I’ve included all the little details I wish someone had told me the first time I made these.
- Preheat your oven to 200°F (93°C). Yes, this is low — that’s intentional. Meringues dry out slowly so they stay white and crisp. If your oven runs hot, use an oven thermometer. I burned my first batch because my oven was actually running at 250°F. Line a baking sheet with parchment paper and set it aside.
- Clean your mixing bowl and beaters thoroughly. Any trace of grease or yolk will ruin your meringue. I wipe mine with a little white vinegar on a paper towel, then dry it completely. It sounds extra, but I promise it makes a difference. Separate your eggs while they’re cold — it’s easier to keep the yolk intact. Then let the whites come to room temperature for about 15 minutes.
- Add the egg whites and cream of tartar to your bowl. Beat on medium speed until foamy — about 1 minute. You’ll see lots of small bubbles forming. This is the point where I usually add the pinch of salt too. Don’t rush this step; the foam needs to be consistent before you add sugar.
- With the mixer running, add the sugar one tablespoon at a time. I know it’s tedious, but adding sugar slowly prevents the meringue from deflating. Beat on medium-high speed for about 2 minutes after each addition. The mixture will start looking glossy and smooth. This takes about 7-8 minutes total. Your arm might get tired — that’s normal.
- Add the vanilla extract. Beat for another 30 seconds until combined. The meringue should be stiff and glossy — when you lift the beater, the peak should stand straight up without drooping. If it flops over, keep beating for another minute. This is called “stiff peaks” and it’s your goal. I always do the “bowl test” — if I can hold the bowl upside down over my head and nothing falls out, it’s ready. (I’ve never actually done this over my head, but you get the idea.)
- Gently fold in the mini chocolate chips. Use a rubber spatula and fold in a gentle J-shape motion — scoop from the bottom, lift, and fold over. About 8-10 folds should be enough. Don’t overmix or you’ll deflate all that air you just whipped in. The chips should be evenly distributed but you’ll still see streaks of white meringue.
- Transfer the meringue to your piping bag. If using a zip-top bag, snip about ½ inch off one corner. Twist the top of the bag to push the meringue down toward the tip. Pipe small ghost shapes onto the parchment paper — about 1½ inches wide at the base, tapering up to a point at the top. Leave about 1 inch between each ghost. You should get about 24 ghosts from this batch.
- Add the eyes immediately. While the meringue is still wet, gently press two mini chocolate chips into each ghost for eyes. Place them close together near the top of the wider part. Don’t press too hard or you’ll squish the ghost shape. I use tweezers for precision, but your fingers work fine.
- Bake for 60-75 minutes. The meringues are done when they peel easily off the parchment paper and feel dry to the touch. They shouldn’t be brown at all — if they start to color, your oven is too hot. I check mine at 60 minutes and then every 5 minutes after. The baking time depends on humidity and oven accuracy.
- Turn off the oven and leave the meringues inside to cool completely. This is the hardest part — don’t open the door! Let them sit in the cooling oven for at least 1 hour, preferably 2. This drying step ensures they’re crisp all the way through. I usually make these at night and just leave them in the oven until morning.
Cooking Tips & Techniques
I’ve made these ghost meringue cookies at least twenty times now, and I’ve messed up more batches than I care to admit. Here’s what I’ve learned the hard way so you don’t have to.
Humidity is your enemy. Meringue absorbs moisture from the air, which makes it sticky and prevents it from drying properly. Don’t make these on a rainy day — I tried it once and the cookies came out chewy instead of crisp. If you live in a humid climate, add an extra 15 minutes to the baking time and let them cool completely in the oven with the door closed.
Don’t overbeat the egg whites. I know I said to beat until stiff peaks, but there’s a fine line between stiff and overbeaten. Overbeaten meringue looks grainy and separates into liquid and foam. If you see liquid pooling at the bottom of your bowl, you’ve gone too far. Unfortunately, there’s no saving it — you have to start over. I’ve done this twice and it’s frustrating, but it happens.
Use a timer for the sugar additions. I set a timer for 2 minutes between each spoonful of sugar. It sounds obsessive, but it ensures the sugar dissolves completely. Undissolved sugar crystals cause “weeping” — little beads of syrup that form on the surface of the cookies during baking. Not a disaster, but not pretty either.
Multitasking strategy: While the meringue is baking, clean up your workspace. The bowl and beaters need to soak in hot soapy water because dried meringue is like cement. I also prep my piping bag for the next batch if I’m doubling the recipe. The 60-minute bake time is perfect for folding laundry or answering emails.
For consistent ghost shapes, hold the piping bag straight up and down, not at an angle. Squeeze firmly for 3 seconds at the base, then lift straight up while reducing pressure. This creates that nice rounded bottom and pointed top. Practice on a piece of parchment first — I still do this every time.
Variations & Adaptations
One of the best things about this recipe is how easy it is to customize. I’ve tried several variations over the years, and here are my favorites:
Vegan Ghost Meringues: Replace the egg whites with 6 tablespoons of aquafaba (the liquid from one can of chickpeas). Whip it with the cream of tartar for about 10 minutes until stiff peaks form. The texture is slightly less crisp but still delicious. I made these for my vegan cousin’s Halloween party and she couldn’t tell the difference.
Pumpkin Spice Ghosts: Add 1 teaspoon of pumpkin pie spice and ¼ teaspoon of cinnamon to the sugar before adding it to the egg whites. The spices give the meringues a warm, fall flavor that pairs beautifully with the chocolate eyes. I made these for a Friendsgiving and they were gone in ten minutes.
Colorful Ghosts: Divide the meringue into three bowls and add a drop of gel food coloring to each — purple, orange, and green work great for Halloween. Fold gently until the color is swirled through (don’t overmix). Pipe as usual. The swirl effect looks really professional without any extra effort.
Peppermint Kisses: Substitute the vanilla extract with ½ teaspoon of peppermint extract. Crush a candy cane and sprinkle the pieces on top of the ghosts before baking (skip the chocolate eyes for this version). These are perfect for Christmas parties, and the red and white look festive.
Gluten-Free Option: These are naturally gluten-free since they contain no flour. Just double-check that your vanilla extract and chocolate chips are certified gluten-free if you’re serving someone with celiac disease. Most brands are, but it’s worth checking.
My personal favorite variation is the pumpkin spice version — it feels more seasonal without losing the ghost shape. I made a double batch last October and froze half for Thanksgiving. They thaw perfectly at room temperature for about 15 minutes.
Serving & Storage Suggestions
These ghost meringue cookies are best served at room temperature. The crisp exterior and soft interior are most noticeable when they haven’t been refrigerated. I usually arrange them on a white platter with a few fake spider webs or orange sprinkles scattered around for visual effect. They look especially cute on a cake stand at different heights.
For a Halloween party, I like to serve them alongside a bowl of warm apple cider or hot chocolate. The sweetness of the meringue pairs beautifully with the tartness of the cider. If you’re putting together a dessert table, they complement pumpkin bars, caramel apples, or chocolate cupcakes without competing for attention. I’ve also crumbled them over vanilla ice cream for a quick sundae — the texture contrast is amazing.
Storage Instructions: Store these in an airtight container at room temperature for up to 2 weeks. Do not refrigerate — the moisture in the fridge will make them sticky. I use a glass jar with a tight-fitting lid and layer them between sheets of parchment paper. If you live in a humid climate, add a food-grade silica gel packet to the container to absorb excess moisture.
Freezing Instructions: These freeze beautifully for up to 3 months. Place them in a single layer in a freezer-safe container with parchment between layers. To thaw, remove from the freezer and let them sit at room temperature for 15 minutes — do not microwave them or they’ll turn into a sticky mess. I’ve frozen batches for Halloween parties months in advance and they taste just as fresh.
The flavors actually develop a bit over time — the vanilla becomes more pronounced after a day or two. I actually prefer them on day two, when the texture has stabilized and the chocolate eyes have set firmly. Just don’t store them near anything with a strong smell (like onions or garlic) because meringue absorbs odors like a sponge.
Nutritional Information & Benefits
These ghost meringue cookies are surprisingly light compared to most Halloween treats. Here’s the estimated nutritional breakdown per cookie (based on 24 cookies):
| Nutrient | Amount per Cookie |
|---|---|
| Calories | 35 |
| Total Fat | 0.5g |
| Saturated Fat | 0.3g |
| Cholesterol | 0mg |
| Sodium | 10mg |
| Total Carbohydrates | 8g |
| Sugars | 7g |
| Protein | 1g |
These cookies are fat-free (except for the tiny amount in the chocolate chips), dairy-free, and naturally gluten-free. The egg whites provide a small amount of protein — about 1 gram per cookie — which is more than you’ll find in most Halloween candies. They’re also free of artificial colors and preservatives if you use natural vanilla extract.
From a health perspective, these are a better option than candy corn or packaged cookies because you control exactly what goes in them. The sugar content is lower than most store-bought treats, and the portion size is naturally small — one or two cookies feels satisfying without overdoing it. I let my kids have these as a Halloween treat without worrying about a sugar crash later.
If you’re watching your sugar intake, you can reduce the sugar to ½ cup (100g), but the texture will be slightly less crisp. I’ve tried this and the cookies were still good — just a bit more delicate and prone to cracking. For a lower-carb option, use a monk fruit sweetener blend, but expect a slightly different texture.
Conclusion
These ghost meringue cookies have become my go-to Halloween recipe for good reason. They’re quick enough for a frantic weeknight, simple enough that my kids can help pipe the shapes, and impressive enough that people think I spent hours on them. I’ve made them for classroom parties, office potlucks, and casual get-togethers, and they always get the same reaction — smiles, compliments, and requests for the recipe.
I love that this recipe lets me be creative without the stress. You can keep them classic with the chocolate chip eyes, or experiment with different flavors and colors. The base recipe is forgiving enough that even a beginner can nail it on the first try. And honestly? There’s something deeply satisfying about pulling a tray of perfect little ghosts out of the oven, knowing you made them with ingredients you already had.
I’d love to hear how yours turn out! Leave a comment below and let me know if you tried any variations — I’m always looking for new ideas. And if you’re looking for more quick Halloween treats, check out these spider web dip and pumpkin-shaped cookies that also come together in under 30 minutes. Happy Halloween, and happy baking!
Frequently Asked Questions
Can I make these ghost meringue cookies ahead of time?
Absolutely. These cookies store well for up to 2 weeks in an airtight container at room temperature. You can even freeze them for up to 3 months. I often make a double batch a week before Halloween so I’m not scrambling at the last minute.
Why did my meringue turn out flat and runny?
This usually happens for one of three reasons: your bowl had grease residue, your egg whites had any yolk mixed in, or the weather was too humid. Make sure your equipment is squeaky clean and avoid making these on rainy days. If the meringue won’t stiffen, you can try adding another pinch of cream of tartar and beating longer.
Can I use liquid egg whites from a carton?
Yes, but the texture won’t be quite as stable. Carton egg whites are pasteurized, which slightly affects their ability to whip to stiff peaks. If you use them, add an extra tablespoon per egg white and expect a slightly softer meringue. I’ve done this in a pinch and the cookies still looked cute, just not as crisp.
How do I know when the meringues are fully baked?
They should peel easily off the parchment paper without sticking. The surface should feel dry and firm, not tacky. If you tap one gently, it should sound hollow. The color should remain white — if they’re turning brown, your oven is too hot and you should reduce the temperature by 25 degrees.
Can I skip the cream of tartar?
You can substitute it with 1 teaspoon of lemon juice or white vinegar. The acid helps stabilize the egg whites and prevents them from deflating. Without any acid, your meringue might still work, but it’s more likely to collapse or weep during baking. I always use cream of tartar because it has no flavor, unlike lemon juice.
Pin This Recipe!
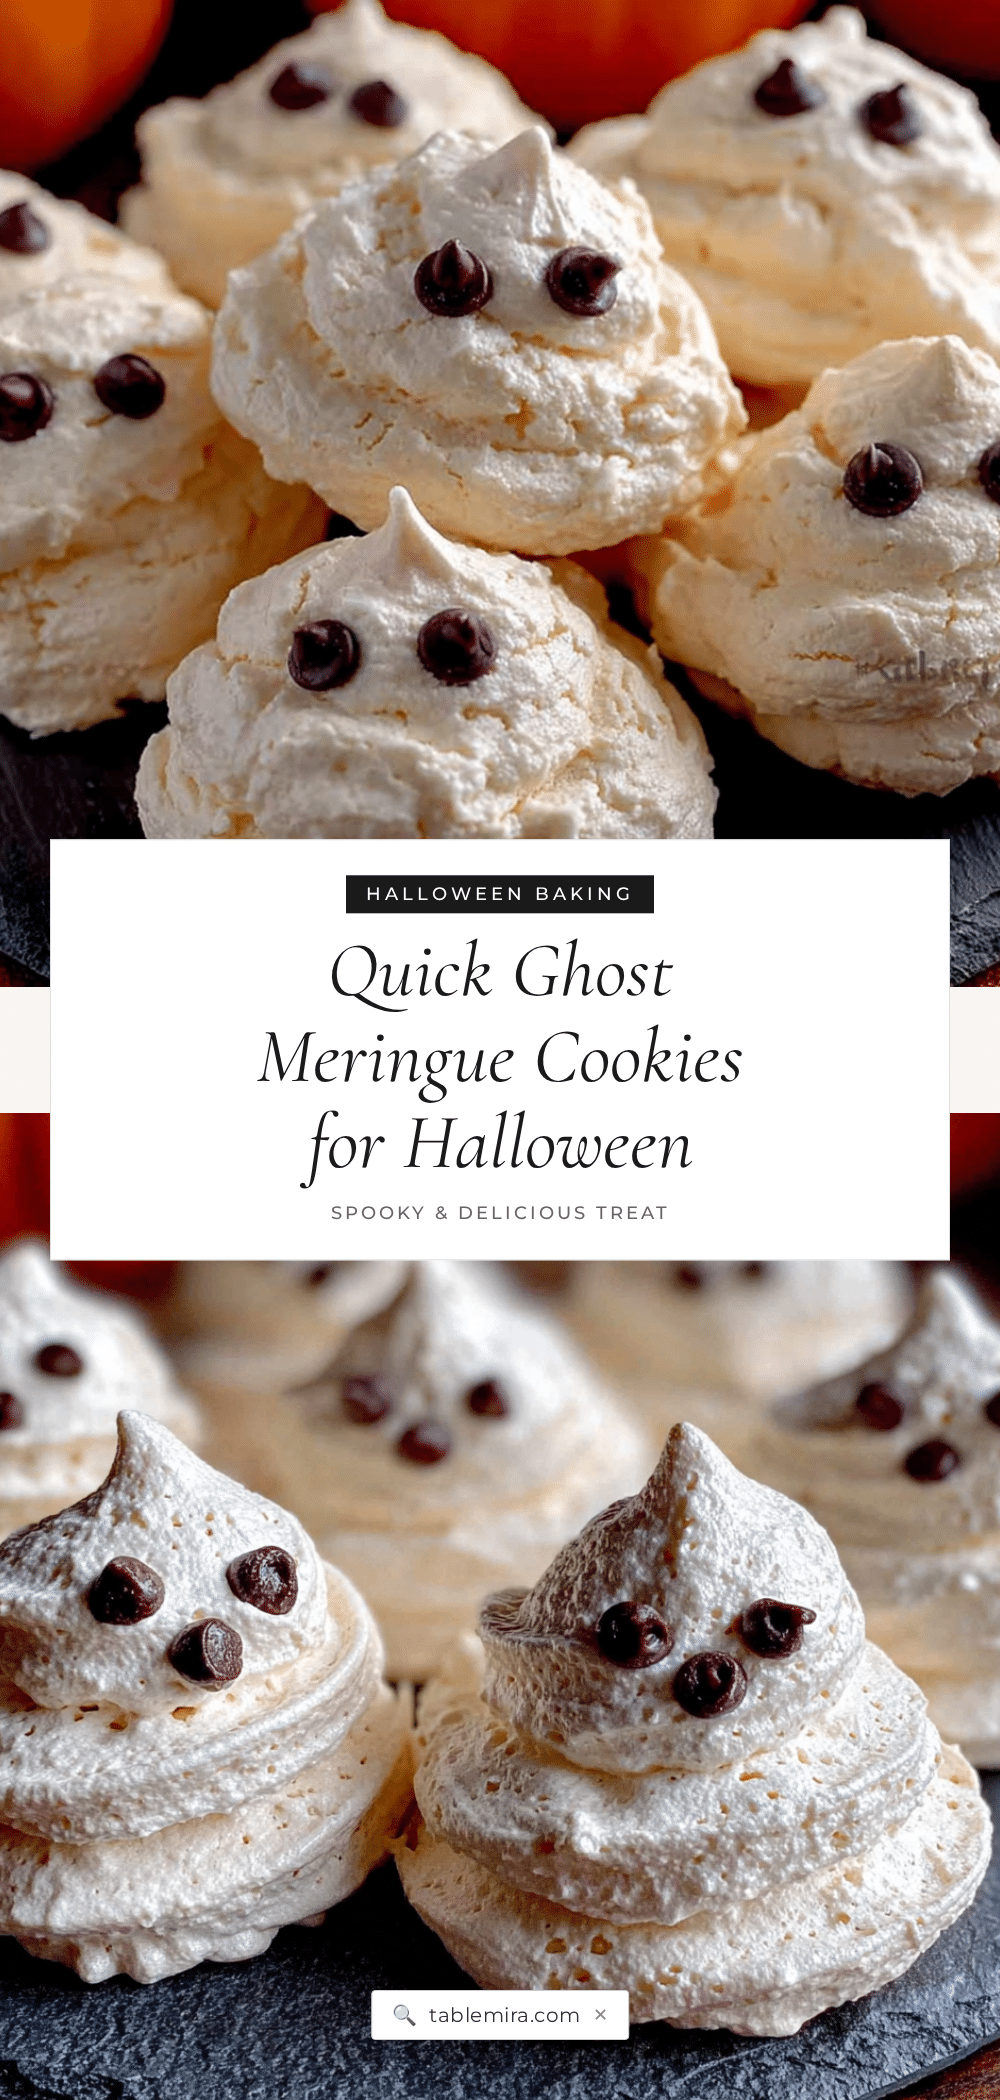
Quick Ghost Meringue Cookies: Easy Halloween Treat
These ghost meringue cookies are light, airy, and shaped like little ghosts with chocolate chip eyes. They’re quick to make with simple ingredients, perfect for Halloween parties, classroom treats, or last-minute baking emergencies.
- Prep Time: 10 minutes
- Cook Time: 60-75 minutes
- Total Time: 1 hour 10 minutes to 1 hour 25 minutes (plus cooling time)
- Yield: 24 cookies 1x
- Category: Dessert
- Cuisine: American
Ingredients
- 3 large egg whites, room temperature
- ¾ cup (150g) granulated sugar
- ½ teaspoon cream of tartar
- 1 teaspoon vanilla extract
- ¼ cup mini chocolate chips (about 48 chips)
- Pinch of salt
Instructions
- Preheat your oven to 200°F (93°C). Line a baking sheet with parchment paper and set it aside.
- Clean your mixing bowl and beaters thoroughly with white vinegar to remove any grease. Separate eggs while cold, then let whites come to room temperature for about 15 minutes.
- Add the egg whites and cream of tartar to your bowl. Beat on medium speed until foamy, about 1 minute. Add the pinch of salt.
- With the mixer running, add the sugar one tablespoon at a time, beating on medium-high speed for about 2 minutes after each addition. Continue until all sugar is added and the mixture is glossy and stiff peaks form (about 7-8 minutes total).
- Add the vanilla extract and beat for another 30 seconds until combined. The meringue should be stiff and glossy with peaks that stand straight up.
- Gently fold in the mini chocolate chips using a rubber spatula with a J-shape motion, about 8-10 folds. Do not overmix.
- Transfer the meringue to a piping bag fitted with a round tip (or a zip-top bag with ½ inch snipped off one corner). Pipe small ghost shapes onto the parchment paper, about 1½ inches wide at the base tapering to a point at the top, leaving 1 inch between each ghost. You should get about 24 ghosts.
- Immediately press two mini chocolate chips into each ghost for eyes, placing them close together near the top of the wider part.
- Bake for 60-75 minutes until the meringues peel easily off the parchment paper and feel dry to the touch. They should remain white.
- Turn off the oven and leave the meringues inside to cool completely for at least 1 hour, preferably 2 hours. Do not open the oven door during this time.
Notes
Humidity is your enemy – don’t make these on a rainy day. For consistent ghost shapes, hold the piping bag straight up and down. If you don’t have cream of tartar, substitute with 1 teaspoon lemon juice or white vinegar. Store in an airtight container at room temperature for up to 2 weeks. Freeze for up to 3 months.
Nutrition
- Serving Size: 1 cookie
- Calories: 35
- Sugar: 7
- Sodium: 10
- Fat: 0.5
- Saturated Fat: 0.3
- Carbohydrates: 8
- Protein: 1
Keywords: ghost meringue cookies, Halloween cookies, meringue cookies, easy Halloween treat, ghost cookies, egg white cookies, gluten-free Halloween cookies


