My neighbor Jen wasn’t trying to throw a party. I’d stopped by to return her slow cooker—the one she’d loaned me three weeks earlier—and the smell hit me before I even made it past her screen door. It was this warm, cheesy, slightly spicy something that made me forget why I’d come over in the first place. I stood there in her entryway, holding that slow cooker like an idiot, while her kids ran past me yelling something about a spider web.
“Oh, that’s just the dip for their Halloween party tomorrow,” Jen said, wiping her hands on her jeans. She said it like it was nothing. Like she hadn’t just created the most incredible aroma I’d ever walked into. I peeked into her kitchen and saw this bubbling dish of creamy, golden goodness with what honestly looked like a spider web drawn right on top in sour cream. Her six-year-old was dipping a chip into it, and I mean, the kid was practically licking the bowl.
I asked for the recipe right there, and Jen shrugged and said she’d just thrown stuff together. You know that feeling when someone makes something amazing and acts like it’s no big deal? That was this moment. I stood in her kitchen for another twenty minutes, eating chip after chip, asking questions while she packed lunch boxes. Maybe you’ve been there—finding a recipe that’s so good, so ridiculously easy, that it feels like you’ve stumbled onto a secret.
That dip became my go-to for every gathering, but especially for Halloween. The spider web design is fun enough to make the kids squeal, but the flavor? It’s the kind of thing that disappears before the game even starts. I’ve tweaked it over the years to make it more budget-friendly and kid-approved, and honestly, I don’t think I’ll ever make buffalo chicken dip any other way.
Why You’ll Love This Recipe
Let me tell you why this Spooky Spider Web Buffalo Chicken Dip has become my most-requested party dish. I’ve tested this recipe at least a dozen times across different gatherings—school parties, family movie nights, potlucks—and it never fails. Here’s what makes it special:
- Kid-Friendly Heat Level : The buffalo sauce is balanced with cream cheese and ranch, so it’s warm without being overwhelming. My own kids, who usually run from anything spicy, go back for seconds.
- Budget-Friendly Ingredients : Everything in this recipe comes from the regular grocery store. Canned chicken, block cream cheese, and store-brand shredded cheese keep the cost low without sacrificing flavor.
- Ready in Under 30 Minutes : You can throw this together after school pickup and still have time to carve pumpkins. It’s that fast.
- Perfect for Halloween Parties : The spider web design on top makes it look like you spent way more effort than you actually did. Kids absolutely lose their minds over it.
- Leftovers Reheat Beautifully : This dip tastes just as good the next day. I’ve even eaten it cold straight from the fridge—don’t judge me, it works.
What makes this version different from every other buffalo chicken dip recipe out there? It’s the ratio. I spent months tweaking the cream cheese to hot sauce balance until I found the sweet spot where kids actually ask for more. Plus, the spider web design isn’t just for show—that sour cream drizzle adds a cool, creamy finish that cuts through the heat perfectly.
This recipe isn’t just good for a Halloween-themed snack. It’s the kind of dip that makes you close your eyes after the first bite. It’s comfort food disguised as a party trick—cheaper, faster, and way more satisfying than anything you’d buy at the store.
What Ingredients You Will Need
This recipe uses simple, everyday ingredients to create something that tastes like you spent hours in the kitchen. Most of these are probably in your pantry or fridge right now.
For the Dip Base
- 2 cans (12.5 oz each) canned chicken, drained and flaked (I prefer the Kirkland or Bumblebee brands for the best texture; drain them well so the dip isn’t watery)
- 8 oz cream cheese, softened to room temperature (Philadelphia is my go-to, but store brands work fine—just make sure it’s truly softened or you’ll get lumps)
- 1/2 cup buffalo hot sauce (Frank’s RedHot is the classic choice, but any cayenne-based sauce works; adjust based on your family’s heat tolerance)
- 1/2 cup ranch dressing (full-fat gives the best texture, but light works if that’s what you have)
- 1 cup shredded cheddar cheese, divided (sharp cheddar adds more flavor, but mild is fine for picky eaters)
- 1/2 cup shredded mozzarella cheese (this gives the dip that perfect stretchy texture when it’s hot)
For the Spider Web Topping

- 1/4 cup sour cream (full-fat works best for piping; Greek yogurt can substitute but it’s thinner)
- 2-3 black olive slices (for the spider body—optional but honestly, the kids go wild for this detail)
- 8-10 pretzel sticks (broken in half to make spider legs—again optional but highly recommended)
For Serving
- Tortilla chips (I like scoop-shaped chips for maximum dip delivery)
- Celery sticks and carrot sticks (for a crunchy, healthier option that still tastes great)
A quick note on ingredient selection: If you’re feeding very young kids or spice-sensitive eaters, use only 1/4 cup of buffalo sauce and add an extra tablespoon of ranch dressing. You can always stir in more heat at the end if the adults want it spicier. For a dairy-free version, use vegan cream cheese and dairy-free shredded cheese—I’ve tested this with Kite Hill products and it works surprisingly well.
Equipment Needed
You don’t need fancy equipment for this recipe, which is part of why I love it. Here’s what you’ll need:
- 9-inch pie dish or small baking dish (a round dish makes the spider web design easier to create; an 8×8 square pan works too)
- Mixing bowl (medium-sized, for combining the ingredients)
- Hand mixer or sturdy spoon (the hand mixer makes the cream cheese mixture silky smooth; a spoon works but expect some arm work)
- Small piping bag or zip-top bag (for the sour cream spider web; a sandwich bag with the corner snipped off works perfectly)
- Measuring cups and spoons
- Spatula (for scraping every last bit of dip into the dish—trust me, you’ll want it all)
If you don’t have a piping bag, don’t stress. I’ve used a plastic sandwich bag more times than I can count. Just fill it with sour cream, snip a tiny corner off, and you’re in business. For baking, any oven-safe dish works—even a cast iron skillet if that’s what you have. I actually prefer using my small cast iron because it keeps the dip hot longer on the table.
Preparation Method
Let me walk you through this step by step. I’ve made this dip so many times that I’ve got it down to a science, and I’ll share every little trick I’ve learned along the way.
- Preheat your oven to 375°F (190°C). While it’s heating, take your cream cheese out of the fridge if you haven’t already. You want it soft—like, leave-it-out-for-an-hour soft. If you forgot (I forget all the time), microwave it for 15 seconds on low power. Just don’t nuke it too long or it gets grainy.
- Drain and flake your canned chicken. Open both cans, dump them into a fine-mesh strainer, and press down with a spoon to get as much liquid out as possible. Wet chicken makes watery dip, and nobody wants that. Once drained, put the chicken in your mixing bowl and break it up with a fork until it’s in small, even pieces.
- Mix the cream cheese base. Add the softened cream cheese, buffalo sauce, and ranch dressing to the bowl with the chicken. Use your hand mixer on low speed (or a sturdy spoon and some elbow grease) to combine everything until it’s smooth and evenly mixed. You shouldn’t see any white streaks of cream cheese. This takes about 2 minutes with a mixer, maybe 4 if you’re doing it by hand.
- Fold in the cheeses. Add 3/4 cup of the shredded cheddar and all of the mozzarella to the bowl. Stir gently until the cheeses are distributed throughout the mixture. Save that remaining 1/4 cup of cheddar for the top—it’ll get all golden and bubbly in the oven.
- Transfer to your baking dish. Use your spatula to scrape every bit of the mixture into your greased pie dish or baking dish. Spread it out evenly with the back of a spoon. Don’t press it down too firmly—you want a nice, even layer that’ll heat through properly.
- Sprinkle the reserved cheddar on top. That 1/4 cup of cheddar goes over the entire surface now. This creates that gorgeous golden crust that everyone fights over.
- Bake for 18-22 minutes. Put the dish in the preheated oven and bake until the dip is hot and bubbly around the edges and the cheese on top is melted and starting to brown slightly. You’ll know it’s ready when you see little bubbles breaking through the cheese layer. If you want it extra golden, switch to broil for the last 1-2 minutes—but watch it carefully because it can burn fast.
- Let it rest for 5 minutes. Pull the dip out of the oven and let it sit on the counter for about 5 minutes. This lets it set up slightly so the spider web doesn’t just dissolve into the hot dip. I know it’s hard to wait, but trust me on this one.
- Create the spider web design. While the dip cools slightly, fill your small piping bag or zip-top bag with the sour cream. Snip a tiny corner off the bag. Starting from the center of the dip, pipe a small circle of sour cream. Then pipe a larger circle around it, then another, until you reach the edges. You should have 4-5 concentric circles. Take a toothpick or the tip of a knife and drag it from the center outward through all the circles, creating lines that look like a spider web. Repeat this every inch or so around the entire dip. It takes about 30 seconds and looks incredible.
- Add the spider decoration. Place the black olive slices in the center of the web to form a spider body. Arrange the pretzel stick halves around it to look like spider legs—four on each side. Now stand back and admire your work. The kids are going to lose it.
One thing I learned the hard way: don’t skip the resting step before adding the spider web. The first time I made this, I piped the sour cream onto piping hot dip and it just melted into a white puddle. Still tasted great, but it looked nothing like a web. That 5-minute rest makes all the difference.
Cooking Tips & Techniques
After making this dip more times than I can count, I’ve picked up a few tricks that make the process smoother and the results better. Let me share what I’ve learned—including the mistakes I’ve made so you don’t have to repeat them.
Don’t overmix the chicken. I used to beat the chicken into submission with my hand mixer, trying to get it perfectly smooth. Big mistake. You want some texture in the dip—little shreds of chicken that you can actually bite into. Mix just until everything is combined, then stop. Overmixed chicken dip turns into a paste, and that’s just sad.
Room temperature cream cheese is non-negotiable. I know, I know, we’re all in a hurry. But cold cream cheese creates lumps that no amount of mixing will fix. If you forget to set it out (I forget at least half the time), cut it into small cubes and microwave it in 10-second bursts. It’s not perfect, but it’s better than trying to mix cold cream cheese into hot sauce.
Watch your oven temperature. Every oven runs differently. My old oven would burn the top of this dip while the inside was still cold. If your oven runs hot, check the dip at 15 minutes instead of 18. You want the edges bubbly and the center hot—not the entire surface looking like a desert landscape.
Make it ahead of time. This is my favorite trick for party days. You can assemble the entire dip (up to step 6) the night before, cover it with plastic wrap, and keep it in the fridge. The next day, just pull it out while the oven preheats and bake as directed. You might need to add 5 minutes to the baking time since it’s starting cold. This saves so much stress when you’re juggling party prep.
Double the recipe for crowds. This recipe fills a 9-inch pie dish perfectly. If you’re feeding a crowd (like a Halloween block party), double everything and use a 9×13 baking dish. Bake for 25-30 minutes instead of 20. The spider web design works on a rectangular dish too—just pipe your circles in an oval shape.
Variations & Adaptations
One of the best things about this recipe is how flexible it is. I’ve tried several variations over the years, and some of them have become favorites in their own right.
Mild Version for Super Picky Eaters : If your kids are really sensitive to spice, replace the buffalo sauce with 1/2 cup of BBQ sauce instead. You lose the buffalo flavor, but you gain this sweet, smoky dip that kids absolutely devour. I’ve made this version for preschool parties and it disappears just as fast as the original.
Extra Spicy for the Adults : For game day or adult parties, I add 2 tablespoons of extra buffalo sauce and 1/2 teaspoon of cayenne pepper to the mix. I also drizzle a little extra hot sauce over the top before baking. The spider web design still works, and the contrast between the cool sour cream and the spicy dip is amazing.
Slow Cooker Method : If you need to keep this warm for a party, make it in a small slow cooker instead of the oven. Combine all the dip ingredients (except the sour cream and toppings) in the slow cooker and cook on low for 2 hours, stirring occasionally. Once it’s hot and bubbly, spoon it into a serving dish, add the spider web design, and serve. The slow cooker version stays warm for hours, which is perfect for parties.
Gluten-Free Adaptation : This recipe is naturally gluten-free as written, as long as you check your hot sauce and ranch labels. Some brands use wheat-based thickeners. Serve with gluten-free tortilla chips or vegetable sticks, and you’re good to go.
Dairy-Free Version : I tested this for a friend who’s dairy-free, and it worked beautifully. Use vegan cream cheese (Kite Hill is my favorite), dairy-free shredded cheddar and mozzarella, and a dairy-free ranch dressing. The texture is slightly less creamy, but the flavor is still fantastic. The spider web works best with a thick dairy-free sour cream alternative.
My personal favorite variation? I add a can of drained black beans and a cup of corn kernels to the mix for a heartier version. It stretches the recipe further (great for feeding a crowd on a budget) and adds a nice texture contrast. My kids don’t even notice the extra veggies.
Serving & Storage Suggestions
This dip is best served warm, right after the spider web goes on. The contrast between the hot, cheesy dip and the cool sour cream web is part of the magic. I set it out with a basket of tortilla chips and a plate of celery and carrot sticks arranged around the dish like they’re part of the Halloween display.
Presentation Tips : Place the dish on a black or orange platter to really make the spider web pop. I scatter a few fake spider rings around the platter for extra spooky effect. The kids always grab those rings and wear them for the rest of the party. If you’re serving this at a Halloween party, put a small sign next to it that says “Spider Web Dip” and watch how fast it disappears.
What to Serve With It : Tortilla chips are the classic choice, but this dip is also amazing with pretzel chips, pita chips, or even spread on mini toasts. For a healthier option, serve with bell pepper strips, cucumber rounds, and snap peas. The dip is so flavorful that even the veggies taste indulgent.
Storage Instructions : Leftover dip keeps in an airtight container in the refrigerator for up to 4 days. The spider web design will disappear into the dip as it sits, but the flavor is still there. To reheat, spoon the dip into a microwave-safe bowl and heat in 30-second bursts, stirring between each, until hot. You can also reheat it in a 350°F oven for 10-15 minutes.
Freezing Tips : This dip freezes surprisingly well. Assemble the dip (without the spider web topping) in a freezer-safe container and freeze for up to 3 months. Thaw in the refrigerator overnight, then bake as directed. Add the spider web after baking. I’ve done this for multiple parties and nobody ever knows it was frozen.
Flavor Development : Here’s something interesting—this dip actually tastes better the next day. The flavors meld together overnight, and the heat from the buffalo sauce mellows out into this rich, complex warmth. I sometimes make it a day ahead on purpose just for that deeper flavor. Cold, it’s also surprisingly good as a sandwich spread or cracker topping. Not that I’ve ever stood in front of the fridge eating it with a spoon. Okay, maybe once or twice.
Nutritional Information & Benefits
Let’s be real—this is a party dip, not a health food. But it does have some redeeming qualities, and knowing what’s in it helps you plan your meal around it.
Estimated Nutritional Values (per serving, about 1/4 cup):
- Calories: 210
- Protein: 14g
- Fat: 16g
- Carbohydrates: 4g
- Fiber: 0g
- Sugar: 2g
- Sodium: 480mg
Health Benefits : The chicken provides a solid dose of protein, which helps keep everyone full and satisfied. Cream cheese contains some calcium and vitamin A, though let’s not pretend it’s a superfood. The celery and carrot sticks you serve alongside add fiber and vitamins, so at least there’s that. I always tell myself that if I eat enough veggies with the dip, it balances out.
Dietary Considerations : This recipe is gluten-free as written (check your labels to be sure). It’s also low-carb and keto-friendly if you skip the chips and use veggie sticks instead. For a lower-fat version, use reduced-fat cream cheese and light ranch dressing—it works, though the texture is slightly less luxurious.
Allergen Note : This recipe contains dairy (cream cheese, cheddar, mozzarella, sour cream, ranch). It does not contain nuts, eggs, or soy in standard form, but always check your ingredient labels for hidden allergens. The canned chicken is fully cooked, so there’s no raw meat concern.
My personal perspective? This dip is a treat, and treats are part of a balanced life. I don’t worry about the calories when I’m at a party. I just enjoy it, load up on veggies alongside the chips, and call it a win.
Conclusion
This Spooky Spider Web Buffalo Chicken Dip has become a Halloween tradition in my house, and I hope it becomes one in yours too. It’s the recipe that proves you don’t need fancy ingredients or hours in the kitchen to create something that feels special. The spider web design takes two minutes and impresses everyone. The flavor takes no time at all and satisfies every time.
What I love most about this recipe is how it brings people together. I’ve watched kids who swore they didn’t like spicy food go back for thirds. I’ve seen adults hover around the dip table, sneaking one more chip before dinner. It’s the kind of food that makes a party feel like a party—warm, welcoming, and just a little bit silly.
I’d love to hear how yours turns out. Did your kids help make the spider web? Did you add your own twist? Drop a comment below and let me know. And if you’re looking for more easy party recipes that actually work for real families, check out my collection of game-day appetizers that use the same budget-friendly approach. Happy Halloween, and happy dipping!
Frequently Asked Questions
Can I make this dip in a slow cooker instead of the oven?
Absolutely! Combine all the dip ingredients (except the sour cream and toppings) in a small slow cooker and cook on low for 2 hours, stirring occasionally. Once hot and bubbly, transfer to a serving dish, add the spider web design, and serve. The slow cooker method is great for keeping the dip warm throughout a party.
How can I make this dip less spicy for my kids?
Use only 1/4 cup of buffalo sauce and add an extra tablespoon of ranch dressing. You can also substitute the buffalo sauce with BBQ sauce for a completely mild version that kids still love. The cream cheese and ranch naturally cut the heat, so even the full recipe is milder than you’d expect.
Can I use fresh chicken instead of canned?
Yes, and it works beautifully. Use about 2 cups of cooked, shredded chicken breast. Leftover rotisserie chicken is perfect for this. Just make sure the chicken is finely shredded so it blends well with the other ingredients. You might need to add an extra tablespoon of ranch dressing if the chicken seems dry.
How do I store leftovers and how long do they last?
Store leftover dip in an airtight container in the refrigerator for up to 4 days. The spider web design will disappear into the dip, but the flavor is still there. Reheat in the microwave in 30-second bursts or in a 350°F oven for 10-15 minutes. The dip also freezes well for up to 3 months.
What can I serve with this dip besides chips?
This dip is incredibly versatile. Try it with pretzel chips, pita chips, mini toasts, or even spread on crackers. For a healthier option, serve with celery sticks, carrot sticks, bell pepper strips, cucumber rounds, or snap peas. It’s also surprisingly good spread on sandwiches or wraps for lunch the next day.
Pin This Recipe!
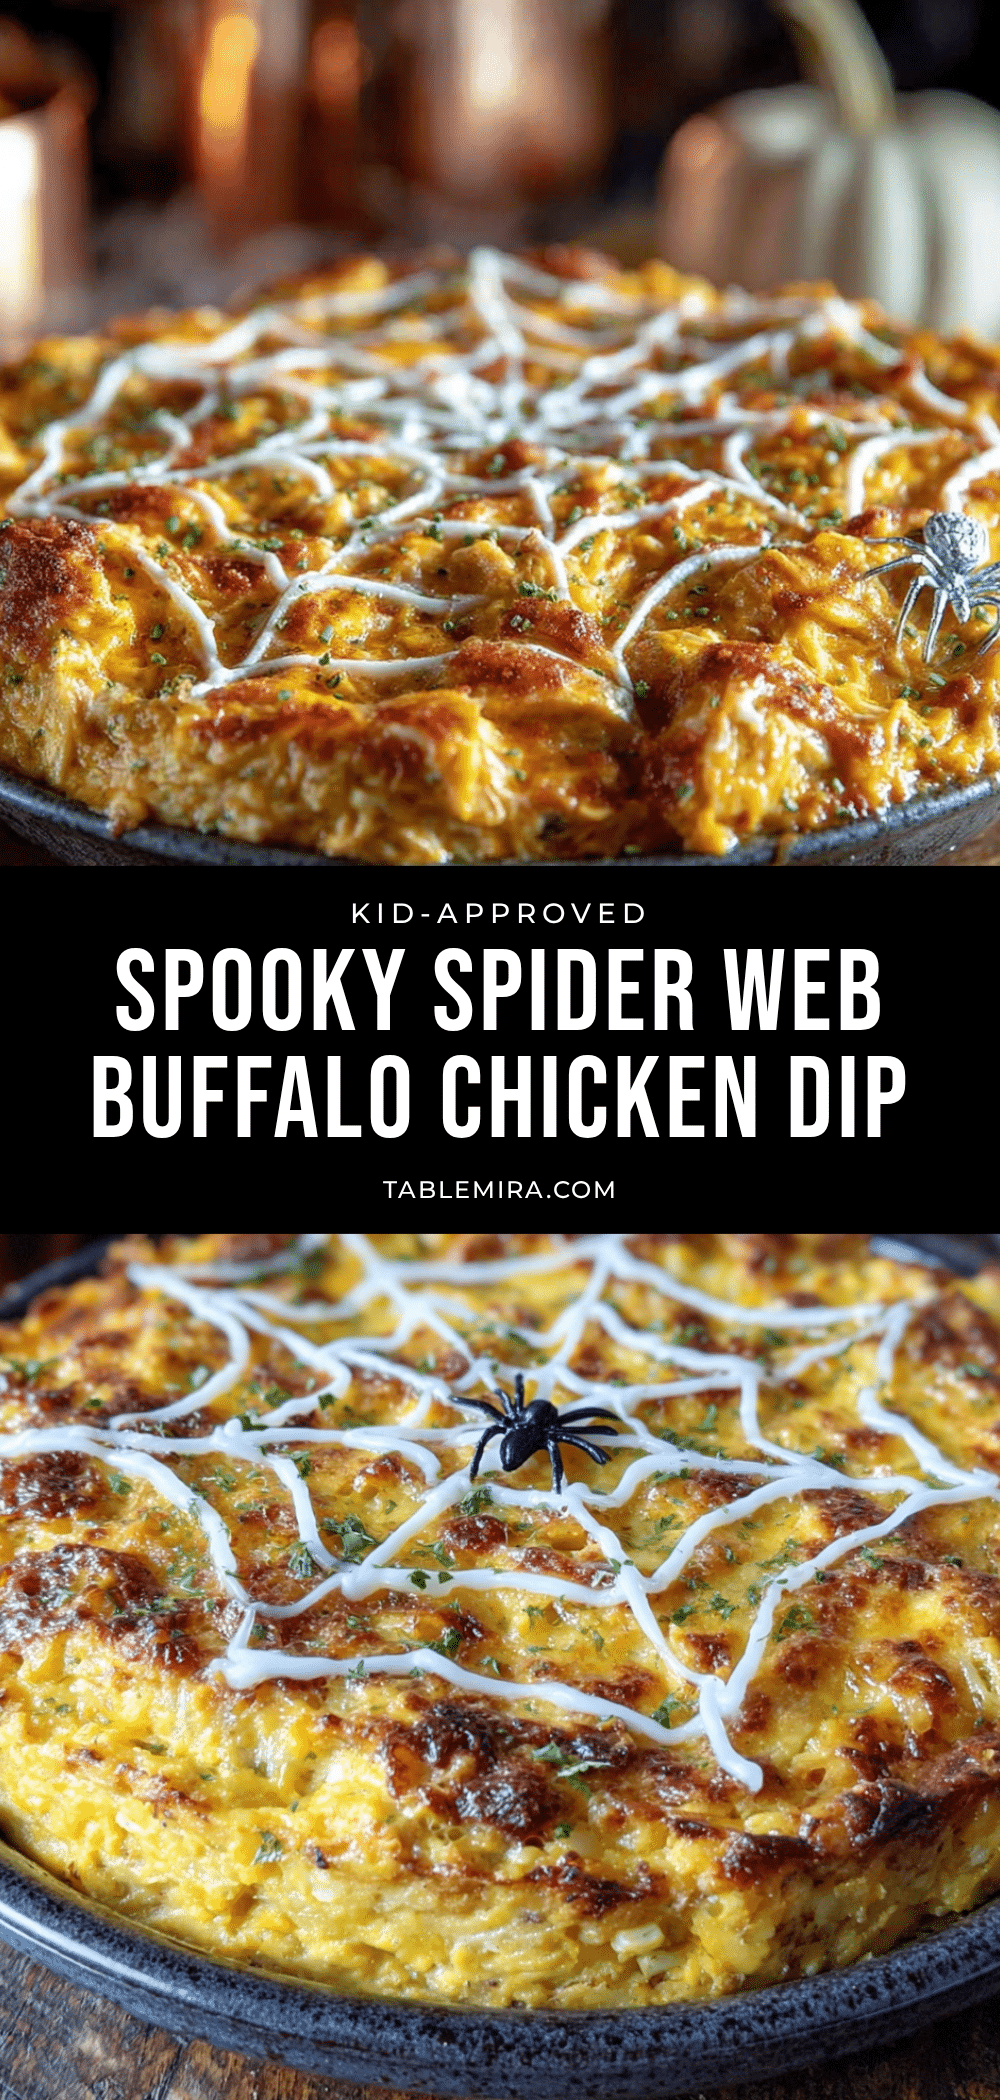
Spooktacular Kid-Approved Buffalo Chicken Dip Recipe

This Spooky Spider Web Buffalo Chicken Dip is a kid-friendly, budget-friendly party favorite that’s ready in under 30 minutes. The creamy, cheesy dip features a fun spider web design made with sour cream, making it perfect for Halloween gatherings.
- Prep Time: 10 minutes
- Cook Time: 20 minutes
- Total Time: 30 minutes
- Yield: 8 servings 1x
- Category: Appetizer
- Cuisine: American
Ingredients
- 2 cans (12.5 oz each) canned chicken, drained and flaked
- 8 oz cream cheese, softened to room temperature
- 1/2 cup buffalo hot sauce (e.g., Frank’s RedHot)
- 1/2 cup ranch dressing
- 1 cup shredded cheddar cheese, divided
- 1/2 cup shredded mozzarella cheese
- 1/4 cup sour cream
- 2–3 black olive slices (optional, for spider decoration)
- 8–10 pretzel sticks, broken in half (optional, for spider legs)
- Tortilla chips, for serving
- Celery sticks and carrot sticks, for serving
Instructions
- Preheat oven to 375°F (190°C). Soften cream cheese if needed.
- Drain and flake canned chicken; place in a mixing bowl.
- Add softened cream cheese, buffalo sauce, and ranch dressing to the chicken. Mix with a hand mixer or sturdy spoon until smooth and combined.
- Fold in 3/4 cup cheddar and all the mozzarella until evenly distributed. Reserve remaining 1/4 cup cheddar for topping.
- Transfer mixture to a greased 9-inch pie dish or small baking dish; spread evenly.
- Sprinkle reserved cheddar over the top.
- Bake for 18-22 minutes until hot and bubbly, with cheese melted and lightly browned. Optionally broil 1-2 minutes for extra golden top.
- Let rest for 5 minutes to set slightly.
- Fill a piping bag or zip-top bag with sour cream; snip a tiny corner. Pipe concentric circles from center outward. Drag a toothpick from center through circles to create a web pattern.
- Place olive slices in center for spider body; arrange pretzel stick halves around for legs. Serve warm with chips and veggies.
Notes
For a milder version, use 1/4 cup buffalo sauce and add extra ranch. For extra spice, add 2 tbsp more buffalo sauce and 1/2 tsp cayenne. The dip can be assembled a day ahead and baked just before serving. Leftovers keep in the fridge for up to 4 days and reheat well.
Nutrition
- Serving Size: 1/4 cup
- Calories: 210
- Sugar: 2
- Sodium: 480
- Fat: 16
- Saturated Fat: 8
- Carbohydrates: 4
- Protein: 14
Keywords: buffalo chicken dip, Halloween dip, spider web dip, kid-friendly, easy appetizer, party dip


