I was packing up the last of the Valentine’s Day treats for my daughter’s class party when my neighbor texted. “Please tell me you have extras.” I did, barely. Two perfect red velvet heart cupcakes sat on the counter, waiting for my husband to get home. I sent her a photo instead, and she showed up at my door five minutes later with a bottle of wine as a trade. That’s when I knew this recipe was something special.
These aren’t just any red velvet cupcakes. They’re the kind that make people close their eyes after the first bite. The kind where the cream cheese frosting is so velvety smooth you want to eat it with a spoon (I won’t judge). And the heart shape? It’s easier than you think. No special pans required.
I first made these for a Galentine’s brunch a few years back, honestly just hoping they’d turn out okay. I’d been testing red velvet recipes for months—some too dry, others too tangy, a few that just tasted like chocolate with food coloring. This one stuck. The balance of cocoa, buttermilk, and a touch of vinegar creates that signature tender crumb without being overly sweet. It’s the kind of cupcake that feels fancy but comes together in one bowl.
So whether you’re baking for a classroom party, a romantic dinner, or just because you deserve something pretty on a Tuesday, these heart-shaped beauties deliver. They’re the kind of treat that makes people text you later asking for the recipe. Trust me on that one.
Why You’ll Love These Red Velvet Heart Cupcakes
Let me tell you why these cupcakes have earned a permanent spot in my baking rotation. I’ve tested this recipe at least a dozen times, tweaking the flour ratio and the frosting consistency until everything clicked. My sister-in-law, who runs a small bakery on weekends, even gave it her seal of approval. That’s when I knew I had something worth sharing.
- Quick & Easy: From start to finish, these come together in under an hour. The batter takes about 10 minutes to whisk together, and the frosting is a five-minute job. Perfect for last-minute baking emergencies.
- Simple Ingredients: No fancy extracts or hard-to-find items. You probably already have cocoa powder, buttermilk, and cream cheese in your fridge. The red food coloring is the only specialty item, and you can find it at any grocery store.
- Perfect for Celebrations: Valentine’s Day, anniversaries, birthdays, Galentine’s brunch—these heart-shaped cupcakes fit right in. They also work beautifully for baby showers or wedding dessert tables.
- Crowd-Pleaser: Kids love the color, adults love the flavor, and everyone goes crazy for that cream cheese frosting. I’ve brought these to potlucks and watched them disappear before the main course.
- Unbelievably Delicious: The texture is what gets me every time. Moist without being dense, tender without falling apart. And that tangy-sweet frosting? It’s the perfect counterpoint to the subtle cocoa flavor.
What makes this version different from all the other red velvet recipes out there? It’s the technique. I blend the buttermilk and vinegar separately before adding them to the batter. That extra step activates the baking soda more effectively, giving you a lighter, fluffier crumb. Plus, I use a combination of butter and oil for the best of both worlds—butter for flavor, oil for moisture.
These cupcakes aren’t just good. They’re the kind that makes you take a bite, pause, and look at what you just created with a little bit of pride. It’s comfort food dressed up in its Sunday best, and it delivers every single time.
What Ingredients You Will Need
This recipe uses simple, everyday ingredients to create something truly special. The magic happens when these pantry staples work together—the acidity of the buttermilk and vinegar reacts with the baking soda to create that tender crumb, while the cocoa powder adds just enough depth without overpowering the signature red velvet flavor.
For the Cupcakes
- All-purpose flour: 2 ½ cups (315 grams). Stick with unbleached for the best structure. I prefer King Arthur Flour for consistent results.
- Granulated sugar: 1 ½ cups (300 grams). Regular white sugar works perfectly here.
- Unsweetened cocoa powder: 2 tablespoons (15 grams). Use natural cocoa powder, not Dutch-processed. The acidity matters for the chemical reaction.
- Baking soda: 1 teaspoon (5 grams). Make sure it’s fresh—test it by dropping a pinch into vinegar; it should bubble immediately.
- Salt: ½ teaspoon (3 grams). Fine sea salt dissolves more evenly.
- Vegetable oil: 1 cup (240 ml). Canola or avocado oil work great. Avoid olive oil—the flavor is too strong.
- Buttermilk: 1 cup (240 ml), room temperature. Shake it well before measuring. If you don’t have buttermilk, add 1 tablespoon of lemon juice to regular milk and let it sit for 5 minutes.
- Large eggs: 2, room temperature. Cold eggs can seize the batter, so let them sit on the counter for 30 minutes first.
- White vinegar: 1 teaspoon (5 ml). Distilled white vinegar is best. Don’t skip this—it’s crucial for the red velvet reaction.
- Vanilla extract: 1 teaspoon (5 ml). Pure vanilla extract makes a noticeable difference.
- Red food coloring: 2 tablespoons (30 ml) or 1 ounce of gel food coloring. I prefer gel because it gives a deeper color without thinning the batter. The brand Americolor works wonderfully.
For the Cream Cheese Frosting
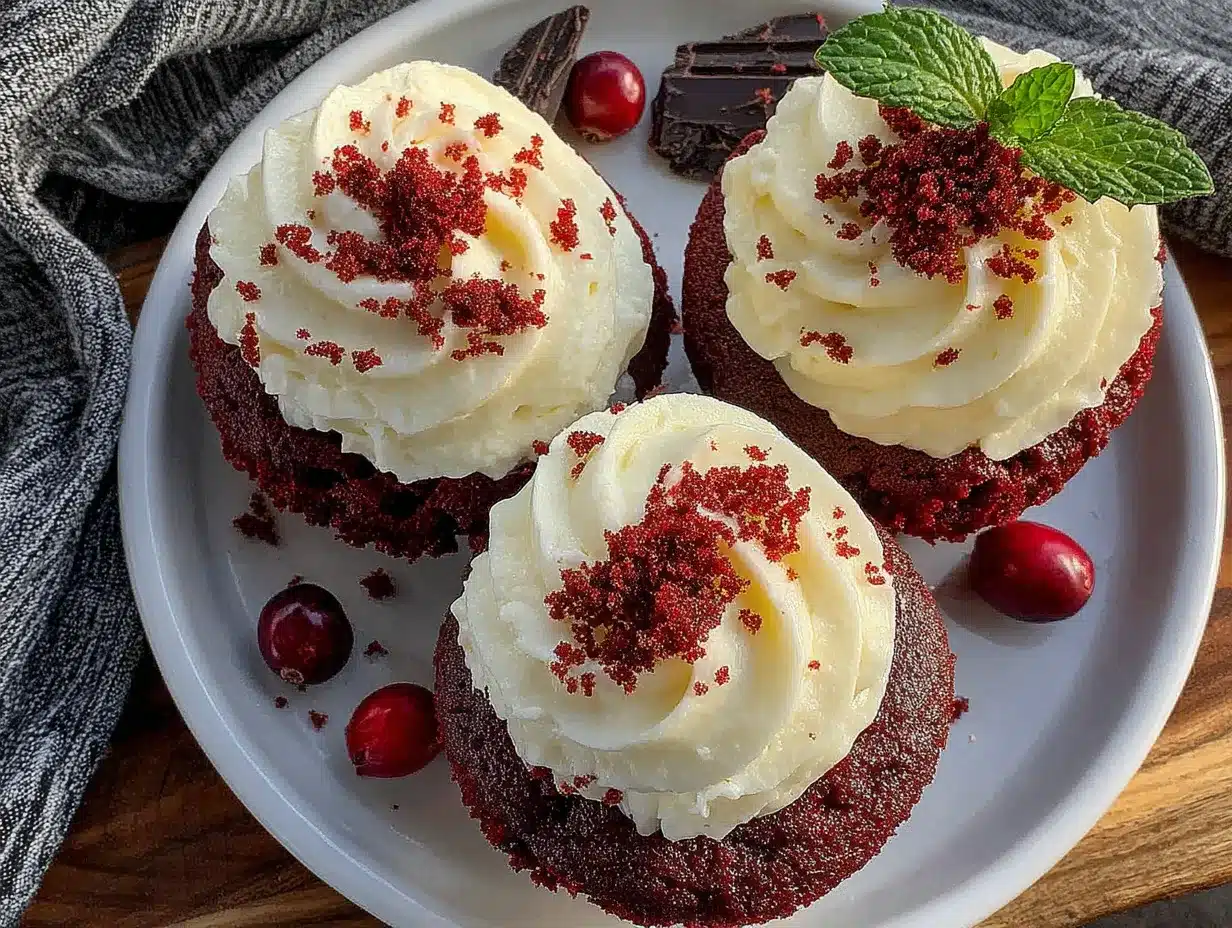
- Cream cheese: 8 ounces (226 grams), softened. Full-fat block cream cheese is non-negotiable here. The spreadable kind in a tub has too much water and will make your frosting runny.
- Unsalted butter: ½ cup (113 grams), softened. Let it sit at room temperature for at least an hour.
- Powdered sugar: 4 cups (480 grams), sifted. Sifting prevents lumps and gives you that silky-smooth texture.
- Vanilla extract: 1 teaspoon (5 ml). Again, pure vanilla is worth the splurge.
- Pinch of salt: Just a tiny pinch to balance the sweetness.
For Decoration (Optional)
- Heart-shaped sprinkles: A mix of red and pink looks lovely.
- Edible glitter: Adds a touch of sparkle for special occasions.
- Fresh raspberries: A single raspberry on top of each cupcake makes a beautiful presentation.
Equipment Needed
You don’t need a fancy bakery setup to make these cupcakes. Here’s what you’ll need:
- Standard 12-cup muffin tin: I use a non-stick one from Wilton. If yours is prone to sticking, use paper liners.
- Cupcake liners: Red or pink liners add to the theme, but white works too. I’ve tried silicone liners, and while they’re reusable, paper liners give a cleaner release.
- Mixing bowls: One large bowl for the dry ingredients and one medium bowl for the wet ingredients. Glass or stainless steel work best.
- Whisk: A good balloon whisk is all you need for the batter. No electric mixer required for the cupcakes.
- Hand mixer or stand mixer: For the cream cheese frosting. You can whisk it by hand, but your arm will thank you for using a mixer.
- Rubber spatula: For scraping down the bowl and folding ingredients. A silicone spatula is heat-resistant and easy to clean.
- Measuring cups and spoons: Accurate measurements matter in baking. I prefer stainless steel for dry ingredients and glass liquid measuring cups for wet.
- Piping bag with star tip: A Wilton 1M tip creates beautiful swirls. If you don’t have a piping bag, a zip-top bag with the corner snipped off works in a pinch.
- Heart-shaped cookie cutter: This is the secret to the heart shape. A 2-inch cutter works perfectly for standard cupcakes. I found mine at a thrift store for a dollar.
- Cooling rack: Wire racks allow air to circulate so your cupcakes cool evenly.
Budget-friendly tip: If you don’t have a heart-shaped cookie cutter, you can cut hearts freehand with a sharp knife. It takes a little more patience, but the result is just as sweet.
Preparation Method
Step 1: Preheat and Prepare
Preheat your oven to 350°F (175°C). Line your muffin tin with 12 cupcake liners. I like to spray the inside of the liners lightly with non-stick spray—it helps the cupcakes release cleanly, especially if you’re going for that perfect heart shape.
Step 2: Mix Dry Ingredients
In a large mixing bowl, whisk together the flour, sugar, cocoa powder, baking soda, and salt. Make sure there are no lumps in the cocoa powder. I use my fingers to break up any clumps before whisking. Set this bowl aside.
Step 3: Combine Wet Ingredients
In a separate medium bowl, whisk together the vegetable oil, buttermilk, eggs, vinegar, and vanilla extract. Add the red food coloring and whisk until everything is well combined. The mixture should be a vibrant, deep red. If it looks more pink than red, add another teaspoon of coloring.
Step 4: Make the Batter
Pour the wet ingredients into the dry ingredients. Whisk gently until just combined—about 20 seconds. Do not overmix. A few small lumps are okay. Overmixing develops the gluten and makes tough cupcakes. The batter will be thin, almost like pancake batter. That’s exactly what you want.
Step 5: Fill the Liners
Divide the batter evenly among the 12 cupcake liners. I use a ¼-cup measuring cup or a cookie scoop to get consistent portions. Fill each liner about ⅔ full. The batter will rise, but not dramatically, so you have some wiggle room.
Step 6: Bake
Bake for 18 to 22 minutes, or until a toothpick inserted into the center of a cupcake comes out clean or with a few moist crumbs. The tops should spring back when lightly touched. My oven runs hot, so I check at 18 minutes. Rotate the pan halfway through baking for even results.
Step 7: Cool Completely
Let the cupcakes cool in the pan for 5 minutes, then transfer them to a wire cooling rack. Cool completely before cutting or frosting. This is crucial—warm cupcakes will crumble when you try to cut the heart shape, and warm frosting is a disaster waiting to happen.
Step 8: Cut the Hearts
Once the cupcakes are completely cool, use a 2-inch heart-shaped cookie cutter to cut out the center of each cupcake. Press straight down and lift gently. The heart-shaped piece will come out cleanly. Set the heart pieces aside. You can eat the scraps (no judgment) or crumble them over ice cream.
Step 9: Make the Cream Cheese Frosting
In a large bowl using a hand mixer or stand mixer with the paddle attachment, beat the softened cream cheese and butter together on medium speed until smooth and creamy—about 2 minutes. Scrape down the sides of the bowl. Add the sifted powdered sugar, vanilla extract, and pinch of salt. Start on low speed to avoid a sugar cloud, then increase to medium-high and beat for 3 to 4 minutes until light and fluffy. The frosting should hold its shape when you lift the beater.
Step 10: Frost the Cupcakes
Fit a piping bag with a star tip (I use Wilton 1M) and fill it with the cream cheese frosting. Pipe a generous swirl onto each cupcake, starting from the outside and working inward. Place the reserved heart piece on top of the frosting at a slight angle. It looks like the heart is nestled into the frosting cloud.
Step 11: Decorate
Add heart-shaped sprinkles or a dusting of edible glitter. If you’re using fresh raspberries, place one next to the heart. These cupcakes photograph beautifully, so take a moment to arrange them nicely.
Cooking Tips & Techniques
I’ve made my share of mistakes with red velvet cupcakes. The first time I tried this recipe, I used cold eggs and the batter seized up into weird lumps. Another time, I overbaked them by just three minutes and ended up with dry, crumbly cupcakes that fell apart when I tried to cut the hearts. Here’s what I’ve learned:
Room temperature ingredients matter. Cold cream cheese creates lumpy frosting. Cold eggs make the batter curdle. Set everything out on the counter at least 30 minutes before you start baking. I usually take out the butter and cream cheese first, then the eggs and buttermilk.
Don’t overmix the batter. This is the number one mistake home bakers make. Mix until the flour disappears, then stop. A few streaks of flour are fine. Overmixing develops gluten, and gluten makes tough cupcakes. Red velvet should be tender, not chewy.
Use gel food coloring. Liquid food coloring works, but you need more of it to get that deep red color. Gel coloring is concentrated, so a little goes a long way. Plus, it doesn’t thin out the batter. I’ve used both, and gel gives a more vibrant, professional-looking result.
Chill the frosting if it gets too soft. Cream cheese frosting can be finicky. If your kitchen is warm, the frosting might become too soft to pipe. Pop it in the fridge for 10 to 15 minutes, then give it a quick stir before piping.
Cut hearts on completely cooled cupcakes. I learned this the hard way. Warm cupcakes are fragile and will crumble under the cookie cutter. Patience is your friend here. Let them cool for at least 30 minutes on the wire rack before attempting the heart cut.
Bake a test cupcake first. If you’re unsure about your oven temperature, bake one cupcake as a test. Check it at 15 minutes and adjust the remaining bake time accordingly. This saves you from ruining a whole batch.
Variations & Adaptations
One of the best things about this recipe is how flexible it is. Here are some variations I’ve tried and loved:
Gluten-Free Version
Substitute the all-purpose flour with a 1:1 gluten-free baking flour blend. I’ve used Bob’s Red Mill and King Arthur’s measure-for-measure blends with great success. Add 1 teaspoon of xanthan gum if your blend doesn’t already include it. The texture will be slightly more tender, but the flavor is spot-on.
Dairy-Free Adaptation
Replace the buttermilk with 1 cup of almond milk mixed with 1 tablespoon of lemon juice. For the frosting, use dairy-free cream cheese (Kite Hill makes a great one) and vegan butter. The frosting will be slightly softer, so chill it longer before piping.
Chocolate Lover’s Twist
Increase the cocoa powder to ¼ cup (30 grams) for a richer chocolate flavor. This moves the cupcake closer to a red velvet–chocolate hybrid. Reduce the sugar by 2 tablespoons to balance the bitterness of the extra cocoa.
Mini Cupcake Version
Use a mini muffin tin and bake for 10 to 12 minutes. You’ll get about 36 mini cupcakes. Use a 1-inch heart-shaped cookie cutter for the centers. These are perfect for parties or gift boxes.
Seasonal Variation
For Christmas, swap the red food coloring for green and use a Christmas tree cookie cutter. For Easter, use pastel colors and an egg-shaped cutter. The base recipe stays the same—just change the color and shape to match the holiday.
I once made these with a raspberry swirl in the frosting. I pureed fresh raspberries, strained out the seeds, and drizzled the puree into the frosting before piping. It added a beautiful pink swirl and a hint of tartness that complemented the sweet cream cheese. Definitely worth trying if you have fresh berries on hand.
Serving & Storage Suggestions
These cupcakes are best served at room temperature. The cream cheese frosting softens slightly, and the cake is at its most tender. If you’ve refrigerated them, let them sit on the counter for 20 to 30 minutes before serving.
For presentation, arrange the cupcakes on a tiered stand or a simple white platter. The red hearts against the white frosting create a stunning visual. Add a few fresh flowers or raspberries around the base for a bakery-worthy display.
These pair beautifully with a cup of hot coffee, a glass of cold milk, or a dessert wine like Moscato. For a Valentine’s Day brunch, serve them alongside a batch of eggnog snickerdoodle cookies for a festive spread.
Storage Instructions:
Store unfrosted cupcakes in an airtight container at room temperature for up to 3 days. Frosted cupcakes should be stored in the refrigerator in an airtight container for up to 5 days. The cream cheese frosting needs refrigeration, but the cake stays moist.
Freezing Instructions:
You can freeze unfrosted cupcakes for up to 3 months. Wrap each cupcake individually in plastic wrap, then place them in a freezer-safe bag. Thaw at room temperature for about an hour before cutting and frosting. Frosted cupcakes can also be frozen, but the texture of the cream cheese frosting may change slightly upon thawing.
Reheating Tips:
If you prefer your cupcakes slightly warm, microwave an unfrosted cupcake for 10 to 15 seconds. For frosted cupcakes, let them come to room temperature naturally—microwaving will melt the frosting.
The flavors actually develop overnight. If you can, make the cupcakes a day ahead and store them unfrosted. The cocoa and buttermilk flavors meld together, and the texture becomes even more tender. Frost them the next day before serving.
Nutritional Information & Benefits
These cupcakes are a treat, so I won’t pretend they’re health food. But here’s the breakdown if you’re curious:
Per cupcake (with frosting):
Calories: approximately 420
Fat: 22g
Carbohydrates: 54g
Protein: 5g
Sugar: 40g
Fiber: 1g
Health Highlights:
- Cocoa powder contains antioxidants called flavonoids that support heart health. Even a small amount adds some benefit.
- Cream cheese provides calcium and protein, though it’s also high in fat. Using full-fat cream cheese means you use less sugar because the fat carries flavor better.
- Buttermilk is lower in fat than heavy cream and contains probiotics that aid digestion.
Dietary Considerations:
- Contains gluten, dairy, and eggs. Not suitable for those with allergies to these ingredients.
- Can be made gluten-free and dairy-free with the substitutions listed above.
- Not low-carb or keto-friendly due to the sugar content.
- If you’re watching your sugar intake, consider reducing the frosting amount or using a sugar substitute in the cake (though I haven’t tested this personally).
I believe in balance. These cupcakes are for celebrations, not everyday snacking. Enjoy them fully when you make them, then get back to your regular routine. Life’s too short for guilt over a really good cupcake.
Conclusion
These red velvet heart cupcakes have become my go-to for any occasion that calls for something special. They’re the recipe I turn to when I want to impress without spending all day in the kitchen. The heart shape adds that extra touch of thoughtfulness that people notice immediately.
What I love most about this recipe is how forgiving it is. Even if your hearts aren’t perfectly centered or your frosting swirls are a little lopsided, they still look beautiful and taste incredible. Baking should feel joyful, not stressful. This recipe delivers that joy every time.
I’d love to hear how yours turn out. Did you try a different variation? Use a different shape? Drop a comment below and share your creation. Tag me in your photos on social media—I always love seeing your bakes. And if you’re looking for more sweet treats, check out my no-bake s’mores icebox cake for another easy dessert that disappears fast.
Happy baking, friends. You’ve got this.
Frequently Asked Questions
Can I make these cupcakes without a heart-shaped cookie cutter?
Absolutely. If you don’t have a cookie cutter, use a sharp paring knife to carefully cut a heart shape freehand. Draw the shape lightly with a toothpick first as a guide. It takes a little practice, but the result is just as charming.
Why did my cream cheese frosting turn out runny?
Runny frosting usually means the cream cheese was too soft or you used the spreadable kind from a tub. Always use block cream cheese and let it soften at room temperature for no more than an hour. If your frosting is already runny, chill it in the fridge for 20 minutes and beat it again briefly.
Can I use a different frosting instead of cream cheese?
Yes, but cream cheese frosting is the classic pairing for red velvet. A vanilla buttercream or a chocolate buttercream would also work. If you want to keep it tangy, try a mascarpone frosting—it’s less sweet but equally creamy.
How do I get a deeper red color without using artificial food coloring?
You can use natural red food coloring made from beet juice or pomegranate powder. Keep in mind that natural colors are less vibrant and may give a more muted, burgundy tone. For a truly red result, gel food coloring is your best bet.
Can I make these into a full cake instead of cupcakes?
Yes. Pour the batter into two greased and floured 8-inch round cake pans. Bake at 350°F (175°C) for 25 to 30 minutes. Let cool completely, then cut hearts from the cake layers using a cookie cutter. Layer with frosting between the hearts and on top. It makes a stunning heart-shaped layer cake.
Pin This Recipe!
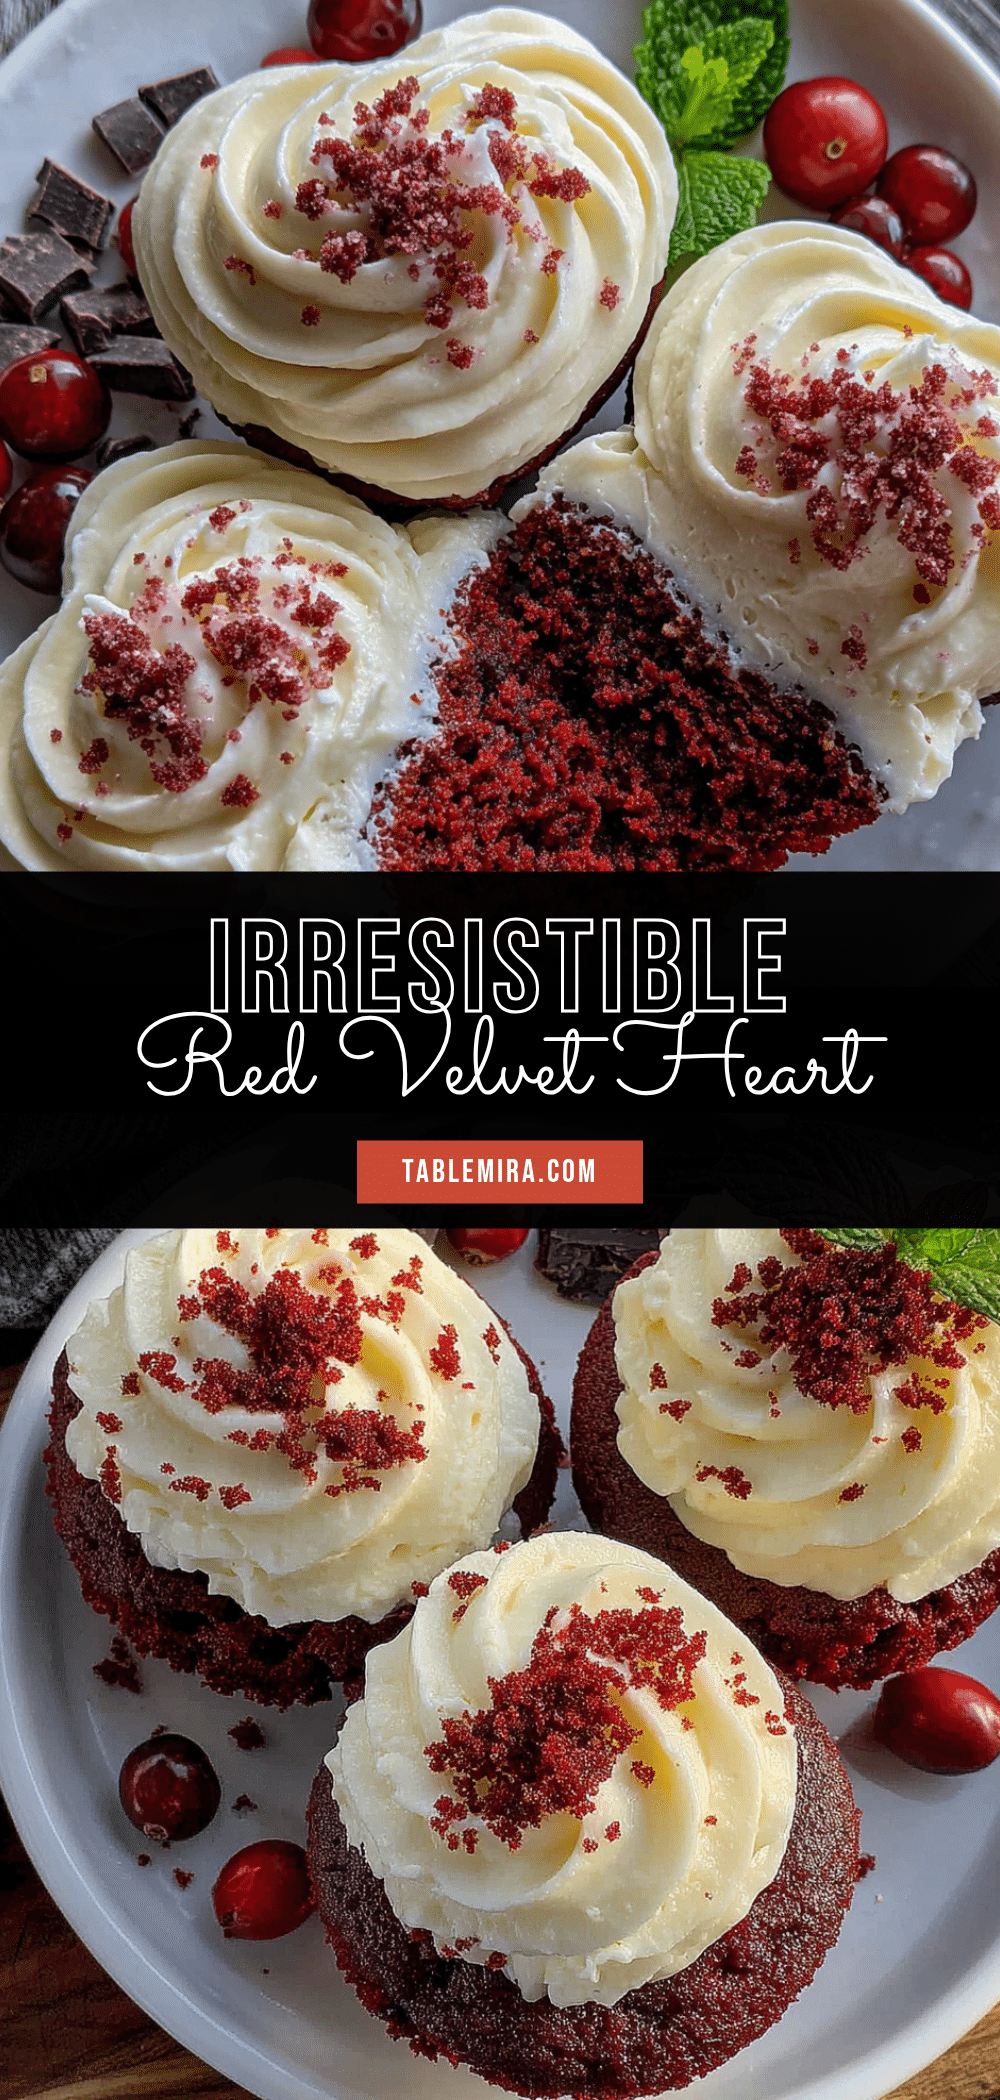
Perfect Red Velvet Heart Cupcakes: Best Easy Recipe
These red velvet heart cupcakes are moist, tender, and topped with a velvety cream cheese frosting. The heart shape is easy to achieve with a cookie cutter, making them perfect for Valentine’s Day, anniversaries, or any celebration.
- Prep Time: 15 minutes
- Cook Time: 20 minutes
- Total Time: 35 minutes
- Yield: 12 servings 1x
- Category: Dessert
- Cuisine: American
Ingredients
- 2 ½ cups (315 grams) all-purpose flour
- 1 ½ cups (300 grams) granulated sugar
- 2 tablespoons (15 grams) unsweetened cocoa powder
- 1 teaspoon (5 grams) baking soda
- ½ teaspoon (3 grams) salt
- 1 cup (240 ml) vegetable oil
- 1 cup (240 ml) buttermilk, room temperature
- 2 large eggs, room temperature
- 1 teaspoon (5 ml) white vinegar
- 1 teaspoon (5 ml) vanilla extract
- 2 tablespoons (30 ml) red food coloring (or 1 ounce gel food coloring)
- 8 ounces (226 grams) cream cheese, softened
- ½ cup (113 grams) unsalted butter, softened
- 4 cups (480 grams) powdered sugar, sifted
- 1 teaspoon (5 ml) vanilla extract
- Pinch of salt
- Heart-shaped sprinkles (optional)
- Edible glitter (optional)
- Fresh raspberries (optional)
Instructions
- Preheat oven to 350°F (175°C). Line a 12-cup muffin tin with cupcake liners. Lightly spray the inside of the liners with non-stick spray.
- In a large bowl, whisk together flour, sugar, cocoa powder, baking soda, and salt until no lumps remain.
- In a separate medium bowl, whisk together vegetable oil, buttermilk, eggs, vinegar, vanilla extract, and red food coloring until well combined.
- Pour the wet ingredients into the dry ingredients. Whisk gently until just combined (about 20 seconds). Do not overmix; a few small lumps are okay.
- Divide the batter evenly among the 12 liners, filling each about ⅔ full.
- Bake for 18 to 22 minutes, or until a toothpick inserted into the center comes out clean or with a few moist crumbs. Rotate the pan halfway through baking.
- Let cupcakes cool in the pan for 5 minutes, then transfer to a wire rack to cool completely.
- Once completely cool, use a 2-inch heart-shaped cookie cutter to cut out the center of each cupcake. Press straight down and lift gently. Set the heart pieces aside.
- In a large bowl, beat softened cream cheese and butter together on medium speed until smooth and creamy (about 2 minutes). Scrape down the sides.
- Add sifted powdered sugar, vanilla extract, and a pinch of salt. Beat on low speed until combined, then increase to medium-high and beat for 3 to 4 minutes until light and fluffy.
- Fit a piping bag with a star tip (e.g., Wilton 1M) and fill with frosting. Pipe a generous swirl onto each cupcake, starting from the outside and working inward.
- Place the reserved heart piece on top of the frosting at a slight angle. Decorate with heart-shaped sprinkles, edible glitter, or fresh raspberries if desired.
Notes
Room temperature ingredients are crucial for best results. Do not overmix the batter. Use gel food coloring for a deeper red color. Chill the frosting if it becomes too soft. Cut hearts only after cupcakes are completely cool. For a gluten-free version, use a 1:1 gluten-free flour blend. For dairy-free, use almond milk with lemon juice and dairy-free cream cheese.
Nutrition
- Serving Size: 1 cupcake
- Calories: 420
- Sugar: 40
- Sodium: 280
- Fat: 22
- Saturated Fat: 8
- Carbohydrates: 54
- Fiber: 1
- Protein: 5
Keywords: red velvet cupcakes, heart cupcakes, Valentine's Day cupcakes, cream cheese frosting, easy cupcake recipe


