I figured leftover turkey was destined for sandwiches, plain reheated plates, or maybe a quick soup. It took about three days of staring at a mountain of post-Thanksgiving meat in the fridge for that assumption to fall apart completely. The bird was beautiful on the table, but by day two, the magic had faded. I needed something that felt like a meal, not a reminder of yesterday’s feast. That’s when the idea of a pot pie hit me—not as a chore, but as a chance to turn those leftovers into something I’d actually look forward to eating.
The first time I made this leftover turkey pot pie, I honestly didn’t expect much. I figured it would be fine, maybe a little dry, definitely a bit of a hassle for a weeknight. But as the smell of butter and thyme started filling the kitchen—that cozy, familiar scent that just wraps around you—I knew I was onto something. The filling came together in one skillet, and the flaky crust on top? It puffed up all golden and ridiculous, making the whole kitchen feel like a holiday all over again. I stood there, wooden spoon in hand, and realized this wasn’t just using up leftovers. This was the meal I’d been craving all along.
And honestly, that’s the thing about a good pot pie. It takes what you have—the bits and pieces of a big meal—and turns them into something complete. Something that feels intentional, not accidental. This cozy leftover turkey pot pie with flaky crust has become my go-to for the days after the big feast, the quiet Sunday dinners, and even the nights when I just want a warm hug in a bowl. It’s the recipe that proved to me that leftovers don’t have to be a letdown. They can be the star of the show.
Why You’ll Love This Recipe
Let’s be real—there are a million ways to use leftover turkey. But this pot pie? It’s the one that gets requested every single year, even before the turkey is carved. Here’s why it’s earned that spot in my kitchen:
- Quick & Easy: This comes together in about 45 minutes, start to finish. Most of that time is hands-off while it bakes, so you can actually sit down.
- Simple Ingredients: You probably have everything already. Butter, flour, broth, veggies, and that leftover turkey. No fancy grocery trips required.
- Perfect for Post-Holiday: Whether it’s the day after Thanksgiving or a random Tuesday in January, this feels like a cozy celebration.
- Crowd-Pleaser: Kids love the creamy filling and flaky top. Adults love that it’s not another dry turkey sandwich.
- Unbelievably Delicious: The combination of tender turkey, savory vegetables, and that buttery, golden crust is pure comfort food magic.
What makes this recipe different from the rest? It’s the method. Instead of a watery filling or a soggy bottom crust, I use a quick stovetop roux to build a rich, velvety sauce that clings to every piece of turkey. And the crust? It’s a simple, forgiving dough that bakes up flaky and tender without any fuss. This isn’t just another version of leftover turkey pot pie—it’s the best version. The one that makes you close your eyes after the first bite and forget you were eating leftovers at all. It’s comfort food reimagined—faster, richer, and with the same soul-soothing satisfaction that makes you want to curl up on the couch with a fork and not share.
What Ingredients You Will Need
This recipe uses simple, wholesome ingredients to deliver that classic pot pie flavor without any fuss. Most of these are pantry staples or holiday leftovers, making it incredibly easy to throw together.
- For the Filling:
- 3 tablespoons unsalted butter (adds richness and helps build the roux)
- 1 medium yellow onion, diced (about 1 cup)
- 2 medium carrots, peeled and diced (about 1 cup)
- 2 celery stalks, diced (about 1/2 cup)
- 3 cloves garlic, minced
- 1/3 cup all-purpose flour (for thickening the sauce)
- 2 cups low-sodium chicken or turkey broth (use homemade if you have it—so much flavor)
- 1 cup whole milk or half-and-half (for extra creaminess; I prefer half-and-half here)
- 1 teaspoon dried thyme (or 1 tablespoon fresh, minced)
- 1/2 teaspoon dried rosemary (crushed between your fingers to release oils)
- 1/2 teaspoon salt, plus more to taste
- 1/4 teaspoon black pepper
- 1 cup frozen peas (no need to thaw)
- 3 cups cooked leftover turkey, shredded or diced (dark and white meat both work great)
- For the Flaky Crust:
- 1 1/2 cups all-purpose flour
- 1/2 teaspoon salt
- 1/2 cup cold unsalted butter, cut into small cubes (keep it cold—this is the secret to flakiness)
- 4-6 tablespoons ice water
- 1 large egg, beaten (for egg wash, to get that golden, shiny top)
Ingredient Tips: I recommend using Kerrygold or another high-fat European butter for the crust—it makes a noticeable difference in flakiness. For the broth, Swanson or Pacific Foods are my go-to brands for consistent flavor. If you have leftover turkey gravy, you can substitute 1 cup of gravy for 1 cup of the broth for an even richer filling. And if you’re using frozen mixed vegetables instead of fresh carrots and celery, that works too—just add them with the peas.
Substitution Guidance: For a gluten-free version, use a gluten-free all-purpose flour blend in both the filling and the crust. For a dairy-free option, substitute the butter with a high-quality vegan butter (like Miyoko’s) and use unsweetened oat milk or canned coconut milk for the liquid. The texture will be slightly different, but still delicious.
Equipment Needed
You don’t need a lot of fancy equipment for this recipe, which is part of its charm. Here’s what you’ll need:
- Large oven-safe skillet or Dutch oven: I use a 10-inch cast iron skillet for this. It goes from stovetop to oven seamlessly, and it holds heat beautifully. If you don’t have one, any large, deep oven-safe pan will work.
- Mixing bowls: One large bowl for the crust dough, and maybe a small one for the egg wash.
- Pastry cutter or two forks: For cutting the butter into the flour. You can also use a food processor if you’re in a hurry, but I like the control of doing it by hand.
- Rolling pin: For rolling out the crust. A wine bottle works in a pinch—I’ve done it.
- Measuring cups and spoons: For accuracy, especially with the flour and butter.
- Sharp knife and cutting board: For dicing the vegetables and turkey.
Personal Note: I bought a cheap rolling pin years ago, and honestly? It works just fine. You don’t need the fancy marble one. And if you don’t have a pastry cutter, two forks crossed in your hand do the job—just takes a little more elbow grease. Keep your butter ice cold, and you’re golden.
Preparation Method
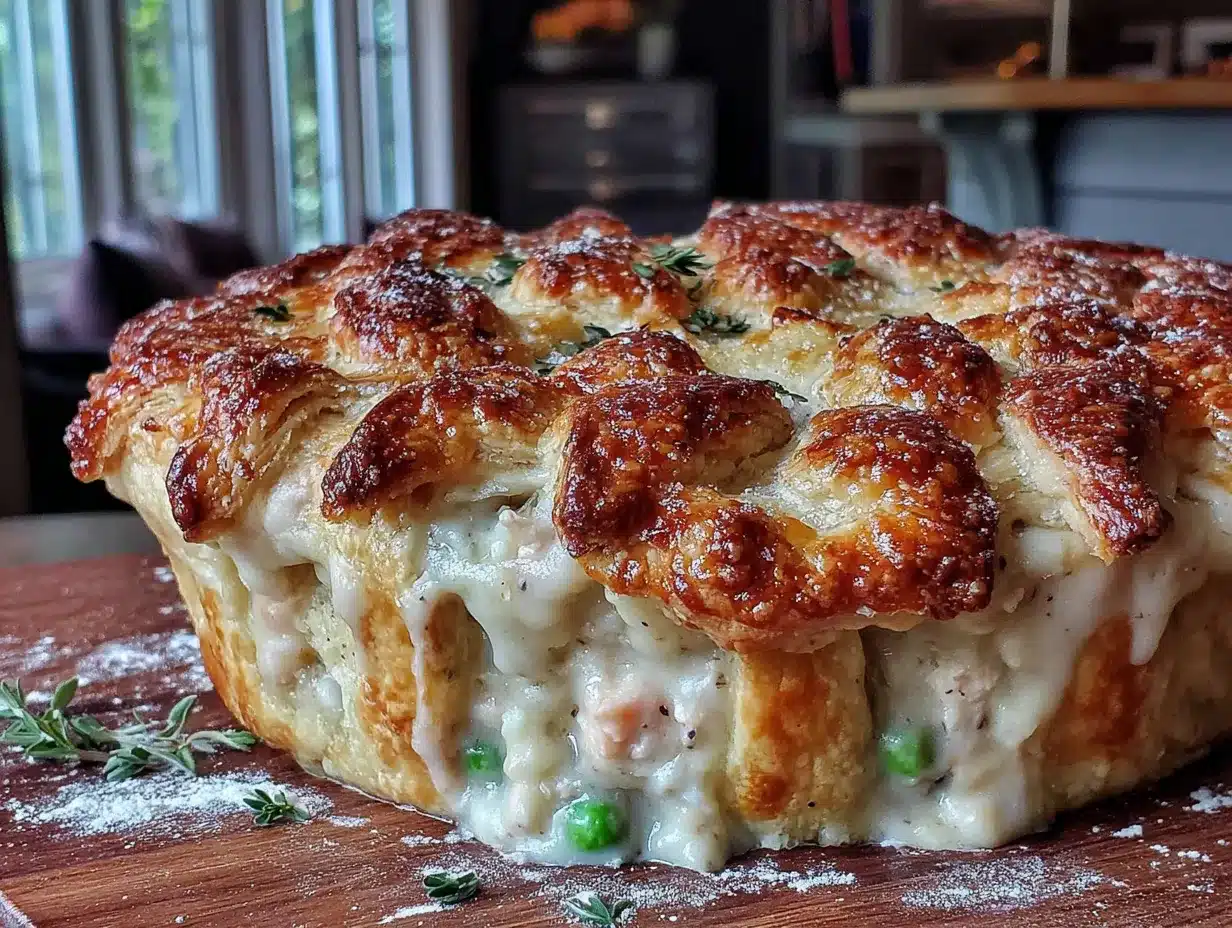
Let’s get cooking. This comes together in stages, but it’s all pretty straightforward. Take your time with the roux—it’s the backbone of the filling.
- Preheat your oven to 400°F (200°C). Position a rack in the center of the oven.
- Make the crust dough: In a large bowl, whisk together 1 1/2 cups flour and 1/2 teaspoon salt. Add the cold butter cubes. Using a pastry cutter or two forks, cut the butter into the flour until the mixture looks like coarse meal with some pea-sized butter pieces remaining. Drizzle 4 tablespoons of ice water over the mixture and stir with a fork until the dough just comes together. If it’s too dry, add more water, 1 tablespoon at a time. Don’t overmix—you want those butter chunks. Form the dough into a disk, wrap in plastic wrap, and refrigerate for at least 30 minutes.
- Start the filling: In your oven-safe skillet or Dutch oven, melt 3 tablespoons of butter over medium heat. Add the diced onion, carrots, and celery. Cook, stirring occasionally, for about 5-7 minutes, until the vegetables have softened and the onion is translucent. The kitchen will start smelling amazing right about now.
- Add the garlic and flour: Stir in the minced garlic and cook for 30 seconds until fragrant. Sprinkle the 1/3 cup of flour over the vegetables and stir constantly for 1-2 minutes. This cooks the raw flour taste out and starts building your roux. The mixture will look thick and pasty—that’s perfect.
- Build the sauce: Slowly pour in the 2 cups of broth while whisking constantly to prevent lumps. Then add the 1 cup of milk or half-and-half, still whisking. Bring the mixture to a gentle simmer—you’ll see it start to thicken after about 2-3 minutes. It should coat the back of a spoon nicely.
- Season and add the turkey: Stir in the thyme, rosemary, salt, and pepper. Add the shredded turkey and frozen peas. Stir everything together until well combined. Taste and adjust seasoning—you might want a pinch more salt or a crack of pepper. Remove from heat.
- Roll out the crust: On a lightly floured surface, roll the chilled dough out to about 1/8-inch thickness, into a circle slightly larger than your skillet (about 11-12 inches). Don’t stress if it’s not a perfect circle—rustic is charming.
- Assemble the pot pie: Gently lay the dough over the filling in the skillet. Trim any overhang to about 1/2 inch, then tuck the edges under and crimp them with your fingers or a fork. Cut 4-5 small slits in the top of the crust to let steam escape. Brush the top with the beaten egg wash for that beautiful golden color.
- Bake: Place the skillet on a baking sheet (just in case it bubbles over) and bake for 25-30 minutes, until the crust is deep golden brown and the filling is bubbling up through the slits. Let it cool for 10 minutes before serving—this lets the filling set so you don’t get a runny mess on your plate.
Sensory Cue: When it’s done, the crust should be a rich golden brown and the filling should be visibly bubbling. You might hear it gently hissing—that’s the sound of success. The smell will be buttery, savory, and slightly herbal. It’s the kind of aroma that makes everyone wander into the kitchen asking, “What’s for dinner?”
Cooking Tips & Techniques
I’ve made this pot pie more times than I can count, and I’ve learned a thing or two the hard way. Here are my best tips for getting it perfect every time:
- Keep your butter cold for the crust. This is non-negotiable. Cold butter creates steam pockets as it melts in the oven, which is what gives you those flaky layers. If your butter starts to soften, pop the dough back in the fridge for 10 minutes.
- Don’t skip the roux. I know it’s tempting to just dump everything in the pan, but cooking the flour for a minute or two before adding liquid is what gives you a silky, lump-free sauce. I learned this after making a few gluey pot pies in my early days. Trust the process.
- Use a mix of dark and white meat. Dark meat stays juicier during baking, while white meat gives you those nice, tender shreds. If you only have white meat, add an extra splash of broth to keep things moist.
- Let it rest before slicing. I know it’s hard to wait, but those 10 minutes of cooling time are crucial. The filling thickens as it sits, so you get neat slices instead of a soupy puddle. Use that time to set the table or pour yourself a glass of wine.
- Multitasking tip: While the crust dough is chilling in the fridge, prep all your vegetables and measure out your ingredients. By the time the dough is ready, you can have the filling almost done. It makes the whole process feel seamless.
Variations & Adaptations
This recipe is wonderfully flexible. Here are some ways to make it your own:
- Dietary Variation – Gluten-Free: Use a 1:1 gluten-free all-purpose flour blend in both the filling and the crust. I’ve had great results with King Arthur Measure for Measure. The crust will be a bit more delicate, so handle it gently.
- Seasonal Variation – Spring Pot Pie: Swap the carrots and celery for asparagus, leeks, and fresh peas. Add a handful of chopped fresh dill or parsley at the end for a bright, fresh finish. Perfect for using up Easter ham leftovers, too.
- Flavor Variation – Mushroom & Turkey: Sauté 8 ounces of sliced cremini mushrooms with the vegetables. They add an earthy, savory depth that pairs beautifully with the turkey. It’s like a turkey and mushroom pot pie hybrid, and it’s incredible.
- Method Variation – Individual Pot Pies: Divide the filling among 4-6 small ramekins or oven-safe bowls. Cut the dough into rounds slightly larger than the ramekins, top each one, and bake for about 20 minutes. They’re perfect for portion control or for making everyone feel special.
- Personal Variation: I once added a handful of shredded sharp cheddar cheese to the filling just before pouring it into the skillet. It melted into the sauce and made everything extra creamy and indulgent. It’s not traditional, but it’s become my secret-weapon version for when I want something a little over the top.
Serving & Storage Suggestions
This pot pie is a meal in itself, but here’s how to serve it and keep it for later.
Serving: Serve it warm, straight from the skillet, with a big spoon or spatula. I like to garnish with a sprinkle of fresh parsley or thyme for a pop of color. It pairs beautifully with a simple green salad dressed with lemon vinaigrette—the acidity cuts through the richness of the pie. For a heartier meal, try it alongside some easy crockpot green bean casserole with crispy onions for a full holiday-style spread. A glass of crisp white wine, like a Sauvignon Blanc, is my favorite accompaniment.
Storage: Leftovers (if you have any) can be stored in an airtight container in the refrigerator for up to 4 days. The crust will soften slightly, but the flavor only gets better. To reheat, place a portion in a 350°F (175°C) oven for about 15 minutes, or until warmed through. The microwave works in a pinch, but the crust won’t be as crispy.
Freezing: This pot pie freezes beautifully. Assemble the pie completely but don’t bake it. Wrap the skillet tightly in plastic wrap, then a layer of aluminum foil, and freeze for up to 3 months. When ready to bake, you can bake it straight from frozen—just add about 15-20 minutes to the baking time and cover the crust with foil if it starts browning too quickly.
Flavor Development: Honestly, this pot pie tastes even better the next day. The flavors meld together overnight, and the filling gets even more savory and cohesive. It’s one of those rare dishes where leftovers are almost better than the original.
Nutritional Information & Benefits
This is comfort food, so it’s not exactly a health food, but it does have some redeeming qualities. Here’s an approximate nutritional breakdown per serving (based on 6 servings):
- Calories: ~480
- Protein: 28g
- Fat: 24g
- Carbohydrates: 38g
- Fiber: 4g
- Sugar: 6g
Health Benefits: Turkey is a lean source of protein, rich in B vitamins and selenium, which supports immune function. Carrots and celery add fiber, vitamin A, and antioxidants. Peas contribute additional fiber and plant-based protein. Using homemade or low-sodium broth helps control the salt content. While the butter and crust add richness, this meal is balanced with plenty of vegetables and lean protein.
Dietary Considerations: This recipe contains gluten and dairy. For gluten-free and dairy-free adaptations, see the Variations section above. It’s naturally egg-free in the filling (the egg wash is optional), and it’s relatively low in added sugar.
Personal Perspective: I love that this recipe feels indulgent without being over-the-top. It’s a meal that satisfies a craving for comfort while still using real, whole ingredients. It’s not about deprivation—it’s about enjoying a warm, hearty dinner that makes you feel good.
Conclusion
This cozy leftover turkey pot pie with flaky crust is more than just a way to use up leftovers. It’s a reminder that the best meals often come from what we already have—a little creativity, a few pantry staples, and a willingness to turn something ordinary into something special. The flaky, buttery crust, the creamy, savory filling, and the tender pieces of turkey all come together in a way that feels both familiar and exciting.
I encourage you to make this recipe your own. Add extra vegetables, swap in different herbs, or try the individual pot pie version. The beauty of this dish is how forgiving and flexible it is. And if you make it, I’d love to hear how it turned out. Drop a comment below, share your photos, or tell me what variation you tried. Your feedback makes this community so much richer.
So go ahead—pull that leftover turkey out of the fridge, preheat your oven, and make yourself a pot pie that’ll make you forget you were ever eating leftovers. You deserve a cozy, delicious meal that feels like a hug in a bowl. Happy cooking!
Frequently Asked Questions
Can I use a store-bought pie crust instead of making my own?
Absolutely. If you’re short on time, a refrigerated pie crust from the store works perfectly. Just roll it out and follow the same assembly instructions. The flavor won’t be quite as rich as homemade, but it will still be delicious and save you about 30 minutes.
Can I make this pot pie in advance?
Yes! You can assemble the entire pot pie (without baking) up to 24 hours in advance. Cover it tightly with plastic wrap and refrigerate. When you’re ready to bake, add about 10 minutes to the baking time since you’re starting from cold. You can also freeze it unbaked for up to 3 months.
What if I don’t have an oven-safe skillet?
No problem. Cook the filling in a regular skillet, then transfer it to a 9-inch pie dish or a 2-quart baking dish. Top with the crust and bake as directed. Just make sure your baking dish is oven-safe and deep enough to hold the filling without overflowing.
Can I use chicken instead of turkey?
Definitely. This recipe works beautifully with cooked chicken, especially rotisserie chicken or leftover roast chicken. The flavors are almost identical, and it’s a great way to use up chicken leftovers any time of year. If you love this approach, you might also enjoy these crispy baked chicken parmesan meatballs for another cozy chicken dinner.
How do I prevent the bottom crust from getting soggy?
Since this recipe uses a top crust only, there’s no bottom crust to worry about. But if you’re making a double-crust version, blind-baking the bottom crust for 10 minutes before adding the filling helps keep it crisp. Also, make sure your filling is thick enough—it shouldn’t be watery when you pour it in.
Pin This Recipe!
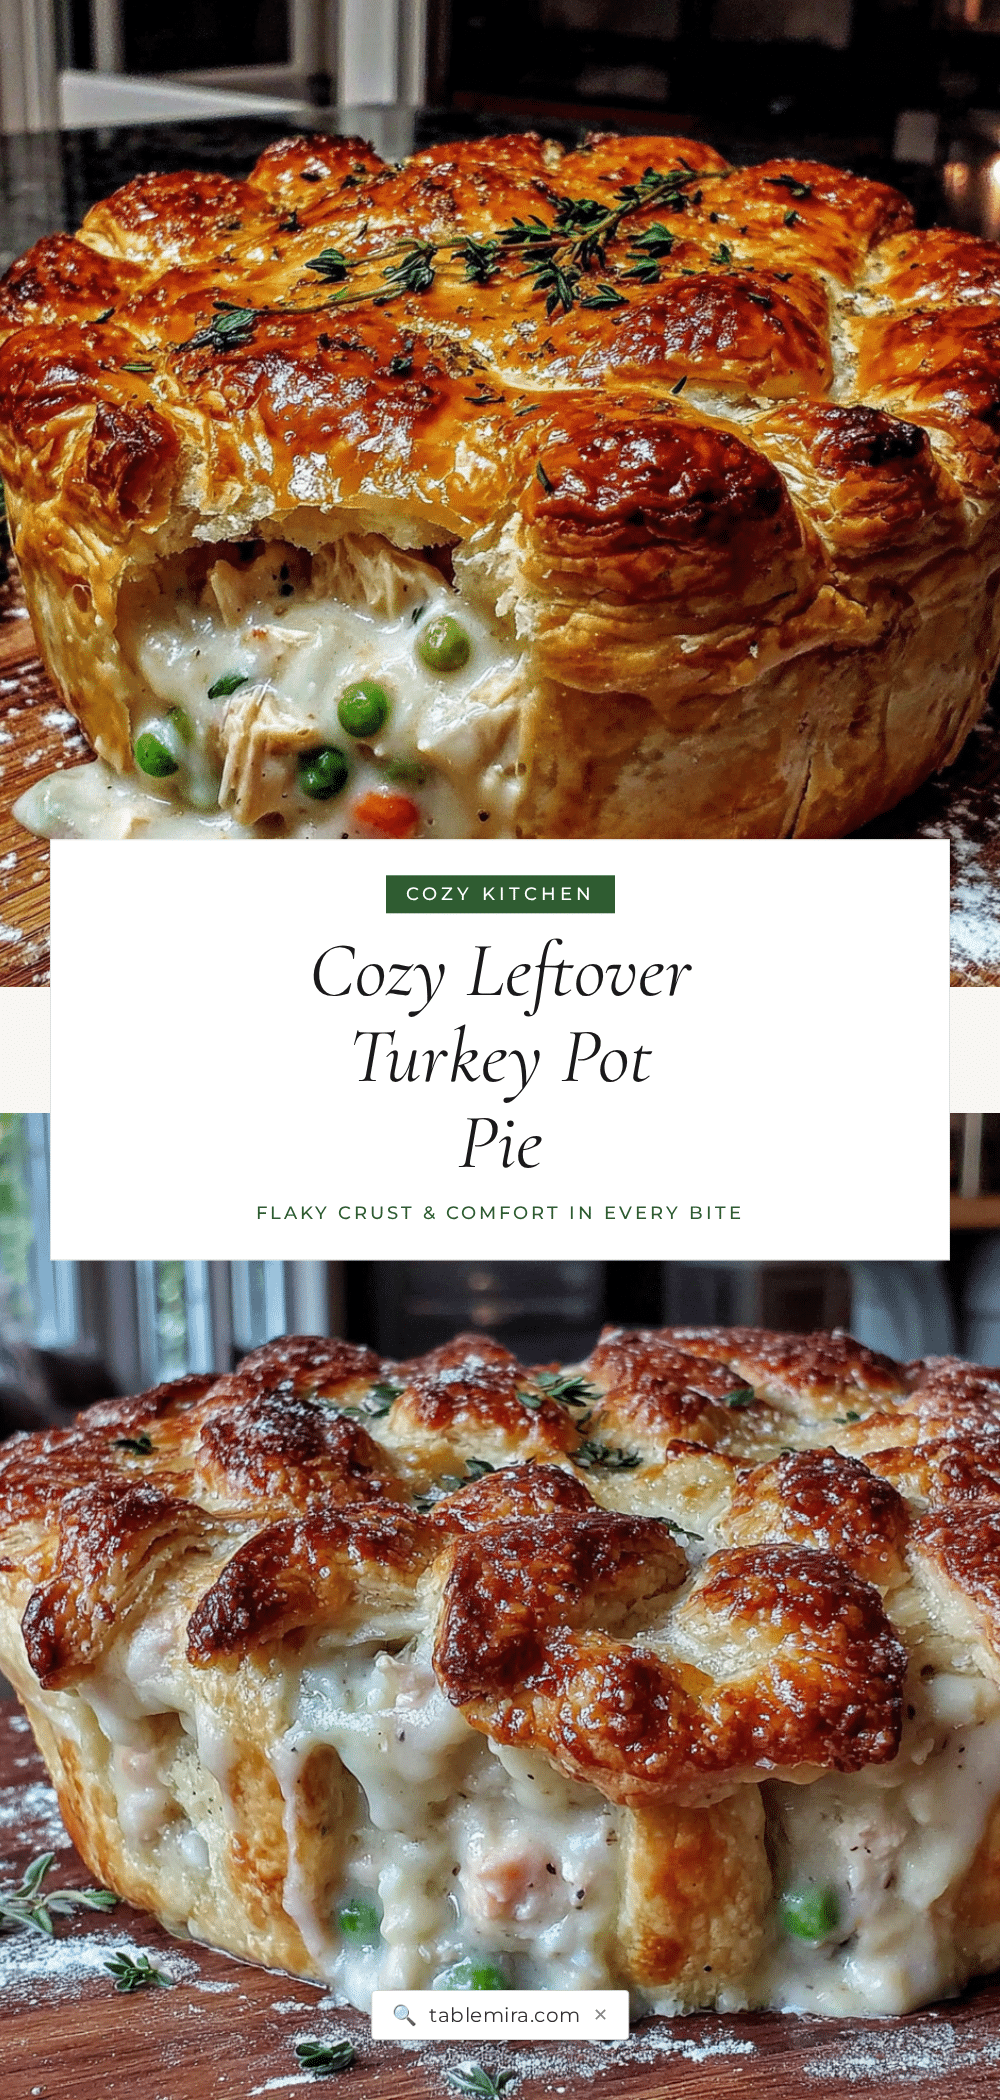
Cozy Leftover Turkey Pot Pie with Easy Flaky Crust

This cozy leftover turkey pot pie transforms holiday leftovers into a comforting, creamy, and flaky masterpiece. With a quick stovetop roux and a simple, forgiving crust, it’s the ultimate post-feast meal that feels intentional, not accidental.
- Prep Time: 15 minutes
- Cook Time: 30 minutes
- Total Time: 45 minutes
- Yield: 6 servings 1x
- Category: Main Course
- Cuisine: American
Ingredients
- 3 tablespoons unsalted butter
- 1 medium yellow onion, diced (about 1 cup)
- 2 medium carrots, peeled and diced (about 1 cup)
- 2 celery stalks, diced (about 1/2 cup)
- 3 cloves garlic, minced
- 1/3 cup all-purpose flour
- 2 cups low-sodium chicken or turkey broth
- 1 cup whole milk or half-and-half
- 1 teaspoon dried thyme
- 1/2 teaspoon dried rosemary
- 1/2 teaspoon salt, plus more to taste
- 1/4 teaspoon black pepper
- 1 cup frozen peas
- 3 cups cooked leftover turkey, shredded or diced
- 1 1/2 cups all-purpose flour (for crust)
- 1/2 teaspoon salt (for crust)
- 1/2 cup cold unsalted butter, cut into small cubes (for crust)
- 4–6 tablespoons ice water (for crust)
- 1 large egg, beaten (for egg wash)
Instructions
- Preheat your oven to 400°F (200°C). Position a rack in the center of the oven.
- Make the crust dough: In a large bowl, whisk together 1 1/2 cups flour and 1/2 teaspoon salt. Add the cold butter cubes. Using a pastry cutter or two forks, cut the butter into the flour until the mixture looks like coarse meal with some pea-sized butter pieces remaining. Drizzle 4 tablespoons of ice water over the mixture and stir with a fork until the dough just comes together. If it’s too dry, add more water, 1 tablespoon at a time. Don’t overmix—you want those butter chunks. Form the dough i…
- Start the filling: In your oven-safe skillet or Dutch oven, melt 3 tablespoons of butter over medium heat. Add the diced onion, carrots, and celery. Cook, stirring occasionally, for about 5-7 minutes, until the vegetables have softened and the onion is translucent.
- Add the garlic and flour: Stir in the minced garlic and cook for 30 seconds until fragrant. Sprinkle the 1/3 cup of flour over the vegetables and stir constantly for 1-2 minutes. This cooks the raw flour taste out and starts building your roux. The mixture will look thick and pasty—that’s perfect.
- Build the sauce: Slowly pour in the 2 cups of broth while whisking constantly to prevent lumps. Then add the 1 cup of milk or half-and-half, still whisking. Bring the mixture to a gentle simmer—you’ll see it start to thicken after about 2-3 minutes. It should coat the back of a spoon nicely.
- Season and add the turkey: Stir in the thyme, rosemary, salt, and pepper. Add the shredded turkey and frozen peas. Stir everything together until well combined. Taste and adjust seasoning—you might want a pinch more salt or a crack of pepper. Remove from heat.
- Roll out the crust: On a lightly floured surface, roll the chilled dough out to about 1/8-inch thickness, into a circle slightly larger than your skillet (about 11-12 inches). Don’t stress if it’s not a perfect circle—rustic is charming.
- Assemble the pot pie: Gently lay the dough over the filling in the skillet. Trim any overhang to about 1/2 inch, then tuck the edges under and crimp them with your fingers or a fork. Cut 4-5 small slits in the top of the crust to let steam escape. Brush the top with the beaten egg wash for that beautiful golden color.
- Bake: Place the skillet on a baking sheet (just in case it bubbles over) and bake for 25-30 minutes, until the crust is deep golden brown and the filling is bubbling up through the slits. Let it cool for 10 minutes before serving—this lets the filling set so you don’t get a runny mess on your plate.
Notes
Keep your butter cold for the crust—this is non-negotiable for flakiness. Don’t skip the roux; cooking the flour for a minute or two before adding liquid gives a silky, lump-free sauce. Use a mix of dark and white meat for best texture. Let the pot pie rest for 10 minutes before slicing to allow the filling to set. For a gluten-free version, use a gluten-free all-purpose flour blend. For a dairy-free version, substitute butter with vegan butter and use unsweetened oat milk or canned coconut milk.
Nutrition
- Serving Size: 1 serving (1/6 of pi
- Calories: 480
- Sugar: 6
- Fat: 24
- Carbohydrates: 38
- Fiber: 4
- Protein: 28
Keywords: leftover turkey pot pie, turkey pot pie, leftover turkey recipe, pot pie with flaky crust, easy pot pie, comfort food, Thanksgiving leftovers, turkey pie


