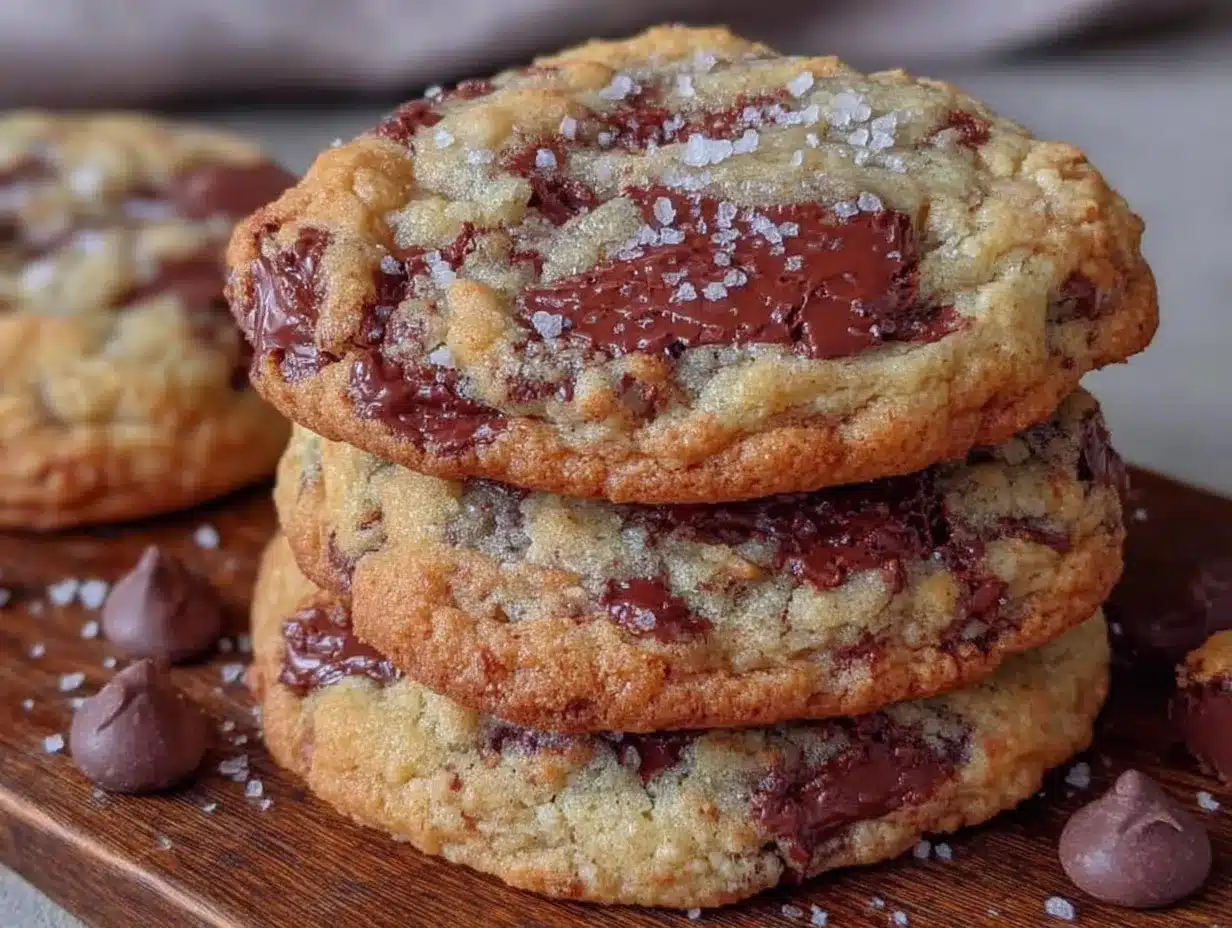
The first time I tried browning butter for cookies, I was convinced I’d ruined a perfectly good batch of dough. I stood there, staring at the foaming pan, certain the nutty smell meant I had burned something. It took about three minutes of panicking and stirring before I realized this was exactly what was supposed to happen. That little moment of kitchen panic turned into the best batch of chocolate chip cookies I had ever made. The edges were crisp, the centers were soft, and that deep, almost caramel-like flavor made everyone at the table stop mid-bite and ask what I had done differently.
Honestly, it felt like a secret I had stumbled onto by accident. I have made hundreds of chocolate chip cookies over the years—some flat, some too cakey, some that disappeared before they even cooled. But these Perfect Chewy Brown Butter Chocolate Chip Cookies? They are the ones I keep coming back to. They are the ones my friends text me about after the holidays, asking when I am baking again.
There is something about that browned butter that changes everything. It adds a warmth that regular butter just cannot match. And the texture—chewy in the middle, slightly crunchy at the edges—is exactly what a chocolate chip cookie should be. I have tweaked and tested this recipe more times than I can count, and this version is the one I trust completely.
Why You’ll Love This Recipe
These cookies are not just another chocolate chip cookie recipe. They are the result of trial, error, and a lot of happy accidents. Here is why they work so well:
- Deep, Nutty Flavor : Browning the butter takes about five extra minutes, but it transforms the entire cookie. You get this rich, toasty flavor that pairs perfectly with the sweetness of chocolate.
- Chewy Texture That Lasts : The combination of melted browned butter and an extra egg yolk gives these cookies a soft, chewy center that stays that way for days. No sad, dry cookies here.
- Simple Pantry Ingredients : You probably have everything you need already. Butter, sugar, eggs, flour, chocolate chips—nothing fancy, just good basics done right.
- Perfect for Any Occasion : These work for bake sales, holiday cookie swaps, or just a random Tuesday when you need something warm and comforting.
- Foolproof Once You Know the Trick : The hardest part is browning the butter without burning it, but once you get the hang of it, these cookies come together in no time.
I have brought these to potlucks and watched grown adults argue over the last one. I have packed them in lunchboxes and gotten notes back saying they were the best cookies ever. That is the kind of reaction that makes all the stirring and waiting worth it.
What Ingredients You Will Need
This recipe uses simple ingredients, but each one plays a specific role in getting that perfect chewy texture and deep flavor. Let me walk you through what you will need and why it matters.
For the Cookies:
- 1 cup (2 sticks) unsalted butter — You will brown this, so go with unsalted to control the salt level. I prefer using a good-quality butter like Kerrygold for the richest flavor, but any unsalted butter works.
- 1 cup packed light brown sugar (200g) — Brown sugar adds moisture and that slight molasses flavor that makes cookies chewy. Do not skip this one.
- 1/2 cup granulated sugar (100g) — White sugar helps with spreading and gives the edges a little crispness.
- 2 large eggs, room temperature — Room temperature eggs mix in more evenly. If you forget to take them out early, place them in a bowl of warm water for five minutes.
- 1 large egg yolk — This is my secret for extra chewiness. The extra yolk adds richness without making the dough too wet.
- 2 teaspoons vanilla extract — Pure vanilla, not imitation. It makes a noticeable difference in the final flavor.
- 2 1/4 cups all-purpose flour (280g) — Spoon and level your flour. Scooping directly from the bag packs it down and gives you too much flour, which leads to dry cookies.
- 1 teaspoon baking soda — This helps the cookies spread just enough and gives them a light texture.
- 1/2 teaspoon salt — I use fine sea salt. If you only have table salt, use a little less.
- 2 cups semi-sweet chocolate chips (about 340g) — I love using a mix of semi-sweet chips and chopped dark chocolate bars. The chips hold their shape, while the chopped pieces melt into puddles.
- Flaky sea salt for finishing (optional but highly recommended) — A tiny sprinkle on top right out of the oven takes these cookies to another level.
If you are out of brown sugar, you can make a quick substitute by mixing 1 cup of granulated sugar with 1 tablespoon of molasses. It works in a pinch, but the real thing is better.
Equipment Needed
You do not need a lot of fancy tools for these cookies. Here is what I use:
- A light-colored saucepan or skillet — Dark pans make it hard to see when the butter is browning. A stainless steel or light-colored nonstick pan works best.
- A large mixing bowl — Any bowl large enough to hold all the dough works.
- A whisk — For mixing the wet ingredients together.
- A rubber spatula — For folding in the chocolate chips and scraping down the sides.
- A cookie scoop (about 2 tablespoons) — This gives you evenly sized cookies. A regular tablespoon works too.
- Baking sheets — I like using light-colored baking sheets. Dark sheets can cause the bottoms to brown too quickly.
- Parchment paper or a silicone baking mat — Prevents sticking and makes cleanup easy.
- A wire cooling rack — Lets the cookies cool evenly without getting soggy bottoms.
If you do not have a cookie scoop, just use two spoons to portion the dough. It is not as pretty, but the cookies taste the same.
Preparation Method
Let me walk you through this step by step. Take your time with the butter browning part—it is the most important step and the easiest to rush.
- Brown the butter. Cut the butter into pieces and place it in your saucepan over medium heat. Stir it constantly with a rubber spatula or whisk. The butter will melt, then foam, then start to bubble. After a few minutes, you will see little brown specks forming at the bottom of the pan. The butter will smell nutty and toasty. This takes about 5 to 7 minutes. As soon as it turns a golden amber color and smells amazing, remove it from the heat immediately. Pour it into a heatproof bowl to stop the cooking process. Let it cool for about 10 minutes. Do not skip the cooling step—hot butter will cook the eggs when you mix them in.
- Mix the sugars and butter. In your large mixing bowl, combine the browned butter (it should still be warm but not hot) with the brown sugar and granulated sugar. Whisk them together until they look like wet sand. This takes about a minute. The mixture should be smooth and slightly shiny.
- Add the eggs and vanilla. Whisk in the room temperature eggs and the extra egg yolk one at a time. Add the vanilla extract. Whisk until everything is well combined and the mixture looks smooth and glossy. It will be thinner than regular cookie dough at this point—that is normal.
- Combine the dry ingredients. In a separate bowl, whisk together the flour, baking soda, and salt. Make sure there are no lumps.
- Mix the wet and dry ingredients. Add the dry ingredients to the wet mixture in two additions. Use your rubber spatula to fold everything together gently. Stop mixing as soon as you no longer see streaks of flour. Overmixing will make the cookies tough.
- Fold in the chocolate chips. Add the chocolate chips and fold them in with your spatula. Make sure they are evenly distributed throughout the dough. If you are using a mix of chips and chopped chocolate, fold gently so the pieces do not break up too much.
- Chill the dough. This is the step you cannot skip. Cover the bowl with plastic wrap and refrigerate the dough for at least 30 minutes, but 1 hour is better. Chilling the dough solidifies the butter, which prevents the cookies from spreading too much in the oven. It also allows the flavors to develop. I have left this dough in the fridge for up to 48 hours, and the cookies only get better.
- Preheat the oven. About 15 minutes before you are ready to bake, preheat your oven to 375°F (190°C). Line your baking sheets with parchment paper or silicone mats.
- Scoop the dough. Use your cookie scoop to portion the dough into balls about 2 tablespoons each. Place them on the prepared baking sheets about 2 inches apart. If you want bakery-style cookies, you can roll the dough balls slightly taller instead of perfectly round—this gives them that thick, domed look.
- Bake. Bake one sheet at a time for 10 to 12 minutes. The edges should be golden brown, but the centers will still look slightly soft and puffy. That is exactly what you want. They will continue to set as they cool. If you like softer cookies, pull them at the 10-minute mark. For crisper edges, go the full 12 minutes.
- Cool on the baking sheet. Let the cookies rest on the baking sheet for 5 minutes. This allows them to finish setting up. Then transfer them to a wire cooling rack. Sprinkle with flaky sea salt while they are still warm if you are using it.
One thing I learned the hard way—do not crowd the baking sheet. If the cookies are too close together, they will merge into one giant cookie. That sounds fun, but it is harder to get even baking.
Cooking Tips & Techniques
I have made these cookies more times than I want to admit, and I have definitely made my share of mistakes. Here are the things I wish someone had told me:
Watch the butter like a hawk. Browning butter goes from perfect to burnt in about 30 seconds. The moment you see those brown specks and smell that nutty aroma, pull it off the heat. If you are nervous, take it off a little early. You can always put it back, but you cannot un-burn it.
Do not skip the chilling step. I know it is tempting to skip it when you want cookies right now. But warm dough spreads into flat, thin cookies that lose that perfect chewy center. Chilled dough gives you thick, soft cookies with crispy edges. Trust me on this one.
Use a light-colored baking sheet. Dark baking sheets absorb more heat and can burn the bottoms of your cookies before the tops are done. If you only have dark sheets, reduce the oven temperature by 25 degrees and keep an eye on them.
Rotate the baking sheet halfway through. Ovens have hot spots. Rotating the sheet halfway through baking ensures even browning. I usually do this at the 5-minute mark.
Let them cool on the sheet. Moving cookies too early can break them apart. Those 5 minutes on the hot baking sheet are crucial for the structure to set. Be patient.
I once forgot to chill the dough and ended up with cookies that spread into flat, crispy disks. They still tasted good, but they were not the chewy cookies I was going for. That mistake taught me to never skip that step again.
Variations & Adaptations
This recipe is flexible, and I have tried several variations over the years. Here are some of my favorites:
Dark Chocolate Lovers Version : Swap the semi-sweet chips for dark chocolate chunks (60-70% cocoa). The bitterness of the dark chocolate balances the sweet, nutty browned butter beautifully. I made these for a friend who claims she does not like sweets, and she ate three.
Gluten-Free Option : Substitute the all-purpose flour with a 1:1 gluten-free baking flour blend that contains xanthan gum. I have used Bob’s Red Mill and King Arthur brands with good results. The texture is slightly different—a little more tender—but still delicious.
Add Some Crunch : Fold in 1/2 cup of toasted chopped pecans or walnuts along with the chocolate chips. Toasting the nuts first brings out their flavor and keeps them crunchy in the dough.
Double Chocolate Version : Replace 1/4 cup of the flour with unsweetened cocoa powder. Use white chocolate chips or milk chocolate chips for contrast. These are dangerously good.
Lower Sugar Option : Reduce the granulated sugar to 1/4 cup and use a full cup of brown sugar. The cookies will be less sweet but still chewy and flavorful. I have done this for friends who are watching their sugar intake, and nobody complained.
If you are feeling adventurous, try adding a teaspoon of instant espresso powder to the dry ingredients. It does not make the cookies taste like coffee—it just deepens the chocolate flavor in a way that is hard to describe but impossible to ignore.
Serving & Storage Suggestions
These cookies are best served warm, straight from the oven, with a cold glass of milk. But they are also fantastic at room temperature the next day—if they last that long.
Serving Temperature: Warm cookies have that gooey, melty chocolate thing going on. If you are serving them later, pop them in a 300°F oven for 3-4 minutes to warm them up. It brings back that fresh-baked magic.
Storage: Keep the cookies in an airtight container at room temperature for up to 5 days. Place a slice of bread in the container with the cookies—it absorbs excess moisture and keeps the cookies soft. Replace the bread slice every other day.
Freezing: You have two options here. Freeze the baked cookies in a single layer on a baking sheet, then transfer them to a freezer bag. They will keep for up to 3 months. Or freeze the raw dough balls on a baking sheet, then pop them into a freezer bag. You can bake them straight from frozen—just add 2-3 minutes to the baking time.
Flavor Development: Honestly, these cookies taste even better the next day. The browned butter flavor deepens and melds with the chocolate overnight. I have been known to make the dough a day ahead just for this reason.
These cookies also make great ice cream sandwiches. Let them cool completely, then sandwich a scoop of vanilla or chocolate ice cream between two cookies. Wrap in plastic wrap and freeze for at least an hour. Perfect for summer.
Nutritional Information & Benefits
Let us be real—these are cookies, not health food. But here is a rough estimate per cookie (based on 24 cookies):
- Calories: Approximately 230
- Fat: 12g
- Carbohydrates: 30g
- Protein: 3g
- Sugar: 19g
On the bright side, the browned butter adds a richness that means one or two cookies are usually enough to satisfy a sweet craving. And the dark chocolate contains antioxidants and a little bit of iron. So there is that.
If you are looking for a slightly lighter option, you can reduce the chocolate chips to 1 1/2 cups and use dark chocolate (70% cocoa or higher) for less sugar. But honestly, these cookies are meant to be enjoyed as a treat. Life is too short to count calories in a chocolate chip cookie.
These cookies are not gluten-free or dairy-free as written, but the substitutions I mentioned earlier work well for gluten-free diets. For a dairy-free version, use a high-quality vegan butter substitute. The browning step might not work as well with some vegan butters, so check the package instructions first.
Conclusion
These Perfect Chewy Brown Butter Chocolate Chip Cookies are the kind of recipe that becomes a staple in your kitchen. They are simple enough for a beginner baker but impressive enough to bring to any gathering. The browned butter adds a depth of flavor that makes people think you spent hours in the kitchen, when really it only takes about 30 minutes of active work.
I love that this recipe is forgiving. If your butter gets a little too dark, it still works. If you forget to chill the dough for the full hour, it still works. It is a recipe that rewards attention but does not punish imperfection. That is the kind of cooking I believe in.
I would love to hear how these turn out for you. Did you add any fun mix-ins? Did you try the flaky salt on top? Drop a comment below and let me know. And if you share a photo on social media, tag me—I love seeing your baking adventures.
Happy baking, friend. These cookies are worth every minute.
Frequently Asked Questions
Can I use salted butter instead of unsalted?
Yes, you can. Just reduce the added salt in the recipe to 1/4 teaspoon. The browned butter may taste slightly saltier, but it works fine.
Why did my cookies turn out flat?
Flat cookies usually mean the dough was not chilled long enough, or the butter was too warm when you mixed it. Make sure to chill the dough for at least 30 minutes, and let the browned butter cool before adding the eggs.
Can I make the dough ahead of time?
Absolutely. The dough can be refrigerated for up to 48 hours. In fact, the flavor gets better as it sits. You can also freeze the dough balls for up to 3 months.
How do I know when the butter is properly browned?
Look for small brown specks at the bottom of the pan and a nutty, toasty aroma. The butter will go from melted to foamy to bubbling. When you see those brown specks, remove it from the heat right away.
Can I use milk chocolate chips instead of semi-sweet?
Yes, but the cookies will be sweeter. Milk chocolate is softer and melts more, so the texture might be slightly different. I prefer semi-sweet for balance, but use what you love.
If you enjoyed this recipe, you might also like my brown butter banana bread with espresso walnut swirl or these soft brown butter pumpkin chocolate chip cookies for another take on that nutty brown butter flavor. For something savory to balance all the sweetness, try this creamy roasted butternut squash soup with sage brown butter.
Pin This Recipe!
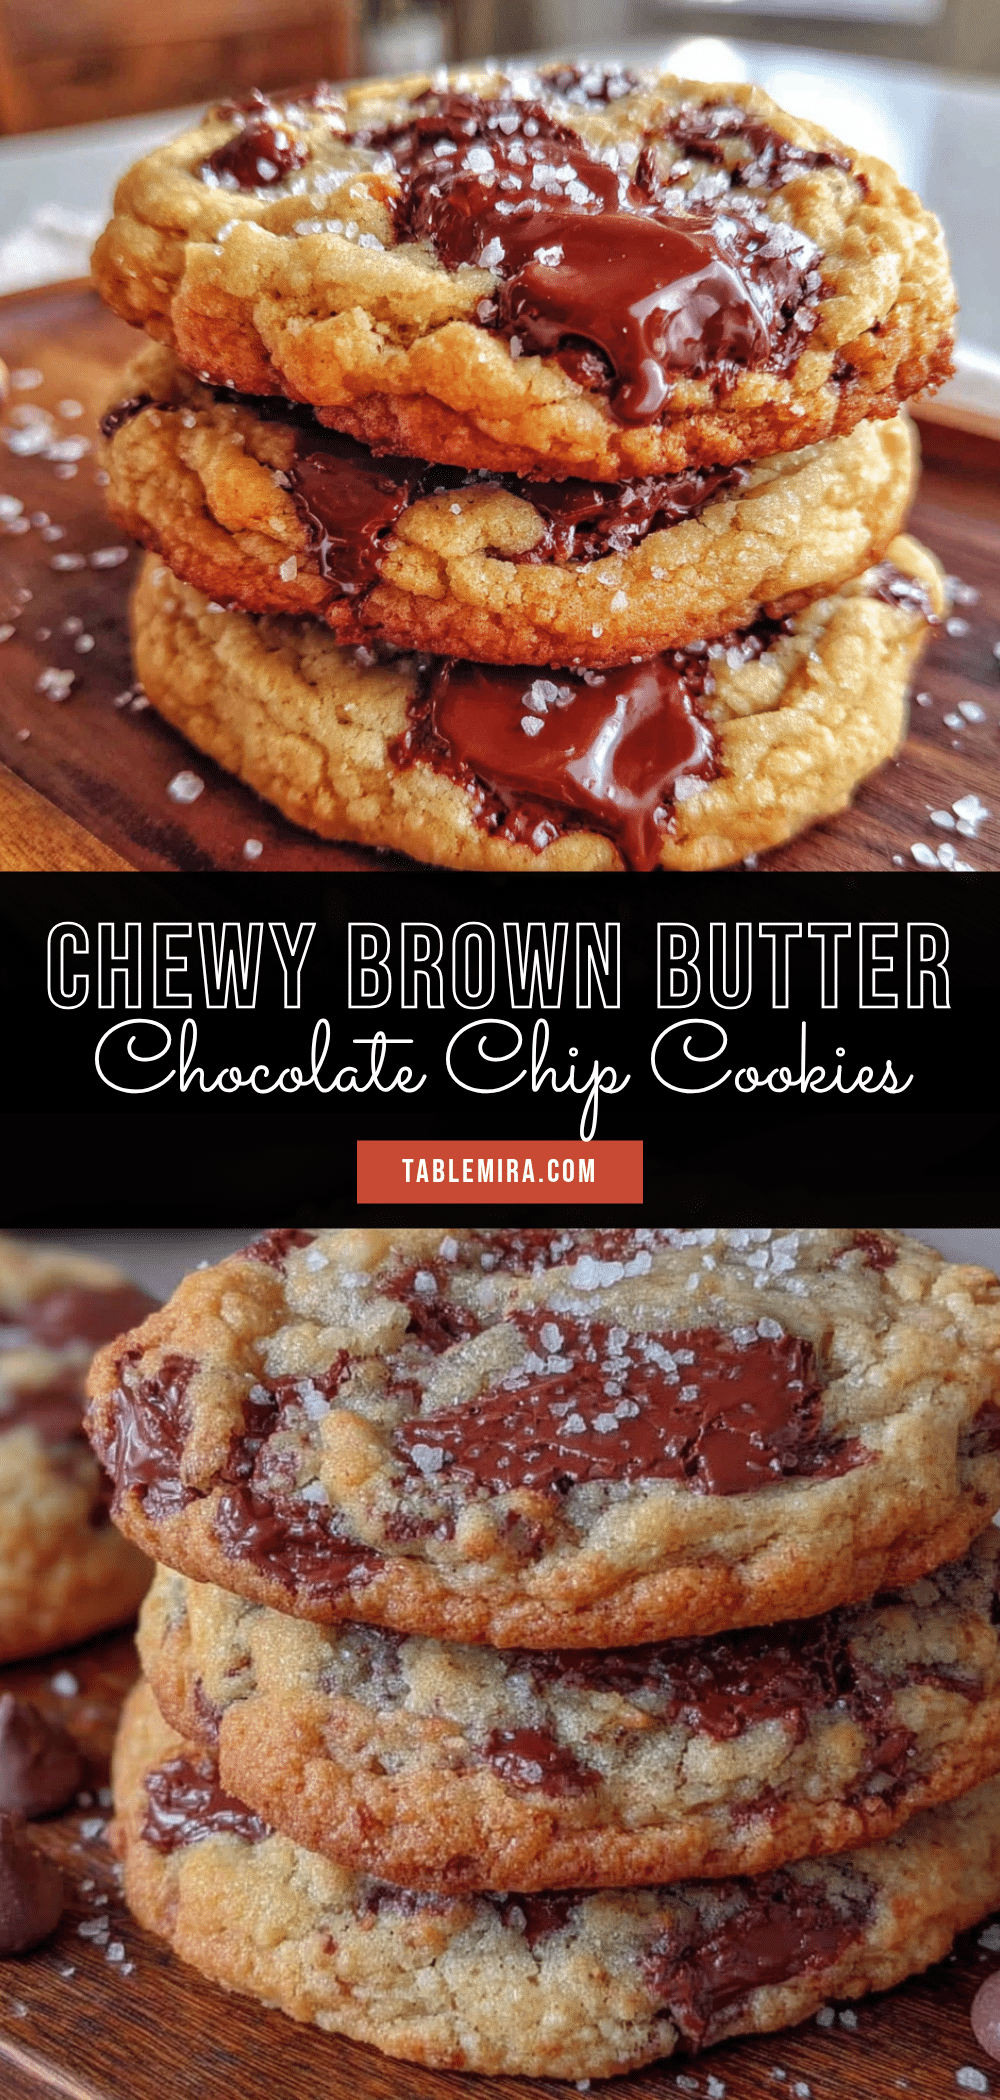
Perfect Chewy Brown Butter Chocolate Chip Cookies – Easy Recipe
These brown butter chocolate chip cookies have crisp edges, soft centers, and a deep, nutty flavor that makes them irresistible. A simple recipe with a special technique that transforms ordinary cookies into something extraordinary.
- Prep Time: 15 minutes
- Cook Time: 12 minutes
- Total Time: 1 hour 27 minutes (including chilling)
- Yield: 24 cookies 1x
- Category: Dessert
- Cuisine: American
Ingredients
- 1 cup (2 sticks) unsalted butter
- 1 cup packed light brown sugar (200g)
- 1/2 cup granulated sugar (100g)
- 2 large eggs, room temperature
- 1 large egg yolk
- 2 teaspoons vanilla extract
- 2 1/4 cups all-purpose flour (280g)
- 1 teaspoon baking soda
- 1/2 teaspoon salt
- 2 cups semi-sweet chocolate chips (about 340g)
- Flaky sea salt for finishing (optional)
Instructions
- Brown the butter: Cut the butter into pieces and place in a light-colored saucepan over medium heat. Stir constantly until the butter melts, foams, and turns a golden amber color with brown specks, about 5-7 minutes. Remove from heat immediately and pour into a heatproof bowl. Let cool for 10 minutes.
- Mix the sugars and butter: In a large mixing bowl, combine the browned butter (still warm but not hot) with brown sugar and granulated sugar. Whisk until the mixture looks like wet sand, about 1 minute.
- Add the eggs and vanilla: Whisk in the room temperature eggs and extra egg yolk one at a time, then add the vanilla extract. Whisk until smooth and glossy.
- Combine the dry ingredients: In a separate bowl, whisk together the flour, baking soda, and salt until no lumps remain.
- Mix wet and dry ingredients: Add the dry ingredients to the wet mixture in two additions, folding gently with a rubber spatula until just combined. Do not overmix.
- Fold in the chocolate chips: Add the chocolate chips and fold until evenly distributed.
- Chill the dough: Cover the bowl with plastic wrap and refrigerate for at least 30 minutes, preferably 1 hour. Dough can be chilled up to 48 hours.
- Preheat the oven: About 15 minutes before baking, preheat oven to 375°F (190°C). Line baking sheets with parchment paper or silicone mats.
- Scoop the dough: Use a cookie scoop (about 2 tablespoons) to portion dough into balls. Place on prepared baking sheets about 2 inches apart.
- Bake: Bake one sheet at a time for 10-12 minutes. Edges should be golden brown, centers still soft and puffy.
- Cool on the baking sheet: Let cookies rest on the baking sheet for 5 minutes, then transfer to a wire cooling rack. Sprinkle with flaky sea salt while warm if desired.
Notes
Watch the butter carefully when browning; it can go from perfect to burnt in 30 seconds. Do not skip chilling the dough—it prevents excessive spreading and develops flavor. For softer cookies, bake at the 10-minute mark; for crisper edges, go the full 12 minutes. Cookies taste even better the next day as the brown butter flavor deepens.
Nutrition
- Serving Size: 1 cookie
- Calories: 230
- Sugar: 19
- Sodium: 120
- Fat: 12
- Saturated Fat: 7
- Carbohydrates: 30
- Fiber: 1
- Protein: 3
Keywords: brown butter chocolate chip cookies, chewy chocolate chip cookies, easy cookie recipe, homemade cookies, chocolate chip cookies