The doorbell rang at 5:47 PM. I was elbow-deep in ground beef, rice, and a Pyrex measuring cup, and my kitchen looked like a small explosion in a spice rack. My sister had texted an hour earlier—“Hey, bringing the kids by for a quick visit before trick-or-treating!”—and I had approximately zero plans for feeding them anything remotely festive. The fridge held bell peppers, cheese, and the usual odds and ends. No candy corn. No themed snacks. Just a very ordinary Wednesday dinner waiting to happen.
I stood there, spatula in hand, staring at those bell peppers like they might spontaneously turn into something spooky. And then it hit me—what if I just… wrapped them? Like little mummies? I had crescent dough in the fridge (doesn’t everyone, honestly?) and those little candy eyes left over from a baking project last year. Within twenty minutes, those ordinary stuffed peppers had bandages, and my kitchen smelled like Halloween had finally shown up.
That’s how these Spooky Mummy Stuffed Peppers were born—not from a grand plan, but from a last-minute scramble and a stubborn refusal to serve a boring dinner on Halloween night. They’re silly, they’re delicious, and they saved me from serving my sister’s kids plain old tacos while dressed as a witch. Sometimes the best recipes come from the tightest corners, you know? This one stuck because it’s the kind of dinner that makes everyone at the table smile—including the grown-ups who pretend they’re too old for this stuff.
Why You’ll Love This Recipe
Let me tell you—this isn’t just another stuffed pepper recipe. These Spooky Mummy Stuffed Peppers hit that sweet spot between genuinely good dinner and pure Halloween fun. I’ve tested this one at least four times (the first batch looked more like sad ghosts than mummies, let’s be real), and here’s what makes it worth your time:
- Quick & Easy: From fridge to table in about 45 minutes. That’s faster than ordering pizza on Halloween night, and way more memorable.
- Simple Ingredients: Ground beef, rice, bell peppers, cheese, and crescent dough. You probably have most of this already, minus the candy eyes.
- Perfect for Halloween Dinner: This is the main event—not a side snack or a dessert. It fills hungry little (and big) bellies before the sugar rush begins.
- Crowd-Pleaser: My niece, who claims she “doesn’t like peppers,” ate two. The mummy wrapping is apparently a game-changer for picky eaters.
- Unbelievably Delicious: The crescent dough gets golden and flaky around the edges, the filling is savory and cheesy, and the whole thing tastes like comfort food with a costume on.
What makes this different from every other stuffed pepper recipe out there? It’s the presentation, honestly. The dough wrapping isn’t just for show—it soaks up some of the juices from the filling and gets this incredible buttery texture that plain peppers just don’t have. And let’s face it, when you’re serving dinner on a night when everyone’s dressed like a zombie or a superhero, you need food that plays along.
This is the kind of recipe that makes you feel like a kitchen superhero without actually working that hard. It’s Halloween dinner, but make it fun—and still filling enough that nobody’s asking for candy five minutes later.
What Ingredients You Will Need
This recipe uses straightforward, pantry-friendly ingredients to create something that looks way more complicated than it actually is. Here’s what you’ll need to round up:
For the Filling
- 1 lb ground beef (80/20 works great—lean enough but still juicy)
- 1 cup cooked white rice (leftover rice is perfect here; day-old rice works beautifully)
- 1 small yellow onion, finely diced
- 3 cloves garlic, minced
- 1 can (15 oz) tomato sauce
- 1 teaspoon dried oregano
- 1 teaspoon ground cumin
- ½ teaspoon smoked paprika
- Salt and black pepper, to taste
- 1 cup shredded mozzarella cheese (I prefer whole-milk mozzarella for that stretchy, melty texture)
- ¼ cup grated Parmesan cheese
For the Peppers & Mummy Wrapping
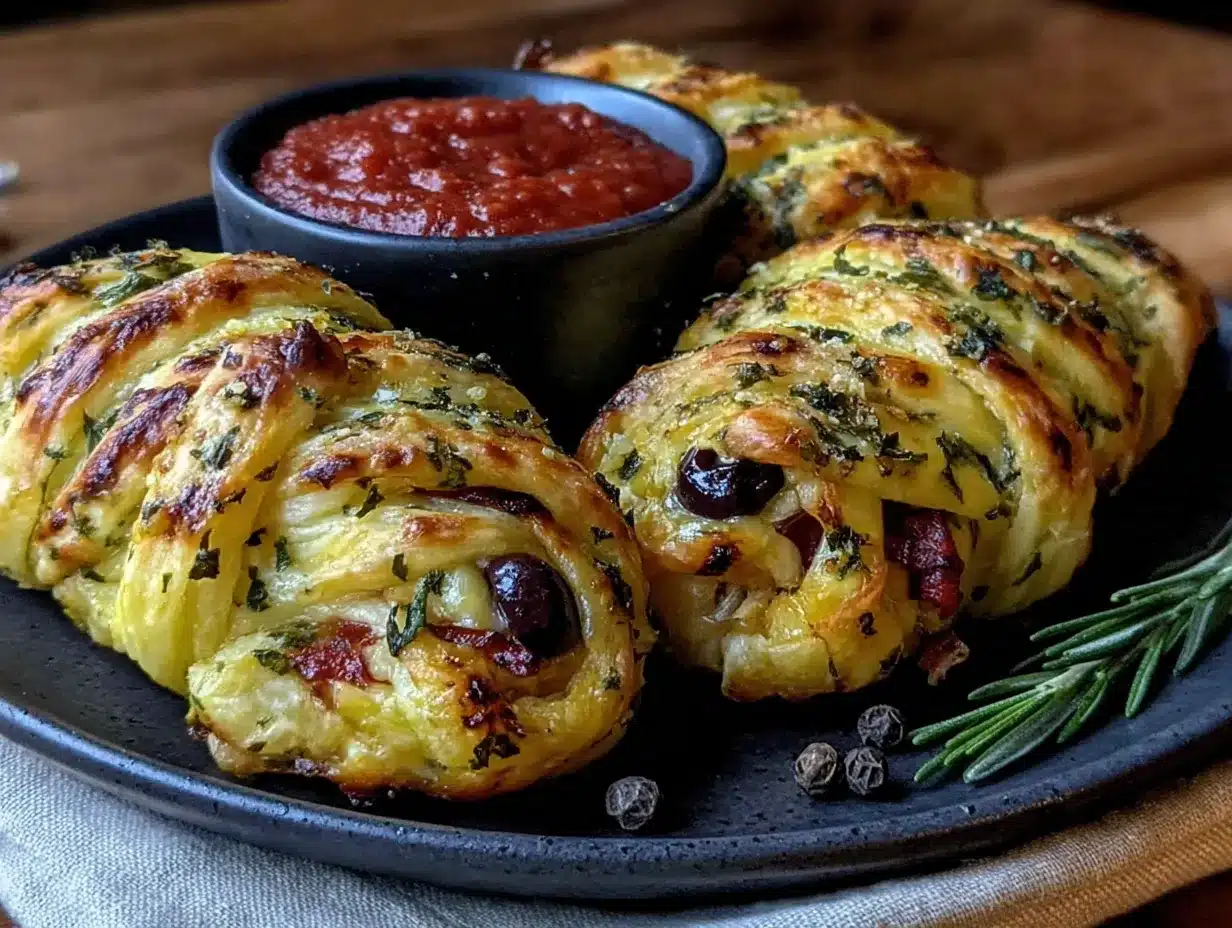
- 4 large bell peppers (any color works, but green or red gives the best Halloween contrast with the dough)
- 1 can (8 oz) refrigerated crescent roll dough (Pillsbury is my go-to; the sheets version is even easier to work with)
- 12-16 candy eyes (you can find these in the baking aisle, or make your own with black icing)
Ingredient Selection Tips
For the bell peppers, look for ones that stand up straight on their own—this matters way more than you’d think. A wobbly pepper is a sad mummy. I’ve made that mistake. Also, if you’re using green peppers, they have a slightly more bitter edge that balances beautifully with the savory filling. Red peppers are sweeter and my personal favorite for this recipe.
For the crescent dough, I really do recommend the sheet version if you can find it. The perforated triangles work fine, but you have to press the seams together, and sometimes they come apart during baking. The sheets give you clean, even strips that wrap like actual bandages.
Substitution Guidance
You can swap the ground beef for ground turkey or chicken—just add a tablespoon of olive oil to the pan since poultry is leaner. For a vegetarian version, use cooked lentils or a plant-based ground meat substitute. The rest of the filling stays the same. If you’re gluten-free, skip the crescent dough and use gluten-free pizza dough rolled thin, or just serve the stuffed peppers without the wrapping (they’re still delicious, just less mummy-ish).
Equipment Needed
You don’t need anything fancy for these Spooky Mummy Stuffed Peppers, which is part of the beauty. Here’s what I used:
- Large skillet or frying pan (for browning the meat and sautéing the onions)
- 9×13-inch baking dish (glass or ceramic works best; metal is fine too)
- Sharp knife and cutting board
- Mixing bowl (for combining the filling ingredients)
- Measuring cups and spoons
- Paring knife or kitchen shears (for cutting the crescent dough into strips)
- Small spoon (for stuffing the peppers—a teaspoon works perfectly)
If you don’t have a 9×13 dish, you can use a large cast-iron skillet instead. Just make sure the peppers fit snugly so they don’t tip over during baking. I learned this the hard way when one of my mummies decided to take a nap mid-bake. Not cute.
For the candy eyes, a pair of clean tweezers can help you place them precisely without smudging the dough. Or just use your fingers—that’s what I do most of the time.
Preparation Method
Alright, let’s get into the actual making of these little guys. I’ve broken this down step by step so you don’t end up with a mummy that looks more like a melted snowman (been there).
- Preheat your oven to 375°F (190°C). Get this going first so it’s ready when you are.
- Cook the rice if you haven’t already. You’ll need about ⅓ cup of uncooked rice to get 1 cup cooked. Fluff it with a fork and set it aside to cool slightly.
- Prepare the bell peppers. Slice the tops off each pepper and remove the seeds and membranes from the inside. Be thorough here—nobody wants a crunchy seed in their bite. If the peppers wobble when you set them down, trim a thin slice off the bottom to create a flat surface. Just don’t cut through the bottom, or the filling will leak out during baking.
- Brown the ground beef. Heat your skillet over medium-high heat and add the ground beef. Break it apart with a wooden spoon as it cooks, about 5-6 minutes until no pink remains. Drain off any excess fat, leaving about a tablespoon in the pan for flavor.
- Sauté the aromatics. Add the diced onion to the skillet with the beef and cook for 3-4 minutes until translucent. Stir in the minced garlic and cook for another 30 seconds until fragrant. Your kitchen should smell amazing at this point.
- Build the filling. Reduce the heat to medium-low. Stir in the tomato sauce, cooked rice, oregano, cumin, smoked paprika, salt, and pepper. Let this simmer together for 3-4 minutes so the flavors meld. Taste it and adjust seasoning—I always add a little more salt than I think I need because the peppers will absorb some of it.
- Add the cheese. Remove the skillet from heat and stir in the mozzarella and Parmesan until melted and gooey. The filling should look cohesive and slightly sticky, not dry. If it seems dry, add a tablespoon of tomato sauce or water.
- Stuff the peppers. Spoon the filling into each pepper, packing it gently but firmly. Don’t overstuff—you need about ¼ inch of space at the top to prevent the filling from spilling out during baking. Place the stuffed peppers upright in your baking dish.
- Wrap the mummies. Open the crescent dough and separate it into triangles (or unroll the sheet). Use a sharp knife or kitchen shears to cut the dough into thin strips, about ½ inch wide. Wrap the strips around each pepper in a crisscross pattern, leaving gaps so you can see the pepper “skin” underneath. Think mummy bandages, not full-body cast. Leave a small opening near the top for the eyes.
- Bake the peppers. Place the baking dish in the preheated oven and bake for 20-25 minutes, until the peppers are tender and the dough is golden brown and puffed. The filling should be bubbling slightly around the edges.
- Add the eyes. Remove the dish from the oven and let it cool for 5 minutes. Press two candy eyes onto each mummy in the exposed gap you left near the top. The residual heat will help them stick. If you’re using icing eyes, let the peppers cool completely first so the icing doesn’t melt.
- Serve immediately. These are best eaten warm, while the dough is still flaky and the cheese is stretchy. Use a spatula to transfer each mummy to a plate, and watch everyone’s face light up.
Sensory cue: When the peppers are done, the dough should be puffed and golden with darker brown edges where it touched the dish. The peppers themselves will be slightly wrinkled and soft when pierced with a fork. The smell is incredible—savory beef, roasted peppers, and buttery pastry all mingling together.
Cooking Tips & Techniques
I’ve made these Spooky Mummy Stuffed Peppers enough times to know where things can go sideways. Here’s what I’ve learned:
Don’t overcook the filling. The rice and beef will continue cooking inside the pepper during baking. If you simmer the filling too long on the stove, it can dry out. Keep it moist and slightly saucy before stuffing.
Blanch the peppers first if you’re short on time. Drop them in boiling water for 3 minutes before stuffing. This softens them so they bake faster—about 15 minutes instead of 25. I do this when I’m in a rush and it works great.
The dough needs space. Don’t wrap the crescent strips too tightly around the pepper. The dough expands as it bakes, and if it’s wrapped too tight, it can tear or become dense instead of flaky. Leave a little breathing room between the strips.
My biggest failure: The first time I made these, I used too much filling and the peppers burst open in the oven. It looked like a mummy explosion. Now I always leave that ¼ inch of space at the top, and I’ve never had a problem since.
Timing tip: You can prep the filling and stuff the peppers up to a day ahead. Just wrap the dough on right before baking so it stays fresh and flaky. This is a lifesaver on Halloween when you’re also helping kids into costumes and answering the door every ten minutes.
For consistent results, use a kitchen scale to portion the filling. Each pepper should get about ¾ cup of filling. This ensures even cooking and prevents some peppers from being understuffed while others are overflowing.
Variations & Adaptations
One of the best things about this recipe is how flexible it is. Here are some variations I’ve tried and loved:
Spicy Southwest Mummy Peppers
Add 1 diced jalapeño (seeds removed unless you like heat) to the onion mixture, and swap the mozzarella for pepper jack cheese. Stir in ½ cup of corn kernels and a can of drained black beans. The filling gets this smoky, spicy kick that pairs perfectly with the buttery dough.
Italian-Inspired Mummies
Replace the cumin and paprika with 1 teaspoon of dried basil and 1 teaspoon of dried parsley. Use Italian sausage (casings removed) instead of ground beef, and swap the tomato sauce for crushed tomatoes. Top with fresh mozzarella pearls instead of shredded. This version tastes like a deconstructed lasagna wrapped in a pepper.
Vegetarian Lentil Mummies
Cook 1 cup of brown lentils in 2 cups of vegetable broth until tender (about 20 minutes). Use this in place of the ground beef. Add ½ cup of finely chopped mushrooms to the onion mixture for extra umami. The lentils hold up beautifully and the texture is surprisingly meaty.
Breakfast-for-Dinner Mummies
Okay, hear me out. Use scrambled eggs, cooked breakfast sausage, and shredded cheddar as the filling. Wrap with the crescent dough and bake as directed. Serve with a side of hot sauce. My kids thought I was a genius when I made these for Halloween brunch last year.
For any variation, the cooking time stays the same. Just make sure your filling is fully cooked before stuffing, since the oven time is mostly for softening the peppers and baking the dough.
Serving & Storage Suggestions
These Spooky Mummy Stuffed Peppers are best served warm, right out of the oven. The contrast between the hot, savory filling and the flaky, buttery dough is at its peak within the first 15 minutes. I like to serve them on a dark plate or black platter to make the mummy faces pop—it’s a small touch, but it really sells the Halloween vibe.
What to serve alongside: A simple green salad with a tangy vinaigrette cuts through the richness of the cheese and dough. Roasted broccoli or green beans work well too. If you’re going all-out Halloween, serve them with a bowl of creamy roasted tomato basil soup on the side for dipping—the soup’s acidity balances the savory peppers beautifully.
Storage: Leftover mummy peppers keep in the fridge for up to 4 days in an airtight container. The dough will soften slightly, but they’re still delicious. To reheat, pop them in a 350°F oven for 10-12 minutes until warmed through. The microwave works in a pinch, but the dough won’t be crispy.
Freezer instructions: You can freeze the stuffed peppers before adding the dough. Wrap each stuffed pepper tightly in plastic wrap and place in a freezer bag for up to 3 months. When ready to bake, thaw overnight in the fridge, wrap with dough, and bake as directed. Add 5 extra minutes to the baking time since the peppers will be cold.
The flavors actually get better after a day in the fridge—the peppers soften more and the filling becomes almost casserole-like. I’ve been known to make a double batch just for the leftovers.
Nutritional Information & Benefits
Here’s the approximate nutritional breakdown for one Spooky Mummy Stuffed Pepper (based on using 80/20 ground beef and whole-milk mozzarella):
| Nutrient | Amount per Serving |
|---|---|
| Calories | 485 |
| Protein | 28g |
| Carbohydrates | 34g |
| Fat | 24g |
| Saturated Fat | 10g |
| Fiber | 4g |
| Sugar | 8g |
| Sodium | 820mg |
Bell peppers are packed with vitamin C—actually more than oranges gram for gram. They’re also a great source of vitamin A and antioxidants. The ground beef provides iron and B vitamins, while the cheese adds calcium. It’s not a health food, but it’s a balanced meal with real nutritional value, especially if you use lean ground beef or turkey.
For a lower-carb option, skip the rice and add extra vegetables like diced zucchini or mushrooms to the filling. The crescent dough adds about 12g of carbs per serving, so if you’re watching your carb intake, you can serve the filling without the wrapping (though it’s less fun that way).
This recipe contains dairy (cheese) and gluten (crescent dough). For dairy-free, use vegan cheese shreds and omit the Parmesan. For gluten-free, use gluten-free pizza dough or serve the filling in the peppers without wrapping.
Conclusion
These Spooky Mummy Stuffed Peppers are proof that Halloween dinner doesn’t have to be a bag of candy or a sad bowl of cereal before the sugar rush. They’re fun without being fussy, festive without requiring a culinary degree, and genuinely delicious enough to earn a spot in your regular dinner rotation—not just on October 31st.
I love that this recipe lets me feed my family something hearty and homemade while still leaning into the silly, joyful spirit of Halloween. The first time I made these, my nephew looked at his plate and whispered “cool” under his breath. That’s the kind of kitchen win you remember.
So go ahead—raid your fridge for those bell peppers, grab a can of crescent dough, and give your Halloween dinner a little personality. And if you come up with your own mummy variation (I’m still thinking about a buffalo chicken version), I’d love to hear about it. Drop a comment below or tag me in your photos—I’m always looking for new ideas to try.
Happy Halloween, and happy cooking! 🎃
Frequently Asked Questions
Can I make these Spooky Mummy Stuffed Peppers ahead of time?
Absolutely! You can prep the filling and stuff the peppers up to 24 hours in advance. Just keep them covered in the fridge and add the crescent dough strips right before baking. This is actually my preferred method for Halloween—it makes the actual dinner prep super quick.
What if I can’t find candy eyes at the store?
No problem at all! You can use a small dot of black icing or even a piece of black olive cut into tiny rounds. I’ve also used black sesame seeds in a pinch—they’re small but they work. The eyes are mostly for fun, so get creative with what you have.
Can I use a different type of dough for the mummy wrapping?
Yes, definitely. Pizza dough, puff pastry, or even refrigerated biscuit dough rolled thin all work. Puff pastry gives a flakier result, while pizza dough is chewier. Just adjust the baking time as needed—puff pastry bakes faster (about 15 minutes), while pizza dough might need a few extra minutes.
How do I keep the crescent dough from getting soggy?
The key is not overstuffing the peppers and making sure the filling isn’t too watery. If your tomato sauce is very thin, let it simmer a few extra minutes to reduce. Also, pat the inside of the peppers dry with a paper towel before stuffing. This little step makes a big difference in keeping the dough crisp.
Can I make these in an air fryer?
Yes! Preheat your air fryer to 350°F (175°C). Place the stuffed and wrapped peppers in the basket, leaving space between them so the air can circulate. Cook for 12-15 minutes, checking at the 10-minute mark. The dough gets extra crispy in the air fryer—it’s actually my favorite way to make these now.
Pin This Recipe!
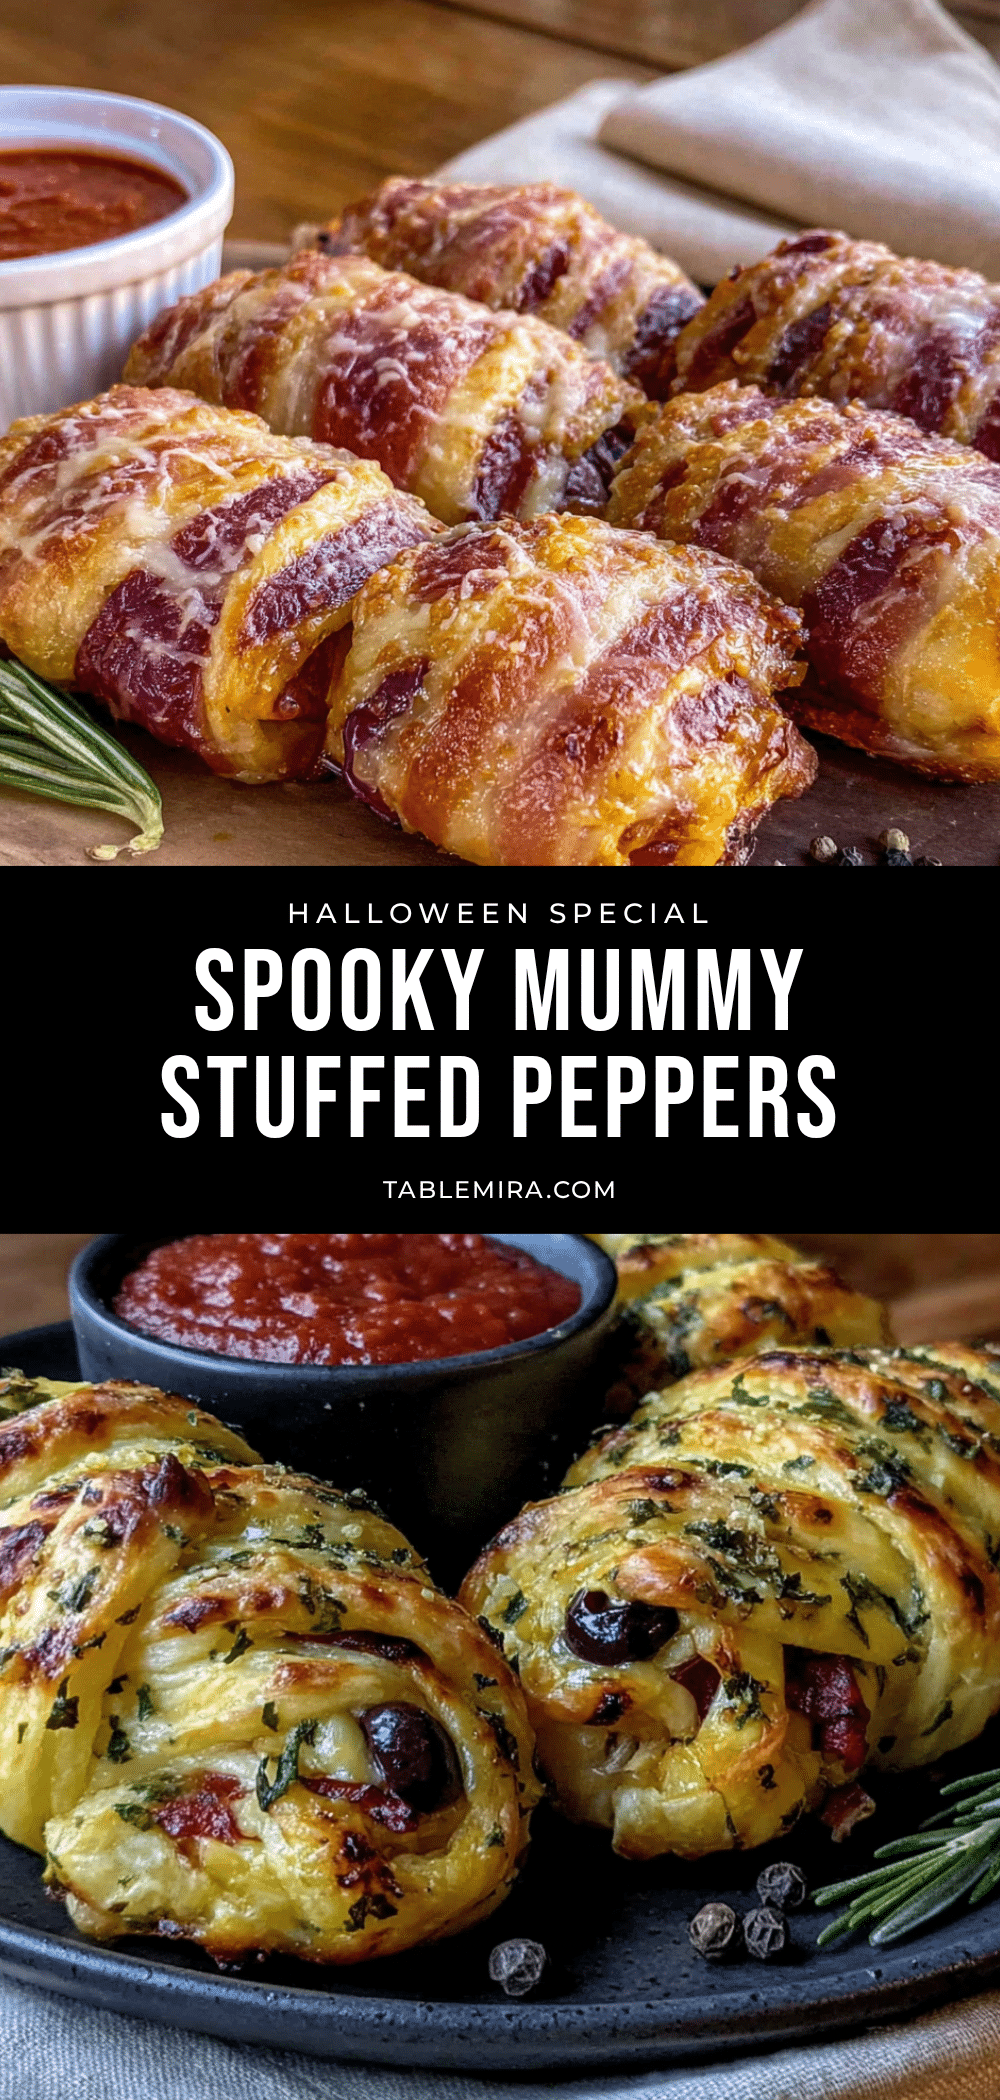
Spooky Mummy Stuffed Peppers – Easy Halloween Dinner

These Spooky Mummy Stuffed Peppers are a fun and delicious Halloween dinner made with bell peppers, savory ground beef and rice filling, and crescent dough wrapped like mummy bandages. Ready in about 45 minutes, they’re a crowd-pleaser that brings festive flair to any Halloween table.
- Prep Time: 20 minutes
- Cook Time: 25 minutes
- Total Time: 45 minutes
- Yield: 4 servings 1x
- Category: Main Course
- Cuisine: American
Ingredients
- 1 lb ground beef (80/20)
- 1 cup cooked white rice
- 1 small yellow onion, finely diced
- 3 cloves garlic, minced
- 1 can (15 oz) tomato sauce
- 1 teaspoon dried oregano
- 1 teaspoon ground cumin
- ½ teaspoon smoked paprika
- Salt and black pepper, to taste
- 1 cup shredded mozzarella cheese
- ¼ cup grated Parmesan cheese
- 4 large bell peppers (any color)
- 1 can (8 oz) refrigerated crescent roll dough
- 12–16 candy eyes
Instructions
- Preheat your oven to 375°F (190°C).
- Cook the rice if you haven’t already. You’ll need about ⅓ cup of uncooked rice to get 1 cup cooked. Fluff it with a fork and set it aside to cool slightly.
- Prepare the bell peppers. Slice the tops off each pepper and remove the seeds and membranes from the inside. If the peppers wobble, trim a thin slice off the bottom to create a flat surface, but don’t cut through the bottom.
- Brown the ground beef in a large skillet over medium-high heat, breaking it apart with a wooden spoon, about 5-6 minutes until no pink remains. Drain off excess fat, leaving about a tablespoon in the pan.
- Add the diced onion to the skillet with the beef and cook for 3-4 minutes until translucent. Stir in the minced garlic and cook for another 30 seconds until fragrant.
- Reduce heat to medium-low. Stir in the tomato sauce, cooked rice, oregano, cumin, smoked paprika, salt, and pepper. Let simmer for 3-4 minutes so the flavors meld. Taste and adjust seasoning.
- Remove the skillet from heat and stir in the mozzarella and Parmesan until melted and gooey.
- Spoon the filling into each pepper, packing gently but firmly, leaving about ¼ inch of space at the top. Place the stuffed peppers upright in a 9×13-inch baking dish.
- Open the crescent dough and separate into triangles (or unroll the sheet). Cut the dough into thin strips, about ½ inch wide. Wrap the strips around each pepper in a crisscross pattern, leaving gaps so the pepper ‘skin’ shows. Leave a small opening near the top for the eyes.
- Bake for 20-25 minutes, until the peppers are tender and the dough is golden brown and puffed.
- Remove from the oven and let cool for 5 minutes. Press two candy eyes onto each mummy in the exposed gap near the top.
- Serve immediately while warm.
Notes
For best results, don’t overstuff the peppers—leave ¼ inch of space at the top to prevent bursting. You can prep the filling and stuff the peppers up to a day ahead; add the dough just before baking. For a crispier dough, use an air fryer at 350°F for 12-15 minutes. Leftovers keep in the fridge for up to 4 days; reheat in a 350°F oven for 10-12 minutes.
Nutrition
- Serving Size: 1 stuffed pepper
- Calories: 485
- Sugar: 8
- Sodium: 820
- Fat: 24
- Saturated Fat: 10
- Carbohydrates: 34
- Fiber: 4
- Protein: 28
Keywords: Halloween dinner, stuffed peppers, mummy peppers, easy Halloween recipe, ground beef recipe, crescent dough recipe, festive dinner