I have a confession to make that might get me kicked out of the camping club. I don’t actually love making s’mores over a campfire. There, I said it. The fire is either too hot and I torch the marshmallow into a blackened, bitter mess, or it’s not hot enough and I’m standing there for ten minutes like a fool while everyone else is already eating. The chocolate never melts properly, the graham cracker always cracks in half, and somehow, no matter how careful I am, I end up with sticky marshmallow goo all over my fingers. It’s a sticky, frustrating process for what is supposed to be a simple, joyful treat.
So when a friend first mentioned making a “s’mores icebox cake” a few years ago, I honestly thought it sounded like a gimmick. I figured it would be one of those recipes that looks good in photos but tastes like a sad, soggy disappointment. I imagined the graham crackers turning into mush and the whole thing just being a flavorless, textureless blob. I was wrong. Really wrong. The first time I made this Easy No-Bake S’mores Icebox Cake, I actually laughed out loud at how good it was. It was like someone had bottled the very essence of a perfect campfire s’more and turned it into a cool, creamy, ridiculously easy dessert. No fire required. No sticky fingers. Just pure, unadulterated s’mores happiness.
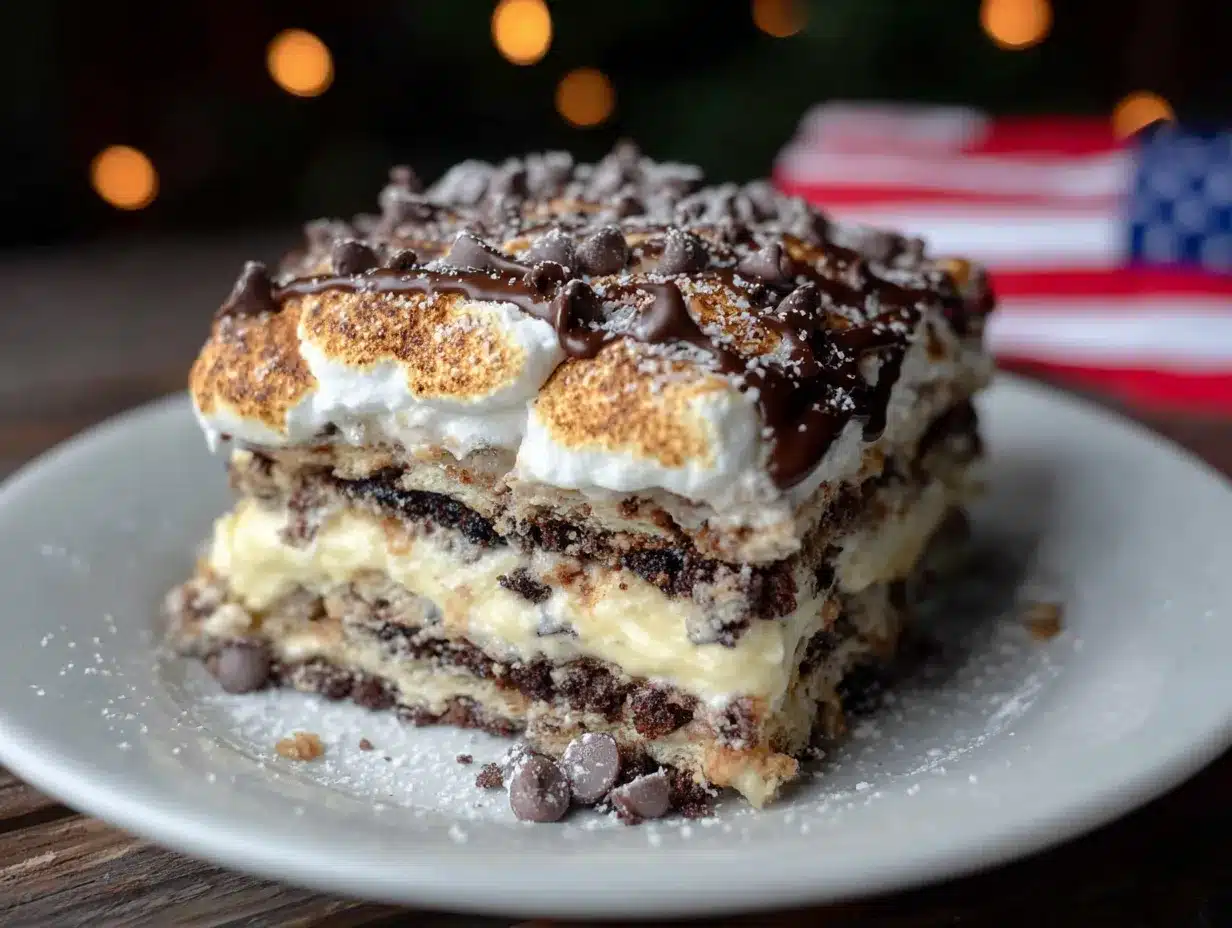
This cake is the kind of dessert that makes you look like a hero with almost zero effort. You layer graham crackers, a rich chocolate pudding filling, and a cloud of marshmallow fluff, let it sit in the fridge overnight, and the next day you have a dessert that tastes like it took hours of work. The graham crackers soften just enough to become cake-like, the chocolate and marshmallow meld into something magical, and every single bite tastes exactly like the best part of a campfire. It’s the kind of recipe that makes you believe in kitchen magic again. And honestly, that’s a feeling worth keeping.
Why You’ll Love This Recipe
This isn’t just another dessert recipe. This is the dessert that will save you on a hot summer day, a busy weeknight, or any time you need a showstopper without turning on the oven. I’ve tested this recipe more times than I can count, tweaking the ratios and the layering to get it absolutely perfect, and I can say with confidence: this is the one.
- Truly No-Bake: The oven stays off. No heat, no fuss, no waiting for anything to cool. This is a summer lifesaver.
- Five Minutes of Prep: I am not exaggerating. If you have all your ingredients ready, you can have this assembled in about five minutes flat. It’s that simple.
- Simple, Pantry-Friendly Ingredients: You probably already have most of these items in your kitchen. No fancy baker’s chocolate or obscure extracts needed.
- Perfect for Any Occasion: This cake is a hit at backyard barbecues, potlucks, birthday parties, or just a quiet Tuesday night when you need a little something sweet.
- Crowd-Pleaser Guaranteed: Kids love it. Adults love it. Even the pickiest eaters at the table will go back for seconds. It’s a universally beloved flavor combination.
- Make-Ahead Magic: This cake actually gets better after it sits overnight. You can make it a day or two in advance, which makes it the ultimate stress-free dessert for entertaining.
What really sets this recipe apart is the texture. The graham crackers soften into a tender, cake-like layer, but they don’t get mushy. The chocolate pudding is rich and creamy, and the marshmallow topping is light and airy. It’s a perfect balance of textures and flavors that feels both nostalgic and sophisticated. This isn’t just another version of a s’mores dessert; it’s the version you’ll come back to again and again.
What Ingredients You Will Need
This recipe uses simple, everyday ingredients to create something truly special. The beauty of it is in the layering and the way the flavors meld together overnight. Here is everything you need, along with a few notes from my own kitchen trials.
For the Chocolate Pudding Layer
- 3 cups whole milk: Whole milk gives the pudding the richest, creamiest texture. You can use 2% in a pinch, but the pudding will be slightly less luxurious. I have not tested this with non-dairy milks, but a barista-style oat milk might work in a pinch.
- 1 (3.4 oz) box instant chocolate pudding mix: This is the shortcut that makes the recipe so fast. I prefer the Jell-O brand for its consistent texture and rich flavor. Do not use cook-and-serve pudding; it will not set up properly in this recipe.
- 1 cup heavy cream: This is my secret ingredient. Whisking a little heavy cream into the pudding mix along with the milk gives the filling an extra velvety richness that takes it from good to incredible.
For the Graham Cracker Layers
- 1 (14.4 oz) box graham crackers: You will need about 18-20 full sheets of graham crackers. Do not use the low-fat or honey-flavored ones if you can help it; the classic original flavor has the best texture and taste for this cake. I have found that the Nabisco brand holds up the best and doesn’t get too soggy.
For the Marshmallow Topping
- 1 (7 oz) jar marshmallow fluff or creme: This is the easiest option and gives a perfectly stable, fluffy topping. I prefer the Kraft Jet-Puffed brand.
- 1 cup heavy cream: Whipped into stiff peaks and folded with the marshmallow fluff, this creates the lightest, dreamiest topping.
- 1 teaspoon vanilla extract: A good quality vanilla adds warmth and depth to the marshmallow topping.
For Garnish (Optional, but Recommended)
- 1/2 cup mini chocolate chips: Sprinkled on top for a little extra chocolate crunch.
- 2-3 graham cracker sheets, crushed: For a final, pretty crumb topping.
- Large marshmallows, toasted: If you want to go the extra mile, toast a few marshmallows under the broiler or with a kitchen torch and place them on top just before serving. It makes for a stunning presentation.
If you are looking for another simple, no-bake dessert that is perfect for summer entertaining, you should definitely check out this Red, White, and Blue Berry Cheesecake Icebox Cake. It uses the same easy layering technique but with a completely different flavor profile.
Equipment Needed
One of the best things about this recipe is that it requires almost no special equipment. Here is what you will need:
- A 9×13-inch baking dish: This is the perfect size for this cake. A glass or ceramic dish works best. If you only have a metal pan, that will work too, just keep in mind it might take a little longer to chill through.
- Two large mixing bowls: One for the chocolate pudding and one for the marshmallow topping.
- A whisk or electric hand mixer: You can whisk the pudding by hand, but an electric mixer is a lifesaver for whipping the heavy cream into stiff peaks.
- A rubber spatula: For folding the whipped cream into the marshmallow fluff and for spreading the layers evenly.
- Plastic wrap or aluminum foil: To cover the dish while it chills in the refrigerator.
That’s it. No springform pans, no double boilers, no candy thermometers. Just simple, everyday kitchen tools. If you don’t have an electric mixer, you can absolutely whip the cream by hand with a whisk and a little bit of elbow grease. It will take about 5-7 minutes, but it is a great arm workout!
Preparation Method
This is where the magic happens. Follow these steps, and you will have a dessert that looks and tastes like it came from a fancy bakery. Trust the process, especially the overnight chill.
- Make the chocolate pudding layer. In a large mixing bowl, combine the instant chocolate pudding mix with the 3 cups of whole milk and 1 cup of heavy cream. Whisk vigorously for about 2 minutes, until the mixture is smooth and begins to thicken. It will be quite thin at first, but it will set up beautifully in the fridge. Set it aside for about 5 minutes to allow it to firm up slightly.
- Prepare the graham crackers. While the pudding is setting, line the bottom of your 9×13-inch baking dish with a single layer of whole graham cracker sheets. You will likely need to break some crackers in half to fit them perfectly, filling in any gaps. Don’t leave any big empty spaces, as the filling will seep through and make the cake uneven.
- Build the first layer. Pour half of the chocolate pudding mixture over the first layer of graham crackers. Use your rubber spatula to spread it out evenly, making sure it gets into all the corners and covers the crackers completely.
- Repeat the layers. Place another layer of graham crackers on top of the pudding. Press down gently so they adhere to the pudding. Pour the remaining half of the chocolate pudding over the second layer of graham crackers and spread it evenly.
- Add the final graham cracker layer. Place a third and final layer of graham crackers on top of the second pudding layer. Press down gently. This top layer of crackers will be the base for your marshmallow topping.
- Make the marshmallow topping. In a clean, large mixing bowl, pour in the 1 cup of heavy cream and 1 teaspoon of vanilla extract. Using an electric hand mixer (or a whisk and a lot of determination), whip the cream until stiff peaks form. This means when you lift the beaters, the cream stands up in firm, unwavering peaks. Be careful not to over-whip, or you’ll end up with butter.
- Fold in the marshmallow fluff. Gently scoop the entire jar of marshmallow fluff into the bowl with the whipped cream. Using your rubber spatula, fold the two together. Do not stir vigorously; use a gentle, cutting motion to combine them until no streaks of white remain. You want a light, airy, unified mixture.
- Assemble the top. Spread the marshmallow and cream mixture evenly over the top layer of graham crackers. Make sure it goes all the way to the edges to seal the cake and prevent the crackers from drying out.
- Add the garnish (optional but recommended). Sprinkle the mini chocolate chips and the crushed graham crackers evenly over the top of the marshmallow layer. If you want to be really fancy, you can reserve a few toasted marshmallows for the top just before serving.
- Chill, chill, chill. This is the most important step. Cover the baking dish tightly with plastic wrap or aluminum foil and place it in the refrigerator. It needs to chill for at least 6 hours, but overnight is truly best. The graham crackers need this time to soften and absorb the moisture from the pudding, transforming into a tender, cake-like texture.
After the overnight chill, the cake is ready to slice and serve. The slices will be clean and beautiful, with distinct layers of graham cracker, chocolate, and marshmallow. It is a thing of beauty.
Cooking Tips & Techniques
Over the many times I have made this cake (and I have made it a lot), I have learned a few things the hard way. Here are my best tips to ensure your cake is perfect every single time.
- Don’t skip the overnight chill. I know it is tempting to dig in after a few hours, but trust me on this one. The graham crackers need a full 8-12 hours to soften properly. If you cut into it too early, the crackers will still be crunchy and the layers will slide apart. The wait is worth it.
- Use a sharp, wet knife for clean slices. When you are ready to serve, run a large, sharp knife under hot water, dry it off, and then make your cut. This will help you glide through the marshmallow topping without it sticking and pulling. Wipe the knife clean between cuts for the prettiest slices.
- Press the graham crackers down gently. After you place each layer of graham crackers on the pudding, give them a gentle, even press. This helps them adhere to the pudding and prevents air pockets from forming. It also helps the final cake hold together better when you slice it.
- Make sure your cream is cold. For the best whipped cream, make sure your heavy cream is very cold, straight from the refrigerator. You can even chill your mixing bowl and beaters for 10 minutes before you start. Cold cream whips up faster and holds its shape much better.
- Don’t over-whip the cream. This is a common mistake. You want stiff peaks, but not dry, grainy cream. Once you see the cream holding firm peaks and the whisk leaves clean tracks, stop. Over-whipping can quickly turn it into butter.
If you are in the mood for another easy, comforting dessert that comes together with minimal fuss, you might also enjoy this Tender One-Bowl Pumpkin Coffee Cake with Espresso Crumble. It is a perfect fall alternative to this summer favorite.
Variations & Adaptations
This recipe is incredibly versatile. Once you have the basic technique down, you can adapt it in so many delicious ways. Here are a few of my favorite variations that I have tried and loved.
- Peanut Butter S’mores Icebox Cake: This is my personal favorite twist. Add 1/2 cup of creamy peanut butter to the chocolate pudding mixture and whisk it in until smooth. The peanut butter and chocolate combination is absolutely divine. You can also drizzle some melted peanut butter over the top before serving.
- Mint Chocolate S’mores Icebox Cake: For a refreshing twist, use a box of instant chocolate fudge or chocolate mint pudding mix. You can also add 1/2 teaspoon of peppermint extract to the marshmallow topping. It tastes just like a thin mint cookie!
- Gluten-Free S’mores Icebox Cake: This is an easy adaptation. Simply swap the regular graham crackers for your favorite gluten-free graham crackers. I have tested this with the Schar brand, and they work perfectly. The texture is slightly different, but it is still absolutely delicious.
- Berry S’mores Icebox Cake: Add a layer of fresh berries on top of the first chocolate pudding layer. Sliced strawberries, raspberries, or blueberries all work wonderfully. The tartness of the berries cuts through the sweetness of the chocolate and marshmallow beautifully.
- Vegan S’mores Icebox Cake: This is a bit more involved but totally doable. Use a high-quality vegan graham cracker, a dairy-free instant chocolate pudding mix made with oat or coconut milk, and a vegan marshmallow fluff (like Dandies brand). For the topping, use a can of full-fat coconut cream, chilled and whipped, instead of heavy cream.
Serving & Storage Suggestions
This cake is best served cold, straight from the refrigerator. The cool, creamy texture is part of its charm. Here are my best tips for serving and storing it.
Serving: Cut the cake into clean squares or rectangles. A 9×13 pan will give you about 12-15 generous servings. For a truly stunning presentation, top each slice with a toasted marshmallow and a drizzle of warm chocolate sauce just before serving. It pairs beautifully with a cup of hot coffee or a cold glass of milk.
Storage: This cake keeps incredibly well in the refrigerator. Cover the dish tightly with plastic wrap or aluminum foil, and it will stay fresh for up to 5 days. The flavors actually continue to meld and deepen, so it might even taste better on day two or three. The graham crackers will continue to soften, so by day four, it will be very tender, almost like a pudding cake.
Freezing: You can also freeze this cake for up to 3 months. Assemble the cake completely, but do not add the graham cracker or chocolate chip garnish on top. Cover it tightly with a layer of plastic wrap and then a layer of aluminum foil. To serve, thaw it overnight in the refrigerator. The texture will be slightly different, a bit more like an ice cream cake, but it is still delicious. Once thawed, add the garnish before serving.
If you are hosting a party and want another easy, shareable dessert option, this Flavorful Sheet Pan Nacho Bar with Chipotle Pulled Chicken is a fantastic savory option that pairs well with a sweet ending.
Nutritional Information & Benefits
Let’s be honest: this is a dessert, and it is meant to be enjoyed as a treat. But here is a general idea of what you are looking at per serving (based on 12 servings).
Estimated Nutritional Values (Per Serving):
- Calories: 380-420
- Fat: 22g
- Saturated Fat: 14g
- Carbohydrates: 48g
- Sugar: 32g
- Protein: 5g
- Sodium: 360mg
Dietary Considerations:
- Contains dairy (milk, cream) and gluten (graham crackers).
- Can be made gluten-free (see variations above).
- Can be made vegan (see variations above).
- Contains no eggs.
Health Benefits (A Silver Lining):
- Calcium from Dairy: The milk and cream provide a good amount of calcium, which is essential for strong bones and teeth.
- Antioxidants from Chocolate: Dark chocolate (which is what the pudding mix is based on) contains flavonoids, which are antioxidants that can be beneficial for heart health.
- Mood Booster: Let’s be real. Sometimes, a little bit of sugar and chocolate is exactly what your soul needs. This cake is a happiness delivery system, and that has its own kind of nutritional value.
Frequently Asked Questions
Can I use homemade chocolate pudding instead of instant?
Yes, you absolutely can! If you have a favorite homemade chocolate pudding recipe, it will work beautifully here. Just make sure it has cooled completely and thickened up before you start layering. Instant pudding is just a huge time-saver.
My graham crackers are still crunchy after 6 hours. What did I do wrong?
This usually happens if the pudding mixture was not thin enough when you poured it over the crackers. The crackers need moisture to soften. Make sure your pudding is still slightly pourable when you add it. If it has set up too much, you can whisk in a tablespoon or two of milk to thin it out. Also, make sure your dish is tightly covered so no moisture escapes during the chill.
Can I make this in a different sized pan?
Yes, you can. A 9×13 pan is standard, but you can use an 8×8 or 9×9 pan for a thicker cake. You will just have more layers. If you use a smaller pan, you might need a little less pudding and fewer graham crackers. A 9-inch springform pan also works well and makes for a beautiful round cake.
Can I use Cool Whip instead of whipping my own cream?
You can, but I really do not recommend it. Homemade whipped cream is so much lighter, fluffier, and has a much better flavor. Cool Whip has a slightly artificial taste and a denser texture that just does not compare. The extra five minutes it takes to whip your own cream is absolutely worth it.
How do I get clean, perfect slices?
As mentioned in the tips, use a long, sharp knife. Run it under hot water, dry it off, and make one clean cut. Wipe the knife clean and re-warm it between each cut. This will give you those beautiful, Instagram-worthy slices. Chilling the cake for the full recommended time also helps the layers hold together.
Conclusion
This Easy No-Bake S’mores Icebox Cake is more than just a dessert; it is a solution to a problem I never knew I had. It takes all the messy, frustrating parts of making s’mores and turns them into a cool, creamy, effortless cake that you can make any time of year. No campfire, no burnt fingers, no arguing over who gets the last marshmallow.
I love this recipe because it reminds me that the best things in life don’t have to be complicated. It is simple, honest, and deeply satisfying. It is the kind of dessert that makes people smile, and that is the highest compliment I can give any recipe. I encourage you to make it your own. Add your favorite toppings, try one of the variations, or just stick to the classic. Either way, I promise you will fall in love.
I would love to hear how it turns out for you! Leave a comment below and let me know if you tried any fun variations. Did you go with the peanut butter twist? Or did you add a layer of fresh berries? Share your creations and tag me on social media. Happy no-baking, my friends!
Pin This Recipe!
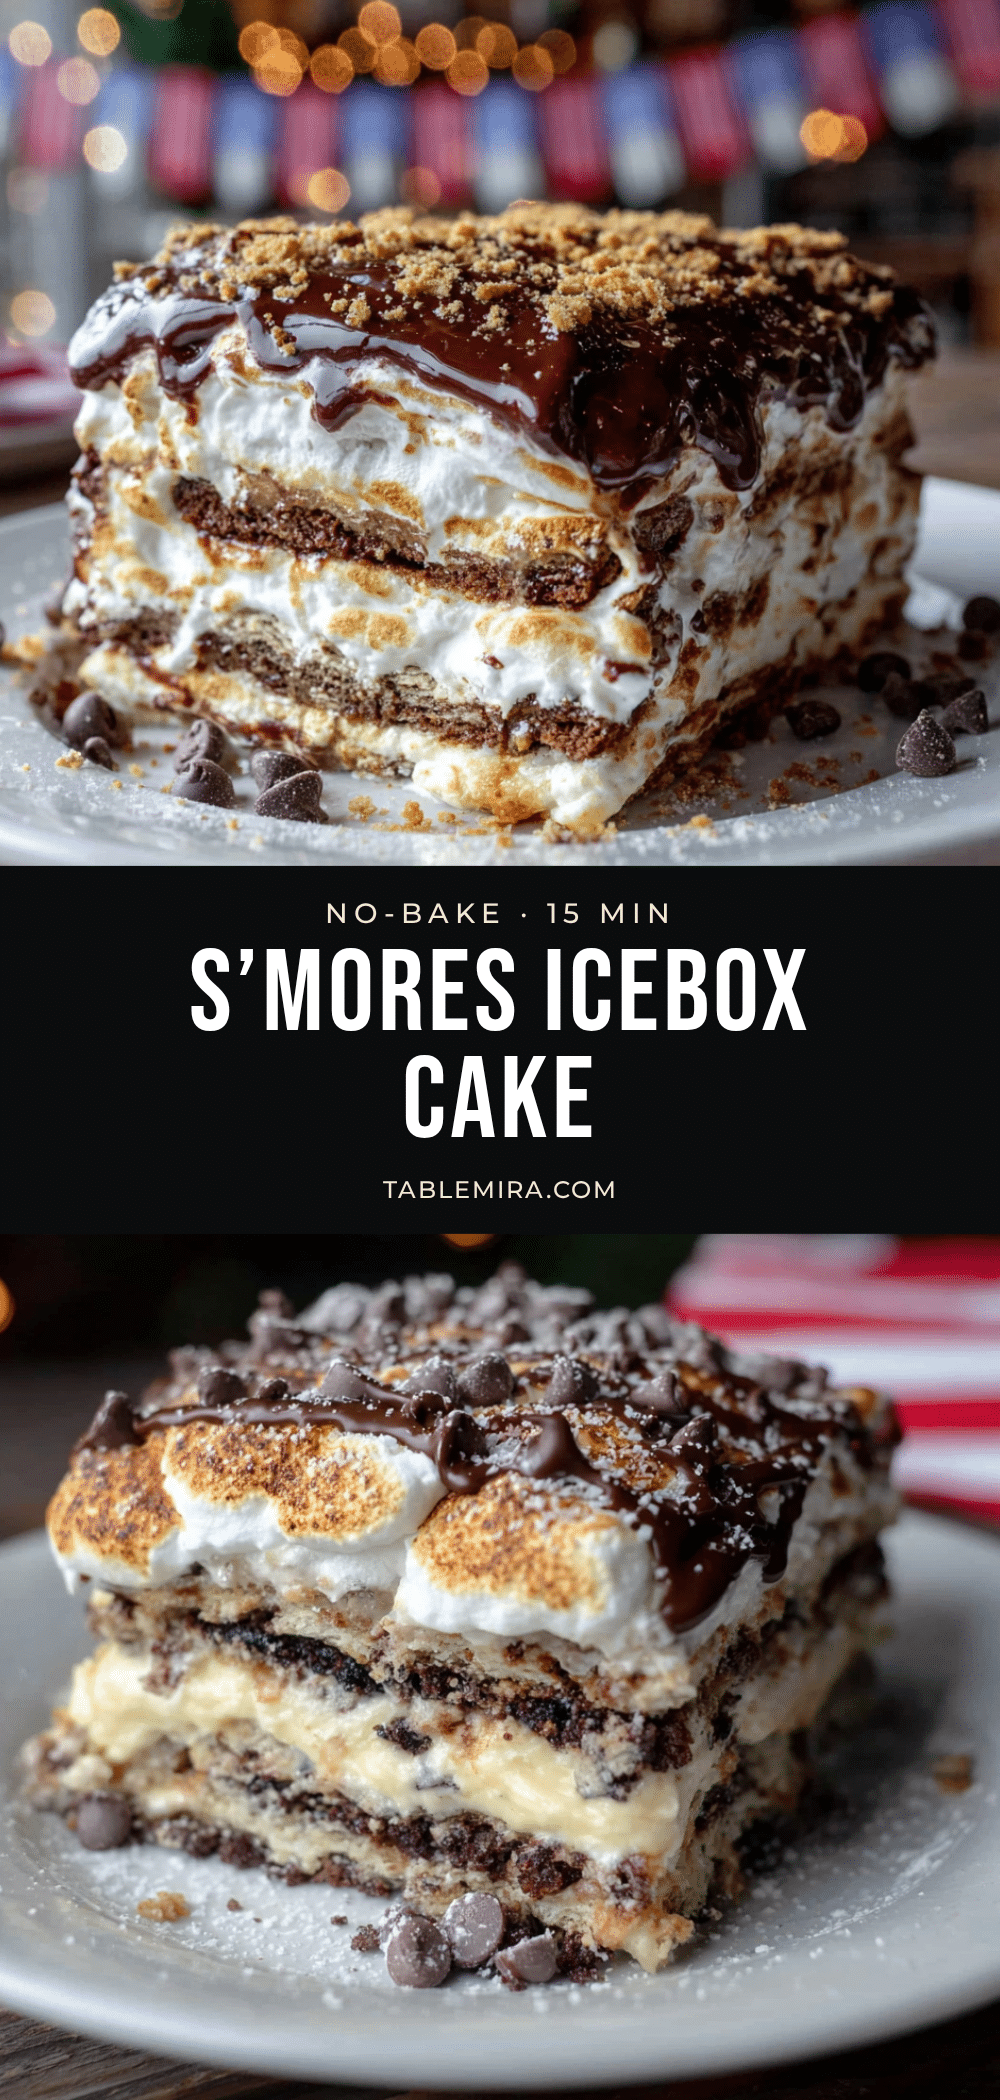
Best No-Bake S’mores Icebox Cake: Easy 5-Minute Dessert
This easy no-bake s’mores icebox cake layers graham crackers, rich chocolate pudding, and a cloud of marshmallow fluff for a cool, creamy dessert that tastes just like a campfire s’more without the mess. Ready in 5 minutes of prep, it’s the perfect make-ahead treat for any occasion.
- Prep Time: 5 minutes
- Cook Time: 0 minutes
- Total Time: 6 hours 5 minutes (includes chilling)
- Yield: 12-15 servings 1x
- Category: Dessert
- Cuisine: American
Ingredients
- 3 cups whole milk
- 1 (3.4 oz) box instant chocolate pudding mix
- 1 cup heavy cream (for pudding)
- 1 (14.4 oz) box graham crackers (about 18–20 full sheets)
- 1 (7 oz) jar marshmallow fluff or creme
- 1 cup heavy cream (for topping)
- 1 teaspoon vanilla extract
- 1/2 cup mini chocolate chips (optional, for garnish)
- 2–3 graham cracker sheets, crushed (optional, for garnish)
- Large marshmallows, toasted (optional, for garnish)
Instructions
- Make the chocolate pudding layer: In a large mixing bowl, combine the instant chocolate pudding mix with 3 cups whole milk and 1 cup heavy cream. Whisk vigorously for about 2 minutes until smooth and beginning to thicken. Set aside for 5 minutes to firm up slightly.
- Prepare the graham crackers: Line the bottom of a 9×13-inch baking dish with a single layer of whole graham cracker sheets, breaking some to fit and fill gaps.
- Build the first layer: Pour half of the chocolate pudding mixture over the graham crackers and spread evenly with a rubber spatula.
- Repeat the layers: Place another layer of graham crackers on top of the pudding, pressing down gently. Pour the remaining half of the pudding over and spread evenly.
- Add the final graham cracker layer: Place a third layer of graham crackers on top and press down gently.
- Make the marshmallow topping: In a clean large mixing bowl, whip 1 cup heavy cream and 1 teaspoon vanilla extract with an electric hand mixer until stiff peaks form.
- Fold in the marshmallow fluff: Gently fold the entire jar of marshmallow fluff into the whipped cream using a rubber spatula until no streaks remain.
- Assemble the top: Spread the marshmallow mixture evenly over the top layer of graham crackers, sealing the edges.
- Add the garnish (optional): Sprinkle mini chocolate chips and crushed graham crackers over the top. If desired, top with toasted marshmallows just before serving.
- Chill: Cover the dish tightly with plastic wrap or aluminum foil and refrigerate for at least 6 hours, preferably overnight (8-12 hours), until the graham crackers have softened and the cake is set.
Notes
For best results, chill overnight (8-12 hours) to allow graham crackers to soften properly. Use a sharp, wet knife for clean slices. Make sure heavy cream is very cold for whipping. Do not over-whip the cream. The cake keeps in the refrigerator for up to 5 days and can be frozen for up to 3 months.
Nutrition
- Serving Size: 1 slice (1/12 of cak
- Calories: 400
- Sugar: 32
- Sodium: 360
- Fat: 22
- Saturated Fat: 14
- Carbohydrates: 48
- Fiber: 1
- Protein: 5
Keywords: no-bake s'mores icebox cake, easy s'mores dessert, no-bake dessert, icebox cake, s'mores cake, 5-minute dessert, summer dessert, graham cracker dessert