Fourth time in two weeks and I finally stopped burning the garlic. That was the thing, you know—I kept getting distracted by the smell, that intoxicating butter-and-allium cloud filling my kitchen, and I’d forget the air fryer was still running. By the time I remembered, the parmesan had gone from golden-brown to “well, that’s a learning experience.” But the fourth batch? The fourth batch had that perfect crust—the kind that shatters when you bite into it, giving way to impossibly juicy meat underneath.
It started as a weeknight desperation move. I had chicken thighs thawed, a block of parmesan staring at me from the fridge, and zero patience for the oven preheating for forty-five minutes. The air fryer seemed like the obvious answer, but I wasn’t prepared for how good it would actually get. Not just good—addictive. The kind of good where you find yourself making excuses to cook chicken again just so you can have leftovers.
Here’s the thing nobody tells you about air fryer chicken: it’s not just faster. The circulating heat does something to the skin that an oven can’t quite replicate. It gets shatteringly crisp without drying out the meat, and when you add garlic and parmesan to the equation? Honestly, it’s hard to go back to any other method. This recipe for Crispy Air Fryer Garlic Parmesan Chicken Thighs became my gold standard—the one I measure all other chicken dinners against now.
I still burn the garlic sometimes. But I’ve learned to work around my own impatience, and I’m sharing every trick I picked up along the way. Because a recipe this good deserves to be made right the first time.
Why You’ll Love This Recipe
Let me be straight with you—I’ve tested this recipe more times than I care to admit. Not because it was hard, but because I wanted to understand every variable. What I found is that this is one of those rare recipes where the air fryer genuinely outperforms every other cooking method. Here’s why it works:
- Ready in Under 30 Minutes : From fridge to plate in about 25 minutes. No preheating an oven for ages, no standing over a splattering skillet. The air fryer does the heavy lifting while you throw together a side.
- Simple Pantry Ingredients : Chicken thighs, garlic, parmesan, butter, and a few seasonings. That’s it. No weird specialty items or trips to three different stores.
- Perfect for Busy Weeknights : This is the kind of dinner that makes a Tuesday feel special without making you work for it. Great for meal prep too—the leftovers reheat beautifully.
- Guaranteed Crowd-Pleaser : I’ve served these to picky kids, skeptical in-laws, and friends who “don’t really like chicken.” Every single plate came back clean. The crispy, cheesy crust is universally appealing.
- Texture That Rivals Fried Chicken : No deep-frying required, but you get that same satisfying crunch. The parmesan creates a savory, nutty crust that’s absolutely irresistible.
What sets this recipe apart from other garlic parmesan chicken recipes is the technique. Most versions either burn the garlic or end up with soggy skin. I figured out the right temperature balance, the perfect garlic-to-butter ratio, and the exact timing to get that golden, crunchy exterior every single time. It’s not just another recipe—it’s the version I’d serve to a food critic without hesitation.
There’s something deeply satisfying about pulling a tray of these golden thighs out of the air fryer. The smell alone—garlicky, buttery, with that nutty parmesan note—is enough to make your stomach growl. And that first bite? The crunch gives way to impossibly tender, juicy meat. It’s comfort food that feels just a little bit fancy, even though it took you twenty minutes of actual work.
What Ingredients You Will Need
This recipe relies on a handful of quality ingredients doing exactly what they’re supposed to do. No complicated lists, no fuss—just smart choices that build flavor. Here’s what you’ll need and why each one matters.
- Boneless, Skinless Chicken Thighs (1.5 lbs / 680g) — I prefer thighs over breasts here because they stay juicier and more forgiving. The higher fat content means they won’t dry out in the air fryer, even if you get distracted for an extra minute. Look for thighs that are similar in size so they cook evenly. If you can only find bone-in, skin-on thighs, adjust cooking time by about 5-7 minutes.
- Fresh Garlic (4-5 cloves, minced) — Please don’t use the pre-minced stuff in a jar. Fresh garlic makes a massive difference here. It has a sharper, more aromatic flavor that mellows beautifully as it cooks. I mince mine by hand because the texture matters—you want small, even pieces that will cling to the chicken without burning.
- Unsalted Butter (3 tablespoons / 42g) — Salted butter works in a pinch, but unsalted gives you more control over the final seasoning. The butter helps the garlic and parmesan stick to the chicken while adding richness. I’ve tried this with olive oil, and while it works, the butter version is undeniably better. (For a dairy-free option, use a high-quality vegan butter or ghee.)
- Grated Parmesan Cheese (½ cup / 50g) — Buy a block and grate it yourself. The pre-shredded stuff has anti-caking agents that prevent it from melting properly. Freshly grated parmesan creates that perfect crispy, lacy crust. I recommend Parmigiano-Reggiano if you can swing it—the nutty, salty flavor is unparalleled.
- Panko Breadcrumbs (¼ cup / 30g) — These give the crust its signature crunch. Regular breadcrumbs are too fine and won’t create the same texture. If you’re gluten-free, use gluten-free panko or crushed pork rinds for a low-carb option.
- Dried Italian Seasoning (1 teaspoon) — A blend of oregano, basil, rosemary, and thyme adds depth without overpowering the garlic and parmesan. You can substitute with dried oregano alone if that’s what you have.
- Garlic Powder (½ teaspoon) — This might seem redundant with the fresh garlic, but trust me—garlic powder adds a different kind of flavor. It’s more subtle and savory, and it helps season the chicken all the way through.
- Salt and Black Pepper (to taste) — I use about 1 teaspoon of kosher salt and ½ teaspoon of freshly ground black pepper. Adjust based on your preference and the saltiness of your parmesan.
- Fresh Parsley (for garnish, optional) — Not strictly necessary, but a sprinkle of fresh parsley brightens up the dish and adds a pop of color. It also helps cut through the richness.
- Cooking Spray or Oil — A light spray on the air fryer basket prevents sticking. I use avocado oil spray for its high smoke point.
The beauty of this ingredient list is its flexibility. If you don’t have panko, crushed crackers or even crushed pork rinds work. No fresh parsley? Skip it. The core flavors—garlic, parmesan, butter—are what make this recipe shine, and they’re simple enough that you probably have most of them already.
Equipment Needed
You don’t need a professional kitchen to make this recipe work. Here’s what you’ll actually use:
- Air Fryer — Any model works, but basket-style air fryers tend to give the most even browning. I use a 5.8-quart model, which fits about 4-5 thighs comfortably without overcrowding. If yours is smaller, cook in batches—crowding leads to steaming, not crisping.
- Mixing Bowls — You’ll need one medium bowl for the butter-garlic mixture and another for the parmesan-panko coating.
- Tongs — For flipping the chicken halfway through cooking. Silicone-tipped tongs won’t scratch your air fryer basket.
- Chef’s Knife and Cutting Board — For mincing garlic and chopping parsley. A sharp knife makes the garlic mincing much less tedious.
- Microplane or Box Grater — For grating your parmesan cheese. A microplane gives you that fine, fluffy texture that melts perfectly.
- Pastry Brush or Spoon — For brushing the garlic butter onto the chicken. A brush gives more even coverage, but a spoon works fine.
- Instant-Read Thermometer (Optional but Recommended) — Chicken thighs are done at 165°F (74°C), but I actually prefer pulling them at 160°F (71°C) and letting carryover cooking finish the job. A thermometer takes the guesswork out.
If you don’t have an air fryer, you can make this in a convection oven at 400°F (200°C) for about 20-25 minutes. The texture won’t be quite as crispy, but it’ll still be delicious. I’ve also done these on a sheet pan in a regular oven—just add 5-10 minutes and keep an eye on the garlic.
Preparation Method
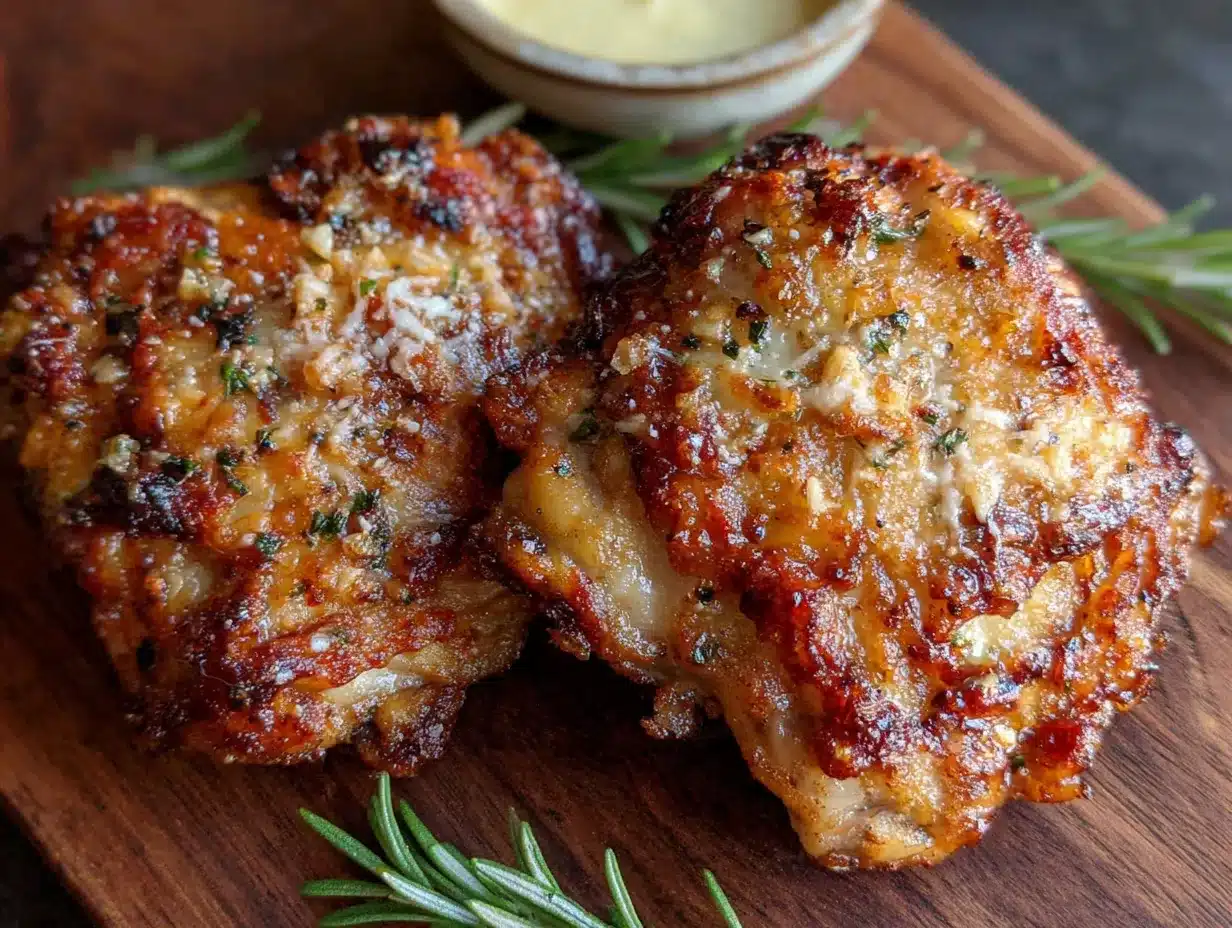
This is where the magic happens. Follow these steps carefully, and you’ll have perfectly crispy, juicy chicken thighs every single time.
Step 1: Prep the Chicken
Pat the chicken thighs dry with paper towels. This is non-negotiable—excess moisture is the enemy of crispy skin. I usually pat them, let them sit for a minute, then pat again. Season both sides generously with salt, pepper, and garlic powder. Let them rest at room temperature for about 10 minutes while you prepare the coating.
Step 2: Make the Garlic Butter
In a small microwave-safe bowl, melt the butter (about 20-30 seconds in the microwave). Stir in the minced fresh garlic. Let it sit for a minute—this allows the garlic to infuse the butter without cooking. You want the garlic flavor to bloom, not burn.
Step 3: Prepare the Coating
In a shallow bowl, combine the grated parmesan, panko breadcrumbs, and Italian seasoning. Mix until evenly distributed. The parmesan should be finely grated so it clings to the chicken. If your parmesan is in larger shreds, pulse it in a food processor a few times.
Step 4: Coat the Chicken
Brush each chicken thigh generously with the garlic butter mixture. Make sure every surface is covered—this is what helps the coating stick and adds flavor throughout. Then, press each thigh into the parmesan-panko mixture, coating both sides evenly. Don’t be shy—really press it in. I use my fingers to pat the coating firmly onto the chicken.
Step 5: Preheat the Air Fryer
Set your air fryer to 380°F (193°C) and let it preheat for 3-5 minutes. Preheating ensures the chicken starts cooking immediately, which helps develop that crispy crust. If your air fryer doesn’t have a preheat function, just run it empty for 3 minutes at the target temperature.
Step 6: Arrange in the Basket
Lightly spray the air fryer basket with cooking spray. Place the coated chicken thighs in a single layer, leaving a little space between each piece for air circulation. Overcrowding is the number one mistake—if they’re touching, they’ll steam instead of crisp. Cook in batches if needed.
Step 7: Air Fry
Cook at 380°F (193°C) for 12 minutes. Flip the thighs carefully using tongs, then cook for another 10-12 minutes, until the internal temperature reaches 165°F (74°C) and the coating is golden brown and crispy. Every air fryer runs slightly differently—start checking at the 20-minute mark. The coating should be deeply golden and feel firm to the touch.
Step 8: Rest and Garnish
Remove the chicken from the air fryer and let it rest on a wire rack for 5 minutes. This allows the juices to redistribute, keeping the meat tender. Sprinkle with fresh parsley if using, and serve immediately. The crust is at its peak crispiness right out of the air fryer.
Pro Tip: If you want extra crispy coating, spray the tops of the chicken lightly with cooking spray before the final few minutes of cooking. A little oil helps the panko get that deep golden color.
Cooking Tips & Techniques
I’ve made every mistake in the book so you don’t have to. Here’s what I’ve learned:
Don’t skip the resting step. I know it’s tempting to dig in immediately, but letting the chicken rest for 5 minutes makes a huge difference. The juices settle back into the meat instead of running out onto your plate, leaving you with dry chicken. I learned this the hard way after serving weepy, less-flavorful chicken to guests.
Mind your garlic. Fresh garlic burns faster than you think. That’s why I mix it into the butter rather than sprinkling it directly on the chicken. The butter provides a buffer, helping the garlic cook more gently. If you want even more garlic flavor without the burn risk, add a pinch of granulated garlic to the coating mixture as well.
Watch the temperature. 380°F is the sweet spot. Too high, and the parmesan burns before the chicken cooks through. Too low, and you lose that crispy texture. I’ve tried 400°F and ended up with blackened parmesan and undercooked chicken—not a good look. Stick with 380°F and adjust time based on your air fryer’s quirks.
Batch cooking is your friend. If you’re cooking for more than two people, cook in batches. I know it’s annoying, but overcrowding the basket leads to soggy, unevenly cooked chicken. The extra 10 minutes is worth the perfect texture. You can keep the first batch warm in a 200°F (93°C) oven while the second batch cooks.
Use a wire rack for resting. If you rest the chicken on a plate, the bottom will steam and lose its crispness. A wire rack allows air to circulate, keeping the entire piece crunchy. This is one of those small details that separates good chicken from great chicken.
Double-coat for extra crunch. For an even thicker, crunchier crust, dip the chicken in the garlic butter, then the coating, then back in the butter, then the coating again. This creates a double layer that’s almost like a light breading. It’s not necessary for the recipe to work, but it’s a fun upgrade when you’re feeling extra.
Variations & Adaptations
This recipe is incredibly versatile. Here are some of my favorite ways to change it up:
Spicy Buffalo Version
Add 2 tablespoons of hot sauce to the melted butter along with the garlic. The heat cuts through the richness of the parmesan beautifully. Serve with ranch or blue cheese dressing for dipping. I’ve made this version for game day and it disappears faster than anything else on the table.
Lemon Herb Twist
Add the zest of one lemon and 2 tablespoons of fresh chopped herbs (thyme, rosemary, or oregano) to the garlic butter mixture. The lemon brightens everything up and pairs wonderfully with the parmesan. This is my go-to spring and summer version.
Low-Carb / Keto Adaptation
Replace the panko breadcrumbs with crushed pork rinds or almond flour. The texture won’t be exactly the same, but it’s still satisfyingly crispy. I’ve also used grated parmesan alone (no panko) for a lower-carb option—the crust is a bit more delicate but still delicious.
Gluten-Free Version
Use gluten-free panko breadcrumbs. Most brands work well, though I’ve found that some absorb more oil than regular panko, so you might need to adjust cooking time by a minute or two. Check that your parmesan is also gluten-free (most are, but some pre-shredded varieties contain anti-caking agents with gluten).
Air Fryer vs. Oven
If you don’t have an air fryer, bake these at 400°F (200°C) on a wire rack set over a baking sheet. The wire rack is crucial—it allows hot air to circulate underneath, mimicking the air fryer effect. Bake for 20-25 minutes, flipping halfway through. The crust won’t be quite as crispy, but it’ll still be very good.
Serving & Storage Suggestions
These chicken thighs are incredibly versatile when it comes to serving. Here’s how I like to enjoy them:
Serving Temperature: Serve immediately while the crust is at its crispiest. If you need to hold them, keep them on a wire rack in a 200°F (93°C) oven for up to 30 minutes. Avoid covering them—trapped steam will ruin the crust.
What to Serve With: These pair beautifully with a simple green salad dressed with lemon vinaigrette—the acidity cuts through the richness. I also love them alongside roasted vegetables like asparagus or broccoli. For a heartier meal, serve with Mediterranean grain bowls or Chipotle-style burrito bowls. The crispy chicken adds amazing texture to both.
Storage: Store leftovers in an airtight container in the refrigerator for up to 4 days. The crust will soften over time, but the flavor remains excellent. To reheat, place the chicken back in the air fryer at 350°F (175°C) for 4-5 minutes. This restores much of the original crispiness. Avoid microwaving—it turns the crust rubbery.
Freezing: You can freeze the cooked chicken thighs for up to 3 months. Let them cool completely, then wrap individually in plastic wrap and place in a freezer bag. To reheat, thaw overnight in the refrigerator, then reheat in the air fryer at 350°F (175°C) for 6-8 minutes.
Flavor Development: Interestingly, the flavors actually meld and deepen after a day in the fridge. The garlic and parmesan become more pronounced. I sometimes make a double batch specifically for leftovers—they’re fantastic chopped up over salads or pasta the next day.
Nutritional Information & Benefits
Here’s the nutritional breakdown per serving (based on 4 servings with 1 thigh each):
- Calories: Approximately 380-420
- Protein: 32g
- Fat: 26g (10g saturated)
- Carbohydrates: 6g
- Fiber: 0.5g
- Sugar: 0.5g
- Sodium: 580mg
These values are estimates and will vary based on exact ingredients and portion sizes.
Health Benefits: Chicken thighs are an excellent source of high-quality protein, which supports muscle maintenance and repair. They also provide important B vitamins, particularly niacin and B6, which help convert food into energy. Garlic offers anti-inflammatory properties and may support immune function. Parmesan cheese provides calcium and protein, though it’s also high in sodium, so be mindful if you’re watching your salt intake.
Dietary Considerations: This recipe is naturally low-carb (about 6g per serving) and can be made gluten-free with a simple substitution. It’s not suitable for dairy-free diets unless you substitute the butter and parmesan. For a lower-fat option, use chicken breast instead of thighs—just reduce cooking time by 2-3 minutes and watch carefully to avoid drying out.
Personal Perspective: I don’t believe in demonizing any food group, and this recipe is proof that you can have something indulgent-tasting that still fits into a balanced diet. The protein keeps you full, the fat provides satiety, and the portion size is reasonable. It’s about enjoying what you eat without guilt.
Conclusion
This Crispy Air Fryer Garlic Parmesan Chicken Thighs recipe has become a staple in my kitchen for good reason. It’s quick enough for a busy weeknight, impressive enough for company, and simple enough that anyone can make it successfully. The combination of juicy chicken, nutty parmesan, and aromatic garlic is genuinely hard to beat.
What I love most about this recipe is how forgiving it is. Even when I mess up the timing or forget to flip the chicken, it still turns out delicious. It’s the kind of recipe that builds confidence in the kitchen—you’ll make it once, realize how easy it is, and start experimenting with different flavors and variations.
I’d love to hear how yours turn out. Did you try the spicy buffalo version? Add extra garlic like I always do? Serve it with garlic parmesan zucchini noodles for a double dose of flavor? Drop a comment below and let me know. And if you have your own twist on this recipe, share it—I’m always looking for new ideas to try.
Until next time, happy cooking—and don’t forget to save that extra garlic butter for dipping. Trust me on this one.
Frequently Asked Questions
Can I use chicken breasts instead of thighs?
Absolutely. Chicken breasts will work, but they cook faster and dry out more easily. Reduce the cooking time to about 15-18 minutes total, and check the internal temperature at 14 minutes. I recommend pounding the breasts to an even thickness for consistent cooking.
Why is my coating not crispy?
Several things could be at play. First, make sure you patted the chicken completely dry before coating. Second, don’t overcrowd the air fryer basket—the pieces need space for hot air to circulate. Third, check that your air fryer is actually reaching 380°F (193°C). Older models can run cooler than their settings indicate.
Can I make this recipe ahead of time?
You can prep the garlic butter and the coating mixture up to 3 days in advance. Store them separately in the refrigerator. When you’re ready to cook, just coat the chicken and air fry as directed. I don’t recommend coating the chicken ahead of time—the breadcrumbs will get soggy.
How do I keep the garlic from burning?
The key is mixing the garlic into the butter rather than sprinkling it directly on the chicken. The butter acts as a buffer and helps the garlic cook more gently. Also, keep your air fryer at 380°F (193°C) instead of higher temperatures. If you’re still having trouble, try using garlic powder instead of fresh garlic.
Can I double this recipe?
Yes, but you’ll need to cook in batches. A standard 5-6 quart air fryer can handle about 4-5 thighs at a time without overcrowding. Keep the first batch warm in a 200°F (93°C) oven while the second batch cooks. The extra time is worth it for that perfect crispy texture.
Pin This Recipe!
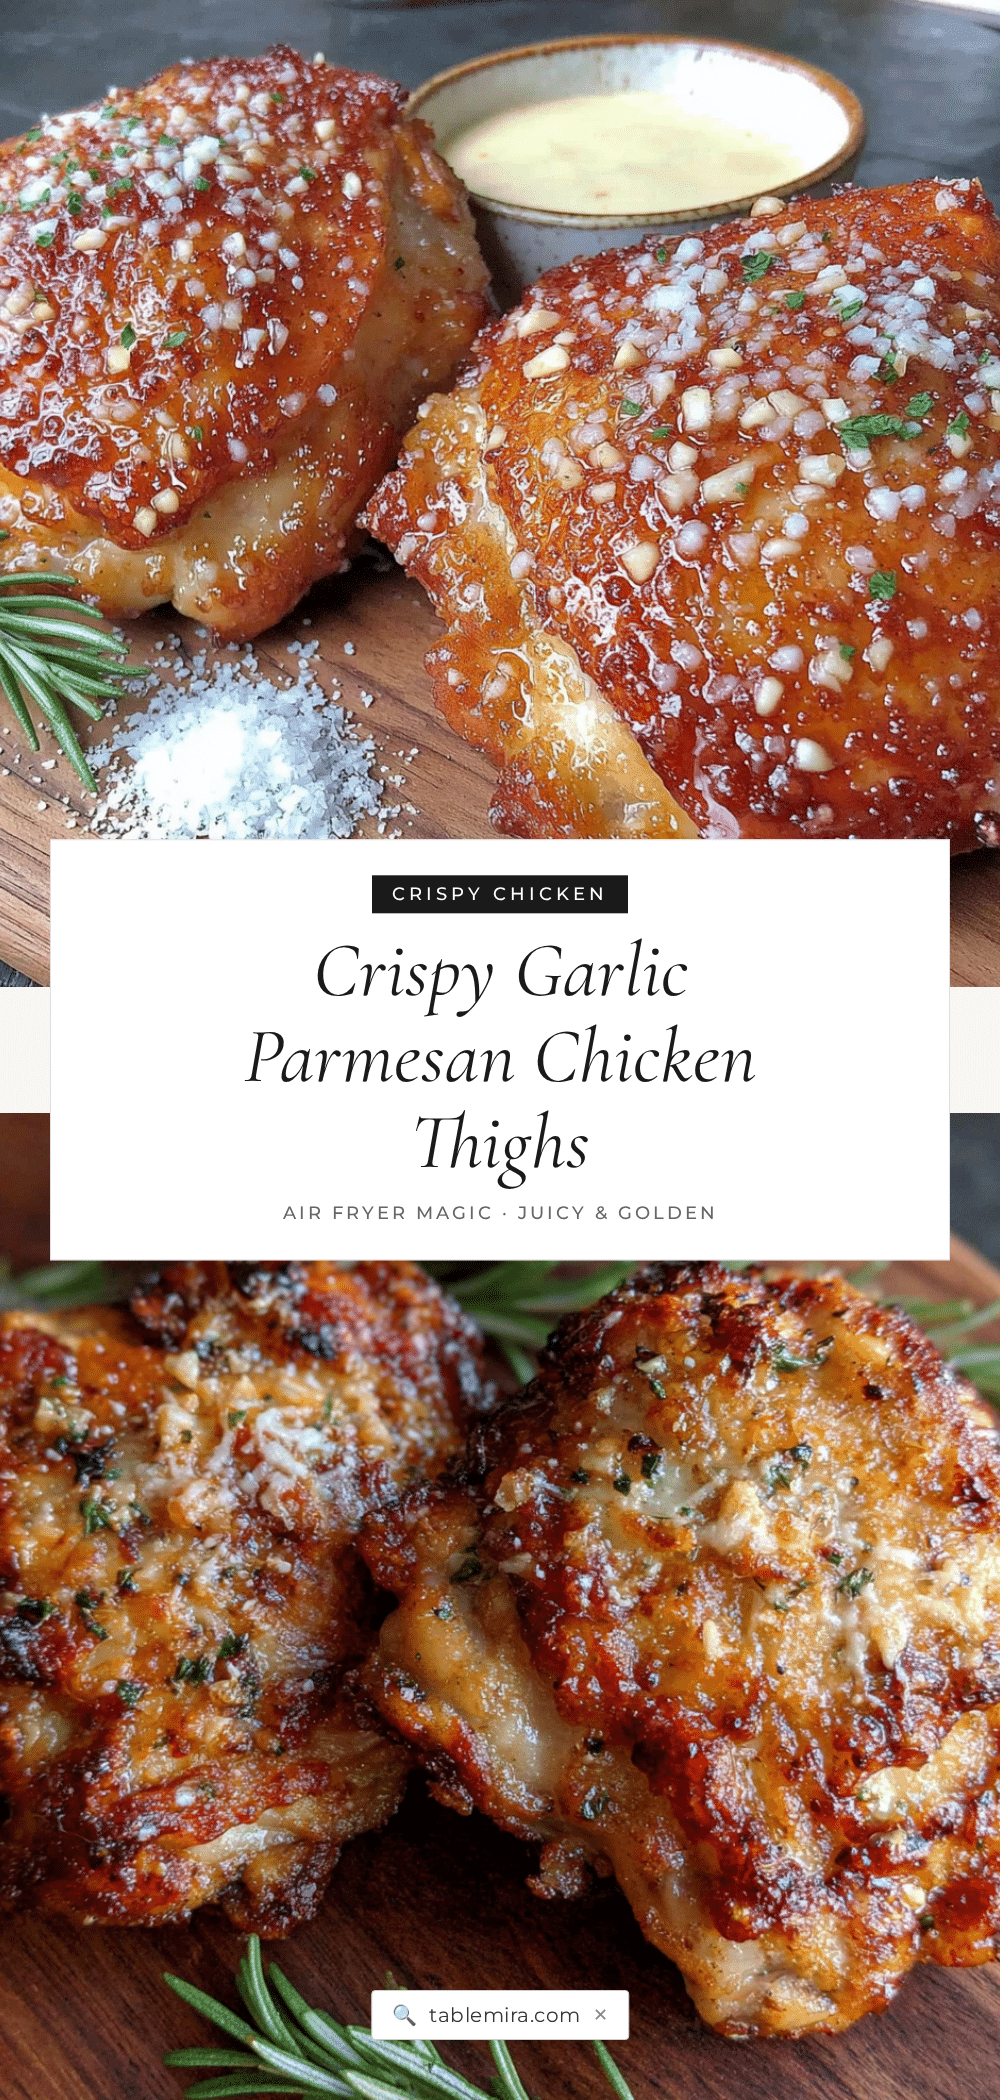
Best Crispy Air Fryer Garlic Parmesan Chicken Thighs Recipe

Juicy, tender chicken thighs with a shatteringly crispy garlic parmesan crust, ready in under 30 minutes. This air fryer recipe delivers restaurant-quality results with simple pantry ingredients.
- Prep Time: 15 minutes
- Cook Time: 22-24 minutes
- Total Time: 37-39 minutes
- Yield: 4 servings 1x
- Category: Main Course
- Cuisine: American
Ingredients
- 1.5 lbs (680g) boneless, skinless chicken thighs
- 4–5 cloves fresh garlic, minced
- 3 tablespoons (42g) unsalted butter
- ½ cup (50g) grated Parmesan cheese (freshly grated)
- ¼ cup (30g) panko breadcrumbs
- 1 teaspoon dried Italian seasoning
- ½ teaspoon garlic powder
- 1 teaspoon kosher salt (or to taste)
- ½ teaspoon freshly ground black pepper (or to taste)
- Fresh parsley for garnish (optional)
- Cooking spray or oil (for the air fryer basket)
Instructions
- Pat the chicken thighs dry with paper towels. Season both sides with salt, pepper, and garlic powder. Let rest at room temperature for 10 minutes.
- In a small microwave-safe bowl, melt the butter (20-30 seconds). Stir in the minced garlic and let sit for 1 minute.
- In a shallow bowl, combine the grated Parmesan, panko breadcrumbs, and Italian seasoning. Mix well.
- Brush each chicken thigh generously with the garlic butter mixture. Press each thigh into the Parmesan-panko mixture, coating both sides evenly.
- Preheat the air fryer to 380°F (193°C) for 3-5 minutes.
- Lightly spray the air fryer basket with cooking spray. Place the coated chicken thighs in a single layer, leaving space between each piece.
- Air fry at 380°F (193°C) for 12 minutes. Flip the thighs carefully, then cook for another 10-12 minutes until the internal temperature reaches 165°F (74°C) and the coating is golden brown and crispy.
- Remove the chicken from the air fryer and let rest on a wire rack for 5 minutes. Garnish with fresh parsley if desired. Serve immediately.
Notes
For extra crispy coating, spray the tops of the chicken lightly with cooking spray before the final few minutes of cooking. If you don’t have an air fryer, bake at 400°F (200°C) on a wire rack over a baking sheet for 20-25 minutes, flipping halfway. To reheat leftovers, place in the air fryer at 350°F (175°C) for 4-5 minutes.
Nutrition
- Serving Size: 1 chicken thigh
- Calories: 400
- Sugar: 0.5
- Sodium: 580
- Fat: 26
- Saturated Fat: 10
- Carbohydrates: 6
- Fiber: 0.5
- Protein: 32
Keywords: air fryer chicken thighs, garlic parmesan chicken, crispy chicken thighs, easy weeknight dinner, air fryer recipe, chicken dinner


