That sharp, warm bite of molasses and ginger — the kind that hits the back of your throat before you even finish chewing — still takes me straight to my aunt’s tiny kitchen in December. She wasn’t much of a baker, honestly. More of a “dump everything in and hope for the best” kind of cook. But every year, without fail, she’d pull out this stained recipe card for gingerbread cheesecake bars, and suddenly her whole apartment smelled like Christmas had physically moved in.
I remember standing on a wobbly stool beside her, watching her press the gingersnap crust into the pan with her knuckles. She never used a measuring cup for the cream cheese — just eyeballed it like she was negotiating with the block. And the frosting? She’d let me lick the spatula clean, which I considered the highest form of culinary education. Those bars were messy, uneven, and absolutely perfect. They tasted like someone had figured out how to bake a hug.
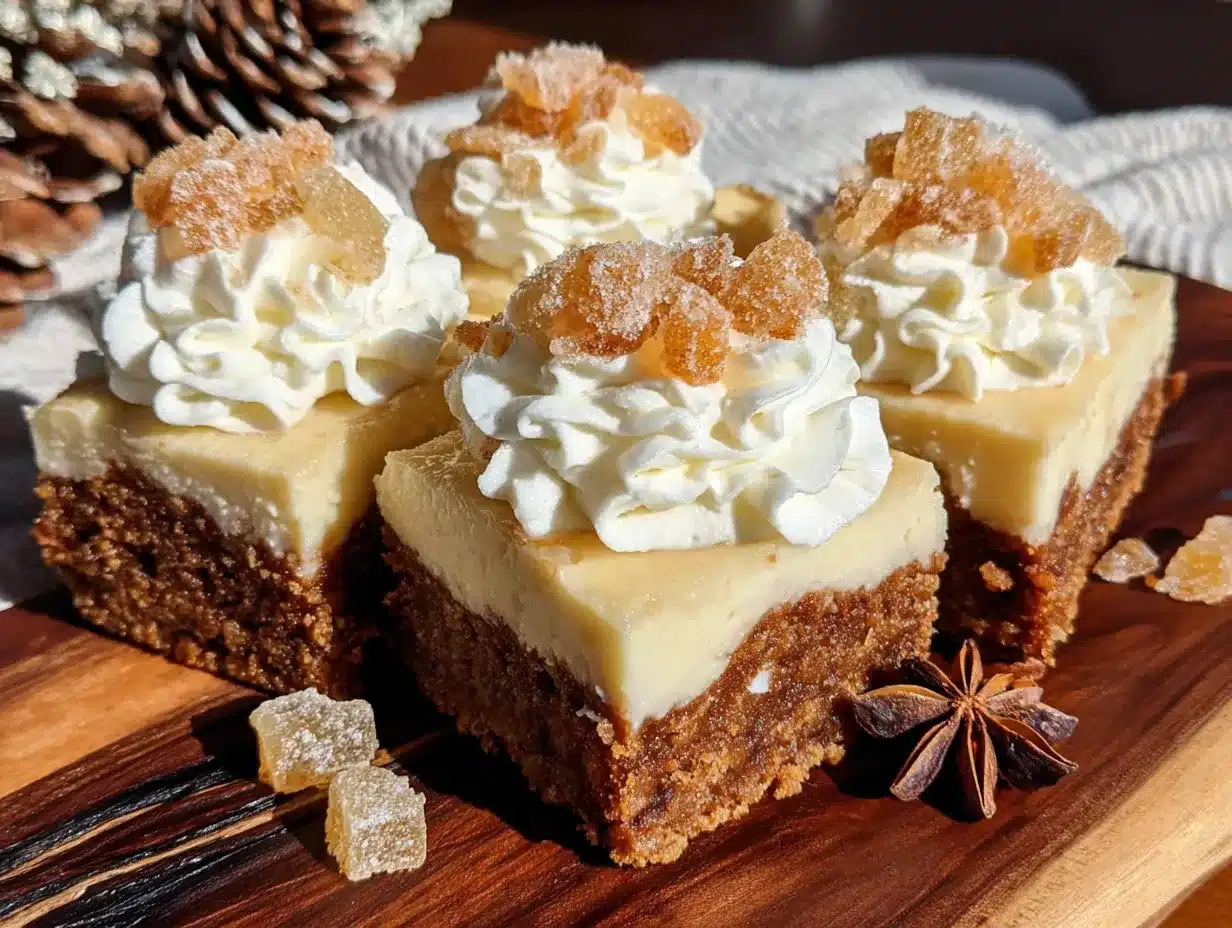
So when I set out to recreate that feeling in my own kitchen, I knew exactly what I was chasing. Not just a dessert, but that specific moment when the spicy gingerbread crust meets the cool, velvety cheesecake layer, all topped with a tangy cream cheese frosting that makes you close your eyes involuntarily. These Perfect Gingerbread Cheesecake Bars are my love letter to that memory — slightly more refined, but with the same soul-soothing magic. Trust me, you are going to want these in your holiday rotation.
Why You’ll Love This Recipe
Let’s be real for a second. The holidays are chaotic. Between the gift wrapping, the family dynamics, and the endless to-do lists, the last thing you need is a fussy dessert that requires a pastry degree. These gingerbread cheesecake bars are the opposite of that. They are the dessert equivalent of a deep breath.
- Quick & Easy : No water bath, no complicated techniques. Just a simple press-in crust, a creamy filling you can whip up in minutes, and a dreamy frosting on top. From start to finish, you are looking at about an hour of active time.
- Simple Ingredients : You probably already have most of these items in your pantry. Molasses, ginger, cinnamon, cream cheese — nothing weird or hard to find. This isn’t one of those recipes that requires a specialty store run.
- Perfect for Holiday Gatherings : These bars are the ultimate potluck hero. They travel well, slice cleanly, and disappear faster than you’d expect. Bring them to a cookie exchange, a Friendsgiving, or just keep them all for yourself (no judgment here).
- Crowd-Pleaser : I’ve served these to everyone from my spice-averse mother-in-law to my cousin who “doesn’t really like sweets.” Every single person goes back for seconds. The combo of gingerbread and cheesecake is just irresistible.
- Unbelievably Delicious : The texture is what gets me every time. That crunchy, spiced crust gives way to a silky, tangy cheesecake layer, and then the frosting ties it all together with a creamy finish. It’s next-level comfort food in bar form.
What makes these bars different from every other recipe out there? It’s the balance. I spent three batches getting the ginger-to-molasses ratio exactly right — not too spicy, not too sweet. And the cream cheese frosting? I add a tiny pinch of salt that makes all the flavors pop. This isn’t just another version of gingerbread cheesecake bars. It’s the best version.
What Ingredients You Will Need
This recipe uses simple, wholesome ingredients to deliver that bold, festive flavor and satisfying texture without any fuss. Most of these are pantry staples, especially if you do any fall or winter baking.
For the Gingersnap Crust
- 2 cups gingersnap cookie crumbs (about 8 ounces of cookies, crushed finely) — I prefer Nabisco for consistent crunch, but any brand works. You can also use a food processor or a zip-top bag and rolling pin.
- 1/4 cup granulated sugar — just a little to help the crust hold together and add sweetness.
- 6 tablespoons unsalted butter, melted — use real butter here, not margarine. It makes a huge difference in flavor and texture.
- 1/4 teaspoon salt — balances the sweetness and enhances the ginger.
For the Gingerbread Cheesecake Filling
- 16 ounces cream cheese, softened (two 8-ounce blocks) — full-fat is best for that ultra-creamy texture. Let it sit on the counter for at least 30 minutes before starting.
- 3/4 cup granulated sugar — just enough sweetness without overpowering the spices.
- 2 large eggs, room temperature — cold eggs can cause the filling to curdle. If you forgot to set them out, place them in a bowl of warm water for 5 minutes.
- 1/3 cup molasses — use unsulphured molasses, not blackstrap. Blackstrap is too bitter and will throw off the flavor. Grandma’s brand or Brer Rabbit are great choices.
- 1 teaspoon vanilla extract — pure vanilla, not imitation, if you can swing it.
- 2 teaspoons ground ginger — this is the star spice, so don’t skimp. Freshly ground is amazing if you have it.
- 1 1/2 teaspoons ground cinnamon — warm and cozy, the perfect partner to ginger.
- 1/2 teaspoon ground nutmeg — freshly grated is ideal, but pre-ground works fine.
- 1/4 teaspoon ground cloves — just a touch for that classic gingerbread depth.
- 1/4 teaspoon salt — brings all the flavors together.
For the Cream Cheese Frosting
- 4 ounces cream cheese, softened — same deal, full-fat and room temperature.
- 1/4 cup unsalted butter, softened — let it sit out alongside the cream cheese.
- 1 1/2 cups powdered sugar — sifted if it’s lumpy, but honestly, I rarely bother and it turns out fine.
- 1/2 teaspoon vanilla extract — adds that classic bakery flavor.
- 1/8 teaspoon salt — trust me on this one. It cuts the sweetness and makes the frosting taste more sophisticated.
Optional Garnishes
- Crushed gingersnap cookies for sprinkling on top
- Cinnamon sticks for a festive look (not edible, but pretty)
- A light dusting of ground cinnamon or nutmeg
Equipment Needed
You don’t need a professional bakery setup for these bars. Here’s what you’ll need:
- 9×9-inch baking pan — glass or metal both work. If using metal, line it well with parchment paper so nothing sticks.
- Parchment paper — absolutely essential for easy removal. Leave an overhang on two sides to create “handles.”
- Electric hand mixer or stand mixer — a whisk and some elbow grease can work for the crust, but the cheesecake filling needs to be smooth, and a mixer makes that effortless. I’ve broken a wrist whisking cream cheese by hand — learn from my mistake.
- Mixing bowls — one medium for the crust, one large for the filling, one small for the frosting.
- Measuring cups and spoons — accuracy matters, especially with the spices.
- Spatula — for scraping every last bit of filling into the pan.
- Food processor or zip-top bag — for crushing the gingersnaps. A rolling pin works in a pinch, but a food processor gives you a finer, more even crumb.
If you don’t have a 9×9 pan, an 8×8 pan works too — your bars will just be a little thicker and may need an extra 5-7 minutes of baking time. Line with parchment either way, and you are golden.
Preparation Method
Alright, let’s get to the good part. This is where the magic happens. Follow these steps, and you will have the most incredible gingerbread cheesecake bars on your counter in no time.
Step 1: Prep Your Pan and Preheat
Preheat your oven to 350°F (175°C). Line your 9×9-inch baking pan with parchment paper, leaving a 2-inch overhang on two opposite sides. This is your secret weapon for lifting the bars out later without any drama. Lightly grease the parchment with a little butter or non-stick spray — just a thin layer.
Step 2: Make the Gingersnap Crust
In a food processor, pulse the gingersnap cookies until they turn into fine crumbs. You should have about 2 cups. If you don’t have a food processor, place the cookies in a zip-top bag and smash them with a rolling pin until they are uniformly crushed. It’s a little therapeutic, honestly.
In a medium bowl, combine the cookie crumbs, 1/4 cup sugar, and 1/4 teaspoon salt. Pour in the 6 tablespoons of melted butter and stir with a fork until every crumb is moistened. The mixture should look like wet sand and hold together when you squeeze it.
Press the mixture firmly and evenly into the bottom of your prepared pan. Use the bottom of a measuring cup or a flat glass to really pack it down — a loose crust will fall apart later. Bake the crust for 10 minutes, then set it aside to cool slightly while you make the filling. Leave the oven on.
Step 3: Make the Gingerbread Cheesecake Filling
In a large mixing bowl, beat the softened cream cheese with an electric mixer on medium speed until it’s completely smooth and fluffy — about 2 minutes. Scrape down the sides and bottom of the bowl with a spatula. You want zero lumps here.
Add the 3/4 cup sugar and beat for another minute until well combined. Add the eggs, one at a time, beating on low speed after each addition just until incorporated. Do not overmix once the eggs are in — that can incorporate too much air and cause cracks in your cheesecake layer.
Now add the molasses, vanilla, ground ginger, cinnamon, nutmeg, cloves, and 1/4 teaspoon salt. Beat on low speed until everything is combined and the filling is a uniform, pale brown color. It should smell incredible already. Scrape the bowl one more time to make sure everything is mixed in.
Step 4: Assemble and Bake
Pour the cheesecake filling over the slightly cooled crust. Use your spatula to spread it evenly to the edges. Tap the pan gently on the counter a few times to release any air bubbles.
Bake at 350°F (175°C) for 35-40 minutes. The edges should be set and slightly puffed, but the center should still jiggle just a little when you gently shake the pan — like a firm Jell-O. That slight jiggle is your friend; it means the center will stay creamy and not overbake.
Let the bars cool completely on a wire rack, about 1 hour. Then transfer the pan to the refrigerator and chill for at least 4 hours, or overnight. This step is non-negotiable. The bars need this time to set up properly so you get clean, beautiful slices.
Step 5: Make the Cream Cheese Frosting
While the bars are chilling, make the frosting. In a small bowl, beat the softened cream cheese and butter together until smooth and creamy — about 2 minutes. Add the powdered sugar, vanilla, and 1/8 teaspoon salt. Beat on low speed until the sugar is incorporated, then increase to medium and beat for another 2 minutes until the frosting is light and fluffy.
Cover the bowl and refrigerate the frosting until you are ready to use it. It will firm up a bit, which makes spreading easier.
Step 6: Frost, Slice, and Serve
Once the bars are fully chilled and set, use the parchment overhang to lift them out of the pan onto a cutting board. Spread the cream cheese frosting evenly over the top. If the frosting is too stiff, let it sit at room temperature for 10 minutes and give it a quick stir.
For clean slices, use a sharp knife and wipe it clean between each cut. I like to run the knife under hot water and dry it off before cutting — it glides right through. Sprinkle crushed gingersnaps on top for a little crunch and visual appeal.
Cooking Tips & Techniques
After making these bars more times than I can count (and messing up a few along the way), I’ve picked up some tricks that make a real difference.
Room temperature ingredients are not optional. I learned this the hard way when my first batch of cheesecake filling looked like cottage cheese. Cold cream cheese doesn’t blend smoothly, and cold eggs can seize the mixture. Set everything out on the counter 30-45 minutes before you start. If you are short on time, cut the cream cheese into small cubes — they soften faster.
Don’t overmix the filling. Once the eggs go in, keep the mixer on low and stop as soon as everything is combined. Overmixing whips too much air into the batter, which can cause the cheesecake to puff up and then crack as it cools. A few tiny cracks are fine — the frosting covers them anyway — but we want a smooth, even surface.
Trust the jiggle test. I used to bake my cheesecake bars until the center was completely firm. Big mistake. They came out dry and dense. The center should wobble slightly when you shake the pan. It will continue to cook from residual heat as it cools, and the refrigeration will firm it up perfectly.
Patience with chilling is everything. I know it’s tempting to rush this step, especially when your kitchen smells like a holiday bakery. But cutting into warm or barely-chilled bars is a recipe for a crumbly mess. Give them the full 4 hours minimum. Overnight is even better — the flavors meld and deepen, and the texture becomes incredibly silky.
Use a hot knife for clean slices. Dip your knife in hot water, wipe it dry, then make your cut. Repeat between each slice. This gives you those beautiful, bakery-worthy squares that look as good as they taste.
Variations & Adaptations
One of the best things about this recipe is how flexible it is. Here are some of my favorite ways to change it up:
Gluten-Free Version : Use gluten-free gingersnap cookies for the crust. Most brands offer a gluten-free option, or you can make your own with gluten-free flour and the same spices. The filling is naturally gluten-free, so this swap is easy.
Vegan Adaptation : Replace the cream cheese with a high-quality vegan cream cheese (I like Miyoko’s or Kite Hill). Use a flax egg (1 tablespoon ground flaxseed mixed with 3 tablespoons water per egg) and vegan butter in the crust and frosting. Coconut cream can replace the butter in the frosting for a dairy-free option. The texture will be slightly different, but still delicious.
Spice It Up : If you love heat, add 1/4 teaspoon of cayenne pepper or black pepper to the filling. It sounds weird, but black pepper actually enhances the ginger and gives the bars a subtle, warming kick. I tried this on a whim one year and now it’s my secret holiday weapon.
Pumpkin Gingerbread Swirl : For a fall twist, swirl 1/2 cup of pumpkin puree mixed with 1 teaspoon of pumpkin pie spice into the cheesecake filling before baking. Use a knife to create gentle swirls. It’s like a pumpkin pie cheesecake and gingerbread had a beautiful baby.
Chocolate Lover’s Version : Melt 4 ounces of dark chocolate and swirl it into the cheesecake filling before baking. Or drizzle melted chocolate over the finished frosting for a dramatic look. The chocolate and gingerbread combo is seriously underrated.
Mini Bar Option : Press the crust into a mini muffin tin (lined with paper liners) and fill with cheesecake mixture. Bake for about 12-15 minutes. These are perfect for holiday parties or cookie trays. Just reduce the chilling time to about 2 hours since they are smaller.
Serving & Storage Suggestions
These gingerbread cheesecake bars are versatile enough for any occasion. Here’s how to serve and store them like a pro.
Serving Temperature : I prefer these bars cold, straight from the fridge. The cheesecake layer is firm and creamy, and the crust stays perfectly crunchy. If you prefer a softer texture, let them sit at room temperature for 10-15 minutes before serving. Either way, they are incredible.
Presentation Ideas : Arrange the bars on a festive platter and dust with a light sprinkle of cinnamon or nutmeg. Add a few whole star anise or cinnamon sticks for a holiday vibe. For an extra touch, serve each bar with a dollop of lightly sweetened whipped cream or a scoop of vanilla bean ice cream. The warm spice of the gingerbread pairs beautifully with the cool, creamy toppings.
Perfect Pairings : These bars are amazing with a hot cup of coffee, a spiced chai latte, or even a glass of cold milk. For a festive drink pairing, try a creamy pumpkin cold foam latte — the pumpkin and gingerbread flavors are a match made in heaven. They also go wonderfully with a glass of dessert wine like a late-harvest Riesling or a port.
Storage Instructions : Store the bars in an airtight container in the refrigerator for up to 5 days. Place a sheet of parchment paper between layers if you are stacking them to prevent the frosting from sticking. I actually think they taste even better on day two — the flavors have more time to meld together.
Freezing Instructions : These bars freeze beautifully. After the bars are fully chilled and frosted, place them on a baking sheet in the freezer for about 1 hour, or until the frosting is firm. Then wrap each bar individually in plastic wrap and place them in a freezer-safe bag or container. They will keep for up to 3 months. To thaw, transfer to the refrigerator overnight. The texture remains remarkably creamy.
How Flavors Develop : The ginger and molasses become more pronounced after a day in the fridge. The spices mellow slightly and blend together into a more complex, rounded flavor. This is one of those desserts that rewards patience — it just gets better with time.
Nutritional Information & Benefits
Let’s be honest — these are a treat, not a health food. But that doesn’t mean they don’t have some redeeming qualities.
Estimated Nutritional Values (per bar, based on 16 servings):
- Calories: 345
- Total Fat: 22g
- Saturated Fat: 13g
- Cholesterol: 85mg
- Sodium: 290mg
- Total Carbohydrates: 34g
- Dietary Fiber: 1g
- Sugars: 24g
- Protein: 5g
Health Highlights: Ginger is the real star here. It’s known for its anti-inflammatory properties and can help with digestion — which is handy after a heavy holiday meal. Molasses contains iron, calcium, and magnesium, so there’s a tiny nutritional boost in every bite. The cream cheese provides a small amount of protein and calcium. And hey, the cinnamon and nutmeg are packed with antioxidants.
Dietary Considerations: This recipe contains dairy, gluten, and eggs. For gluten-free and vegan options, see the variations section above. These bars are not low-carb or sugar-free, but they are absolutely worth every single bite. I believe in balance — enjoy the treat, savor it, and don’t feel guilty.
Potential Allergens: Dairy (cream cheese, butter), gluten (gingersnap cookies), eggs. Always check your specific ingredient labels if you are serving someone with allergies.
Conclusion
These Perfect Gingerbread Cheesecake Bars with Cream Cheese Frosting are everything I love about holiday baking. They are cozy, festive, and just a little bit indulgent — the kind of dessert that makes you slow down and actually enjoy the moment. The spiced gingerbread crust, the silky cheesecake filling, the tangy frosting on top… it’s a combination that just works.
What I love most about this recipe is how adaptable it is. You can keep it classic, or you can make it your own with the variations I shared. Add chocolate, swap in pumpkin, or go full spice mode with a pinch of cayenne. The base is so solid that it welcomes creativity. And honestly, that’s the best kind of recipe to have in your back pocket.
I would love to hear how these turn out for you. Did you try a variation? Did your family fight over the last bar? Drop a comment below and let me know — I read every single one. And if you share these on social media, tag me so I can see your beautiful creations. Happy baking, friends. You’ve got this.
Frequently Asked Questions
Can I use a different crust for these gingerbread cheesecake bars?
Absolutely. Graham cracker crumbs work well if you add a little extra ginger and cinnamon to the crust mixture. You can also use crushed vanilla wafers or even shortbread cookies. Just keep the butter-to-crumb ratio the same — about 6 tablespoons of melted butter for every 2 cups of crumbs.
Why did my cheesecake filling crack?
A few small cracks are totally normal and nothing to worry about — the frosting covers them. Larger cracks usually happen from overmixing the batter (too much air) or overbaking. Make sure you stop mixing once the ingredients are combined, and pull the bars out of the oven when the center still has a slight jiggle. Letting them cool gradually on the counter before refrigerating also helps prevent cracking.
Can I make these bars ahead of time for a party?
Yes, and I actually recommend it. These bars taste even better after a day in the fridge. You can make them up to 3 days in advance. Just keep them covered in the refrigerator, and add the frosting and any garnishes on the day you plan to serve them for the freshest presentation.
How do I get clean, neat slices?
The key is a sharp knife and patience. Make sure the bars are fully chilled — at least 4 hours, ideally overnight. Run your knife under hot water, wipe it dry, and make one clean cut. Wipe the blade clean between each cut. Repeat for every slice. It takes an extra minute, but the results are worth it.
Can I freeze these bars with the frosting already on?
Yes, you can. Freeze the fully assembled bars on a baking sheet until the frosting is firm (about 1 hour), then wrap each bar individually in plastic wrap and store in a freezer bag. They will keep for up to 3 months. Thaw in the refrigerator overnight. The frosting may lose a tiny bit of its fluffy texture, but it will still taste amazing.
Pin This Recipe!
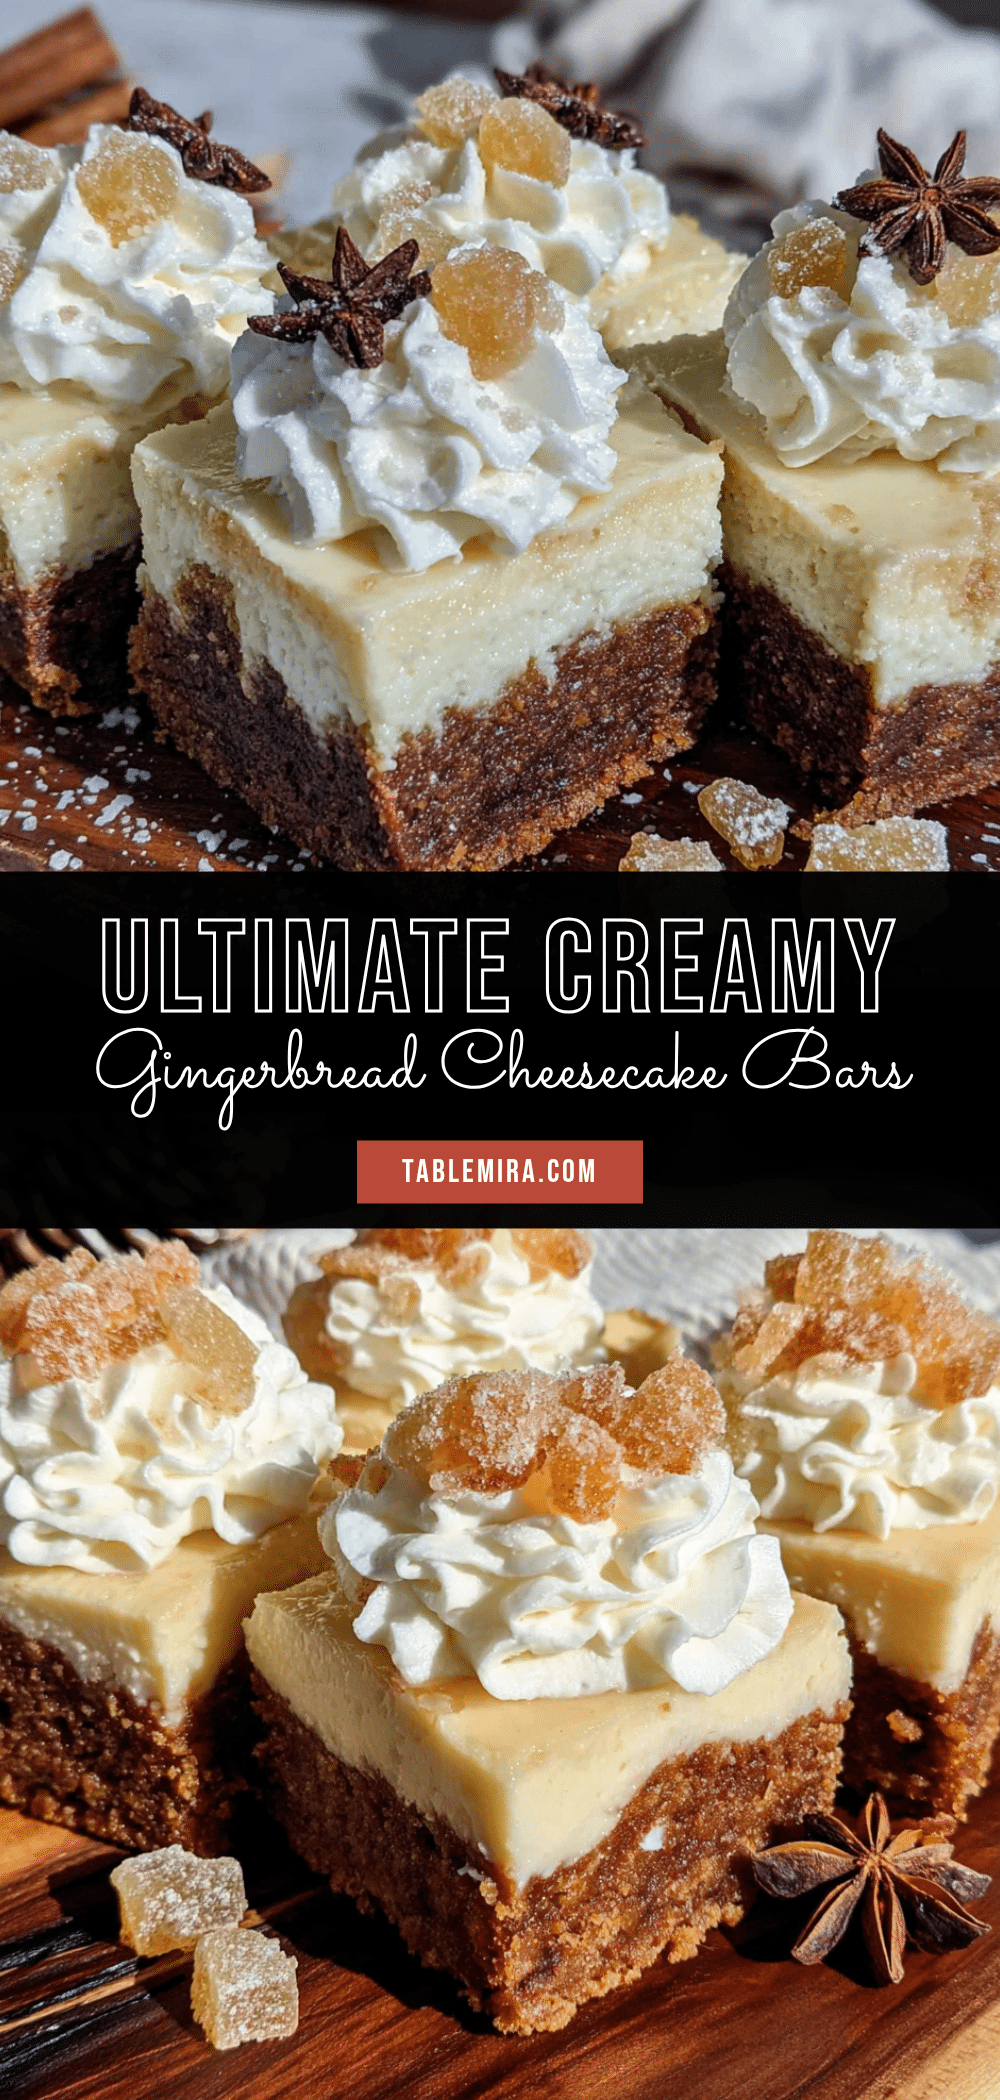
Perfect Gingerbread Cheesecake Bars Recipe (Easy & Homemade)
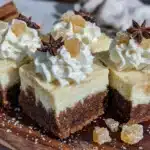
These Perfect Gingerbread Cheesecake Bars feature a crunchy gingersnap crust, a silky spiced cheesecake filling, and a tangy cream cheese frosting. They are an easy, no-fuss holiday dessert that tastes like a hug.
- Prep Time: 20 minutes
- Cook Time: 35-40 minutes
- Total Time: 5 hours (including chilling)
- Yield: 16 servings 1x
- Category: Dessert
- Cuisine: American
Ingredients
- 2 cups gingersnap cookie crumbs (about 8 ounces of cookies, crushed finely)
- 1/4 cup granulated sugar
- 6 tablespoons unsalted butter, melted
- 1/4 teaspoon salt
- 16 ounces cream cheese, softened (two 8-ounce blocks)
- 3/4 cup granulated sugar
- 2 large eggs, room temperature
- 1/3 cup molasses (unsulphured, not blackstrap)
- 1 teaspoon vanilla extract
- 2 teaspoons ground ginger
- 1 1/2 teaspoons ground cinnamon
- 1/2 teaspoon ground nutmeg
- 1/4 teaspoon ground cloves
- 1/4 teaspoon salt
- 4 ounces cream cheese, softened
- 1/4 cup unsalted butter, softened
- 1 1/2 cups powdered sugar
- 1/2 teaspoon vanilla extract
- 1/8 teaspoon salt
- Crushed gingersnap cookies (optional garnish)
- Cinnamon sticks (optional garnish)
- A light dusting of ground cinnamon or nutmeg (optional garnish)
Instructions
- Preheat your oven to 350°F (175°C). Line a 9×9-inch baking pan with parchment paper, leaving a 2-inch overhang on two opposite sides. Lightly grease the parchment with butter or non-stick spray.
- Make the crust: In a food processor, pulse gingersnap cookies into fine crumbs (about 2 cups). In a medium bowl, combine the crumbs, 1/4 cup sugar, and 1/4 teaspoon salt. Pour in the melted butter and stir with a fork until every crumb is moistened. Press the mixture firmly and evenly into the bottom of the prepared pan. Bake for 10 minutes, then set aside to cool slightly. Leave the oven on.
- Make the filling: In a large mixing bowl, beat the softened cream cheese with an electric mixer on medium speed until smooth and fluffy (about 2 minutes). Scrape down the sides. Add 3/4 cup sugar and beat for another minute. Add the eggs one at a time, beating on low speed after each addition just until incorporated. Add molasses, vanilla, ground ginger, cinnamon, nutmeg, cloves, and 1/4 teaspoon salt. Beat on low speed until combined and uniform in color.
- Assemble and bake: Pour the filling over the slightly cooled crust and spread evenly. Tap the pan gently on the counter to release air bubbles. Bake at 350°F (175°C) for 35-40 minutes, until the edges are set and the center jiggles slightly. Cool completely on a wire rack (about 1 hour), then refrigerate for at least 4 hours or overnight.
- Make the frosting: In a small bowl, beat the softened cream cheese and butter together until smooth (about 2 minutes). Add powdered sugar, 1/2 teaspoon vanilla, and 1/8 teaspoon salt. Beat on low speed until incorporated, then increase to medium and beat for 2 minutes until light and fluffy. Cover and refrigerate until ready to use.
- Frost and serve: Once bars are fully chilled, use the parchment overhang to lift them out of the pan onto a cutting board. Spread the frosting evenly over the top. For clean slices, use a sharp knife wiped clean between cuts. Garnish with crushed gingersnaps if desired.
Notes
Room temperature ingredients are crucial for a smooth filling. Do not overmix once eggs are added. The center should jiggle slightly when done. Chill for at least 4 hours (overnight is best) for clean slices. Use a hot knife for neat cuts.
Nutrition
- Serving Size: 1 bar
- Calories: 345
- Sugar: 24
- Sodium: 290
- Fat: 22
- Saturated Fat: 13
- Carbohydrates: 34
- Fiber: 1
- Protein: 5
Keywords: gingerbread cheesecake bars, holiday dessert, easy cheesecake bars, gingerbread dessert, cream cheese frosting