The first Saturday of October, and the only thing I wanted was a batch of these easy Halloween mummy sugar cookies. Not the elaborate, fondant-covered kind that take all afternoon. Just something simple, a little bit spooky, and so buttery you can’t stop at one. My kitchen was quiet, the afternoon light already starting to fade, and I had a bag of candy eyes I’d bought on a whim the week before.
I remember pulling the first tray out of the oven. The kitchen smelled like vanilla and butter—the good kind of warm. I let them cool just enough so the royal icing wouldn’t slide right off, then started wrapping each cookie in thin white stripes. It wasn’t perfect. Some stripes were too thick, some too thin, and a couple of the candy eyes ended up slightly crossed. Honestly? That made them better. They looked like they’d crawled right out of a friendly little graveyard.
These cookies aren’t fancy. They’re the kind of thing you make when you want to get your hands dirty and laugh at your own mistakes. The dough comes together fast, the decorating is forgiving, and the whole process feels like a tiny celebration of the season. I’ve made them for Halloween parties, for classroom treats, and for no reason at all except that I wanted to eat something that looked back at me. And every time, they disappear.
This is the recipe I keep coming back to. Not because it’s complicated—it’s not. But because it’s the one that makes people smile. Even the ones who claim they don’t like baking.
Why You’ll Love This Recipe
Let’s be honest—Halloween baking can be a real pain. Between sticky caramel apples and crumbling pumpkin bars, you end up with more mess than treats. These easy Halloween mummy sugar cookies are different. They’re designed to be fun, not fussy.
- Quick & Easy : From start to finish, you’re looking at about 45 minutes of active time. The dough chills for 30 minutes, but you can use that time to clean up or pour yourself a cup of coffee.
- Simple Ingredients : No weird specialty items here. Butter, sugar, flour, eggs—the usual suspects. You probably have everything already, minus the candy eyes.
- Perfect for Halloween Parties : These little guys are the star of any spread. They’re portable, kid-friendly, and way cuter than a store-bought bag of candy.
- Crowd-Pleaser : I’ve watched adults sneak these off platters when they thought no one was looking. The buttery, tender texture wins everyone over.
- Unbelievably Delicious : The cookie base is soft in the middle with slightly crisp edges. Paired with the sweet royal icing, it’s the kind of cookie that makes you close your eyes after the first bite.
What makes this recipe different from the rest is the technique. Instead of a stiff sugar cookie that holds its shape perfectly (and tastes like cardboard), I use a slightly softer dough that bakes up tender. The royal icing is intentionally thin so it drapes like actual bandages. It’s a small change, but it makes all the difference.
This isn’t just another Halloween cookie. It’s the one that makes you feel like a kid again, even if your frosting skills are a little shaky. And honestly? That’s the whole point.
What Ingredients You Will Need
This recipe uses simple, wholesome ingredients to deliver a buttery, tender cookie that holds up beautifully to decorating. Most of these are pantry staples, which means you can whip up a batch whenever the Halloween mood strikes.
For the Sugar Cookies
- 1 cup (226g) unsalted butter, softened – I always use unsalted so I can control the salt level. Let it sit out for about an hour before you start. (Cold butter won’t cream properly.)
- 1 cup (200g) granulated sugar – Regular white sugar gives these cookies their classic sweetness and helps them spread just the right amount.
- 1 large egg, room temperature – A cold egg can seize the butter mixture. Pop it in a bowl of warm water for 5 minutes if you forgot to take it out.
- 1 teaspoon vanilla extract – Pure vanilla makes a difference here. I prefer Nielsen-Massey, but any good brand works.
- 2 ½ cups (312g) all-purpose flour – Spoon and level your flour. Scooping directly from the bag packs in too much and makes dry cookies.
- ½ teaspoon baking powder – Just enough to give them a little lift without turning them into cakes.
- ¼ teaspoon salt – Balances the sweetness. Don’t skip it.
For the Royal Icing
- 2 cups (240g) powdered sugar, sifted – Sifting removes lumps so your icing is silky smooth. Trust me on this one.
- 2 tablespoons meringue powder – This gives the icing structure and helps it dry hard. You can find it in the baking aisle or online.
- 3-4 tablespoons warm water – Add slowly. You want the consistency of thick glue—thin enough to spread but thick enough to hold its shape.
- ½ teaspoon vanilla extract – Optional, but I like the extra flavor.
For Decoration
- Candy eyeballs – The classic 10mm size works best. You’ll need about 2 per cookie.
- Black decorating gel – For adding little mouths or spiderweb details if you’re feeling fancy.
I recommend Wilton’s candy eyes for consistency—they stick well to the icing and don’t slide off. If you can’t find meringue powder, you can substitute 2 pasteurized egg whites, but the icing won’t be as stable. For a dairy-free version, use plant-based butter sticks (not the spreadable kind in a tub).
Equipment Needed
You don’t need a fancy bakery setup for these cookies. Here’s what I use every time:
- Stand mixer or hand mixer – A stand mixer makes creaming the butter and sugar effortless, but a hand mixer works just fine. I’ve made these with both.
- Large mixing bowls – One for the dry ingredients, one for the wet.
- Baking sheets – Heavy-duty aluminum sheets prevent burning. I’ve ruined cookies on thin, dark pans—they brown too fast.
- Parchment paper or silicone baking mats – Non-negotiable for easy cleanup and even baking.
- Wire cooling rack – Essential for letting cookies cool completely before icing. Warm cookies melt royal icing into a puddle.
- Piping bags or zip-top bags – For the royal icing. A small round tip (like Wilton #3) gives you control, but snipping the corner of a zip-top bag works in a pinch.
- Offset spatula – Helps spread the icing evenly. A butter knife works too, but the spatula is easier.
- Plastic wrap – For chilling the dough.
If you don’t have a stand mixer, don’t worry. I made these cookies for years with just a whisk and a wooden spoon. It takes a little more elbow grease, but the cookies turn out exactly the same.
Preparation Method
Alright, let’s get to the good part. Here’s how to make these easy Halloween mummy sugar cookies from start to finish.
Step 1: Make the Cookie Dough
In a large bowl (or the bowl of your stand mixer), beat the softened butter and granulated sugar together on medium speed until light and fluffy. This takes about 3 minutes. You want it to look pale and almost creamy. Scrape down the sides of the bowl with a spatula halfway through.
Add the egg and vanilla extract. Beat until combined, about 30 seconds. Don’t overmix here—you just want everything incorporated.
In a separate bowl, whisk together the flour, baking powder, and salt. Gradually add the dry ingredients to the wet mixture, mixing on low speed. Stop as soon as the dough comes together. If it looks crumbly, that’s fine. Give it a few turns with your hands to bring it into a ball.
Step 2: Chill the Dough
Flatten the dough into a disc about 1 inch thick. Wrap it tightly in plastic wrap and refrigerate for at least 30 minutes. This step isn’t optional—chilling prevents the cookies from spreading too much in the oven. You can chill it for up to 2 days if you want to prep ahead.
Step 3: Roll and Cut
Preheat your oven to 350°F (175°C). Line your baking sheets with parchment paper.
On a lightly floured surface, roll the chilled dough to about ¼ inch thick. I use a rolling pin with adjustable rings for consistent thickness, but you can eyeball it. Just make sure it’s even.
Use a round cookie cutter (2.5 to 3 inches works best) to cut out your cookies. Re-roll the scraps once—after that, the dough gets tough. Place the cut cookies about 2 inches apart on the prepared baking sheets.
Step 4: Bake
Bake for 10-12 minutes, or until the edges are just barely golden. The centers will look slightly underdone—that’s what you want. Overbaking makes them dry.
Let the cookies cool on the baking sheet for 5 minutes, then transfer them to a wire rack to cool completely. Don’t even think about icing them while they’re warm. I learned this the hard way and ended up with a sticky, sad mess.
Step 5: Make the Royal Icing
In a medium bowl, whisk together the sifted powdered sugar and meringue powder. Add 3 tablespoons of warm water and the vanilla extract. Whisk until smooth. If the icing is too thick, add the remaining tablespoon of water, one teaspoon at a time. You’re looking for a consistency that slowly drips off the whisk but holds a ribbon on the surface for a few seconds.
Transfer the icing to a piping bag fitted with a small round tip, or snip a tiny corner off a zip-top bag.
Step 6: Decorate the Mummies
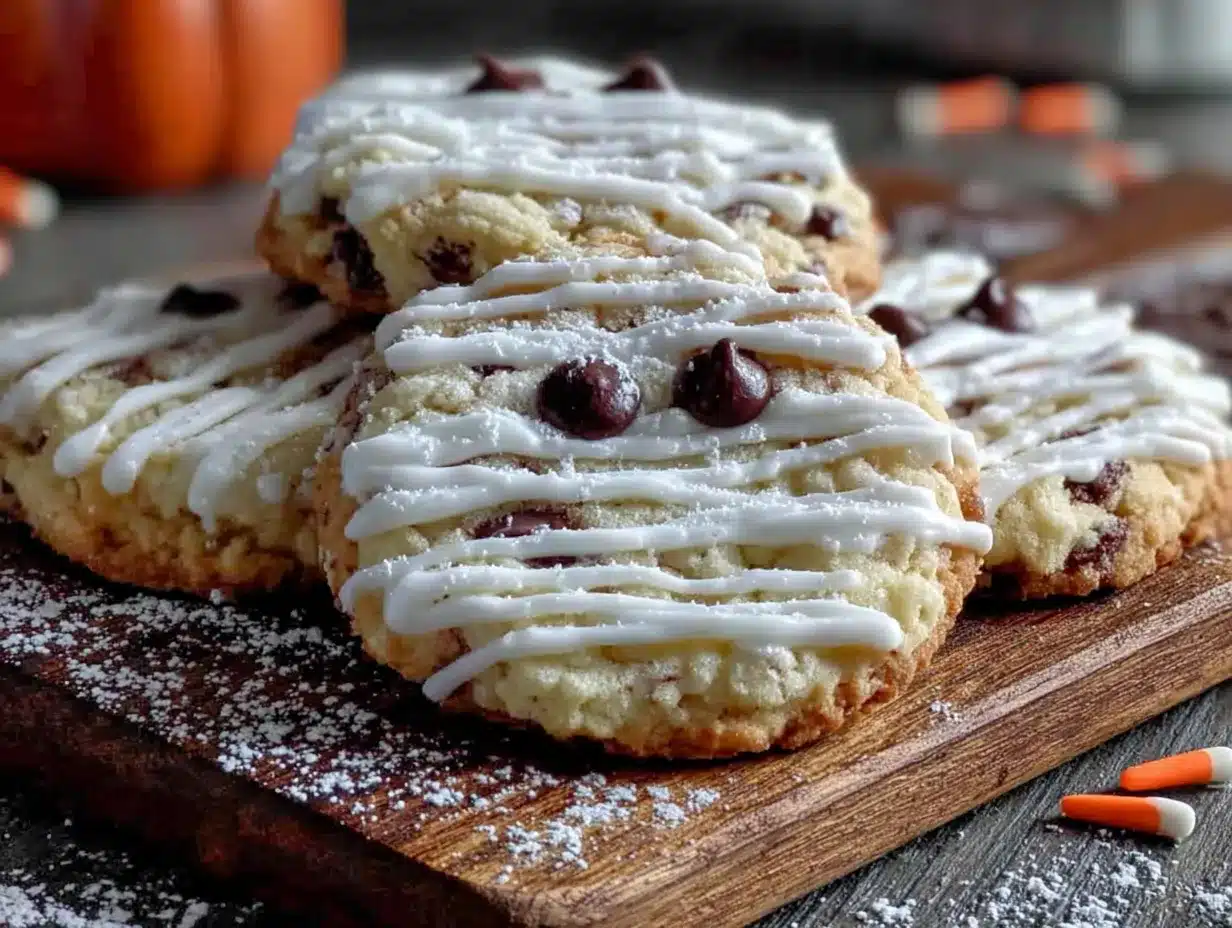
Pipe horizontal lines of icing across each cooled cookie, leaving small gaps for the eyes. Don’t worry about making them perfect—mummies are supposed to look a little messy. While the icing is still wet, press two candy eyeballs into the gaps. Let the icing dry completely, about 1-2 hours.
If you want to add mouths, wait until the white icing is dry, then use black decorating gel to draw tiny zigzag lines or little “X” shapes below the eyes.
Cooking Tips & Techniques
Over the years, I’ve made every mistake you can imagine with these cookies. Here’s what I’ve learned so you don’t have to repeat my failures.
Don’t skip the chill time. I once tried to rush the process and rolled the dough after only 10 minutes in the fridge. The cookies spread into flat, sad pancakes that looked more like ghosts than mummies. Give it the full 30 minutes.
Use a light hand with the flour. When rolling out the dough, dust your surface and rolling pin lightly. Too much flour makes the cookies dry and crumbly. If the dough sticks, chill it for another 10 minutes instead of adding more flour.
Bake one sheet at a time. I know it’s tempting to cram two sheets in the oven, but the heat doesn’t circulate evenly. The bottom sheet will brown faster while the top sheet stays pale. Bake them in batches—your cookies will thank you.
Test your icing consistency. Before you start piping, do a quick test on a piece of parchment. If the icing spreads into a puddle, it’s too thin. Add more powdered sugar, one tablespoon at a time. If it won’t pipe smoothly, add water a few drops at a time.
Work in an assembly line. Pipe the stripes on all the cookies first, then go back and add the eyes. This keeps the icing from drying out before you place the eyes. If the icing starts to set, the eyes won’t stick.
Don’t overbake. The cookies will continue to cook on the hot baking sheet after you pull them out. If they look slightly underdone in the center, they’re perfect. Overbaked cookies are brittle and hard to decorate without cracking.
Variations & Adaptations
One of the best things about these easy Halloween mummy sugar cookies is how flexible they are. Here are some ways to make them your own.
Gluten-Free Version
Swap the all-purpose flour for a 1:1 gluten-free baking flour blend. I’ve used Bob’s Red Mill with great results. The dough will be a little more delicate, so handle it gently and chill it for an extra 15 minutes.
Vegan Version
Use plant-based butter (I like Miyoko’s) and substitute the egg with a flax egg (1 tablespoon ground flaxseed mixed with 3 tablespoons water, let sit for 5 minutes). For the royal icing, use aquafaba (the liquid from a can of chickpeas) instead of meringue powder. Whip it until frothy, then add the powdered sugar.
Chocolate Mummies
Replace ¼ cup of the flour with unsweetened cocoa powder. The chocolate version is rich and pairs beautifully with the sweet white icing. My kids beg for these every year.
Spooky Shapes
Don’t feel limited to round cookies. Use Halloween-themed cutters—pumpkins, ghosts, bats—and decorate them as mummies. The wrapping technique works on any shape. Just make sure the cookies are roughly the same size for even baking.
Gluten-Free Pizookie Option
If you’re craving something warm and gooey instead of crisp, press the dough into a small cast-iron skillet and bake for 15-18 minutes. Top with ice cream and a drizzle of caramel. It’s not a mummy, but it’s delicious.
Serving & Storage Suggestions
These cookies are best served at room temperature. The royal icing should be fully set—firm to the touch but not rock hard. I like to arrange them on a platter with a few fake spiderwebs and plastic spiders for a fun Halloween display.
They pair beautifully with a warm drink. I love serving them alongside a creamy pumpkin cold foam latte for a cozy fall afternoon treat. The spiced pumpkin flavor balances the sweet, buttery cookie perfectly.
For storage, place the decorated cookies in an airtight container at room temperature. Layer them between sheets of parchment paper so the icing doesn’t stick together. They’ll stay fresh for up to 5 days—if they last that long.
You can also freeze the undecorated cookies for up to 3 months. Wrap them tightly in plastic wrap, then place them in a freezer-safe bag. When you’re ready to decorate, thaw them at room temperature for about an hour, then ice as directed. The texture is exactly the same as fresh-baked.
If you’re making these for a party, I recommend baking the cookies a day ahead and decorating them the morning of. The royal icing needs a couple of hours to set completely, so plan accordingly. I’ve also prepped the dough up to 2 days in advance—just let it sit at room temperature for 10 minutes before rolling.
Flavors actually improve after a day or two. The cookies soften slightly, and the icing melds with the cookie base. They’re like little flavor time capsules.
Nutritional Information & Benefits
Let’s be real—these are a treat, not a health food. But here’s the estimated breakdown per cookie (based on a 3-inch round cookie with royal icing and 2 candy eyes):
| Nutrient | Amount per Cookie |
|---|---|
| Calories | 185 |
| Total Fat | 8g |
| Saturated Fat | 5g |
| Cholesterol | 30mg |
| Sodium | 65mg |
| Total Carbohydrates | 27g |
| Sugars | 16g |
| Protein | 2g |
The butter provides a small amount of vitamin A, and the egg adds a touch of protein. But honestly? These cookies are about joy, not nutrition. They’re a once-a-year treat that brings people together. If you want a healthier option, try the easy no-bake salted caramel protein balls for a quick, wholesome snack.
For those with dietary concerns: this recipe contains gluten, dairy, and eggs. The vegan and gluten-free variations above address those needs. The candy eyes are usually gelatin-free, but check the label if you’re serving vegetarians.
Conclusion
These easy Halloween mummy sugar cookies are everything I want in a holiday recipe—simple, fun, and absolutely delicious. They don’t require a culinary degree or a pantry full of specialty ingredients. Just a little patience, a sense of humor, and a willingness to get frosting on your fingers.
I love that each cookie comes out a little different. Some mummies look sleepy, some look surprised, and some look like they’ve seen a ghost (which is fitting, honestly). That imperfection is what makes them special. They’re not factory-made. They’re made by you.
So go ahead—grab your kids, your friends, or just a quiet evening to yourself. Make a mess. Laugh at your crooked stripes. And when you bite into that soft, buttery cookie with the sweet icing and those googly eyes staring back at you, remember that this is what Halloween is really about. Not perfection. Just a little bit of fun.
If you make these, I’d love to hear about it. Leave a comment below and tell me how your mummies turned out. Did they look like adorable little bandaged buddies, or did they look like they’d been through a blender? Either way, I bet they were delicious.
Happy Halloween, friend. Go bake something that makes you smile.
Frequently Asked Questions
Can I use store-bought cookie dough instead?
You can, but the texture won’t be the same. Homemade dough has a buttery tenderness that pre-made doughs just can’t match. If you’re short on time, look for a refrigerated sugar cookie dough that doesn’t have artificial flavors. Roll it out and cut it the same way.
My royal icing is too runny. What do I do?
Add more sifted powdered sugar, one tablespoon at a time, until it thickens. If it’s too thick, add water a few drops at a time. The right consistency should slowly drip off a spoon but hold a slight ribbon on the surface.
How do I keep the candy eyes from falling off?
Press them into the icing while it’s still wet. If the icing has started to set, pipe a tiny dot of fresh icing where you want the eye to go, then press the candy eye into that dot. Let it dry completely before moving the cookies.
Can I freeze the decorated cookies?
I don’t recommend it. The royal icing can crack or become sticky after thawing. Freeze the undecorated cookies instead, then ice them after they thaw. The texture stays perfect.
My cookies spread too much. What went wrong?
Either the dough wasn’t chilled long enough, or the butter was too soft. Make sure your butter is softened but not melted. If your kitchen is warm, pop the cut cookies back in the fridge for 10 minutes before baking. That extra chill helps them hold their shape.
Pin This Recipe!

Best Easy Halloween Mummy Sugar Cookies

These easy Halloween mummy sugar cookies are buttery, tender, and fun to decorate with royal icing and candy eyes. Perfect for Halloween parties, classroom treats, or a cozy fall baking project.
- Prep Time: 45 minutes
- Cook Time: 10-12 minutes per batch
- Total Time: 1 hour 30 minutes (including chilling and decorating time)
- Yield: 24 cookies 1x
- Category: Dessert
- Cuisine: American
Ingredients
- 1 cup (226g) unsalted butter, softened
- 1 cup (200g) granulated sugar
- 1 large egg, room temperature
- 1 teaspoon vanilla extract
- 2 ½ cups (312g) all-purpose flour
- ½ teaspoon baking powder
- ¼ teaspoon salt
- 2 cups (240g) powdered sugar, sifted
- 2 tablespoons meringue powder
- 3–4 tablespoons warm water
- ½ teaspoon vanilla extract (optional)
- Candy eyeballs (10mm size)
- Black decorating gel (optional)
Instructions
- In a large bowl, beat softened butter and granulated sugar together on medium speed until light and fluffy, about 3 minutes. Scrape down the sides halfway through.
- Add egg and vanilla extract. Beat until combined, about 30 seconds. Do not overmix.
- In a separate bowl, whisk together flour, baking powder, and salt. Gradually add dry ingredients to wet mixture, mixing on low speed until dough comes together. If crumbly, bring together with your hands.
- Flatten dough into a 1-inch thick disc, wrap tightly in plastic wrap, and refrigerate for at least 30 minutes (up to 2 days).
- Preheat oven to 350°F (175°C). Line baking sheets with parchment paper.
- On a lightly floured surface, roll chilled dough to about ¼ inch thick. Use a round cookie cutter (2.5 to 3 inches) to cut out cookies. Re-roll scraps once.
- Place cookies 2 inches apart on prepared baking sheets. Bake for 10-12 minutes, until edges are just barely golden. Centers should look slightly underdone.
- Let cookies cool on baking sheet for 5 minutes, then transfer to a wire rack to cool completely.
- For royal icing: Whisk together sifted powdered sugar and meringue powder. Add 3 tablespoons warm water and vanilla extract. Whisk until smooth. Add more water if needed until consistency slowly drips off whisk but holds a ribbon for a few seconds.
- Transfer icing to a piping bag fitted with a small round tip (or snip corner of a zip-top bag).
- Pipe horizontal lines of icing across each cooled cookie, leaving small gaps for eyes. While icing is wet, press two candy eyeballs into gaps. Let dry completely, 1-2 hours.
- Optional: Use black decorating gel to add tiny mouths below eyes once white icing is dry.
Notes
Don’t skip chilling the dough—it prevents spreading. Bake one sheet at a time for even results. Test icing consistency before piping. Work in an assembly line: pipe stripes on all cookies first, then add eyes. Cookies can be stored in an airtight container at room temperature for up to 5 days. Undecorated cookies can be frozen for up to 3 months.
Nutrition
- Serving Size: 1 cookie
- Calories: 185
- Sugar: 16
- Sodium: 65
- Fat: 8
- Saturated Fat: 5
- Carbohydrates: 27
- Protein: 2
Keywords: Halloween cookies, mummy cookies, sugar cookies, easy Halloween treats, royal icing cookies, fall baking, spooky cookies


