My sister called me a traitor. Not because I’d forgotten her birthday—which I had, briefly—but because I told her I was making a Neapolitan layer cake instead of her usual chocolate-fudge situation. She didn’t trust the combination. Three flavors fighting for attention on one plate? Sounded like a dessert identity crisis waiting to happen. Honestly, I wasn’t sure she was wrong. I’d seen too many striped cakes that looked impressive but tasted like vanilla had bullied chocolate into a corner.
The first attempt was a disaster. The strawberry layer came out dry, the chocolate buttercream was too gritty, and the whole thing leaned to one side like it was trying to escape the plate. My husband ate three slices anyway—bless his forgiving palate—but I knew this cake had more potential. So I went back to the drawing board. I swapped cake flour for all-purpose, adjusted the buttercream ratios, and started weighing my ingredients like a scientist in an apron.
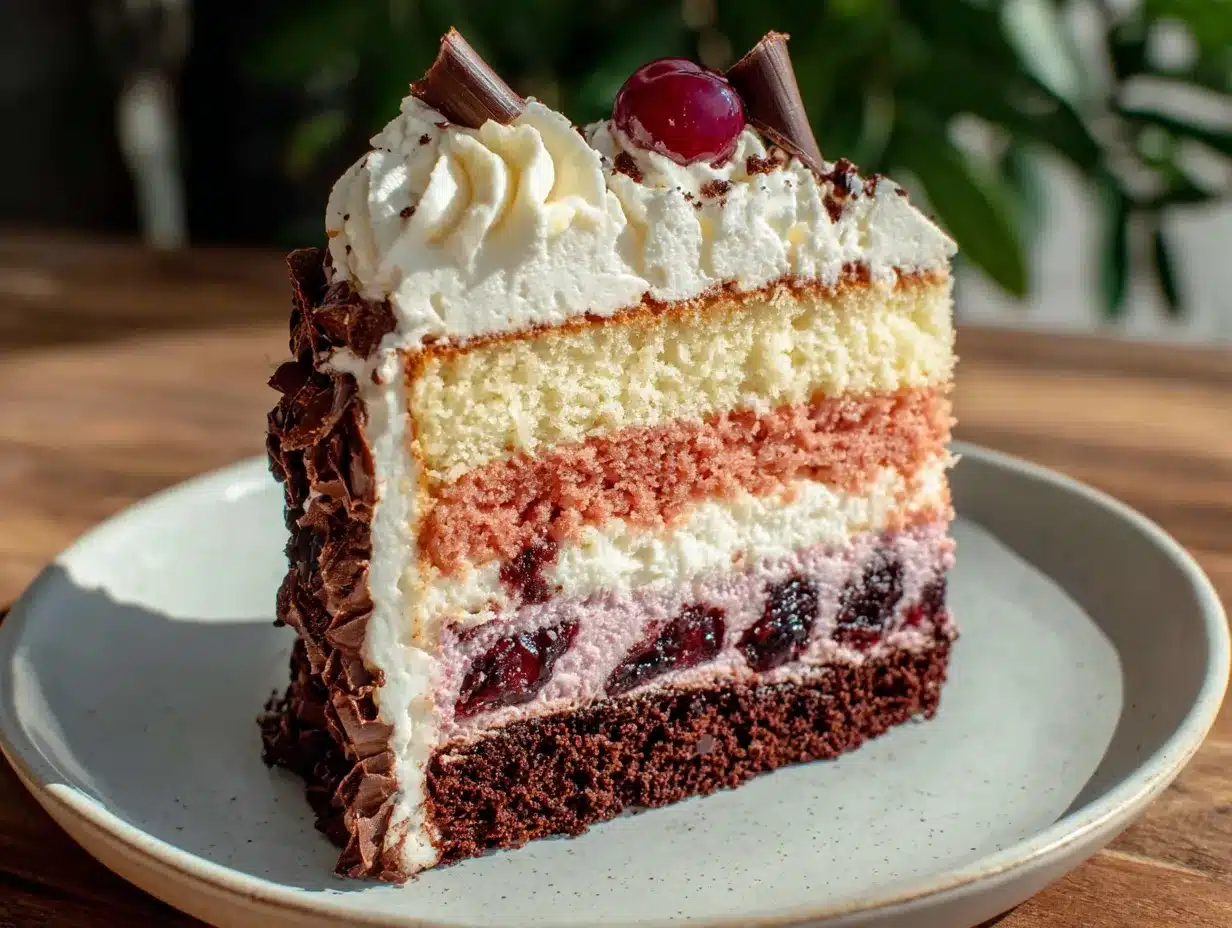
The second cake was different. When I cut into it at my sister’s actual birthday dinner, she went quiet. Then she asked for the recipe. That’s when I knew I’d cracked it. This Neapolitan cake isn’t just three flavors stacked together—it’s a conversation between vanilla, strawberry, and chocolate that actually works. Each layer holds its own without overpowering the others. And that triple buttercream situation? Let’s just say I’ve been asked to bring it to four different gatherings since. I think that counts as proof.
Why You’ll Love This Recipe
This isn’t just another pretty layer cake. After testing this recipe seven times (yes, seven), I can tell you exactly why it works and why you’ll want to make it again.
- Three Distinct Flavors, One Perfect Cake : Each layer is individually flavored and baked separately, so you get authentic vanilla, real strawberry, and rich chocolate in every slice. No shortcuts, no artificial extracts trying to do the heavy lifting.
- Silky, Stable Buttercream : I spent weeks perfecting the buttercream ratios. Each frosting is flavored to complement its matching layer while being sturdy enough for stacking and decorating. No sliding layers, no greasy texture.
- Beginner-Friendly Techniques : Despite looking like a bakery showstopper, this cake uses straightforward methods. If you can cream butter and sugar, you can build this cake. I’ve taught three friends to make it, and all of them succeeded on their first try.
- Make-Ahead Friendly : The cake layers freeze beautifully for up to two months, and the buttercream keeps in the fridge for a week. You can spread the work across several days without sacrificing quality.
- Customizable Without Compromise : Want to swap the strawberry for raspberry? Go ahead. Prefer milk chocolate over dark? Easy switch. The structure stays solid while the flavors adapt to your preferences.
This cake has become my go-to for birthdays, anniversaries, and any occasion that calls for something special. It’s the kind of dessert that makes people close their eyes on the first bite and open them looking for the recipe. And honestly? That never gets old.
What Ingredients You Will Need
This recipe uses simple, pantry-friendly ingredients to create something genuinely impressive. Each component plays a specific role in building flavor and structure, and I’ve included notes on what to look for when shopping.
For the Vanilla Cake Layer
- 1 ½ cups (188g) all-purpose flour – Spoon and level for accuracy; don’t scoop directly from the bag.
- 1 cup (200g) granulated sugar – Standard white sugar works best here.
- ½ cup (113g) unsalted butter, softened – Let it sit at room temperature for about an hour. Cold butter won’t cream properly.
- 2 large eggs, room temperature – If you forget to set them out, place them in warm water for 5 minutes.
- ½ cup (120ml) whole milk, room temperature – Whole milk gives the best texture, but 2% works in a pinch.
- 1 ½ teaspoons vanilla extract – Use pure vanilla extract, not imitation. The flavor difference is noticeable.
- 1 ½ teaspoons baking powder – Check the expiration date; old baking powder won’t give proper rise.
- ¼ teaspoon salt – Fine sea salt dissolves more evenly than coarse.
For the Strawberry Cake Layer
- 1 ½ cups (188g) all-purpose flour
- 1 cup (200g) granulated sugar
- ½ cup (113g) unsalted butter, softened
- 2 large eggs, room temperature
- ⅓ cup (80ml) whole milk, room temperature
- ⅓ cup (80g) strawberry puree – Puree fresh or frozen strawberries and strain out the seeds for a smoother texture. I prefer using frozen strawberries when fresh aren’t in season—they’re often sweeter and more flavorful.
- 1 ½ teaspoons baking powder
- ¼ teaspoon salt
- Pink or red gel food coloring (optional) – Adds visual appeal but doesn’t affect flavor.
For the Chocolate Cake Layer
- 1 ¼ cups (156g) all-purpose flour
- ⅓ cup (28g) unsweetened cocoa powder – I recommend Ghirardelli or Valrhona for deep chocolate flavor.
- 1 cup (200g) granulated sugar
- ½ cup (113g) unsalted butter, softened
- 2 large eggs, room temperature
- ½ cup (120ml) whole milk, room temperature
- 1 teaspoon vanilla extract
- 1 ½ teaspoons baking powder
- ¼ teaspoon salt
For the Vanilla Buttercream
- 1 cup (226g) unsalted butter, softened – European-style butter like Plugrà gives a creamier texture.
- 3 cups (360g) powdered sugar, sifted – Sifting prevents lumps and gives a silky finish.
- 2 tablespoons heavy cream – Adjust for desired consistency.
- 1 ½ teaspoons vanilla extract
- Pinch of salt
For the Strawberry Buttercream
- 1 cup (226g) unsalted butter, softened
- 3 cups (360g) powdered sugar, sifted
- 2 tablespoons heavy cream
- 3 tablespoons strawberry puree, strained – Reduce the puree on the stovetop for 5 minutes to concentrate flavor and remove excess water.
- Pinch of salt
- Pink or red gel food coloring (optional)
For the Chocolate Buttercream
- 1 cup (226g) unsalted butter, softened
- 3 cups (360g) powdered sugar, sifted
- ¼ cup (21g) unsweetened cocoa powder, sifted
- 2 tablespoons heavy cream
- 1 teaspoon vanilla extract
- Pinch of salt
For Assembly
- Chocolate shavings, fresh strawberries, or sprinkles for garnish (optional)
Equipment Needed
You don’t need a professional bakery setup to make this cake, but having the right tools makes the process smoother and the results more consistent.
- Three 8-inch round cake pans – If you only have two pans, bake the vanilla and chocolate layers first, then wash and reuse a pan for the strawberry layer. Let pans cool completely between batches.
- Stand mixer or hand mixer – A stand mixer makes creaming butter and sugar effortless, but a hand mixer works just fine. I used a hand mixer for years before upgrading.
- Parchment paper rounds – Cut circles to line the bottom of each pan. This prevents sticking and makes removal easy.
- Cooling racks – Essential for even cooling. If you don’t have them, inverted cake pans work in a pinch.
- Offset spatula – Worth the investment for smooth frosting application. A butter knife works but requires more patience.
- Cake turntable (optional) – Makes frosting much easier, but you can absolutely frost on a plate by rotating it manually.
- Kitchen scale – I strongly recommend weighing your flour and sugar. It’s the single biggest factor in consistent results.
- Fine-mesh strainer – For straining strawberry puree and sifting powdered sugar and cocoa powder.
Preparation Method
Take your time with each step. Rushing leads to dense layers and lumpy buttercream. Trust me—I’ve learned this the hard way more than once.
Step 1: Prepare Your Pans and Preheat
Preheat your oven to 350°F (175°C). Grease three 8-inch round cake pans with butter or non-stick spray, line the bottoms with parchment paper rounds, then lightly grease the parchment. This double-layer approach guarantees your cakes release cleanly every time.
Step 2: Make the Vanilla Cake Batter
In a medium bowl, whisk together the flour, baking powder, and salt. In a large bowl or the bowl of a stand mixer, beat the softened butter and sugar together on medium speed until light and fluffy, about 3 minutes. Scrape down the sides of the bowl. Add the eggs one at a time, beating well after each addition. Mix in the vanilla extract.
With the mixer on low speed, add the dry ingredients in three additions, alternating with the milk in two additions. Start and end with the dry ingredients. Mix just until combined—overmixing develops gluten and makes the cake tough. The batter should be thick and smooth.
Pour the batter into one of the prepared pans and spread it evenly with an offset spatula.
Step 3: Make the Strawberry Cake Batter
In a medium bowl, whisk together the flour, baking powder, and salt. In a large bowl, beat the butter and sugar until light and fluffy, about 3 minutes. Add the eggs one at a time, beating well after each addition.
In a small bowl, combine the milk and strawberry puree. With the mixer on low speed, add the dry ingredients in three additions, alternating with the milk-puree mixture in two additions. Mix until just combined. Add food coloring if desired and fold gently until evenly distributed.
Pour the batter into the second prepared pan and spread evenly.
Step 4: Make the Chocolate Cake Batter
In a medium bowl, whisk together the flour, cocoa powder, baking powder, and salt. In a large bowl, beat the butter and sugar until light and fluffy, about 3 minutes. Add the eggs one at a time, beating well after each addition. Mix in the vanilla extract.
With the mixer on low speed, add the dry ingredients in three additions, alternating with the milk in two additions. Mix until just combined. The batter will be slightly thicker than the vanilla and strawberry batters.
Pour the batter into the third prepared pan and spread evenly.
Step 5: Bake the Layers
Bake all three layers at 350°F (175°C) for 22-25 minutes, or until a toothpick inserted into the center of each cake comes out clean or with a few moist crumbs. The chocolate layer may take a minute or two longer than the others.
Let the cakes cool in their pans for 10 minutes, then run a knife around the edges and turn them out onto cooling racks. Remove the parchment paper and let the layers cool completely—at least 1 hour. Warm cake will melt your buttercream into a puddle.
Step 6: Make the Vanilla Buttercream
In a large bowl, beat the softened butter on medium speed until smooth and creamy, about 2 minutes. Add the sifted powdered sugar one cup at a time, beating on low speed until incorporated. Add the heavy cream, vanilla extract, and salt, then increase the speed to medium-high and beat for 3-4 minutes until light and fluffy. The buttercream should be smooth and spreadable but firm enough to hold its shape.
Step 7: Make the Strawberry Buttercream
Beat the softened butter until smooth. Add the sifted powdered sugar one cup at a time, beating on low speed. Add the heavy cream, strained strawberry puree, and salt. If using, add a few drops of pink or red gel food coloring. Beat on medium-high speed for 3-4 minutes until light and fluffy. The puree will slightly loosen the buttercream, so don’t be alarmed if it seems softer than the vanilla version.
Step 8: Make the Chocolate Buttercream
Beat the softened butter until smooth. In a separate bowl, whisk together the sifted powdered sugar and sifted cocoa powder. Add this mixture to the butter one cup at a time, beating on low speed. Add the heavy cream, vanilla extract, and salt. Beat on medium-high speed for 3-4 minutes until light and fluffy. Scrape down the sides and bottom of the bowl to ensure even mixing.
Step 9: Level the Cake Layers
Once the cakes are completely cool, use a serrated knife to level the tops if they domed during baking. Hold the knife horizontally and saw gently across the top of each layer, removing just enough to create a flat surface. Save the scraps for snacking or making cake pops.
Step 10: Assemble the Cake
Place the vanilla layer on your cake board or serving plate. Spread a generous layer of vanilla buttercream on top, about ½ cup. Spread it evenly to the edges.
Place the strawberry layer on top of the vanilla. Spread a generous layer of strawberry buttercream on top, again about ½ cup.
Place the chocolate layer on top, cut side down so the top is smooth. Apply a thin crumb coat of chocolate buttercream over the entire cake—just enough to seal in the crumbs. Refrigerate for 30 minutes to set the crumb coat.
After the crumb coat is firm, apply the final coat of chocolate buttercream. Use an offset spatula to spread it evenly, rotating the cake as you go. For a smooth finish, dip your spatula in hot water, wipe it dry, and run it over the frosting.
Step 11: Decorate and Serve
Garnish with chocolate shavings, fresh strawberries, or sprinkles if desired. For best results, let the cake sit at room temperature for 30 minutes before slicing. Use a sharp knife dipped in hot water and wiped clean between cuts for clean slices.
Cooking Tips & Techniques
After making this cake more times than I care to count, I’ve collected a few tricks that make a real difference.
Temperature is everything. Butter that’s too cold won’t cream properly, and eggs straight from the fridge can cause your batter to curdle. Set everything out on the counter at least an hour before you start baking. If you’re short on time, cut the butter into small cubes and let it sit for 20 minutes, and place whole eggs in a bowl of warm water for 5 minutes.
Weigh your ingredients. I know it’s an extra step, but flour measurement is where most home bakers go wrong. Scooping flour directly from the bag can add up to 25% more flour than the recipe calls for, resulting in dry, dense cakes. A kitchen scale costs about $15 and eliminates the guesswork entirely.
Don’t overmix the batter. Once you add the flour, mix just until you can’t see any dry streaks. Overmixing develops gluten, which makes cakes tough and rubbery. The same goes for the buttercream—once it’s light and fluffy, stop beating.
Chill between coats. The crumb coat is not optional. It seals in the crumbs and gives you a clean canvas for the final layer of frosting. I learned this lesson when I tried to skip it once and ended up with crumbs all through my beautiful chocolate buttercream. Never again.
Use a serrated knife for leveling. A straight knife compresses the cake instead of cutting through it. A serrated knife saws gently through the crumb, giving you a flat, even surface without crushing the delicate texture.
Room temperature cake slices better. If you refrigerate the finished cake, let it sit out for 30-40 minutes before slicing. Cold buttercream is stiff and will drag through the cake layers, creating messy slices. Room temperature buttercream cuts cleanly and tastes silkier.
Variations & Adaptations
This cake is surprisingly adaptable. Here are some variations I’ve tested and loved.
Berry Swap : Replace the strawberry puree with raspberry, blueberry, or mixed berry puree. Each berry gives a slightly different flavor and color. Raspberry creates a more tart contrast to the sweet vanilla and rich chocolate, while blueberry adds a milder, earthier sweetness.
Chocolate Intensity : For a darker chocolate flavor, replace the unsweetened cocoa powder with Dutch-process cocoa. The cake will be darker and have a more mellow, sophisticated chocolate taste. Alternatively, add 2 ounces of melted dark chocolate to the chocolate buttercream for extra richness.
Gluten-Free Option : Substitute the all-purpose flour with a 1:1 gluten-free baking flour blend that contains xanthan gum. I’ve tested this with Bob’s Red Mill 1:1 Baking Flour and the texture was nearly identical to the original. No other adjustments needed.
Dairy-Free Adaptation : Use vegan butter sticks (not tub margarine) and substitute the milk with almond or oat milk. For the buttercream, vegan butter works surprisingly well—just make sure it’s at room temperature before beating. The texture will be slightly softer, so refrigerate the finished cake for 30 minutes before serving.
Mini Cake Version : Divide the batter among three 6-inch pans and reduce the baking time to 18-20 minutes. This makes a smaller, two-layer cake that’s perfect for a smaller gathering or a practice run before the big event.
Serving & Storage Suggestions
This cake is best served at room temperature, which brings out the full flavor of the buttercream and keeps the cake layers tender. Let it sit out for 30 minutes before slicing if it’s been refrigerated.
For a stunning presentation, arrange fresh strawberries and chocolate curls on top of the cake. A dusting of powdered sugar or cocoa powder adds a professional touch. If you’re serving this for a special occasion, consider adding a few edible flowers for color.
Leftover cake keeps well in an airtight container in the refrigerator for up to 5 days. The flavors actually meld together over time, so day-old cake is often even better than fresh. Bring slices to room temperature before serving for the best texture.
To freeze, wrap individual slices or the whole cake (without garnish) tightly in plastic wrap, then in aluminum foil. Freeze for up to 3 months. Thaw overnight in the refrigerator, then bring to room temperature before serving. I’ve frozen whole cakes for birthday parties and they tasted just as good as fresh.
If you’re making this cake ahead of time for an event, I recommend baking the layers up to two days in advance and storing them wrapped tightly at room temperature. Make the buttercream up to a week ahead and refrigerate it. On the day of serving, bring the buttercream to room temperature, re-whip it briefly, and assemble the cake. This approach spreads the work across several days without any last-minute stress.
Nutritional Information & Benefits
This is a celebration cake, not a health food, and I think it’s important to be honest about that. One slice (based on 12 servings) contains approximately 580 calories, 32g fat, 68g carbohydrates, and 6g protein.
That said, this cake does use real ingredients—butter, eggs, fresh strawberry puree—rather than artificial flavors and preservatives. The strawberry layer provides a small amount of vitamin C from the real fruit, and the cocoa powder in the chocolate layer contains antioxidants called flavonoids. These aren’t reasons to eat the whole cake, but they’re nice to know.
For those with dietary concerns, this recipe contains dairy, eggs, and gluten. The variations section above includes dairy-free and gluten-free adaptations that have been tested and work well. If you’re watching your sugar intake, you can reduce the sugar in each cake layer by ¼ cup without significantly affecting the texture, though the buttercream needs the full amount for proper structure.
Personally, I believe in enjoying treats in moderation. This cake is meant for celebrations and special moments—the kind where you savor every bite without guilt. Life is too short for bad cake, and this one is worth every calorie.
Conclusion
This Neapolitan layer cake with three buttercreams is the kind of recipe that becomes a tradition. It’s the cake my sister now requests every year for her birthday, the one I bring to potlucks when I want to impress without showing off, and the one that makes people say, “You made this?” with genuine disbelief.
What I love most about this recipe is how it rewards patience. Each step matters—from bringing ingredients to room temperature to chilling the crumb coat—but none of them are difficult. It’s a project, yes, but a deeply satisfying one. And when you cut into that first slice and see the three distinct layers, you’ll understand why it’s worth every minute.
I’d love to hear how yours turns out. Did you try a variation? Did someone request it for their next birthday? Drop a comment below and let me know. And if you’re looking for more layer cake inspiration, you might enjoy this decadent Neapolitan birthday cake with chocolate fudge filling or these cozy pumpkin spice bagels with maple cream cheese for a completely different kind of treat.
Happy baking, friends. May your layers be level and your buttercream be smooth.
Frequently Asked Questions
Can I use cake flour instead of all-purpose flour?
Yes, you can substitute cake flour for all-purpose flour in this recipe. Use 1 ½ cups plus 2 tablespoons of cake flour for each layer instead of the 1 ½ cups of all-purpose flour called for. Cake flour has lower protein content, which results in a softer, more tender crumb. The cake will be slightly more delicate, so handle the layers gently during assembly.
Why did my strawberry cake layer turn out dense?
A dense strawberry layer usually means the strawberry puree added too much moisture to the batter, or the batter was overmixed. Make sure to strain your puree to remove excess liquid and seeds, and mix the batter just until the dry ingredients are incorporated. If your puree is particularly watery, you can reduce it on the stovetop for 5-7 minutes to concentrate the flavor and remove some of the water content.
Can I make this cake in advance for a party?
Absolutely. Bake the cake layers up to two days ahead and store them tightly wrapped at room temperature. Make the buttercream up to a week ahead and refrigerate it. On the day of your event, bring the buttercream to room temperature, re-whip it for a minute to restore its texture, and assemble the cake. The finished cake can sit at room temperature for up to 6 hours if your kitchen isn’t too warm.
How do I get clean slices when cutting this cake?
For clean slices, use a long, sharp knife and dip it in hot water between each cut. Wipe the knife dry with a clean towel before slicing. Chill the cake for 20-30 minutes before cutting if your buttercream is very soft. Cut slowly with a gentle sawing motion rather than pressing down, which can squish the layers together.
Can I use frozen strawberries for the puree?
Yes, frozen strawberries work beautifully for this recipe. Thaw them completely, then puree and strain as you would fresh strawberries. Frozen strawberries are often sweeter and more flavorful than out-of-season fresh berries, so they can actually produce a better-tasting cake layer. Just make sure to drain any excess liquid after thawing to avoid adding too much moisture to the batter.
Pin This Recipe!
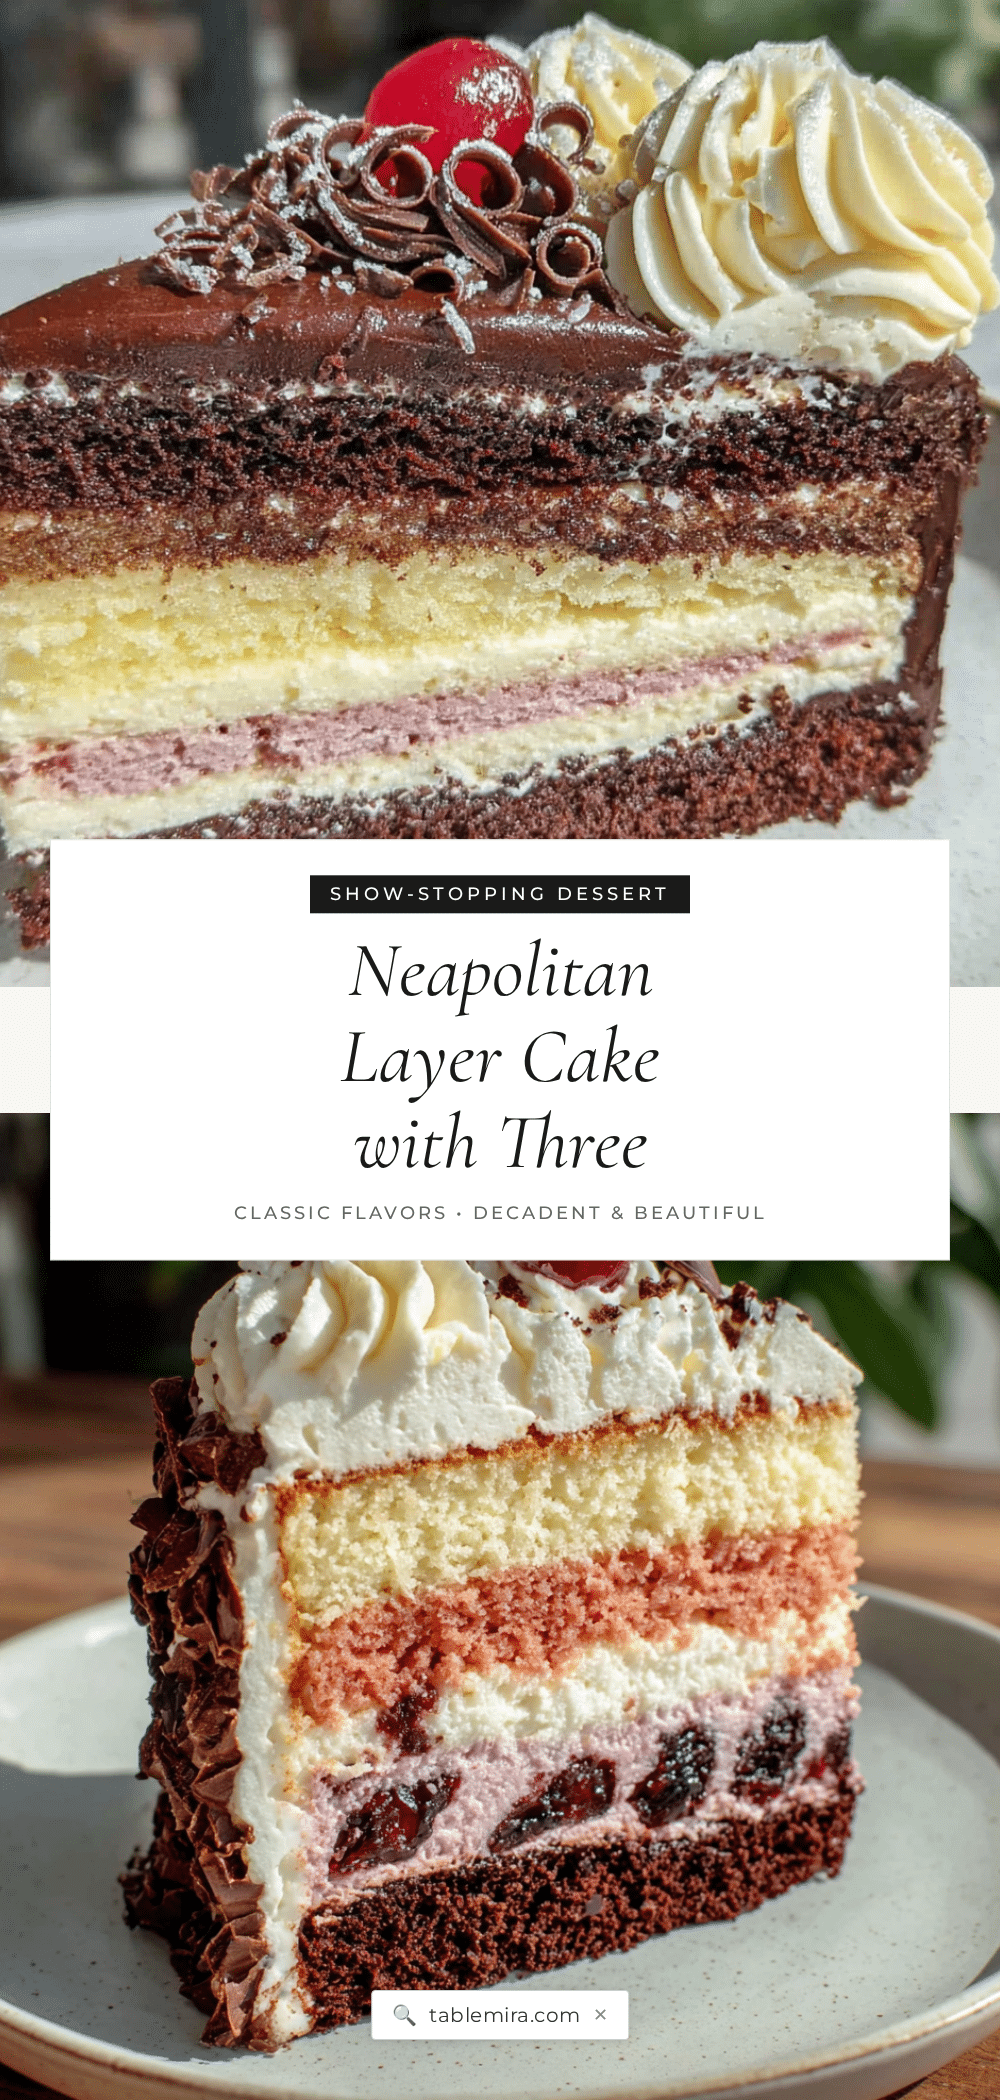
The Perfect Neapolitan Layer Cake with Three Buttercreams
A stunning Neapolitan layer cake featuring three distinct flavors—vanilla, strawberry, and chocolate—each with its own matching buttercream. This showstopper is perfect for birthdays and special occasions, with silky, stable frostings and beginner-friendly techniques.
- Prep Time: 45 minutes
- Cook Time: 25 minutes
- Total Time: 1 hour 10 minutes (plus cooling and chilling)
- Yield: 12 servings 1x
- Category: Dessert
- Cuisine: American
Ingredients
- 1 ½ cups (188g) all-purpose flour
- 1 cup (200g) granulated sugar
- ½ cup (113g) unsalted butter, softened
- 2 large eggs, room temperature
- ½ cup (120ml) whole milk, room temperature
- 1 ½ teaspoons vanilla extract
- 1 ½ teaspoons baking powder
- ¼ teaspoon salt
- 1 ½ cups (188g) all-purpose flour
- 1 cup (200g) granulated sugar
- ½ cup (113g) unsalted butter, softened
- 2 large eggs, room temperature
- ⅓ cup (80ml) whole milk, room temperature
- ⅓ cup (80g) strawberry puree
- 1 ½ teaspoons baking powder
- ¼ teaspoon salt
- Pink or red gel food coloring (optional)
- 1 ¼ cups (156g) all-purpose flour
- ⅓ cup (28g) unsweetened cocoa powder
- 1 cup (200g) granulated sugar
- ½ cup (113g) unsalted butter, softened
- 2 large eggs, room temperature
- ½ cup (120ml) whole milk, room temperature
- 1 teaspoon vanilla extract
- 1 ½ teaspoons baking powder
- ¼ teaspoon salt
- 1 cup (226g) unsalted butter, softened
- 3 cups (360g) powdered sugar, sifted
- 2 tablespoons heavy cream
- 1 ½ teaspoons vanilla extract
- Pinch of salt
- 1 cup (226g) unsalted butter, softened
- 3 cups (360g) powdered sugar, sifted
- 2 tablespoons heavy cream
- 3 tablespoons strawberry puree, strained
- Pinch of salt
- Pink or red gel food coloring (optional)
- 1 cup (226g) unsalted butter, softened
- 3 cups (360g) powdered sugar, sifted
- ¼ cup (21g) unsweetened cocoa powder, sifted
- 2 tablespoons heavy cream
- 1 teaspoon vanilla extract
- Pinch of salt
- Chocolate shavings, fresh strawberries, or sprinkles for garnish (optional)
Instructions
- Preheat oven to 350°F (175°C). Grease three 8-inch round cake pans, line bottoms with parchment paper, and lightly grease the parchment.
- Make the vanilla cake batter: Whisk together flour, baking powder, and salt. Beat butter and sugar until light and fluffy, about 3 minutes. Add eggs one at a time, then vanilla. Add dry ingredients in three additions alternating with milk, starting and ending with dry. Mix until just combined. Pour into one prepared pan.
- Make the strawberry cake batter: Whisk together flour, baking powder, and salt. Beat butter and sugar until fluffy. Add eggs one at a time. Combine milk and strawberry puree. Add dry ingredients in three additions alternating with milk-puree mixture. Mix until just combined. Add food coloring if desired. Pour into second pan.
- Make the chocolate cake batter: Whisk together flour, cocoa powder, baking powder, and salt. Beat butter and sugar until fluffy. Add eggs one at a time, then vanilla. Add dry ingredients in three additions alternating with milk. Mix until just combined. Pour into third pan.
- Bake all layers at 350°F (175°C) for 22-25 minutes, until a toothpick comes out clean. Cool in pans 10 minutes, then turn out onto racks. Remove parchment and cool completely (at least 1 hour).
- Make the vanilla buttercream: Beat butter until smooth. Add sifted powdered sugar one cup at a time. Add heavy cream, vanilla, and salt. Beat on medium-high 3-4 minutes until light and fluffy.
- Make the strawberry buttercream: Beat butter until smooth. Add sifted powdered sugar one cup at a time. Add heavy cream, strawberry puree, salt, and food coloring if using. Beat on medium-high 3-4 minutes until fluffy.
- Make the chocolate buttercream: Beat butter until smooth. Whisk together sifted powdered sugar and cocoa powder. Add to butter one cup at a time. Add heavy cream, vanilla, and salt. Beat on medium-high 3-4 minutes until fluffy.
- Level cake layers with a serrated knife if domed.
- Assemble: Place vanilla layer on serving plate. Spread about ½ cup vanilla buttercream on top. Top with strawberry layer, spread about ½ cup strawberry buttercream. Top with chocolate layer, cut side down. Apply thin crumb coat of chocolate buttercream over entire cake. Refrigerate 30 minutes.
- After crumb coat is firm, apply final coat of chocolate buttercream. Use offset spatula to spread evenly.
- Garnish with chocolate shavings, fresh strawberries, or sprinkles if desired. Let sit at room temperature 30 minutes before slicing.
Notes
Temperature is everything: bring all ingredients to room temperature. Weigh your ingredients for best results. Don’t overmix the batter. Chill between coats of frosting. Use a serrated knife for leveling. Let cake sit at room temperature before slicing for clean cuts.
Nutrition
- Serving Size: 1 slice
- Calories: 580
- Sugar: 50
- Sodium: 280
- Fat: 32
- Saturated Fat: 19
- Carbohydrates: 68
- Fiber: 2
- Protein: 6
Keywords: Neapolitan cake, layer cake, vanilla cake, strawberry cake, chocolate cake, buttercream, birthday cake, celebration cake