I burned the bottom of my first three attempts at turkey chili. Not a little scorched either—I’m talking blackened, stuck-to-the-pot, had-to-soak-it-overnight burned. The fourth time I got it right, and honestly? That failure taught me more about cooking chili than any recipe ever could. This healthy turkey and white bean chili came out of those mistakes, and now it’s the one-pot meal I make when I want something hearty without spending my whole evening stirring and worrying.
The thing about ground turkey is it’s leaner than beef, which means it dries out fast if you’re not careful. I learned that the hard way, standing over my stove wondering why my chili looked more like gray soup than the rich, comforting bowl I was after. But once I figured out the trick—browning the meat properly, letting the beans break down just a little, and building flavor in layers—this recipe became my go-to for busy weeknights. It’s the kind of dinner that feels like it’s been simmering for hours but actually comes together in under an hour. And that smoky, slightly spicy aroma? It’ll make your whole kitchen smell like a cozy Sunday afternoon, even on a random Tuesday.
Why You’ll Love This Recipe
This isn’t just another chili recipe you’ll bookmark and forget about. This is the one you’ll actually make on repeat, and here’s why.
- One Pot, Minimal Mess : Everything cooks in a single pot or Dutch oven. No draining, no transferring, no extra dishes to wash. Dinner and cleanup in under an hour.
- Healthy Without Sacrificing Flavor : Lean ground turkey keeps it light, while white beans add fiber and protein. You get all the comfort of traditional chili without the heavy feeling afterward.
- Pantry-Friendly Ingredients : Canned beans, diced tomatoes, and basic spices mean you can make this without a special trip to the store. It’s the kind of recipe you can throw together on a whim.
- Perfect for Meal Prep : This chili actually tastes better the next day. Make a big batch on Sunday and enjoy it for lunches all week. It freezes beautifully too.
- Crowd-Pleasing Comfort : My kids devour this, my spice-wary mother-in-law asks for seconds, and my chili-obsessed neighbor said it’s better than his famous beef version. High praise, if you ask me.
What makes this different from every other turkey chili out there? It’s the technique. Most recipes tell you to just dump everything in and simmer, but that’s how you end up with bland, watery chili. I brown the turkey in batches so it actually gets golden and flavorful. I sauté the aromatics until they’re soft and fragrant. And I let the chili simmer just long enough for the beans to release their creamy starch, thickening everything naturally. No cornstarch, no flour, no shortcuts that leave you with thin broth.
What Ingredients You Will Need
This recipe relies on simple, wholesome ingredients that work together to create deep, layered flavor without any fuss. Most of these are probably already in your pantry or fridge.
- Ground Turkey (1 lb / 450g): I prefer 93% lean for the best balance of flavor and moisture. Too lean (like 99%) and the meat can dry out during browning. If you can find ground turkey thigh meat, even better—it stays juicier.
- White Beans (2 cans, 15 oz / 425g each, drained and rinsed): Cannellini or great northern beans work perfectly. They hold their shape during simmering but break down just enough to thicken the chili naturally. I like Goya or Bush’s Best for consistent texture.
- Yellow Onion (1 large, diced): The foundation of flavor. Don’t skip this or try to substitute onion powder—the sweetness from fresh onion is essential.
- Garlic (4 cloves, minced): Fresh garlic makes a difference here. Jarred stuff works in a pinch, but you’ll miss that punchy aroma.
- Poblano Pepper (1 large, diced): Adds mild heat and a slightly smoky, earthy flavor. If you can’t find poblanos, use a green bell pepper plus a pinch of cayenne for heat.
- Jalapeño (1, seeded and minced): For a gentle kick. Leave the seeds in if you want more heat, or skip it entirely for a kid-friendly version.
- Diced Tomatoes (1 can, 14.5 oz / 411g): Fire-roasted if you can find them—they add a subtle smokiness that regular diced tomatoes just don’t have. Muir Glen is my go-to brand.
- Chicken Broth (2 cups / 480ml): Low-sodium is best so you can control the salt level. Vegetable broth works too if you want to keep it vegetarian (just swap the turkey for extra beans).
- Tomato Paste (2 tablespoons): This is the secret to deep, concentrated tomato flavor. Don’t skip it.
- Ground Cumin (1 tablespoon): The backbone of any good chili. Freshness matters—if your cumin is more than a year old, it’s probably lost its punch.
- Chili Powder (1 tablespoon): Use a good-quality blend. I reach for Penzey’s or McCormick for consistent heat and flavor.
- Smoked Paprika (1 teaspoon): This is what gives the chili that subtle campfire taste. Regular paprika won’t give you the same effect.
- Dried Oregano (1 teaspoon): Mexican oregano is ideal if you have it, but Mediterranean oregano works perfectly fine.
- Salt and Black Pepper (to taste): Season as you go, not just at the end. I start with 1 teaspoon salt and adjust.
- Lime Juice (from 1 lime): Added at the very end to brighten everything up. Don’t skip this—it’s the finishing touch that makes all the flavors sing.
- Optional Toppings: Fresh cilantro, diced avocado, shredded cheese, sour cream or Greek yogurt, sliced jalapeños, crushed tortilla chips.
Equipment Needed
You don’t need a fancy kitchen to make this chili. Here’s what you’ll need:
- Large Dutch Oven or Heavy-Bottomed Pot (5-6 quart / 5-6 liter): Cast iron enameled is ideal for even heating, but any heavy pot works. Avoid thin stainless steel—it can scorch the chili before it’s done simmering.
- Wooden Spoon or Silicone Spatula: For stirring and scraping up the browned bits from the bottom of the pot. Those bits are pure flavor.
- Chef’s Knife and Cutting Board: For dicing onions, peppers, and mincing garlic. A sharp knife makes prep go faster and feels safer.
- Measuring Spoons and Cups: For accuracy, especially with spices. Eyeballing cumin can lead to disaster.
- Can Opener: Unless you’re using the pull-tab kind.
- Ladle: For serving. A deep ladle with a lip makes less mess.
I use my Le Creuset Dutch oven for this recipe, and honestly, it’s worth the investment if you cook chili or soup often. But a good heavy-bottomed stockpot from Cuisinart or Lodge will do the job just fine. Just make sure the pot has a tight-fitting lid—you want to trap steam during the simmering phase.
Preparation Method
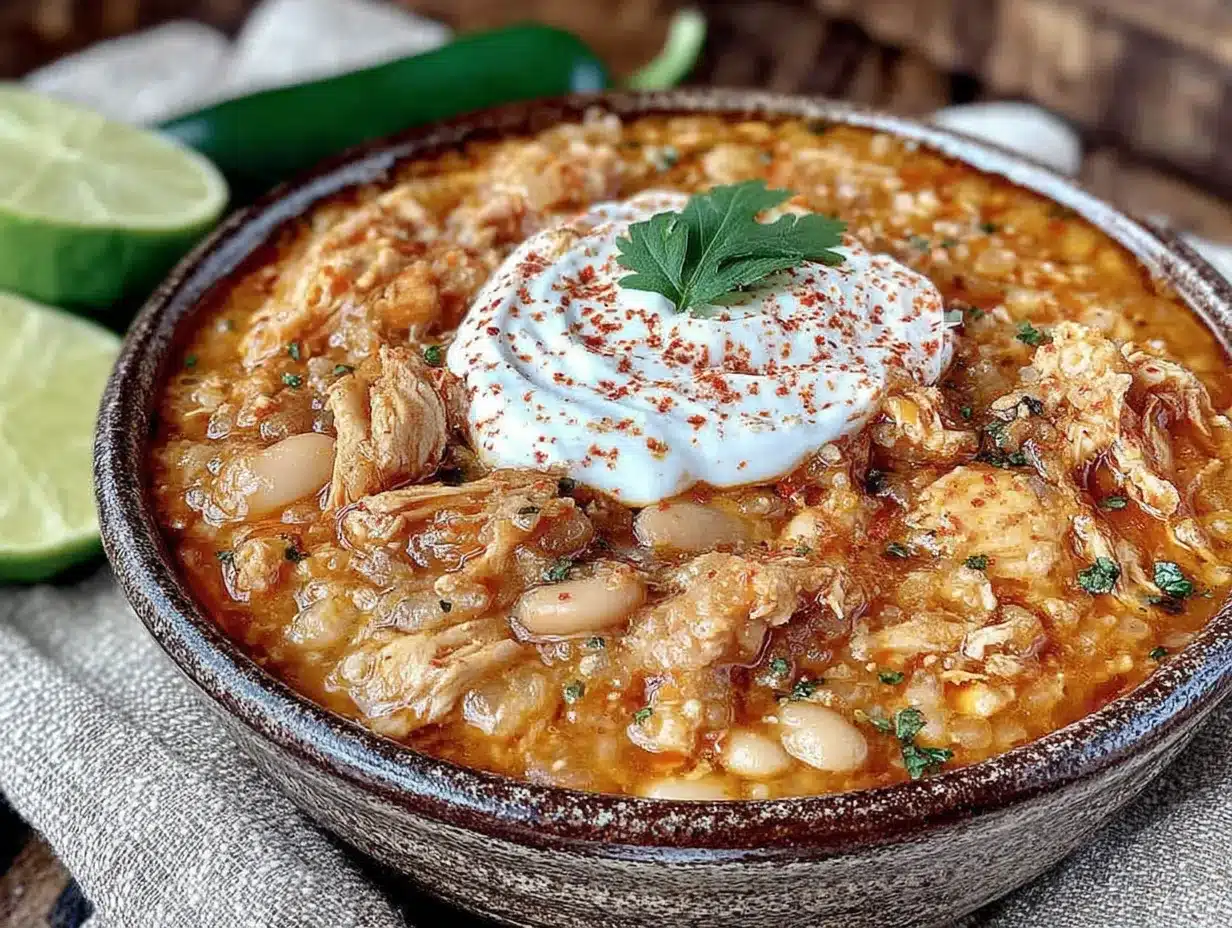
Let’s walk through this step by step. I’ll tell you exactly what to look for at each stage so you know you’re on the right track.
- Prep Your Ingredients First (10 minutes): Dice the onion, poblano, and jalapeño. Mince the garlic. Drain and rinse the white beans. Open the can of tomatoes. Having everything ready before you start cooking makes the process smooth and stress-free. Trust me, you don’t want to be chopping onions while the turkey is burning.
- Brown the Turkey (8-10 minutes): Heat 1 tablespoon of olive oil in your Dutch oven over medium-high heat. Add the ground turkey and let it cook undisturbed for 3-4 minutes—you want a deep golden crust, not gray steamed meat. Break it up with your spoon, then continue cooking until no pink remains. Season with a pinch of salt and pepper. Transfer the cooked turkey to a bowl and set aside. Pro tip: If your turkey releases a lot of liquid, drain it off before continuing to brown. Excess moisture prevents browning.
- Sauté the Aromatics (5-7 minutes): Reduce heat to medium. Add another tablespoon of olive oil to the pot. Toss in the diced onion, poblano, and jalapeño. Cook, stirring occasionally, until the vegetables are soft and the onion is translucent—about 5 minutes. Add the minced garlic and cook for another 30 seconds until fragrant. You should smell the garlic becoming sweet and mellow, not sharp or burnt.
- Build the Flavor Base (2 minutes): Add the tomato paste, cumin, chili powder, smoked paprika, and dried oregano to the pot. Stir constantly for about 1-2 minutes. The tomato paste will darken and the spices will become intensely fragrant. This step is crucial—raw spices taste flat, but toasting them in oil unlocks their full potential. If the paste starts sticking to the bottom, that’s okay. Those browned bits add depth.
- Deglaze the Pot (1 minute): Pour in about half a cup of the chicken broth and scrape the bottom of the pot with your wooden spoon. This lifts all those flavorful browned bits back into the chili. Don’t skip this—it’s where a lot of the flavor lives.
- Combine Everything (5 minutes): Return the browned turkey to the pot. Add the diced tomatoes (with their juices), the remaining chicken broth, and the drained white beans. Stir everything together until well combined. Bring the chili to a gentle boil, then reduce the heat to low.
- Simmer (25-30 minutes): Cover the pot with the lid slightly ajar and let the chili simmer gently. Stir occasionally to prevent sticking. After about 20 minutes, use the back of your spoon to mash some of the beans against the side of the pot. This releases their starch and naturally thickens the chili. The chili should be bubbling lazily, not furiously. A vigorous boil can break down the beans too much and make the texture mushy.
- Finish and Season (5 minutes): Remove the pot from heat. Stir in the fresh lime juice. Taste and adjust salt and pepper—you’ll likely need more salt than you think, especially if you used low-sodium broth. Let the chili rest for 5 minutes before serving. This resting time allows the flavors to meld and the texture to settle.
- Serve: Ladle into bowls and top with your favorite garnishes. I love a dollop of Greek yogurt, a sprinkle of sharp cheddar, fresh cilantro, and a few crunchy tortilla chips on the side.
Cooking Tips & Techniques
I’ve made this chili more times than I can count, and I’ve learned a few things along the way. Here are the tips that make the biggest difference.
Don’t rush the browning. This is the number one mistake people make with ground turkey. They stir it constantly and end up with dry, pale crumbles. Let the meat sit in the hot pan for a few minutes before breaking it up. You want those golden-brown crusty bits—they’re packed with flavor. If your pan is overcrowded, the turkey will steam instead of brown. Work in batches if needed.
Toast your spices. Adding dried spices directly to the liquid without toasting them first is a missed opportunity. That 1-2 minutes of stirring them into the hot oil and tomato paste transforms them from dusty and flat to warm and aromatic. You’ll smell the difference immediately.
Use the bean mashing trick. This is my favorite technique for thickening chili without adding any extra ingredients. After the chili has simmered for about 20 minutes, take a potato masher or the back of a wooden spoon and gently mash about a quarter of the beans against the side of the pot. Stir them back in, and watch the chili transform into a creamy, hearty stew. It’s pure kitchen magic.
Season as you go. Adding all the salt at the end is a recipe for bland chili. Season the turkey lightly, season the vegetables, and season the broth. Layers of seasoning build complexity. Taste the chili before you add the lime juice, then adjust one final time. I usually end up adding about 1.5 teaspoons of salt total, but this varies depending on your broth and beans.
Let it rest. I know you’re hungry, but letting the chili sit off the heat for 5-10 minutes before serving makes a real difference. The flavors settle, the texture evens out, and every spoonful tastes more cohesive. Plus, it gives you time to set out the toppings and pour yourself a glass of something cold.
Variations & Adaptations
This chili is endlessly adaptable. Here are some of my favorite ways to change it up.
Make it vegetarian. Swap the ground turkey for an extra can of white beans or a can of chickpeas. Use vegetable broth instead of chicken broth. The chili will be slightly less hearty but still incredibly satisfying. I’ve also used crumbled tempeh or plant-based ground meat with great results.
Turn up the heat. If you like your chili spicy, leave the seeds in the jalapeño, add an extra jalapeño, or stir in a chopped chipotle pepper in adobo sauce. That smoky heat from chipotles is incredible with the white beans. Start with one and taste before adding more—that stuff is potent.
Swap the protein. Ground chicken works perfectly here. So does shredded rotisserie chicken (just add it during the last 10 minutes of simmering). I’ve even made this with leftover Thanksgiving turkey, and it was honestly some of the best chili I’ve ever had.
Change the beans. No white beans on hand? Try black beans, pinto beans, or even chickpeas. Each will give the chili a slightly different texture and flavor. Black beans make it look more traditional, while chickpeas add a nutty undertone.
Add more vegetables. Diced zucchini, bell peppers, or corn are all excellent additions. Add them when you sauté the aromatics so they soften and meld into the chili. I sometimes sneak in a handful of chopped spinach at the very end—it wilts into the broth and adds extra nutrients without changing the flavor.
Make it creamy. Stir in a splash of heavy cream or half-and-half at the very end for an extra-luxurious texture. A spoonful of cream cheese works too. This turns the chili into something almost like a white chicken chili, and it’s absolutely decadent.
Serving & Storage Suggestions
This chili is wonderful served hot, straight from the pot, but it’s also incredibly versatile for leftovers and meal prep.
Serving temperature and presentation. Serve the chili piping hot in deep bowls. I like to set up a little topping bar so everyone can customize their bowl. Set out bowls of shredded cheddar cheese, diced avocado, fresh cilantro, sliced jalapeños, sour cream or Greek yogurt, lime wedges, and crushed tortilla chips. A sprinkle of everything makes the chili feel like a special meal, even on a Tuesday night.
What to serve with it. A simple green salad with a tangy vinaigrette cuts through the richness of the chili beautifully. Cornbread is a classic pairing—try my pumpkin cream cheese muffins for a sweet-savory twist. Or just serve it with crusty bread for dipping. For a drink, a cold beer or a glass of crisp white wine works wonderfully.
Storage instructions. Let the chili cool completely before transferring to airtight containers. It will keep in the refrigerator for up to 5 days. The flavors actually deepen and meld overnight, so day-two chili is often even better than day-one. I love making a double batch and having lunches sorted for the week.
Freezer instructions. This chili freezes like a dream. Portion it into freezer-safe containers or zip-top bags (lay them flat for easy stacking). It will keep for up to 3 months. Thaw overnight in the refrigerator before reheating. If the chili seems a little thick after thawing, just stir in a splash of broth or water when you reheat it.
Reheating methods. The stovetop is best—reheat the chili in a pot over medium-low heat, stirring occasionally, until bubbling. You can also microwave individual portions in a microwave-safe bowl, covered, for 2-3 minutes. If the chili thickens too much during storage, thin it with a little broth or water. And don’t forget to add a fresh squeeze of lime juice after reheating—it brightens everything back up.
Nutritional Information & Benefits
This chili is not just delicious—it’s genuinely good for you. Here’s a rough breakdown per serving (about 1.5 cups, without toppings):
- Calories: Approximately 380
- Protein: 32g
- Carbohydrates: 35g
- Fiber: 12g
- Fat: 12g
- Saturated Fat: 3g
- Sodium: 680mg (varies based on broth and added salt)
The lean ground turkey provides high-quality protein without the saturated fat of beef. White beans are packed with soluble fiber, which helps with digestion and keeps you feeling full longer. Poblano peppers are rich in vitamin C and capsaicin, which has anti-inflammatory properties. And the tomatoes provide lycopene, a powerful antioxidant. This is the kind of meal that fuels your body while satisfying your soul.
For those with dietary concerns: This recipe is naturally gluten-free and can be made dairy-free by skipping the cheese and sour cream toppings. It’s also low in added sugars. If you’re watching your sodium, use no-salt-added beans and low-sodium broth, and season conservatively with salt.
Conclusion
This healthy turkey and white bean chili has become a staple in my kitchen for good reason. It’s the recipe I turn to when I want something comforting but not heavy, quick but not sacrificed in flavor, and healthy but not boring. It’s proof that you don’t need hours of simmering or a laundry list of exotic ingredients to make a truly satisfying meal.
I love this chili because it’s forgiving. Forget to add the lime juice? It’s still good. Only have one can of beans? It’ll work. Want to throw in leftover vegetables from the fridge? Go for it. It’s a recipe that invites experimentation and rewards confidence. And honestly? That’s the kind of cooking I want to share with you.
I’d love to hear how this chili turns out in your kitchen. Did you add something unexpected? Did your kids ask for seconds? Did you burn it on your first try like I did? Drop a comment below and let me know—your stories and variations might inspire someone else to give it a shot. And if you’re looking for another one-pot wonder, check out my creamy slow cooker Tuscan chicken for a cozy, hands-off dinner that’s just as satisfying.
Happy cooking, friends. You’ve got this.
Frequently Asked Questions
Can I use ground beef instead of turkey?
Absolutely. Swap the ground turkey for an equal amount of lean ground beef (85/15 or 90/10 works well). The cooking method stays exactly the same. Beef will give the chili a richer, more traditional flavor, but it will also be slightly higher in fat and calories.
Can I make this in a slow cooker or Instant Pot?
Yes! For a slow cooker, brown the turkey and sauté the aromatics on the stovetop first, then transfer everything to the slow cooker. Cook on low for 6-8 hours or high for 3-4 hours. For an Instant Pot, use the sauté function for browning and sautéing, then pressure cook on high for 10 minutes with a natural release. The stovetop version gives you the most control over texture, but both work well.
How do I make this chili less spicy for kids?
Skip the jalapeño entirely, and use a green bell pepper instead of the poblano. Bell peppers have no heat at all. You can also reduce or omit the chili powder—it adds warmth more than heat, but sensitive palates might still notice it. Serve with a dollop of sour cream or Greek yogurt, which helps cool down any lingering spice.
Why is my chili watery?
This usually happens for one of three reasons: You didn’t let it simmer long enough for the liquid to reduce, you used too much broth, or you forgot to mash some of the beans. Next time, let the chili simmer uncovered for the last 10 minutes to help it thicken. You can also stir in a tablespoon of tomato paste or a slurry of cornstarch and water if you need a quick fix.
Can I freeze this chili with the toppings already on it?
I wouldn’t recommend it. Freeze the chili on its own, without any toppings. Cheese, sour cream, and avocado don’t freeze well and will become watery or grainy when thawed. Instead, freeze the chili in portions, then add fresh toppings when you reheat it. This way, every bowl tastes just-made.
Pin This Recipe!

Healthy Turkey White Bean Chili: Easy One Pot Meal

This healthy turkey and white bean chili is a one-pot meal that comes together in under an hour. It’s hearty, flavorful, and perfect for busy weeknights, with a smoky, slightly spicy aroma that fills your kitchen.
- Prep Time: 15 minutes
- Cook Time: 30 minutes
- Total Time: 45 minutes
- Yield: 4 servings 1x
- Category: Main Course
- Cuisine: American
Ingredients
- 1 lb (450g) ground turkey (93% lean)
- 2 cans (15 oz / 425g each) white beans (cannellini or great northern), drained and rinsed
- 1 large yellow onion, diced
- 4 cloves garlic, minced
- 1 large poblano pepper, diced
- 1 jalapeño, seeded and minced
- 1 can (14.5 oz / 411g) diced tomatoes (fire-roasted preferred)
- 2 cups (480ml) low-sodium chicken broth
- 2 tablespoons tomato paste
- 1 tablespoon ground cumin
- 1 tablespoon chili powder
- 1 teaspoon smoked paprika
- 1 teaspoon dried oregano (Mexican oregano preferred)
- Salt and black pepper to taste
- Juice of 1 lime
- Optional toppings: fresh cilantro, diced avocado, shredded cheese, sour cream or Greek yogurt, sliced jalapeños, crushed tortilla chips
Instructions
- Prep your ingredients first: Dice the onion, poblano, and jalapeño. Mince the garlic. Drain and rinse the white beans. Open the can of tomatoes.
- Brown the turkey: Heat 1 tablespoon olive oil in a Dutch oven over medium-high heat. Add the ground turkey and let it cook undisturbed for 3-4 minutes until a deep golden crust forms. Break it up and continue cooking until no pink remains. Season with a pinch of salt and pepper. Transfer to a bowl and set aside.
- Sauté the aromatics: Reduce heat to medium. Add another tablespoon of olive oil to the pot. Add the diced onion, poblano, and jalapeño. Cook, stirring occasionally, until soft and onion is translucent (about 5 minutes). Add the minced garlic and cook for 30 seconds until fragrant.
- Build the flavor base: Add the tomato paste, cumin, chili powder, smoked paprika, and dried oregano. Stir constantly for 1-2 minutes until the tomato paste darkens and spices are fragrant.
- Deglaze the pot: Pour in about 1/2 cup of the chicken broth and scrape the bottom of the pot with a wooden spoon to lift browned bits.
- Combine everything: Return the browned turkey to the pot. Add the diced tomatoes (with juices), remaining chicken broth, and drained white beans. Stir to combine. Bring to a gentle boil, then reduce heat to low.
- Simmer: Cover the pot with the lid slightly ajar and let simmer gently for 25-30 minutes, stirring occasionally. After about 20 minutes, mash some of the beans against the side of the pot with the back of a spoon to thicken the chili.
- Finish and season: Remove from heat. Stir in the fresh lime juice. Taste and adjust salt and pepper. Let rest for 5 minutes before serving.
- Serve: Ladle into bowls and top with desired garnishes.
Notes
Don’t rush the browning of the turkey for best flavor. Toast spices in oil to unlock their full potential. Mash some beans to thicken the chili naturally. Season as you go for layered flavor. Let the chili rest before serving for better flavor melding.
Nutrition
- Serving Size: 1.5 cups
- Calories: 380
- Sodium: 680
- Fat: 12
- Saturated Fat: 3
- Carbohydrates: 35
- Fiber: 12
- Protein: 32
Keywords: turkey chili, white bean chili, healthy chili, one pot meal, easy chili recipe, ground turkey recipe, weeknight dinner, meal prep


