Early August, and the kitchen windows are open just wide enough for the warm breeze to carry the scent of freshly cut grass and the faint hum of a distant lawnmower. On the counter, a pile of golden corn on the cob waits patiently, its kernels plump and glistening with morning dew. It’s that quiet time of year when the sweetness of fresh corn is at its peak—and I want to hold onto that moment long after the season slips away. Freezing corn on the cob has become my slow, thoughtful ritual, a way to press pause on summer’s fleeting sweetness.
There’s something comforting about the routine: husking each ear carefully, feeling the cool silk between my fingers, then blanching the corn just long enough to lock in its flavor without losing that fresh snap. Honestly, it’s not just about saving food—it’s about preserving a memory of those perfect summer evenings, when a simple cob of corn could make the whole day feel like a celebration. This method of freezing corn on the cob isn’t rushed or flashy; it’s about respect for the ingredients and the quiet joy of seasonal eating.
After years of trial and error, I’ve landed on a process that keeps the corn tasting as close to fresh-picked as possible. The secret? A brief blanching and quick chilling before sealing each ear tightly for the freezer. This technique keeps the kernels sweet and vibrant, so when winter rolls around, it’s like summer sneaks back onto your plate. I still remember the first time I pulled frozen corn from the freezer and bit into it, surprised by how the natural sugars seemed to have stayed right where they belonged—inside every juicy kernel.
Freezing corn on the cob this way feels like a quiet promise to myself: that even in the cold months, I can taste a bit of the sun-soaked fields and the slow rhythms of late summer. If you’ve ever wondered how to hold onto that fresh corn sweetness beyond its short season, this simple, reliable method is worth trying. It’s not just about freezing food; it’s about capturing a little piece of the season’s soul.
Why You’ll Love This Recipe
Freezing corn on the cob using this method has become my go-to for preserving summer’s sweetest harvest. After testing countless approaches in the kitchen, this one stands out for its simplicity and effectiveness. Here’s why it might become your favorite too:
- Quick & Easy: The whole process takes less than 30 minutes, perfect for those lazy summer afternoons or when you find yourself with a bounty of fresh corn.
- Simple Ingredients: No fancy additives or preservatives—just fresh corn, water, and a bit of ice. You probably already have everything you need.
- Perfect for Any Occasion: Whether you’re prepping for a cozy winter dinner or planning a backyard barbecue, frozen corn on the cob is ready to shine.
- Crowd-Pleaser: Kids and adults alike love the taste of fresh corn, and freezing it this way keeps the texture tender and sweet every time.
- Unbelievably Delicious: The sweet, juicy kernels retain their flavor and snap, unlike some frozen corn that can turn mushy or dull.
This recipe isn’t just about freezing corn—it’s about capturing freshness. The brief blanching step deactivates enzymes that can dull flavor, while the quick ice bath stops the cooking instantly, locking in that just-picked sweetness. I’ve found that skipping these steps leads to disappointing results, so don’t rush through them. Plus, packing each ear individually before freezing means no freezer burn or flavor loss, which is a game changer.
What makes this method special? It’s the balance between preserving the natural sugars and texture without adding anything artificial or complicated. I’ve tried recipes that call for sugar or salt in the blanching water, but honestly, the corn’s own sweetness shines brightest when left alone. This method feels honest and true to the vegetable itself.
Freezing corn on the cob this way brings back the joy of summer whenever you want it. It’s a humble but reliable recipe that makes those long, cold months taste a little sweeter.
What Ingredients You Will Need
This recipe uses simple, wholesome ingredients to deliver bold flavor and satisfying texture without fuss. The focus is on fresh corn itself, with just water and ice playing supporting roles. Here’s what you’ll need to get started:
- Fresh corn on the cob: Choose ears with bright green husks and moist silk. Look for plump kernels that burst with juice when pressed gently. Ideally, harvest or buy corn the same day you plan to freeze it.
- Water: For blanching. Filtered or tap water works fine as long as it’s clean and fresh.
- Ice: For an ice water bath to cool the corn quickly after blanching and stop the cooking process.
- Freezer-safe bags or airtight containers: I recommend heavy-duty zip-top bags from brands like Ziploc or Stasher for best sealing. Vacuum sealers work wonders if you have one on hand.
Optional but helpful:
- Sharp knife: To trim the ends of the corn before blanching if desired.
- Large pot: For boiling water.
- Large bowl: To hold the ice water bath.
That’s really it. No preservatives, no sugar, no salt—just fresh corn and a bit of technique. If you want to experiment, you could swap the water for a mild broth to add subtle flavor, but I find the pure corn flavor is best left untouched.
During peak season, I often pick up extra corn for freezing after making dishes like fresh jalapeño-lime cowboy caviar that celebrate corn’s bright flavor. This way, I get to enjoy that same crisp sweetness even months later.
Equipment Needed
Freezing corn on the cob doesn’t require fancy kitchen gadgets—just a few basics you probably already own. Here’s what you’ll want on hand:
- Large pot: For boiling water. A wide pot helps submerge the ears fully and cook evenly.
- Large bowl: To prepare an ice water bath that stops the cooking instantly after blanching.
- Tongs or slotted spoon: For safely transferring hot corn to the ice bath.
- Sharp knife: To trim the corn ends or cut the cobs if desired.
- Freezer-safe bags or containers: Heavy-duty zip-top bags are budget-friendly and effective. Vacuum sealers are ideal if you want longer storage without freezer burn.
If you don’t have a vacuum sealer, don’t sweat it—double-bagging the corn and pressing out as much air as possible works well. I learned that the hard way after my first freezer burn mishap! For smaller kitchens, a large pot may feel cumbersome, but using a deep saucepan or stockpot can do the trick just fine.
Maintaining your equipment is key; keep your knife sharp to make quick work of trimming, and clean your pot and bowl promptly to avoid any lingering husk residue. These small habits make freezing corn on the cob feel less like a chore and more like a mindful kitchen ritual.
Preparation Method
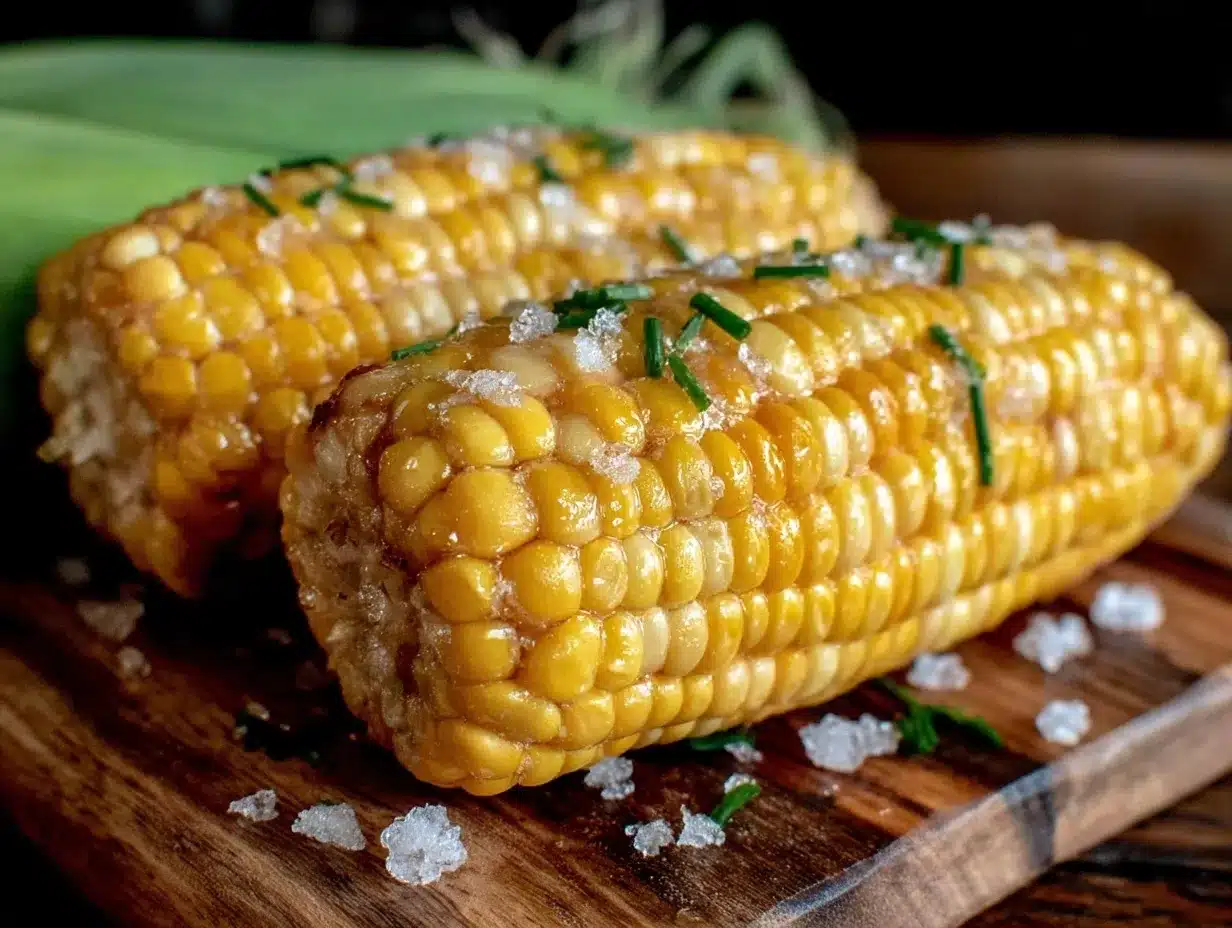
- Husk the corn: Peel back the green husks and remove all silk threads. Rinse the ears under cold water to wash away any remaining silk. Pat dry gently with a clean towel. (Prep time: 5-7 minutes)
- Trim the ends: Using a sharp knife, cut off the stem end and the tip of the cob if desired, making the ears uniform in size for easier storage.
- Bring water to a boil: Fill a large pot with enough water to cover the corn completely. Heat over high until it reaches a rolling boil. (Time: about 10 minutes)
- Blanch the corn: Carefully place the ears into the boiling water using tongs. Let them cook for exactly 4 minutes—no more, no less. This step deactivates enzymes that cause spoilage while preserving the sweet flavor. (Timing is crucial here.)
- Prepare ice bath: While blanching, fill a large bowl with ice and cold water. When the 4 minutes are up, immediately transfer the corn from the boiling water to the ice bath to stop cooking. Let the ears chill for 6-8 minutes until completely cool.
- Dry the corn: Remove ears from the ice bath and pat dry thoroughly with a clean kitchen towel or paper towels. Excess moisture can cause ice crystals and freezer burn.
- Package for freezing: Wrap each ear tightly in plastic wrap or place directly into freezer bags. Press out as much air as possible before sealing. For extra protection, consider double-bagging or vacuum sealing. Label bags with the date.
- Freeze: Lay ears flat in the freezer to freeze quickly and prevent deformation. Once frozen solid, you can stand them upright to save space. Frozen corn on the cob is best used within 10-12 months for optimal flavor.
Pro tip: Don’t skip the ice bath—it’s the secret to that fresh snap and sweetness you want when you thaw or cook the corn later. Also, timing your blanching exactly 4 minutes avoids mushiness or undercooked kernels.
Once I started following this method, my frozen corn tasted so close to fresh that I found myself craving it even in the dead of winter. I usually keep a batch on hand for quick dinners or to toss into dishes like creamy garlic parmesan orzo with spinach and sun-dried tomatoes, where the corn sweetness adds a perfect pop.
Cooking Tips & Techniques
Freezing corn on the cob might seem straightforward, but a few insider tips make a world of difference:
- Use fresh corn: The fresher the corn, the better the frozen result. Corn loses sweetness quickly after harvest, so try to freeze the same day you pick or buy it.
- Don’t skip blanching: This step is essential to stop enzyme activity that leads to loss of flavor and texture. Four minutes is the sweet spot—any longer and your corn might turn mushy.
- Ice water bath matters: Cooling the corn immediately after blanching locks in sweetness and keeps the kernels firm. If skipped, cooking continues and the corn can become overdone.
- Dry thoroughly: Excess moisture causes ice crystals and freezer burn. Pat the ears dry before packaging to avoid this.
- Seal tightly: Use heavy-duty freezer bags or vacuum seal to keep air out. Air exposure is the enemy of frozen corn’s flavor and texture.
- Label and date: Corn is best eaten within a year. Labeling prevents mystery freezer finds later on.
I once left a batch in the freezer bags without pressing out the air—and ended up with tough, dry corn. Lesson learned: take a few extra seconds to squeeze the bag for best results. Also, if you want to save space, consider cutting the ears in half before freezing—just blanch them the same way.
When cooking frozen corn later, boil or grill it straight from the freezer—no need to thaw. It cooks quickly, and that fresh sweetness shines through every time. Multitasking tip: while your corn blanches, prep a quick side salad like a refreshing watermelon cucumber mint salad to balance the meal.
Variations & Adaptations
While freezing fresh corn on the cob is straightforward, you can tweak the process to suit your preferences or dietary needs. Here are some ideas:
- Cut kernels: Instead of freezing whole cobs, slice off the kernels after blanching and freeze in airtight containers. This is handy for recipes needing corn off the cob, like soups or casseroles.
- Herb-infused blanching water: For a subtle twist, add a sprig of fresh thyme or a bay leaf to the boiling water. It imparts a gentle herbal note without overpowering the corn’s natural sweetness.
- Grilled then frozen: For a smoky flavor, grill the corn lightly before blanching and freezing. This adds a layer of complexity perfect for summer BBQ leftovers.
- Allergen adjustments: This recipe is naturally gluten-free and dairy-free, making it suitable for many diets.
- Seasonal swaps: In fall, try freezing fresh butternut squash or sweet potatoes using a similar blanch-and-freeze method to keep their sweetness locked in.
Personally, I’ve had great success grilling the corn first and then freezing it—especially when prepping for smoky chipotle BBQ pulled pork sliders. The smoky corn pairs beautifully with bold flavors.
Serving & Storage Suggestions
Frozen corn on the cob is remarkably versatile once thawed or cooked. Here’s how to make the most of your stash:
- Serving temperature: Best served hot off the grill or boiled directly from frozen. No need to thaw first.
- Presentation: Brush with melted butter, sprinkle with sea salt, or add a squeeze of fresh lime juice for brightness.
- Complementary dishes: Corn pairs beautifully with light salads, grilled meats, and creamy sides. Try it alongside a zesty dill cucumber salad or a rich garlic parmesan orzo for a balanced meal.
- Storage: Keep frozen corn on the cob in airtight bags or containers in the freezer for up to 12 months. Avoid refreezing once thawed.
- Reheating tips: Boil frozen corn for about 5-7 minutes or grill over medium heat until heated through and slightly charred.
- Flavor development: Frozen corn maintains its sweetness well, but flavors can mellow slightly over time. For freshest taste, enjoy within 6 months.
When I pull out frozen corn for a meal, I often pair it with fresh, crisp sides like the cucumber mint lime spritz to keep the meal feeling light and bright. It’s a simple way to remind myself of summer even in the chill of winter.
Nutritional Information & Benefits
One ear of fresh corn on the cob (about 90 grams) contains approximately:
| Nutrient | Amount |
|---|---|
| Calories | 77 kcal |
| Carbohydrates | 17 grams |
| Fiber | 2 grams |
| Protein | 3 grams |
| Fat | 1 gram |
| Vitamin C | 6% DV |
| Magnesium | 7% DV |
Corn is naturally gluten-free and low in fat, making it a healthy addition to most diets. The fiber content supports digestion, while the vitamin C and magnesium contribute to immune and muscle health. Keeping corn frozen preserves these nutrients better than leaving it sitting in the fridge for days.
From a wellness perspective, freezing corn on the cob at peak ripeness means you’re storing not just flavor but vital nutrients. It’s a simple way to enjoy seasonal produce year-round without sacrificing health benefits.
Conclusion
Freezing corn on the cob to lock in its sweetness is a quiet kitchen ritual that feels like a gift to future meals. This straightforward method, honed through experience, keeps your corn tasting fresh and vibrant even months after summer fades. You can tailor the process with your own twists—whether grilling first, cutting kernels, or infusing subtle flavors—but the core steps of blanching, ice cooling, and airtight freezing remain the key to success.
I love this recipe because it transforms a fleeting summer treat into a pantry staple, ready whenever the craving hits. It’s the kind of simple preservation that carries a little piece of the season with you. When you try it, I hope you find the same quiet satisfaction I do—the pleasure of biting into sweet corn in the middle of a snowy January, and feeling like summer is still within reach.
If you try this, I’d love to hear how you customize it or what dishes you pair it with. Sharing these small kitchen moments makes the ritual all the richer.
FAQs About Freezing Corn on the Cob
How long does frozen corn on the cob last?
Properly stored in airtight bags or containers, frozen corn on the cob retains best quality for 10-12 months. After that, it may start to lose flavor and texture.
Do I need to blanch corn before freezing?
Yes, blanching stops enzyme activity that causes spoilage and flavor loss. Four minutes in boiling water is ideal for corn on the cob.
Can I freeze corn without husking it?
It’s best to remove husks and silk before freezing. Leaving the husks on can cause ice buildup and affect texture.
Should I thaw frozen corn before cooking?
No need—cook frozen corn straight from the freezer by boiling or grilling. This keeps the kernels firm and flavorful.
Can I freeze corn kernels instead of whole cobs?
Absolutely. After blanching, cut kernels off the cob and freeze them in airtight containers for easy use in recipes.
Pin This Recipe!

Fresh How to Freeze Corn on the Cob Easily to Lock In Sweetness Perfectly

A simple and effective method to freeze fresh corn on the cob by blanching and quick chilling to preserve its natural sweetness and texture for up to a year.
- Prep Time: 10 minutes
- Cook Time: 4 minutes
- Total Time: 20 minutes
- Yield: Varies (depends on number of ears frozen)
- Category: Preservation
- Cuisine: American
Ingredients
- Fresh corn on the cob
- Water (for blanching)
- Ice (for ice water bath)
- Freezer-safe bags or airtight containers
Instructions
- Husk the corn: Peel back the green husks and remove all silk threads. Rinse the ears under cold water and pat dry.
- Trim the ends: Cut off the stem end and tip of the cob if desired for uniform size.
- Bring water to a boil: Fill a large pot with enough water to cover the corn and heat until boiling.
- Blanch the corn: Place ears into boiling water and cook for exactly 4 minutes.
- Prepare ice bath: Fill a large bowl with ice and cold water. Transfer corn immediately after blanching and chill for 6-8 minutes.
- Dry the corn: Remove ears from ice bath and pat dry thoroughly to avoid freezer burn.
- Package for freezing: Wrap each ear tightly in plastic wrap or place in freezer bags, pressing out air before sealing. Label with date.
- Freeze: Lay ears flat in the freezer to freeze quickly, then store upright. Use within 10-12 months for best flavor.
Notes
Do not skip the ice bath to lock in sweetness and texture. Timing the blanching exactly 4 minutes is crucial to avoid mushy or undercooked kernels. Press out as much air as possible from freezer bags to prevent freezer burn. Label bags with date and use within 10-12 months for best quality.
Nutrition
- Serving Size: One ear of corn (abo
- Calories: 77
- Fat: 1
- Carbohydrates: 17
- Fiber: 2
- Protein: 3
Keywords: freeze corn on the cob, blanching corn, freezing fresh corn, preserving corn sweetness, summer corn preservation


